『居善地』接口测试 — 13、Moco框架的使用
提示:我们上一篇文章介绍了什么是Moco框架,以及Moco框架的启动方式。本篇文章主要说说如何使用Moco框架来辅助我们进行测试。
当需要调用接口来编写测试用例的时候,此时该接口并没有被实现,这个时候我们就可以用Moco框架来模拟一个接口出来。
使用Moco模拟接口以下功能:
- 拦截服务:
http,https。 - 请求方式:GET,POST。
- 模拟请求地址:URL。
- 模拟参数:包括
header和cookie的数据。 - 模拟响应结果。
- 支持重定向。
1、Moco框架第一个练习
编写一个Json文件,接口所有的信息都配置在该json文件中。
[

  {

    "description": "第一个Moco框架例子。",  # 描述:增加接口的可读性

    "request": {

      "uri": "/api/moco/demo",

    },

    "response": {

      "text": "hello Moco !"

    }

  }

]
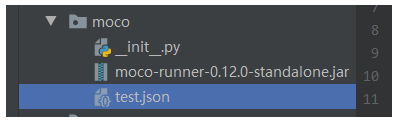
把Moco框架的jar包和上面编辑好的Json文件放在同一个文件夹中。
在cmd命令行或者PyCharm的命令行终端执行启动命令。
- 进入Json文件的所在目录。
- 执行命令:
java -jar ./moco-runner-0.12.0-standalone.jar http -p 12306 -c test.json
Moco服务启动后,我们可以使用Requests库请求接口,也可以用浏览器接口。
# 1.导入requests库

import requests

# 2.明确请求地址

url = "http://127.0.0.1:12306/api/moco/demo"

# 3.发送请求

response = requests.get(url=url)

print(response.text)
浏览器访问接口:

2、Get方法的Mock实现
我们主要是看Json文件怎么写,其他步骤和上面练习一样。
(1)没有参数的get请求
[

  {

    "description": "模拟一个没有参数的get请求。",

    "request": {

      "uri": "/api/moco/get/demo",

      "method": "get"  # 这里添加了要给method属性

    },

    "response": {

      "text": "hello get request !"

    }

  }

]
(2)有参数的get请求
[

  {

    "description": "模拟一个没有参数的get请求。",

    "request": {

      "uri": "/api/moco/get/demo",

      "method": "get"

    },

    "response": {

      "text": "hello get request !"

    }

  },

  {

    "description": "模拟一个带参数的get请求。",

    "request": {

      "uri": "/api/moco/get/param/demo",

      "method": "get",

      "queries": {		# get请求参数的选项,queries固定属性。

        "name": "xiaoming",

        "age": "18"

      }

    },

    "response": {

      "text": "hello xiaoming !"

    }

  }

]
说明:请求地址为:
http://127.0.0.1:12306/api/moco/get/param/demo?name=xiaoming&age=18
3、Post方法的Mock实现
(1)没有参数的post请求
[

  {

    "description": "模拟一个不带数据的post请求。",

    "request": {

      "uri": "/api/moco/post/demo",

      "method": "post"

    },

    "response": {

      "text": "hello post request !"

    }

  }

]
提示:POST请求就不能用浏览器进行查看了。只能用Request库或者JMeter,Postman等进行查看。(能进行接口调用的工具都可以)
# 1.导入requests库

import requests

# 2.明确请求地址

url = "http://127.0.0.1:12306/api/moco/post/demo"

# 3.发送请求

response = requests.post(url=url)

print(response.text)
(2)有参数的post请求
[

  {

    "description": "模拟一个带数据post请求。",

    "request": {

      "uri": "/api/moco/post/param/demo",

      "method": "post",

      "forms": {      # post请求带参数,参数要添加到forms属性中。

        "name": "xiaoming",

        "age": "18"

      }

    },

    "response": {

      "text": "hello post xiaoming !"

    }

  }

]
调用接口查看结果,如下所示:
# 1.导入requests库

import requests

# 2.明确请求地址

url = "http://127.0.0.1:12306/api/moco/post/param/demo"

data = {

    "name": "xiaoming",

    "age": "18"

}

# 3.发送请求

response = requests.post(url=url, data=data)

print(response.text)
4、请求中加入Cookies
使用的是request中的cookies属性。
(1)get请求
[

  {

    "description": "模拟一个带cookie的get请求。",

    "request": {

      "uri": "/api/moco/get/cookies/demo",

      "method": "get",

      "cookies": {			# 这里添加cookies参数

        "login": "true"

      }

    },

    "response": {

      "text": "hello get cookies !"

    }

  }

]
调用接口查看结果,如下所示:
# 1.导入requests库

import requests

# 2.明确请求地址

url = "http://127.0.0.1:12306/api/moco/get/cookies/demo"

cookies = {

    "login": "true"

}

# 3.发送请求

response = requests.get(url=url, cookies=cookies)

print(response.text)
(2)post请求
[

  {

    "description": "模拟一个带cookie的post请求。",

    "request": {

      "uri": "/api/moco/post/cookies/demo",

      "method": "post",

      "cookies": {

        "login": "true"

      },

      "json": {		# post请求的参数也可以用json格式的数据进行传输

        "name": "xiaoming",

        "age": "18"

      }

    },

    "response": {

      "status": 201,

      "json": {

        "text": "hello post cookies !"

      }

    }

  }

]
调用接口查看结果,如下所示:
# 1.导入requests库

import requests

# 2.明确请求地址

url = "http://127.0.0.1:12306/api/moco/post/cookies/demo"

cookies = {

    "login": "true"

}

json = {

    "name": "xiaoming",

    "age": "18"

}

# 3.发送请求

response = requests.post(url=url, json=json ,cookies=cookies)

print(response.text)
5、请求中加入Header
使用的是request中的headers属性。
Header是添加请求头信息,关于请求头信息get请求和post请求都是一样的。
[

  {

    "description": "模拟一个带Header的post请求。",

    "request": {

      "uri": "/api/moco/post/headers/demo",

      "method": "post",

      "headers": {		# 添加请求头信息

        "content-type": "application/json"

      },

      "json": {

        "name": "xiaoming",

        "age": "18"

      }

    },

    "response": {

      "status": 201,

      "json": {

        "text": "hello get Headers !"

      }

    }

  }

]
调用接口查看结果,如下所示:
# 1.导入requests库

import requests

# 2.明确请求地址

url = "http://127.0.0.1:12306/api/moco/post/headers/demo"

headers = {

    "content-type": "application/json"

}

json = {

    "name": "xiaoming",

    "age": "18"

}

# 3.发送请求

response = requests.post(url=url, json=json, headers=headers)

print(response.text)
6、Moco模拟重定向
重定向使用的是和request同级的redirectTo属性。
[

  {

    "description": "重定向到百度",

    "request": {

      "uri": "/api/moco/redirect/demo",

      "method": "get"

    },

    "redirectTo": "http://www.baidu.com"

  },

  {

    "description": "重定向到自己的接口",

    "request": {

      "uri": "/api/moco/redirect/new/demo",

      "method": "get"

    },

    "redirectTo": "http://www.baidu.com",

    "response": {

      "text": "hello redirectTo !"

    }

  }

]
使用浏览器进行测试就可以。
还有更多的使用方式请查看文档:https://github.com/dreamhead/moco/blob/master/moco-doc/apis.md
7、综合练习
Json文件内容,如下所示:
[

  {

    "description": "department by dep_id",

    "request": {

      "uri": "/api/departments/",

      "method": "get",

      "queries": {

        "$dep_id_list": "T001"

      }

    },

    "response": {

      "json": {

        "count": 1,

        "next": null,

        "previous": null,

        "results": [

          {

            "dep_id": "T001",

            "dep_name": "php学院",

            "master_name": "老李",

            "slogan": "啦啦啦啦"

          }

        ]

      }

    }

  },

  {

    "description": "update department by dep_id",

    "request": {

      "uri": "/api/departments/T03/",

      "method": "put",

      "json": {

        "data": [

          {

            "dep_id": "T03",

            "dep_name": "C++",

            "master_name": "C++-Master",

            "slogan": "Here is Slogan"

          }

        ]

      }

    },

    "response": {

      "status": 201,

      "json": {

        "dep_id": "T03",

        "dep_name": "C++",

        "master_name": "C++-Master",

        "slogan": "Here is Slogan"

      }

    }

  }

]
8、总结:
(1)Json文件的配置属性说明:
像我们上面练习过的Json文件配置,所有的数据值是固定的,
如:description、request、response、redirectTo等这些都是固定的,不能修改,修改可能连Moco服务都启动不来。
还有request的属性值,如:uri、method、cookies、headers,也是必须这样写的。
还有GET请求传递参数用queries属性,POST请求传递参数用forms和json属性都可以。(PUT,DELETE请求同Post请求。)
(2)Moco框架原理:
就是把所有接口的数据,包括发送请求的所有数据和返回结果的所有数据,以Json数据格式进行编写。
把这些数据放入Moco框架提供的HTTP或者HTTPS的服务上,就实现了接口数据的模拟。
在使用的时候,我们只要按照json文件中接口配置的信息进行请求即可,如果调用接口传递的数据和Json文件中接口编写要接收的数据不一致,则无法请求成功。
『居善地』接口测试 — 13、Moco框架的使用的更多相关文章
- 『居善地』接口测试 — 12、Moco框架介绍
目录 1.Mock功能介绍 2.Moco框架介绍 3.Moco框架在接口测试中的作用 4.Moco框架的优点 5.Moco框架的下载与启动 (1)Moco框架的下载 (2)Moco框架的启动 1.Mo ...
- 『居善地』接口测试 — 6、Httpbin服务介绍
目录 1.Httpbin服务介绍 2.在Windows系统中部署Httpbin服务 3.在Linux系统中部署Httpbin服务 4.Httpbin访问方式 5.Httpbin常用调试接口 6.总结: ...
- 『居善地』接口测试 — 7、Requests库使用proxies代理发送请求
目录 1.代理的了解 2.代理的分类 (1)正向代理 (2)反向代理 (3)总结 3.Requests库使用代理 4.总结 1.代理的了解 在上图中我们可以把Web server看成是Google服务 ...
- 『居善地』接口测试 — 3、Requests库介绍
目录 1.Requests库 2.Requests库文档 3.Requests库安装 4.Requests库的使用 (1)使用步骤 (2)示例练习 5.补充:Json数据和Python对象互相转化 1 ...
- 『居善地』接口测试 — 4、Requests库发送GET请求
目录 1.使用Requests库发送带参数的GET请求 2.查看GET请求的内容 3.带请求头.参数的Get请求 Requests库GET请求是使用HTTP协议中的GET请求方式对目标网站发起请求. ...
- 『居善地』接口测试 — 5、使用Requests库发送POST请求
目录 1.请求正文是application/x-www-form-urlencoded 2.请求正文是raw (1)json格式文本(application/json) (2)xml格式文本(text ...
- 『居善地』接口测试 — 11、接口签名sign原理
目录 1.什么是加密以及解密? 2.加密方式的分类 (1)对称加密 (2)非对称加密 (3)总结: 3.接口签名sign原理 (1)什么是接口签名? (2)为什么需要做接口签名 (3)接口签名的实践方 ...
- 『心善渊』Selenium3.0基础 — 24、Selenium的expected_conditions模块详细介绍
目录 1.EC模块介绍 2.EC模块常用类 3.EC模块的使用 4.EC模块综合使用 (1)title_is(title)示例 (2)presence_of_element_located(locat ...
- 『政善治』Postman工具 — 13、Postman接口测试综合练习
目录 (一)项目接口文档 1.鉴权接口 2.注册接口 3.登录接口 4.用户信息接口 5.注销接口 (二)网站上手动验证 (三)Postman测试实现 1.准备工作 (1)创建一个Collection ...
随机推荐
- 分布式ID
需求 全局唯一 高性能 高可用 简单易用 UUID 优点: 唯一 不依赖于任何第三方服务 缺点: 是字符串类型而非数字,不满足数字ID的需求 字符串太长了,DB查询效率受影响 数据库自增ID 如果使用 ...
- Mybatis最终搭建
框架搭建的流程1. 导入jar2. 准备属性文件和配置文件3. 编写数据库的表和类4. 为类编写一个XxxMapper接口5. 编写接口对应的映射文件XxxMapper.xml6. 根据接口的方法, ...
- Windows反调试技术(上)
写在前面 在逆向工程中为了防止破解者调试软件,通常都会在软件中采用一些反调试技术来防破解.下面就是一些在逆向工程中常见的反调试技巧与示例. BeingDebuged 利用调试器加载程序时调试器会通过C ...
- Flink去重统计-基于自定义布隆过滤器
一.背景说明 在Flink中对流数据进行去重计算是常有操作,如流量域对独立访客之类的统计,去重思路一般有三个: 基于Hashset来实现去重 数据存在内存,容量小,服务重启会丢失. 使用状态编程Val ...
- 【Web前端HTML5&CSS3】08-盒模型补充
笔记来源:尚硅谷Web前端HTML5&CSS3初学者零基础入门全套完整版 目录 盒模型补充及田径场实战 1. 盒子大小 2. 轮廓 3. 阴影 4. 圆角 圆 椭圆 盒模型补充及田径场实战 1 ...
- [bug] JavaScript:Uncaught SyntaxError: missing ) after argument list
function拼写错误
- [bug] MapReduce卡死
参考 https://blog.csdn.net/WYpersist/article/details/80202055
- SpringBoot + WebSocket 实现答题对战匹配机制
概要设计 类似竞技问答游戏:用户随机匹配一名对手,双方同时开始答题,直到双方都完成答题,对局结束.基本的逻辑就是这样,如果有其他需求,可以在其基础上进行扩展 明确了这一点,下面介绍开发思路.为每个用户 ...
- MySQL 通过.frm文件和.ibd文件实现InnoDB引擎的数据恢复
起因是这样的,公司的领导表示说服务器崩了,修理好之后,只剩下数据库目录下的物理文件(即.frm文件与.ibd文件).然后,整了一份压缩包给我,叫我瞅一下能不能把数据恢复出来.我当场愣了一下,这都啥文件 ...
- 高频访问SQLite数据库
SQLite 是一款开源的 SQL 数据库引擎,由于其自包含.无服务.零配置和友好的使用许可(完全免费)等特点,在桌面和移动平台被广泛使用. 在应用开发过程中,如果想保存点数据,自然而然地就会想到 S ...