MVC文件上传04-使用客户端jQuery-File-Upload插件和服务端Backload组件实现多文件异步上传
本篇使用客户端jQuery-File-Upload插件和服务端Badkload组件实现多文件异步上传。MVC文件上传相关兄弟篇:
MVC文件上传01-使用jquery异步上传并客户端验证类型和大小
MVC文件上传02-使用HttpPostedFileBase上传多个文件
MVC文件上传03-使用Request.Files上传多个文件
处理文件上传的服务端组件Backload
用于处理文件上传的服务端组件。Backload与客户端文件上传插件(比如jQuery-File-Upload)配合使用,初步形成一个处理文件异步上传的解决方案。
□ Badkload的一些功能和特点
● 零配置:Backload提供默认BackloadDemoController用来处理上传文件请求。如果其它控制器也想拥有"Backload处理上传文件的超强能力",只需要继承BackloadDemoController就可以。
● 在web.config中显式配置
● 支持多种存储位置:文件夹、数据库(通过Entity Framework)、云存储(将来支持)
● 根据不同的请求上下文把上传文件保存到不同的位置
● 根据上传文件的不同类型保存到不同的位置
● 支持对图片的裁剪,而参数可以在web.confgig中配置
● 支持对多个图片的处理
● 支持图片类型转换
● 支持生成缩略图
● 支持在服务端创建唯一的文件名(GUIDs)
● 还可以在原始文件和修改文件之间建立映射,并返回给客户端一个友好的名称。
● 良好的可扩展性:通过实现Badkload的接口和使用ExportAttribute特性。
● 安全性:为控制器加上验证和授权
● 可调试:方便断点调试发现错误
...
□ 安装客户端jQuery-File-Upload插件和服务端Badkload组件,有2种方式:
1、分别安装客户端和服务端所需的插件和组件
● 安装服务端的Backload:
PM> Install-Package Backload
● 如果客户端选择使用jQuery-File-Upload插件,通过如下来安装这个客户端文件上传插件:
PM> Install-Package JQuery_File_Upload_Plugin
2、安装Query-File-Upload结合Backload实现文件上传的Demo,一次性安装客户端和服务端所需的插件和组件:
PM> Install-Package JQueryFileUpload_Demo_with_Backload
例子:零配置实现多文件上传
□ 新建一个MVC4项目,工具--库程序包管理器--程序包管理器控制台,输入:
PM> Install-Package JQueryFileUpload_Demo_with_Backload
引用文件夹多了如下文件: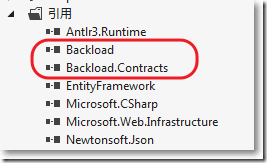
App_Start文件夹里多了如下BackloadConfig.cs文件,里面有jQuery File Upload插件所有需要的js和css文件: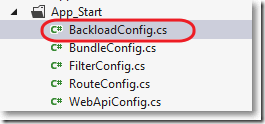
Content文件夹多了如下文件: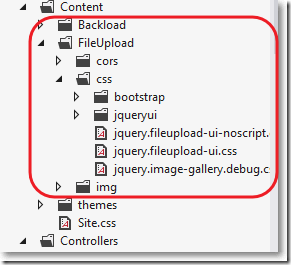
Controller文件夹多了一个控制器:
Scripts文件夹多了如下文件: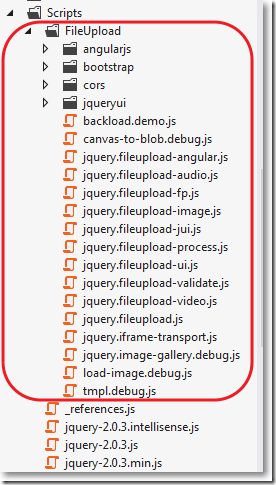
Views文件夹多了如下文件夹和文件: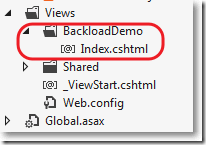
□ 运行http://localhost:1631/BackloadDemo/Index,发现如下问题:
1、工具--库程序包管理器--程序包管理器控制台,被禁用
关闭VS,重新打开就恢复。
2、报错
未能加载文件或程序集“WebGrease, Version=1.5.1.25624, Culture=neutral, PublicKeyToken=31bf3856ad364e35”或它的某一个依赖项。找到的程序集清单定义与程序集引用不匹配。 (异常来自 HRESULT:0x80131040)
通过"uninstall-package -f WebGrease"先卸载,然后通过"install-package WebGrease"再下载最新版本,问题解决。
□ 再次运行http://localhost:1631/BackloadDemo/Index

□ 添加2个上传文件,出现上传文件列表并配有缩略图
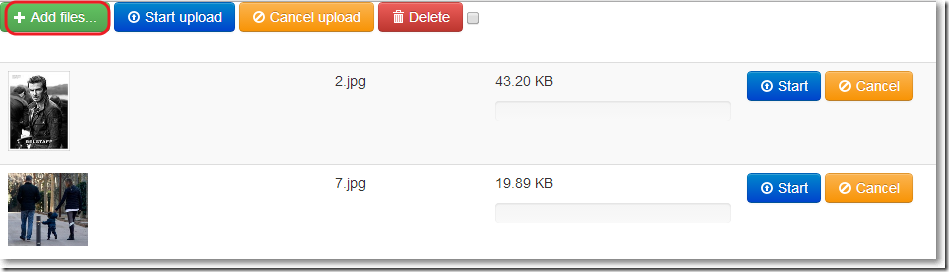
□ 分别点击"Start"按钮,上传成功后,"Start"按钮消失,出现"Delete"按钮。

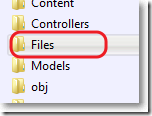
□ 根目录下多了Files文件夹
□ File文件夹下不仅有上传的图片,还有一个存放缩略图的文件夹_thumbs:

□ 勾选上传文件列表中的一行,点击"Delete":
界面少了一行记录:
File文件夹下原先的图片也被删除:
总结
● 仅仅通过PM> Install-Package JQueryFileUpload_Demo_with_Backload 安装了客户端文件上传插件jQuery-File-Upload和服务端文件处理组件Backload,没有做任何配置,就可以进行多个文件的上传。
● 文件默认被上传到根目录下的Files文件夹,需要这个文件夹的"写"权限。
□ BackloadDemoController是默认的控制器
1: using System.Web.Mvc;
2:
3: namespace MvcApplication6.Controllers
4: {
5: public class BackloadDemoController : Controller
6: {
7: //
8: // GET: /BackupDemo/
9: public ActionResult Index()
10: {
11: return View();
12: }
13: }
14: }
□ BackloadDemoController是默认的上传文件视图


展开@{
Layout = null;
}
<!DOCTYPE html>
<html>
<head>
<meta charset="utf-8" />
<meta name="viewport" content="width=device-width" />
<title>JQuery File Upload Plugin with Backload demo installation</title>
@Styles.Render("~/Content/themes/base/css")
@Styles.Render("~/Content/css")
<!-- We use Backloads. bundeling feature to register only those client side javascript and style files of the jQuery File Upload Plugin that are needed -->
@Styles.Render("~/bundles/fileupload/bootstrap/BasicPlusUI/css")
<!-- Bootstrap CSS fixes for IE6 -->
<!--[if lt IE 7]><link rel="stylesheet" href="/Content/FileUpload/css/bootstrap/bootstrap-ie6.debug.css"><![endif]-->
<!--[if lt IE 9]><script src="http://html5shim.googlecode.com/svn/trunk/html5.js"></script><![endif]-->
<!--[if IE]><meta http-equiv="X-UA-Compatible" content="IE=edge,chrome=1"><![endif]-->
</head>
<body>
<div>
<!-- The file upload form used as target for the file upload widget -->
<form id="fileupload" action="/Backload/UploadHandler" method="POST" enctype="multipart/form-data">
<!-- Redirect browsers with JavaScript disabled to the origin page -->
<noscript><input type="hidden" name="redirect" value="/"></noscript>
<!-- The fileupload-buttonbar contains buttons to add/delete files and start/cancel the upload -->
<div class="row fileupload-buttonbar">
<div class="span7">
<!-- The fileinput-button span is used to style the file input field as button -->
<span class="btn btn-success fileinput-button">
<i class="icon-plus icon-white"></i>
<span>Add files...</span>
<input type="file" name="files[]" multiple>
</span>
<button type="submit" class="btn btn-primary start">
<i class="icon-upload icon-white"></i>
<span>Start upload</span>
</button>
<button type="reset" class="btn btn-warning cancel">
<i class="icon-ban-circle icon-white"></i>
<span>Cancel upload</span>
</button>
<button type="button" class="btn btn-danger delete">
<i class="icon-trash icon-white"></i>
<span>Delete</span>
</button>
<input type="checkbox" class="toggle">
<!-- The loading indicator is shown during file processing -->
<span class="fileupload-loading"></span>
</div>
<!-- The global progress information -->
<div class="span5 fileupload-progress fade">
<!-- The global progress bar -->
<div class="progress progress-success progress-striped active" role="progressbar" aria-valuemin="" aria-valuemax="">
<div class="bar" style="width:0%;"></div>
</div>
<!-- The extended global progress information -->
<div class="progress-extended"> </div>
</div>
</div>
<!-- The table listing the files available for upload/download -->
<table role="presentation" class="table table-striped"><tbody class="files" data-toggle="modal-gallery" data-target="#modal-gallery"></tbody></table>
</form>
<!-- The template to display files available for upload -->
<script id="template-upload" type="text/x-tmpl">
{% for (var i=0, file; file=o.files[i]; i++) { %}
<tr class="template-upload fade">
<td>
<span class="preview"></span>
</td>
<td>
<p class="name">{%=file.name%}</p>
{% if (file.error) { %}
<div><span class="label label-important">Error</span> {%=file.error%}</div>
{% } %}
</td>
<td>
<p class="size">{%=o.formatFileSize(file.size)%}</p>
{% if (!o.files.error) { %}
<div class="progress progress-success progress-striped active" role="progressbar" aria-valuemin="" aria-valuemax="" aria-valuenow=""><div class="bar" style="width:0%;"></div></div>
{% } %}
</td>
<td>
{% if (!o.files.error && !i && !o.options.autoUpload) { %}
<button class="btn btn-primary start">
<i class="icon-upload icon-white"></i>
<span>Start</span>
</button>
{% } %}
{% if (!i) { %}
<button class="btn btn-warning cancel">
<i class="icon-ban-circle icon-white"></i>
<span>Cancel</span>
</button>
{% } %}
</td>
</tr>
{% } %}
</script>
<!-- The template to display files available for download -->
<script id="template-download" type="text/x-tmpl">
{% for (var i=0, file; file=o.files[i]; i++) { %}
<tr class="template-download fade">
<td>
<span class="preview">
{% if (file.thumbnail_url) { %}
<a href="{%=file.url%}" title="{%=file.name%}" data-gallery="gallery" download="{%=file.name%}"><img src="{%=file.thumbnail_url%}"></a>
{% } %}
</span>
</td>
<td>
<p class="name">
<a href="{%=file.url%}" title="{%=file.name%}" data-gallery="{%=file.thumbnail_url&&'gallery'%}" download="{%=file.name%}">{%=file.name%}</a>
</p>
{% if (file.error) { %}
<div><span class="label label-important">Error</span> {%=file.error%}</div>
{% } %}
</td>
<td>
<span class="size">{%=o.formatFileSize(file.size)%}</span>
</td>
<td>
<button class="btn btn-danger delete" data-type="{%=file.delete_type%}" data-url="{%=file.delete_url%}"{% if (file.delete_with_credentials) { %} data-xhr-fields='{"withCredentials":true}'{% } %}>
<i class="icon-trash icon-white"></i>
<span>Delete</span>
</button>
<input type="checkbox" name="delete" value="" class="toggle">
</td>
</tr>
{% } %}
</script>
</div>
@Scripts.Render("~/bundles/jquery")
@Scripts.Render("~/bundles/jqueryui")
<!-- We use Backloads. bundeling feature to register only those client side javascript and style files of the jQuery File Upload Plugin that are needed -->
@Scripts.Render("~/bundles/fileupload/bootstrap/BasicPlusUI/js")
<!-- Initialize the jQuery File Upload Plugin -->
<script src="~/Scripts/FileUpload/backload.demo.js"></script>
</body>
</html>
以上,html部分:
● <form id="fileupload" action="/Backload/UploadHandler" method="POST" enctype="multipart/form-data">放置添加、取消、上传等按钮
● <script id="template-upload" type="text/x-tmpl">上传文件列表
● 下载文件列表
css部分:
● @Styles.Render("~/Content/themes/base/css")
● @Styles.Render("~/Content/css")
● @Styles.Render("~/bundles/fileupload/bootstrap/BasicPlusUI/css") 使用Backloads的bundeling功能注册jQuery File Upload所需的css
js部分:
● @Scripts.Render("~/bundles/jquery")
● @Scripts.Render("~/bundles/jqueryui")
● @Scripts.Render("~/bundles/fileupload/bootstrap/BasicPlusUI/js") 使用Backloads的bundeling功能注册jQuery File Upload所需的js
● script src="~/Scripts/FileUpload/backload.demo.js"></script> 初始化jQuery File Upload
参考资料:
※ http://backload.org/ Backload官网
※ https://github.com/blackcity/Backload#examples Backload例子
※ http://nuget.org/packages/Backload/ nuget上的Backload
※ http://blueimp.github.io/jQuery-File-Upload/ jQuery File Upload官网
※ https://github.com/blueimp/jQuery-File-Upload/wiki github上的jQuery File Upload介绍
※ https://github.com/blueimp/jQuery-File-Upload github上的jQuery File Upload源码
※ https://www.nuget.org/packages/JQueryFileUpload_Demo_with_Backload/ 下载jQuery File Upload结合Backload的MVC案例
MVC文件上传04-使用客户端jQuery-File-Upload插件和服务端Backload组件实现多文件异步上传的更多相关文章
- MVC文件上传09-使用客户端jQuery-File-Upload插件和服务端Backload组件让每个用户有专属文件夹,并在其中创建分类子文件夹
为用户创建专属上传文件夹后,如果想在其中再创建分类子文件夹,该怎么做?可以在提交文件的视图中再添加一个隐藏域,并设置 name="uploadContext". 相关兄弟篇: MV ...
- MVC文件上传08-使用客户端jQuery-File-Upload插件和服务端Backload组件让每个用户有专属文件夹
当需要为每个用户建立一个专属上传文件夹的时候,可以在提交文件的视图中添加一个隐藏域,并设置name="objectContext". 相关兄弟篇: MVC文件上传01-使用jque ...
- MVC文件上传07-使用客户端jQuery-File-Upload插件和服务端Backload组件裁剪上传图片
本篇通过在配置文件中设置,对上传图片修剪后保存到指定文件夹. 相关兄弟篇: MVC文件上传01-使用jquery异步上传并客户端验证类型和大小 MVC文件上传02-使用HttpPostedFileB ...
- MVC文件上传06-使用客户端jQuery-File-Upload插件和服务端Backload组件自定义控制器上传多个文件
当需要在控制器中处理除了文件的其他表单字段,执行控制器独有的业务逻辑......等等,这时候我们可以自定义控制器. MVC文件上传相关兄弟篇: MVC文件上传01-使用jquery异步上传并客户端验证 ...
- MVC文件上传05-使用客户端jQuery-File-Upload插件和服务端Backload组件自定义上传文件夹
在零配置情况下,文件的上传文件夹是根目录下的Files文件夹,如何自定义文件的上传文件夹呢? MVC文件上传相关兄弟篇: MVC文件上传01-使用jquery异步上传并客户端验证类型和大小 MVC文 ...
- jQuery File Upload 插件 php代码分析
jquery file upload php代码分析首先进入构造方法 __construct() 再进入 initialize()因为我是post方式传的数据 在进入initialize()中的po ...
- JQuery File Upload 插件 出现 “empty file upload result” 错误的解决方案。
本例中采用的是 JQuery File Upload + ASP.NET 的方式, Google了大半天基本没有找到合理的解决方案,倒是在 NodeJS的一遍博客中找到了灵感:http://www.i ...
- 客户端 jQuery 跨端口 调用 node 服务端
一句话 很顶用 response.setHeader('Access-Control-Allow-Origin', 'http://127.0.0.1:8020'); 说 响应的头文件里设置 一个 h ...
- 定制jQuery File Upload为微博式单文件上传
日志未经声明,均为AlloVince原创.版权采用『 知识共享署名-非商业性使用 2.5 许可协议』进行许可. jQuery File Upload是一个非常优秀的上传组件,主要使用了XHR作为上传方 ...
随机推荐
- Hive与HBase区别 大墨垂杨
大墨垂杨 http://www.cnblogs.com/quchunhui/p/5340989.html
- (一) solr的安装与配置
载solr文件压缩包,并解压 ,要运行solr服务之前需要先安装jdk,具体安装过程可以参看下面这篇文章: http://www.cnblogs.com/xiazh/archive/2012/05/2 ...
- JS验证表单中TEXT文本框中是否含有非法字符
<form id="form" action="" method="post"> <input type="hi ...
- 2016-2017-2 20155309南皓芯《java程序设计》第十周学习总结
教材内容总结 网络编程 定义:网络编程就是在两个或两个以上的设备之间传输数据. 计算机网络概述: 网络编程的实质就是两个(或多个)设备(例如计算机)之间的数据传输. 网络中的每个设备都会有一个唯一的数 ...
- Windows 10利用自带的 Hyper-v 安装Linux
Linux由于其众多独特的优势(可参见Linux系统的优势),而被很多人所喜爱.而要使用Linux那首先要做的工作就是安装Linux系统了.这里给出在 win10 下利用虚拟机 Hyper-v 安装 ...
- 关于ARM指令那些你必须知道的东西
1.32位ARM指令每一位都有其作用,具体如下: 低12为第二操作数, 12~15位为目的寄存器, 16~19位为第一操作数, 20~27就是操作码, 28~31就是条件域. 2.多寄存器load和s ...
- Spark(十五)SparkCore的源码解读
一.启动脚本分析 独立部署模式下,主要由master和slaves组成,master可以利用zk实现高可用性,其driver,work,app等信息可以持久化到zk上:slaves由一台至多台主机构成 ...
- 【51nod】1149 Pi的递推式
题解 我们把这个函数的递归形式画成一张图,会发现答案是到每个出度为0的点的路径的方案数 这个可以用组合数算 记录一下P[i]为i减几次PI减到4以内 如果P[i + 1] > P[i],那么转向 ...
- Caffe训练AlexNet网络模型——问题一
训练AlexNet网络时,出现Check failed:datum_height >= crop_size (size vs. 227)错误,具体如下图所示: 根据提示,问题是crop_size ...
- Loadrunner参数化逗号报错解决方法
Loadrunner参数化逗号报错解决方法 介绍Loadrunner参数化时,参数中包含有逗号时出错的解决方法. 在Loadrunner进行参数化时,参数中如果含有逗号,编辑保存后会报错: 此 ...