SpringBoot+Shiro入门小栗子
写一个不花里胡哨的纯粹的Springboot+Shiro的入门小栗子
效果如图:
首页:有登录注册
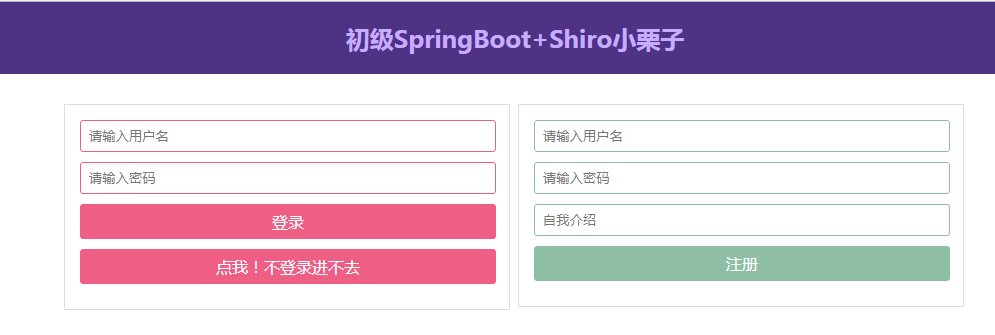
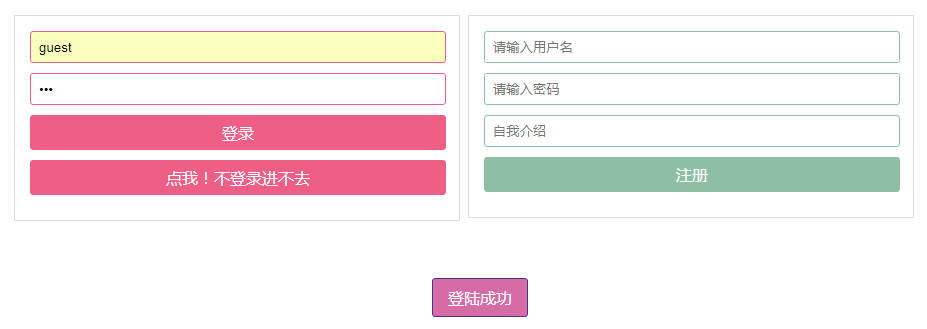
先注册一个,然后登陆

登录,成功自动跳转到home页
home页:通过认证之后才可以进

代码部分:
依赖:
<?xml version="1.0" encoding="UTF-8"?>

<project xmlns="http://maven.apache.org/POM/4.0.0" xmlns:xsi="http://www.w3.org/2001/XMLSchema-instance"

    xsi:schemaLocation="http://maven.apache.org/POM/4.0.0 http://maven.apache.org/xsd/maven-4.0.0.xsd">

    <modelVersion>4.0.0</modelVersion>

    <groupId>com.example</groupId>

    <artifactId>demo</artifactId>

    <version>0.0.1-SNAPSHOT</version>

    <packaging>jar</packaging>

    <name>demo</name>

    <description>Demo project for Spring Boot</description>

    <parent>

        <groupId>org.springframework.boot</groupId>

        <artifactId>spring-boot-starter-parent</artifactId>

        <version>2.0.3.RELEASE</version>

        <relativePath/> <!-- lookup parent from repository -->

    </parent>

    <properties>

        <project.build.sourceEncoding>UTF-8</project.build.sourceEncoding>

        <project.reporting.outputEncoding>UTF-8</project.reporting.outputEncoding>

        <java.version>1.8</java.version>

    </properties>

    <dependencies>

        <dependency>

            <groupId>org.springframework.boot</groupId>

            <artifactId>spring-boot-starter-data-redis</artifactId>

        </dependency>

        <dependency>

            <groupId>org.springframework.boot</groupId>

            <artifactId>spring-boot-starter-thymeleaf</artifactId>

        </dependency>

        <dependency>

            <groupId>org.springframework.boot</groupId>

            <artifactId>spring-boot-starter-web</artifactId>

        </dependency>

        <!-- https://mvnrepository.com/artifact/org.apache.shiro/shiro-all -->

        <dependency>

            <groupId>org.apache.shiro</groupId>

            <artifactId>shiro-all</artifactId>

            <version>1.3.2</version>

        </dependency>

        <!-- https://mvnrepository.com/artifact/com.alibaba/fastjson -->

        <dependency>

            <groupId>com.alibaba</groupId>

            <artifactId>fastjson</artifactId>

            <version>1.2.47</version>

        </dependency>

        <!-- https://mvnrepository.com/artifact/net.sf.ehcache/ehcache -->

        <dependency>

            <groupId>net.sf.ehcache</groupId>

            <artifactId>ehcache</artifactId>

            <version>2.10.5</version>

        </dependency>

        <dependency>

            <groupId>org.springframework.boot</groupId>

            <artifactId>spring-boot-devtools</artifactId>

            <scope>runtime</scope>

        </dependency>

        <dependency>

            <groupId>org.springframework.boot</groupId>

            <artifactId>spring-boot-starter-test</artifactId>

            <scope>test</scope>

        </dependency>

    </dependencies>

    <build>

        <plugins>

            <plugin>

                <groupId>org.springframework.boot</groupId>

                <artifactId>spring-boot-maven-plugin</artifactId>

            </plugin>

        </plugins>

    </build>

</project>
Java配置类:
package com.example.demo.conf;

import com.example.demo.auth.PermissionRealm;

import org.apache.shiro.authc.credential.HashedCredentialsMatcher;

import org.apache.shiro.cache.CacheManager;

import org.apache.shiro.cache.ehcache.EhCacheManager;

import org.apache.shiro.realm.AuthorizingRealm;

import org.apache.shiro.spring.LifecycleBeanPostProcessor;

import org.apache.shiro.spring.web.ShiroFilterFactoryBean;

import org.apache.shiro.web.mgt.DefaultWebSecurityManager;

import org.springframework.aop.framework.autoproxy.DefaultAdvisorAutoProxyCreator;

import org.springframework.context.annotation.Bean;

import org.springframework.context.annotation.Configuration;

import org.springframework.context.annotation.DependsOn;

import java.util.LinkedHashMap;

/**

 * @program: boot-shiro

 * @description:

 * @author: 001977

 * @create: 2018-07-17 18:22

 */

@Configuration

public class ShiroConfig {

    /**

     * 1. 配置SecurityManager

     * @return

     */

    @Bean

    public DefaultWebSecurityManager securityManager(){

        DefaultWebSecurityManager securityManager = new DefaultWebSecurityManager();

        securityManager.setRealm(realm());

        return securityManager;

    }

    /**

     * 2. 配置缓存

     * @return

     */

    @Bean

    public CacheManager cacheManager(){

        EhCacheManager ehCacheManager = new EhCacheManager();

        ehCacheManager.setCacheManagerConfigFile("classpath:ehcache.xml");

        return ehCacheManager;

    }

    /**

     * 3. 配置Realm

     * @return

     */

    @Bean

    public AuthorizingRealm realm(){

        PermissionRealm realm = new PermissionRealm();

        HashedCredentialsMatcher matcher = new HashedCredentialsMatcher();

        // 指定加密算法

        matcher.setHashAlgorithmName("MD5");

        // 指定加密次数

        matcher.setHashIterations(10);

        // 指定这个就不会报错

        matcher.setStoredCredentialsHexEncoded(true);

        realm.setCredentialsMatcher(matcher);

        return realm;

    }

    /**

     * 4. 配置LifecycleBeanPostProcessor,可以来自动的调用配置在Spring IOC容器中 Shiro Bean 的生命周期方法

     * @return

     */

    @Bean

    public LifecycleBeanPostProcessor lifecycleBeanPostProcessor(){

        return new LifecycleBeanPostProcessor();

    }

    /**

     * 5. 启用IOC容器中使用Shiro的注解,但是必须配置第四步才可以使用

     * @return

     */

    @Bean

    @DependsOn("lifecycleBeanPostProcessor")

    public DefaultAdvisorAutoProxyCreator defaultAdvisorAutoProxyCreator(){

        return new DefaultAdvisorAutoProxyCreator();

    }

    /**

     * 6. 配置ShiroFilter

     * @return

     */

    @Bean

    public ShiroFilterFactoryBean shiroFilterFactoryBean(){

        LinkedHashMap<String, String> map = new LinkedHashMap<>();

        // 静态资源

        map.put("/css/**", "anon");

        map.put("/js/**", "anon");

        // 公共路径

        map.put("/login", "anon");

        map.put("/register", "anon");

        //map.put("/*", "anon");

        // 登出,项目中没有/logout路径,因为shiro是过滤器,而SpringMVC是Servlet,Shiro会先执行

        map.put("/logout", "logout");

        // 授权

        map.put("/user/**", "authc,roles[user]");

        map.put("/admin/**", "authc,roles[admin]");

        // everything else requires authentication:

        map.put("/**", "authc");

        ShiroFilterFactoryBean factoryBean = new ShiroFilterFactoryBean();

        // 配置SecurityManager

        factoryBean.setSecurityManager(securityManager());

        // 配置权限路径

        factoryBean.setFilterChainDefinitionMap(map);

        // 配置登录url

        factoryBean.setLoginUrl("/");

        // 配置无权限路径

        factoryBean.setUnauthorizedUrl("/unauthorized");

        return factoryBean;

    }

}
Realm类:
package com.example.demo.auth;

import com.example.demo.common.entity.User;

import com.example.demo.service.UserService;

import org.apache.shiro.authc.*;

import org.apache.shiro.authz.AuthorizationInfo;

import org.apache.shiro.authz.SimpleAuthorizationInfo;

import org.apache.shiro.realm.AuthorizingRealm;

import org.apache.shiro.subject.PrincipalCollection;

import org.apache.shiro.util.ByteSource;

import org.springframework.beans.factory.annotation.Autowired;

import java.util.HashSet;

import java.util.Set;

/**

 * @program: boot-shiro

 * @description:

 * @author: 001977

 * @create: 2018-07-12 13:03

 */

public class PermissionRealm extends AuthorizingRealm {

    @Autowired

    private UserService userService;

    @Override

    protected AuthorizationInfo doGetAuthorizationInfo(PrincipalCollection principalCollection) {

        Object principal = principalCollection.getPrimaryPrincipal();

        User user = (User) principal;

        Set<String> roles = new HashSet<>();

        roles.add("user");

        SimpleAuthorizationInfo info = new SimpleAuthorizationInfo(roles);

        return info;

    }

    @Override

    protected AuthenticationInfo doGetAuthenticationInfo(AuthenticationToken authenticationToken) throws AuthenticationException {

        UsernamePasswordToken uToken = (UsernamePasswordToken) authenticationToken;

        String username = uToken.getUsername();

        String password = String.valueOf(uToken.getPassword());

        User user = userService.login(new User(username,password));

        if(user == null){

            throw new AuthenticationException("用户名密码不存在");

        }

        //认证的实体信息

        Object principal = user;

        //从数据库获取的密码

        Object hashedCredentials = user.getPassword();

        //盐值

        ByteSource credentialsSalt = ByteSource.Util.bytes(user.getUsername());

        //当前Realm对象的name,调用父类的getName方法

        String realmName = getName();

        SimpleAuthenticationInfo info = new SimpleAuthenticationInfo(principal, hashedCredentials, credentialsSalt, realmName);

        return info;

    }

}
Controller:
package com.example.demo.controller;

import com.example.demo.common.TempStorage;

import com.example.demo.common.entity.User;

import com.example.demo.common.response.BaseResponse;

import com.example.demo.service.UserService;

import org.apache.shiro.SecurityUtils;

import org.apache.shiro.authc.UsernamePasswordToken;

import org.apache.shiro.subject.Subject;

import org.springframework.beans.factory.annotation.Autowired;

import org.springframework.web.bind.annotation.RequestBody;

import org.springframework.web.bind.annotation.RequestMapping;

import org.springframework.web.bind.annotation.RestController;

import org.springframework.web.servlet.ModelAndView;

/**

 * @program: boot-shiro

 * @description:

 * @author: 001977

 * @create: 2018-07-12 13:02

 */

@RestController

public class SimpleController {

    @Autowired

    private UserService userService;

    @RequestMapping("/")

    public ModelAndView index(){

        return new ModelAndView("index");

    }

    @RequestMapping("/login")

    public BaseResponse<String> login(@RequestBody User user){

        BaseResponse<String> response = new BaseResponse<>(0,"登陆成功");

        Subject subject = SecurityUtils.getSubject();

        UsernamePasswordToken token = new UsernamePasswordToken(

                user.getUsername(), user.getPassword());

        subject.login(token);

        response.setData("/home");

        return response;

    }

    @RequestMapping("/register")

    public BaseResponse register(@RequestBody User user){

        userService.addUser(user);

        return new BaseResponse(0,"注册成功");

    }

    @RequestMapping("/home")

    public ModelAndView home(){

        ModelAndView mv = new ModelAndView("home");

        mv.addObject("users", TempStorage.getInstance().getMap());

        return mv;

    }

}
其余代码参见GitHub
SpringBoot+Shiro入门小栗子的更多相关文章
- SpringBoot+Shiro+Redis共享Session入门小栗子
在单机版的Springboot+Shiro的基础上,这次实现共享Session. 这里没有自己写RedisManager.SessionDAO.用的 crazycake 写的开源插件 pom.xml ...
- Java IO 与 NIO 服务器&客户端通信小栗子
本篇包含了入门小栗子以及一些问题的思考 BIO package com.demo.bio; import java.io.*; import java.net.ServerSocket; import ...
- SpringBoot介绍,快速入门小例子,目录结构,不同的启动方式,SpringBoot常用注解
SpringBoot介绍 引言 为了使用ssm框架去开发,准备ssm框架的模板配置 为了Spring整合第三方框架,单独的去编写xml文件 导致ssm项目后期xml文件特别多,维护xml文件的成本也是 ...
- springboot+shiro
作者:纯洁的微笑 出处:http://www.ityouknow.com/ 这篇文章我们来学习如何使用Spring Boot集成Apache Shiro.安全应该是互联网公司的一道生命线,几乎任何的公 ...
- Spring Cloud之路:(七)SpringBoot+Shiro实现登录认证和权限管理
版权声明:本文为博主原创文章,未经博主允许不得转载. https://blog.csdn.net/sage_wang/article/details/79592269一.Shiro介绍1.Shiro是 ...
- Shiro入门指引
最近项目中用到Shiro,专门对其研究了一番,颇有收获,以下是笔者最近写的博客,希望对大家入门有所帮助. Shiro入门资源整理 Shiro在SpringBoot中的使用 Shiro源码解析-登录篇 ...
- 前端基于vue,后台采用springboot+shiro的方式搭建的一个移动端商品展示平台
基于vue实现的移动端商品展示页,可以web-view的方式嵌入到小程序中,布局简约.大气,减少初学者或开发者不必要的工作量.后台维护采用的springboot+shiro的方式,为广大爱好者提供展示 ...
- SpringBoot+Shiro学习(七):Filter过滤器管理
SpringBoot+Shiro学习(七):Filter过滤器管理 Hiwayz 关注 0.5 2018.09.06 19:09* 字数 1070 阅读 5922评论 1喜欢 20 先从我们写的一个 ...
- SpringBoot&Shiro实现权限管理
SpringBoot&Shiro实现权限管理 引言 相信大家前来看这篇文章的时候,是有SpringBoot和Shiro基础的,所以本文只介绍整合的步骤,如果哪里写的不好,恳请大家能指出错误,谢 ...
随机推荐
- bpmn.js & BPMN diagram
bpmn.js & BPMN diagram BPMN 2.0 for the web https://github.com/bpmn-io/bpmn-js https://demo.bpmn ...
- wget 下载网页
如有转载,不胜荣幸.http://www.cnblogs.com/aaron-agu/ wget --http-user=username --http-passwd=password http:/w ...
- Linux(Centos)下调整分区大小(以home和根分区为例)
在安装新系统的时候,有时候没法预估或者说错误的划分了分区大小,常常会导致我们后面的操作出现极大地不方便,比如某个分区分的太小了,导致 软件安装的时候会报安装空间不够,这就很麻烦.在这里我就记录一下 ...
- kubernetes 外部访问集群暴露端口服务
在yaml文件中多个不同类型资源可以用“---”在划分 name: httpd2-svc namespace: kube-public #给资源分配网络 所用资源将在 kube-public ...
- Codeforces Round #432 Div. 1
A:大胆猜想合法点不会很多,于是暴力检验,一旦发现不合法就break,可以random_shuffle一下. #include<iostream> #include<cstdio&g ...
- CodeForces615A-Bulbs-模拟
水题 #include <cstdio> #include <algorithm> using namespace std; ]; int main() { scanf(&qu ...
- ajax 提交数组 泛型集合(嵌套集合)
直接上代码 后台接口: A类型中嵌套了 List<B> B类型中嵌套了 List<C> [HttpPost] public string Post(A a) { return ...
- Going Home POJ - 2195(费用流)
就是一个简单题 四个月前a的一道题,今天又看到了,再a一遍吧. 好吧 我想多了 用了bfs求最短路 其实不用的 因为没有障碍物 #include <iostream> #include ...
- 怎么用Verilog描述双向IO口
在很多情况下,需要使用双向IO.不过最好谨慎使用,在top层使用.网上很多描述的代码甚至是不可以综合并且有语法错误的,还是老实自己写个模块吧. 如果你需要一个口既做输入端口也做输出端口,那么你就需要去 ...
- bzoj1559 [JSOI2009]密码
题目链接:[JSOI2009]密码 我们先看第一问:输出方案数 我们把所有给出来的串丢到AC自动机里面去,然后在建出来的\(trie\)图上跑dp 由于\(n\leq 10\)我们很自然的就想到了状压 ...