PyQt:无边框自定义标题栏及最大化最小化窗体大小调整
环境
Python3.5.2
PyQt5
陈述
隐藏掉系统的控制栏,实现了自定义的标题控制栏,以及关闭/最大化/最小化的功能,自由调整窗体大小的功能(跟随一个大佬学的),代码内有详细注释
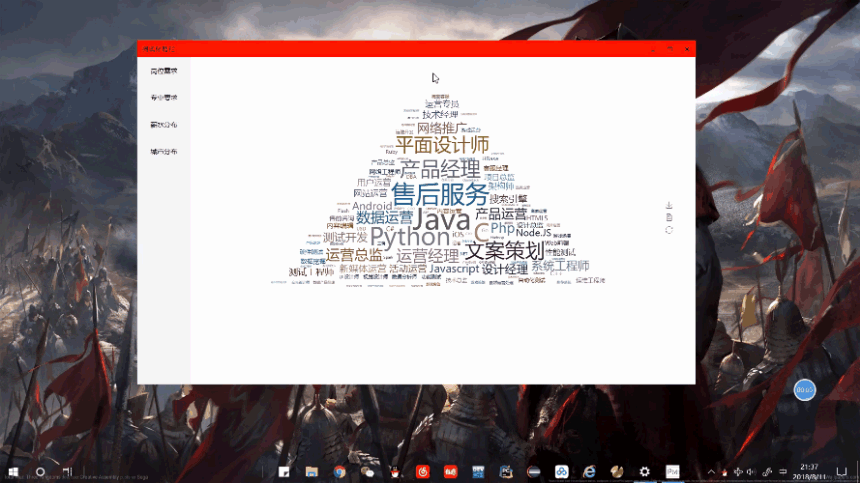
只要把MainWindow类自己实现就可以了,我把左侧栏的demo(可以看我这篇https://www.cnblogs.com/jyroy/p/9457882.html)搭载上了,效果如下
标题栏的风格我和左侧栏的风格统一了,还是模仿网易云音乐的红色格调(我觉得网易云的红色很ok)
代码
 #!/usr/bin/env python

 # -*- coding:utf-8 -*-

 # Author: jyroy

 import sys

 from PyQt5.QtCore import QSize

 from PyQt5.QtWidgets import QApplication

 from PyQt5.QtCore import Qt, pyqtSignal, QPoint

 from PyQt5.QtGui import QFont, QEnterEvent, QPainter, QColor, QPen

 from PyQt5.QtWidgets import QWidget, QVBoxLayout, QHBoxLayout, QLabel,QSpacerItem, QSizePolicy, QPushButton

 from PyQt5.QtGui import QIcon

 from PyQt5.QtWidgets import QWidget, QVBoxLayout, QPushButton, QTextEdit

 from LeftTabWidget import LeftTabWidget

 # 样式

 StyleSheet = """

 /*标题栏*/

 TitleBar {

     background-color: red;

 }

 /*最小化最大化关闭按钮通用默认背景*/

 #buttonMinimum,#buttonMaximum,#buttonClose {

     border: none;

     background-color: red;

 }

 /*悬停*/

 #buttonMinimum:hover,#buttonMaximum:hover {

     background-color: red;

     color: white;

 }

 #buttonClose:hover {

     color: white;

 }

 /*鼠标按下不放*/

 #buttonMinimum:pressed,#buttonMaximum:pressed {

     background-color: Firebrick;

 }

 #buttonClose:pressed {

     color: white;

     background-color: Firebrick;

 }

 """

 class TitleBar(QWidget):

     # 窗口最小化信号

     windowMinimumed = pyqtSignal()

     # 窗口最大化信号

     windowMaximumed = pyqtSignal()

     # 窗口还原信号

     windowNormaled = pyqtSignal()

     # 窗口关闭信号

     windowClosed = pyqtSignal()

     # 窗口移动

     windowMoved = pyqtSignal(QPoint)

     def __init__(self, *args, **kwargs):

         super(TitleBar, self).__init__(*args, **kwargs)

         # 支持qss设置背景

         self.setAttribute(Qt.WA_StyledBackground, True)

         self.mPos = None

         self.iconSize = 20  # 图标的默认大小

         # 设置默认背景颜色,否则由于受到父窗口的影响导致透明

         self.setAutoFillBackground(True)

         palette = self.palette()

         palette.setColor(palette.Window, QColor(240, 240, 240))

         self.setPalette(palette)

         # 布局

         layout = QHBoxLayout(self, spacing=0)

         layout.setContentsMargins(0, 0, 0, 0)

         # 窗口图标

         self.iconLabel = QLabel(self)

 #         self.iconLabel.setScaledContents(True)

         layout.addWidget(self.iconLabel)

         # 窗口标题

         self.titleLabel = QLabel(self)

         self.titleLabel.setMargin(2)

         layout.addWidget(self.titleLabel)

         # 中间伸缩条

         layout.addSpacerItem(QSpacerItem(

             40, 20, QSizePolicy.Expanding, QSizePolicy.Minimum))

         # 利用Webdings字体来显示图标

         font = self.font() or QFont()

         font.setFamily('Webdings')

         # 最小化按钮

         self.buttonMinimum = QPushButton(

             '', self, clicked=self.windowMinimumed.emit, font=font, objectName='buttonMinimum')

         layout.addWidget(self.buttonMinimum)

         # 最大化/还原按钮

         self.buttonMaximum = QPushButton(

             '', self, clicked=self.showMaximized, font=font, objectName='buttonMaximum')

         layout.addWidget(self.buttonMaximum)

         # 关闭按钮

         self.buttonClose = QPushButton(

             'r', self, clicked=self.windowClosed.emit, font=font, objectName='buttonClose')

         layout.addWidget(self.buttonClose)

         # 初始高度

         self.setHeight()

     def showMaximized(self):

         if self.buttonMaximum.text() == '':

             # 最大化

             self.buttonMaximum.setText('')

             self.windowMaximumed.emit()

         else:  # 还原

             self.buttonMaximum.setText('')

             self.windowNormaled.emit()

     def setHeight(self, height=38):

         """设置标题栏高度"""

         self.setMinimumHeight(height)

         self.setMaximumHeight(height)

         # 设置右边按钮的大小

         self.buttonMinimum.setMinimumSize(height, height)

         self.buttonMinimum.setMaximumSize(height, height)

         self.buttonMaximum.setMinimumSize(height, height)

         self.buttonMaximum.setMaximumSize(height, height)

         self.buttonClose.setMinimumSize(height, height)

         self.buttonClose.setMaximumSize(height, height)

     def setTitle(self, title):

         """设置标题"""

         self.titleLabel.setText(title)

     def setIcon(self, icon):

         """设置图标"""

         self.iconLabel.setPixmap(icon.pixmap(self.iconSize, self.iconSize))

     def setIconSize(self, size):

         """设置图标大小"""

         self.iconSize = size

     def enterEvent(self, event):

         self.setCursor(Qt.ArrowCursor)

         super(TitleBar, self).enterEvent(event)

     def mouseDoubleClickEvent(self, event):

         super(TitleBar, self).mouseDoubleClickEvent(event)

         self.showMaximized()

     def mousePressEvent(self, event):

         """鼠标点击事件"""

         if event.button() == Qt.LeftButton:

             self.mPos = event.pos()

         event.accept()

     def mouseReleaseEvent(self, event):

         '''鼠标弹起事件'''

         self.mPos = None

         event.accept()

     def mouseMoveEvent(self, event):

         if event.buttons() == Qt.LeftButton and self.mPos:

             self.windowMoved.emit(self.mapToGlobal(event.pos() - self.mPos))

         event.accept()

 # 枚举左上右下以及四个定点

 Left, Top, Right, Bottom, LeftTop, RightTop, LeftBottom, RightBottom = range(8)

 class FramelessWindow(QWidget):

     # 四周边距

     Margins = 5

     def __init__(self, *args, **kwargs):

         super(FramelessWindow, self).__init__(*args, **kwargs)

         self._pressed = False

         self.Direction = None

         # 背景透明

         self.setAttribute(Qt.WA_TranslucentBackground, True)

         # 无边框

         self.setWindowFlags(Qt.FramelessWindowHint)  # 隐藏边框

         # 鼠标跟踪

         self.setMouseTracking(True)

         # 布局

         layout = QVBoxLayout(self, spacing=0)

         # 预留边界用于实现无边框窗口调整大小

         layout.setContentsMargins(

             self.Margins, self.Margins, self.Margins, self.Margins)

         # 标题栏

         self.titleBar = TitleBar(self)

         layout.addWidget(self.titleBar)

         # 信号槽

         self.titleBar.windowMinimumed.connect(self.showMinimized)

         self.titleBar.windowMaximumed.connect(self.showMaximized)

         self.titleBar.windowNormaled.connect(self.showNormal)

         self.titleBar.windowClosed.connect(self.close)

         self.titleBar.windowMoved.connect(self.move)

         self.windowTitleChanged.connect(self.titleBar.setTitle)

         self.windowIconChanged.connect(self.titleBar.setIcon)

     def setTitleBarHeight(self, height=38):

         """设置标题栏高度"""

         self.titleBar.setHeight(height)

     def setIconSize(self, size):

         """设置图标的大小"""

         self.titleBar.setIconSize(size)

     def setWidget(self, widget):

         """设置自己的控件"""

         if hasattr(self, '_widget'):

             return

         self._widget = widget

         # 设置默认背景颜色,否则由于受到父窗口的影响导致透明

         self._widget.setAutoFillBackground(True)

         palette = self._widget.palette()

         palette.setColor(palette.Window, QColor(240, 240, 240))

         self._widget.setPalette(palette)

         self._widget.installEventFilter(self)

         self.layout().addWidget(self._widget)

     def move(self, pos):

         if self.windowState() == Qt.WindowMaximized or self.windowState() == Qt.WindowFullScreen:

             # 最大化或者全屏则不允许移动

             return

         super(FramelessWindow, self).move(pos)

     def showMaximized(self):

         """最大化,要去除上下左右边界,如果不去除则边框地方会有空隙"""

         super(FramelessWindow, self).showMaximized()

         self.layout().setContentsMargins(0, 0, 0, 0)

     def showNormal(self):

         """还原,要保留上下左右边界,否则没有边框无法调整"""

         super(FramelessWindow, self).showNormal()

         self.layout().setContentsMargins(

             self.Margins, self.Margins, self.Margins, self.Margins)

     def eventFilter(self, obj, event):

         """事件过滤器,用于解决鼠标进入其它控件后还原为标准鼠标样式"""

         if isinstance(event, QEnterEvent):

             self.setCursor(Qt.ArrowCursor)

         return super(FramelessWindow, self).eventFilter(obj, event)

     def paintEvent(self, event):

         """由于是全透明背景窗口,重绘事件中绘制透明度为1的难以发现的边框,用于调整窗口大小"""

         super(FramelessWindow, self).paintEvent(event)

         painter = QPainter(self)

         painter.setPen(QPen(QColor(255, 255, 255, 1), 2 * self.Margins))

         painter.drawRect(self.rect())

     def mousePressEvent(self, event):

         """鼠标点击事件"""

         super(FramelessWindow, self).mousePressEvent(event)

         if event.button() == Qt.LeftButton:

             self._mpos = event.pos()

             self._pressed = True

     def mouseReleaseEvent(self, event):

         '''鼠标弹起事件'''

         super(FramelessWindow, self).mouseReleaseEvent(event)

         self._pressed = False

         self.Direction = None

     def mouseMoveEvent(self, event):

         """鼠标移动事件"""

         super(FramelessWindow, self).mouseMoveEvent(event)

         pos = event.pos()

         xPos, yPos = pos.x(), pos.y()

         wm, hm = self.width() - self.Margins, self.height() - self.Margins

         if self.isMaximized() or self.isFullScreen():

             self.Direction = None

             self.setCursor(Qt.ArrowCursor)

             return

         if event.buttons() == Qt.LeftButton and self._pressed:

             self._resizeWidget(pos)

             return

         if xPos <= self.Margins and yPos <= self.Margins:

             # 左上角

             self.Direction = LeftTop

             self.setCursor(Qt.SizeFDiagCursor)

         elif wm <= xPos <= self.width() and hm <= yPos <= self.height():

             # 右下角

             self.Direction = RightBottom

             self.setCursor(Qt.SizeFDiagCursor)

         elif wm <= xPos and yPos <= self.Margins:

             # 右上角

             self.Direction = RightTop

             self.setCursor(Qt.SizeBDiagCursor)

         elif xPos <= self.Margins and hm <= yPos:

             # 左下角

             self.Direction = LeftBottom

             self.setCursor(Qt.SizeBDiagCursor)

         elif 0 <= xPos <= self.Margins and self.Margins <= yPos <= hm:

             # 左边

             self.Direction = Left

             self.setCursor(Qt.SizeHorCursor)

         elif wm <= xPos <= self.width() and self.Margins <= yPos <= hm:

             # 右边

             self.Direction = Right

             self.setCursor(Qt.SizeHorCursor)

         elif self.Margins <= xPos <= wm and 0 <= yPos <= self.Margins:

             # 上面

             self.Direction = Top

             self.setCursor(Qt.SizeVerCursor)

         elif self.Margins <= xPos <= wm and hm <= yPos <= self.height():

             # 下面

             self.Direction = Bottom

             self.setCursor(Qt.SizeVerCursor)

     def _resizeWidget(self, pos):

         """调整窗口大小"""

         if self.Direction == None:

             return

         mpos = pos - self._mpos

         xPos, yPos = mpos.x(), mpos.y()

         geometry = self.geometry()

         x, y, w, h = geometry.x(), geometry.y(), geometry.width(), geometry.height()

         if self.Direction == LeftTop:  # 左上角

             if w - xPos > self.minimumWidth():

                 x += xPos

                 w -= xPos

             if h - yPos > self.minimumHeight():

                 y += yPos

                 h -= yPos

         elif self.Direction == RightBottom:  # 右下角

             if w + xPos > self.minimumWidth():

                 w += xPos

                 self._mpos = pos

             if h + yPos > self.minimumHeight():

                 h += yPos

                 self._mpos = pos

         elif self.Direction == RightTop:  # 右上角

             if h - yPos > self.minimumHeight():

                 y += yPos

                 h -= yPos

             if w + xPos > self.minimumWidth():

                 w += xPos

                 self._mpos.setX(pos.x())

         elif self.Direction == LeftBottom:  # 左下角

             if w - xPos > self.minimumWidth():

                 x += xPos

                 w -= xPos

             if h + yPos > self.minimumHeight():

                 h += yPos

                 self._mpos.setY(pos.y())

         elif self.Direction == Left:  # 左边

             if w - xPos > self.minimumWidth():

                 x += xPos

                 w -= xPos

             else:

                 return

         elif self.Direction == Right:  # 右边

             if w + xPos > self.minimumWidth():

                 w += xPos

                 self._mpos = pos

             else:

                 return

         elif self.Direction == Top:  # 上面

             if h - yPos > self.minimumHeight():

                 y += yPos

                 h -= yPos

             else:

                 return

         elif self.Direction == Bottom:  # 下面

             if h + yPos > self.minimumHeight():

                 h += yPos

                 self._mpos = pos

             else:

                 return

         self.setGeometry(x, y, w, h)

 class MainWindow(QWidget):

     def __init__(self, *args, **kwargs):

         super(MainWindow, self).__init__(*args, **kwargs)

         layout = QVBoxLayout(self, spacing=0)

         layout.setContentsMargins(0, 0, 0, 0)

         self.left_tag = LeftTabWidget()

         layout.addWidget(self.left_tag)

 if __name__ == '__main__':

     app = QApplication(sys.argv)

     app.setStyleSheet(StyleSheet)

     mainWnd = FramelessWindow()

     mainWnd.setWindowTitle('测试标题栏')

     mainWnd.setWindowIcon(QIcon('Qt.ico'))

     mainWnd.resize(QSize(1250,780))

     mainWnd.setWidget(MainWindow(mainWnd))  # 把自己的窗口添加进来

     mainWnd.show()

     sys.exit(app.exec_())
效果展示
拓展知识
1.设置宽度和高度。
resize(int w,int h)
resize(QSize s)
2.设置窗口的位置、宽度和高度。
setGeometry(int X,int Y,int W,int H)
setGeometry(QRect r)
3.设置窗口为固定值。
setFixedSize(int w,int h)
setFixedSize(QSize s)
注意:窗口标题栏上的最大化按钮无效;用鼠标无法调整窗口尺寸。
4.设置窗口为固定值。
setFixedWidth(int w)
窗口标题栏上的最大化按钮无效;用鼠标无法调整窗口的宽度。
5.设置窗口为固定值。
setFixedHeight(int h)
窗口标题栏上的最大化按钮无效;用鼠标无法调整窗口的高度。
5.设置窗口的最小尺寸。
setMinimumSize(int w,int h)
setMinimumSize(QSize s)
用鼠标可以让窗口变宽、变高。
设置窗口的最小宽度:
setMinimumWidth(int w)
设置窗口的最小高度:
setMinimumHeight(int h)
6.设置窗口的最大尺寸。
setMaximumSize(int w,int h)
setMaximumSize(QSize s)
用鼠标可以让窗口变宽、变高。
设置窗口的最小宽度:
setMaximumWidth(int w)
设置窗口的最小高度:
setMaximumHeight(int h)
说明
因为只是自己写的简单的例子,在窗口方面都是利用的写死的大小。不同的电脑像素会有差别。我的是1920*1080的设备。在实际用的时候尽量加上判断,来适应不同的设备。
PyQt:无边框自定义标题栏及最大化最小化窗体大小调整的更多相关文章
- C#应用编程小例子-02-窗体最大化和最小化窗体大小
using System; using System.Collections.Generic; using System.ComponentModel; using System.Data; usin ...
- Electron 无边框窗口最大化最小化关闭功能
Electron 无边框窗口最大化最小化关闭功能 目的 实现无边框窗口,并添加最大化最小化和关闭功能 前提 了解Electron 主进程和渲染进程的通讯 了解 BrowserWindow相关功能 操作 ...
- WPF一步步实现完全无边框自定义Window(附源码)
在我们设计一个软件的时候,有很多时候我们需要按照美工的设计来重新设计整个版面,这当然包括主窗体,因为WPF为我们提供了强大的模板的特性,这就为我们自定义各种空间提供了可能性,这篇博客主要用来介绍如何自 ...
- C# WPF 建立无边框(标题栏)的登录窗口
前言:笔者最近用c#写WPF做了一个项目,此前未曾做过完整的WPF项目,算是一边学一边用,网上搜了不少资料,效率当然是不敢恭维的,有时会在一些很简单的问题上纠结很长时间,血与泪的教训可不少. 不过,正 ...
- c# 窗体相关操作(最大化/最小化/关闭/标题栏)
/// <summary> /// 窗体跟随鼠标移动的标记 /// </summary> private bool normalmoving = false; /// < ...
- Java-如何去掉JFrame上的最大化最小化和关闭按钮(转)
在JDK1.4以前,我们只有一种方式来去掉窗口的标题栏,那就是直接使用JWindow,用JWindow来代替JFrame使用.但用过JWindow的人一定知道,JWindow在操作系统的任务栏是不可见 ...
- Q窗口操作函数(窗口最大化,全屏,隐藏最大化最小化按钮)
//Qt主窗口没有最小化,最大化按钮且最大化显示 int main(int argc, char *argv[]) { QApplication a(argc, argv); TestQtForWi ...
- delphi 窗体最大化 最小化
procedure TForm1.SpeedButton2Click(Sender: TObject); begin sendmessage(form1.WindowHandle,WM_SYSCOMM ...
- pyqt5-QWidget-窗口状态(最大化最小化等)
setWindowState(state) #设置窗口状态 Qt.WindowNoState 无状态-正常状态 Qt.WindowMinimized 最小化 Qt.Wind ...
随机推荐
- kvm虚拟机迁移
一.迁移简介 迁移: 系统的迁移是指把源主机上的操作系统和应用程序移动到目的主机,并且能够在目的主机上正常运行.在没有虚拟机的时代,物理机之间的迁移依靠的是系统备份和恢复技术.在源主机上实时备份操作系 ...
- git创建本地分支以及推送本地分之至远程分支
Git分支策略 实际开发中,应当按照以下几个基本原则进行管理: 首先,master分支应该是非常稳定的,也就是仅用来发布新版本,平时不能再上边干活. 那在哪干活呢?干活都在dev分支上,也就是说,de ...
- 磁共振成像SENSE 并行加速重建 g-factor计算方法(待更新)
MRI SENSE 并行图像加速重建 g-factor计算方法: Matlab代码如下: function g=gfactor_noise(map,LOSS,Rx,Ry) % map -> se ...
- BZOJ.5305.[HAOI2018]苹果树(组合 计数)
LOJ BZOJ 洛谷 BZOJ上除了0ms的Rank1啦.明明这题常数很好优化的. 首先,\(n=1\)时有\(2\)个位置放叶子,\(n=2\)时有\(3\)个... 可知\(n\)个点的有标号二 ...
- SharePoint2016: 使用powerShell启用project web app
1. 创建pwa承载的webApplication 在SharePoint2016管理中心>应用程序管理>管理web应用程序,新建web应用程序>sharepoint-1001, ...
- sql server 2012 减少日志
USE [master] GO ALTER DATABASE 数据库名 SET RECOVERY SIMPLE WITH NO_WAIT GO ALTER DATABASE 数据库名 SET RECO ...
- SSM框架mapper.xml模糊查询语句
SSM框架mapper.xml模糊查询语句 在用SSM框架时,如果想要实现模糊查询,可以在mapper.xml文件中进行数据库语句的书写,方法有很多种,在这里我选择了两种介绍: 方法1: <se ...
- Summer Project
Summer Project Summer是一个用于学习交流,基于Netty4.x的简单mvc库. 使用 快速开始 public class Application { public static v ...
- php调用c/c++时 passthru()被禁用问题
passthru被禁用,需要编辑php.ini文件 disable_functions = scandir,passthru,exec,system,chroot,chgrp,chown,shell_ ...
- VS 2013+ ArcGIS 10.3 AddIn 断点不断异常解决
1. http://resources.arcgis.com/en/help/arcobjects-net/conceptualhelp/index.html#/How_to_debug_add_in ...