Mask rcn nanchor部分理解
Anchors
Mask 生成锚框本质与SSD一样
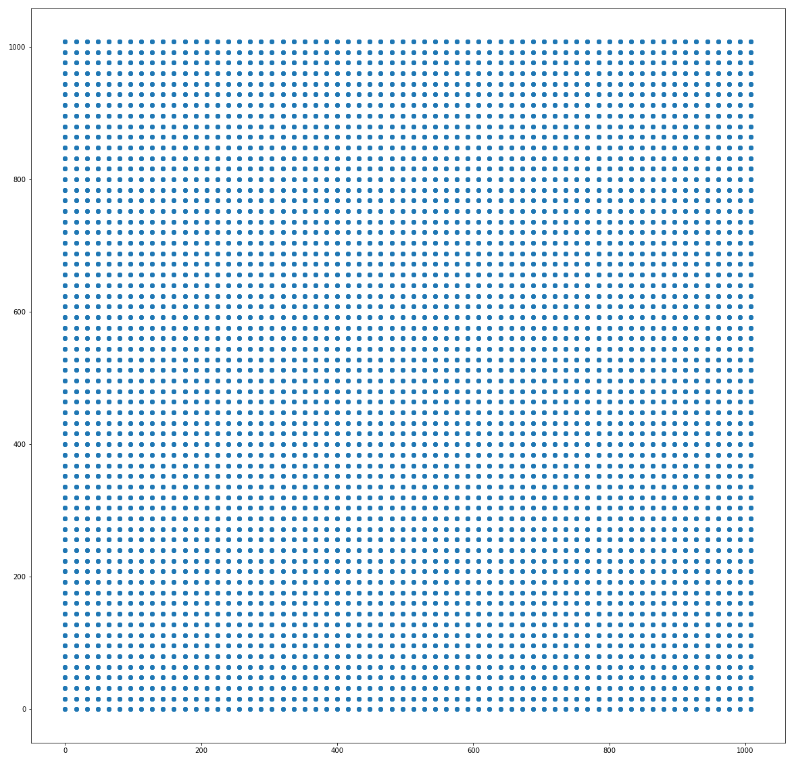
中心点个数等于特征层像素数
框体生成围绕中心点
Bbox的坐标是要归一化到0~1之间的,都是相对于输入图片的大小。
基本生成方式:
H乘np.sqrt(anchor_ratio)
W乘np.sqrt(anchor_ratio)
这样,H:W = ratio
Mask rcnn
self.config.BACKBONE_STRIDES = [4, 8, 16, 32, 64]
# 特征层的下采样倍数,中心点计算使用
self.config.RPN_ANCHOR_RATIOS = [0.5, 1, 2] # 特征层锚框生成参数
self.config.RPN_ANCHOR_SCALES = [32, 64, 128, 256, 512] # 特征层锚框感
anchor生成:
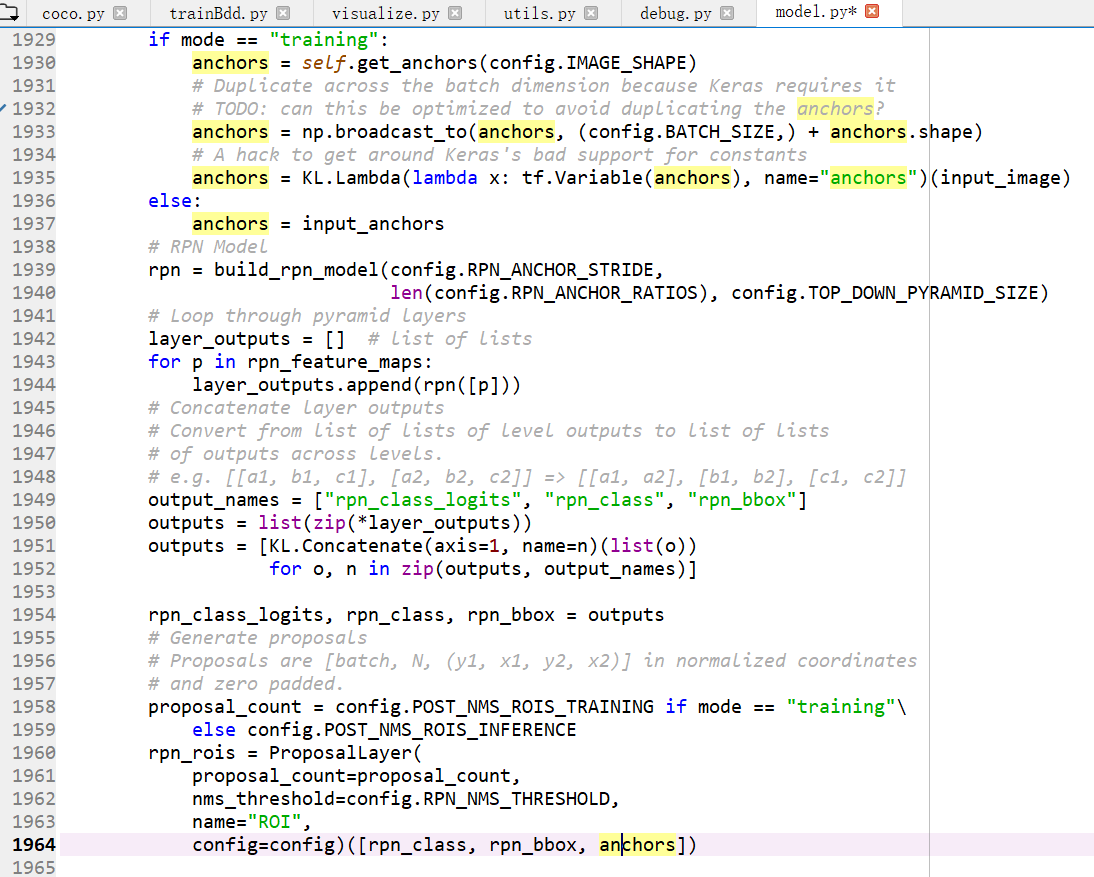
锚框生成入口函数位于model.py中的get_anchor函数,需要参数image_shape,保证含有[h, w]即可,也可以包含[h, w, c],
 def get_anchors(self, image_shape):

     """Returns anchor pyramid for the given image size."""

     # [N, (height, width)]

     backbone_shapes = compute_backbone_shapes(self.config, image_shape)

     # Cache anchors and reuse if image shape is the same

     if not hasattr(self, "_anchor_cache"):

         self._anchor_cache = {}

     if not tuple(image_shape) in self._anchor_cache:

         # Generate Anchors: [anchor_count, (y1, x1, y2, x2)]

         a = utils.generate_pyramid_anchors(

             self.config.RPN_ANCHOR_SCALES,  # (32, 64, 128, 256, 512)

             self.config.RPN_ANCHOR_RATIOS,  # [0.5, 1, 2]

             backbone_shapes,                # with shape [N, (height, width)]

             self.config.BACKBONE_STRIDES,   # [4, 8, 16, 32, 64]

             self.config.RPN_ANCHOR_STRIDE)  #

         # Keep a copy of the latest anchors in pixel coordinates because

         # it's used in inspect_model notebooks.

         # TODO: Remove this after the notebook are refactored to not use it

         self.anchors = a

         # Normalize coordinates

         self._anchor_cache[tuple(image_shape)] = utils.norm_boxes(a, image_shape[:2])

     return self._anchor_cache[tuple(image_shape)]
调用函数compute_backbone_shapes计算各个特征层shape:
def compute_backbone_shapes(config, image_shape):

    """Computes the width and height of each stage of the backbone network.

    Returns:

        [N, (height, width)]. Where N is the number of stages

    """

    if callable(config.BACKBONE):

        return config.COMPUTE_BACKBONE_SHAPE(image_shape)

    # Currently supports ResNet only

    assert config.BACKBONE in ["resnet50", "resnet101"]

    return np.array(

        [[int(math.ceil(image_shape[0] / stride)),

            int(math.ceil(image_shape[1] / stride))]

            for stride in config.BACKBONE_STRIDES])  # [4, 8, 16, 32, 64]
调用函数utils.generate_pyramid_anchors生成全部锚框:
def generate_pyramid_anchors(scales, ratios, feature_shapes, feature_strides,

                             anchor_stride):

    """Generate anchors at different levels of a feature pyramid. Each scale

    is associated with a level of the pyramid, but each ratio is used in

    all levels of the pyramid.

    Returns:

    anchors: [N, (y1, x1, y2, x2)]. All generated anchors in one array. Sorted

        with the same order of the given scales. So, anchors of scale[0] come

        first, then anchors of scale[1], and so on.

    """

    # Anchors

    # [anchor_count, (y1, x1, y2, x2)]

    anchors = []

    for i in range(len(scales)):

        anchors.append(generate_anchors(scales[i],

                                        ratios,

                                        feature_shapes[i],

                                        feature_strides[i],

                                        anchor_stride))

    # [anchor_count, (y1, x1, y2, x2)]

    return np.concatenate(anchors, axis=0)
utils.generate_pyramid_anchors会调用utils.generate_anchors来生成每一层的锚框(介绍见『Numpy』np.meshgrid):
def generate_anchors(scales, ratios, shape, feature_stride, anchor_stride):

    """

    scales: 1D array of anchor sizes in pixels. Example: [32, 64, 128]

    ratios: 1D array of anchor ratios of width/height. Example: [0.5, 1, 2]

    shape: [height, width] spatial shape of the feature map over which

            to generate anchors.

    feature_stride: Stride of the feature map relative to the image in pixels.

    anchor_stride: Stride of anchors on the feature map. For example, if the

        value is 2 then generate anchors for every other feature map pixel.

    """

    # Get all combinations of scales and ratios

    scales, ratios = np.meshgrid(np.array(scales), np.array(ratios))

    scales = scales.flatten()

    ratios = ratios.flatten()

    # Enumerate heights and widths from scales and ratios

    heights = scales / np.sqrt(ratios)

    widths = scales * np.sqrt(ratios)

    # Enumerate shifts in feature space

    shifts_y = np.arange(0, shape[0], anchor_stride) * feature_stride

    shifts_x = np.arange(0, shape[1], anchor_stride) * feature_stride

    shifts_x, shifts_y = np.meshgrid(shifts_x, shifts_y)

    # Enumerate combinations of shifts, widths, and heights

    box_widths, box_centers_x = np.meshgrid(widths, shifts_x)    # (n, 3) (n, 3)

    box_heights, box_centers_y = np.meshgrid(heights, shifts_y)  # (n, 3) (n, 3)

    # Reshape to get a list of (y, x) and a list of (h, w)

    # (n, 3, 2) -> (3n, 2)

    box_centers = np.stack([box_centers_y, box_centers_x], axis=2).reshape([-1, 2])
  #box_centers_y, box_centers_x都是坐标矩阵,要想恢复各个点的坐标,调用np.stack函数,指定axis
box_sizes = np.stack([box_heights, box_widths], axis=2).reshape([-1, 2]) # Convert to corner coordinates (y1, x1, y2, x2) boxes = np.concatenate([box_centers - 0.5 * box_sizes, box_centers + 0.5 * box_sizes], axis=1) # 框体信息是相对于原图的, [N, (y1, x1, y2, x2)] return boxes
boxes的长宽:
self.config.RPN_ANCHOR_RATIOS = [0.5, 1, 2] # 特征层锚框生成参数
self.config.RPN_ANCHOR_SCALES = [32, 64, 128, 256, 512] # 特征层锚框感
最小的框:
heights: 32/sqrt(0.5) = 45.25 width: 32 * sqrt(0.5) = 22.62
height: 32/sqrt(1) = 32 width:32* sqrt(1) = 32
最大的框:
heights: 512/sqrt(2) = 362 widths: 512*sqrt(2) = 724
最后回到get_anchor,调用utils.norm_boxes将锚框坐标化为01之间:
def norm_boxes(boxes, shape):

    """Converts boxes from pixel coordinates to normalized coordinates.

    boxes: [N, (y1, x1, y2, x2)] in pixel coordinates

    shape: [..., (height, width)] in pixels

    Note: In pixel coordinates (y2, x2) is outside the box. But in normalized

    coordinates it's inside the box.

    Returns:

        [N, (y1, x1, y2, x2)] in normalized coordinates

    """

    h, w = shape

    scale = np.array([h - 1, w - 1, h - 1, w - 1])

    shift = np.array([0, 0, 1, 1])

    return np.divide((boxes - shift), scale).astype(np.float32)
抄自:https://www.cnblogs.com/hellcat/p/9854736.html
Mask rcn nanchor部分理解的更多相关文章
- mask rcnn input数据理解
Array.min() #无参,所有中的最小值 Array.min(0) # axis=0; 每列的最小值 Array.min(1) # axis=1:每行的最小值 字符串在输出时的对齐: S.lju ...
- Mask R-CNN论文理解
摘要: Mask RCNN可以看做是一个通用实例分割架构. Mask RCNN以Faster RCNN原型,增加了一个分支用于分割任务. Mask RCNN比Faster RCNN速度慢一些,达到了5 ...
- 深入理解 Android 之 View 的绘制流程
概述 本篇文章会从源码(基于Android 6.0)角度分析Android中View的绘制流程,侧重于对整体流程的分析,对一些难以理解的点加以重点阐述,目的是把View绘制的整个流程把握好,而对于特定 ...
- [译] 理解数组在 PHP 内部的实现(给PHP开发者的PHP源码-第四部分)
文章来自:http://www.hoohack.me/2016/02/15/understanding-phps-internal-array-implementation-ch 原文:https:/ ...
- 【blade的UI设计】理解前端MVC与分层思想
前言 最近校招要来了,很多大三的同学一定按捺不住心中的焦躁,其中有期待也有彷徨,或许更多的是些许担忧,最近在开始疯狂的复习了吧 这里小钗有几点建议给各位: ① 不要看得太重,关心则乱,太紧张反而表现不 ...
- 利用layer的mask属性实现逐渐揭示的动画效果
github上又看到个不错的动画(https://github.com/rounak/RJImageLoader),如图: 所以就想来自己实现以下 不试不知道,这个动画还真不是看上去那么简单,我自己想 ...
- 理解 OpenStack 高可用(HA)(3):Neutron 分布式虚拟路由(Neutron Distributed Virtual Routing)
本系列会分析OpenStack 的高可用性(HA)概念和解决方案: (1)OpenStack 高可用方案概述 (2)Neutron L3 Agent HA - VRRP (虚拟路由冗余协议) (3)N ...
- Deep learning:四十六(DropConnect简单理解)
和maxout(maxout简单理解)一样,DropConnect也是在ICML2013上发表的,同样也是为了提高Deep Network的泛化能力的,两者都号称是对Dropout(Dropout简单 ...
- Deep learning:四十一(Dropout简单理解)
前言 训练神经网络模型时,如果训练样本较少,为了防止模型过拟合,Dropout可以作为一种trikc供选择.Dropout是hintion最近2年提出的,源于其文章Improving neural n ...
随机推荐
- 20 由属性查询学习到的ArcMap、javaScripts API相关操作
因项目需要,想要在属性查询的时候连同相关的图片一并查出来,但是因为要查询的图层众多,且字段不固定,而且还要方便后期维护,因此一个个单独配置并不是最优的解决方法 为实现这个功能,我想到如下几种解决方法 ...
- dtFindNearestPolyQuery :: process
dtFindNearestPolyQuery :: process(const dtMeshTile* tile, dtPoly** polys, dtPolyRef* refs, int count ...
- 使用Xilinx UART-LITE IP实现串口--逻辑代码实现
`timescale 1ns / 1ps /////////////////////////////////////////////////////////////////////////////// ...
- 2018-2019-2 网络对抗技术 20165311 Exp6 信息搜集与漏洞扫描
20165311 Exp6 信息搜集与漏洞扫描 1.实验内容 2.实验过程 任务一:各种搜索技巧的应用 通过搜索引擎进行信息搜集 使用FOFA.SO 搜索特定类型的文件 任务二:DNS IP注册信息的 ...
- python3 文件读写操作中的文件指针seek()使用
python中可以使用seek()移动文件指针到指定位置,然后读/写.通常配合 r+ .w+.a+ 模式,在此三种模式下,seek指针移动只能从头开始移动,即seek(x,0) . 模式 默认 写方式 ...
- 栈->栈与递归
文字简述 1.阶乘函数 2.2阶Fiibonacci数列 3.n阶Hanoi塔问题 代码实现 // // Created by lady on 19-4-3. // #include <stdi ...
- 干了这杯java之ThreadLocal
ThreadLocal Java篇 是什么 怎么用 源码 缺点 总结 是什么 ThreadLocal是一个关于创建线程局部变量的类,这个变量只能当前线程使用,其他线程不可用. ThreadLocal提 ...
- MATLAB 通过对话框返回值选择下一步操作
学习来源:http://muchong.com/t-10428977-1-pid-1 Userchoice = questdlg(['您确定导入彩色图像?'],'提示','转为灰度图处理','展示彩色 ...
- Vim编辑器设置及其使用
一.vim编辑器的相关配置文件 /etc/vimrc:vim编辑器的全局配置文件,针对所有用户有效 /etc/virc:vi编辑器的全局配置文件,针对所有用户有效 ~/.vimrc:vim编辑器的其他 ...
- Linux 命令整理-ps
ps 命令 ps -ef | grep tomcat ps -ef :以长格式(全格式)显示所有进程:“|” :是管道grep :检索tomcat :与字符tomcat有关的进程 ps[选项]-e:显 ...