day38 18-Spring的XML和注解的结合使用


什么情况下使用XML,什么情况下使用注解?又有XML,又有注解,开发的时候使用哪种?

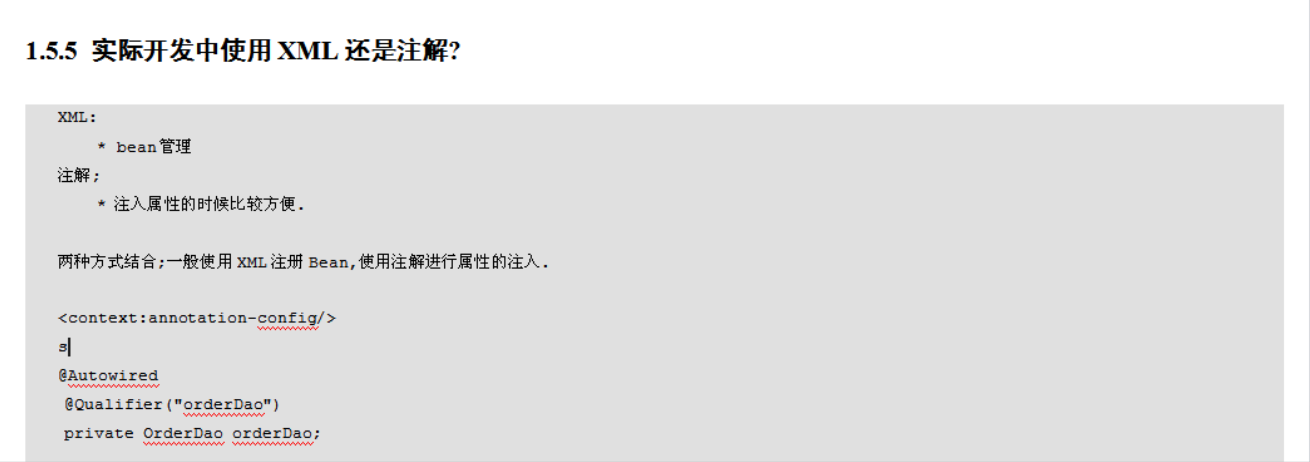
XML:结构清晰,配置麻烦.
注解:简单,
它俩的结合点在属性注入上.
两种方式结合:一般使用XML注册Bean,使用注解进行属性的注入.
package cn.itcast.spring3.demo1; import javax.annotation.PostConstruct;
import javax.annotation.PreDestroy;
import javax.annotation.Resource; import org.springframework.beans.factory.annotation.Autowired;
import org.springframework.beans.factory.annotation.Qualifier;
import org.springframework.beans.factory.annotation.Value;
import org.springframework.context.annotation.Scope;
import org.springframework.stereotype.Component;
import org.springframework.stereotype.Service; /**
* 注解的方式装配Bean.
* @author zhongzh
*
*/
//在Spring配置文件中<bean id="userService" class="cn.itcast.demo1.UserService">
//其实也需要核心配置文件,只不过不是用来装配bean了,你得告诉Spring需要去哪些包下面去扫描.它得扫描到这些注解才行.它得去哪里扫描你得告诉人家才行
//@Component(value="userService")
//@Component("userService")
@Service(value="userService")//Service层,默认把这个类UserService交由Spring来管理了 //@Scope(value="")//Scope的默认值是单例的
@Scope(value="prototype")//Scope,多例,默认值都是单例的.
public class UserService {
//如果是普通属性,可以使用value注解来注入了
@Value(value="itcast")
private String info;
//@Autowired//如果是复杂类型或者是对象属性使用@Autowired这个注解:自动装配默认使用类型注入.
//@Autowired(required=false)//AutoWired的属性required=false忽略异常。默认required=true出异常就终止了.required=false依然可以注入,但是出异常的话注入的是null值.
//required属性出异常不管了,required=false出异常程序照样往下执行,成不成功另外说了.默认required=true,有异常就不注入就停止了.
//@Qualifier("userDao")
//@Autowired(required=true)//默认,一般不去改这个值
//@Qualifier("uDao")//按名称注入,@AutoWired+@Qualifier()
@Resource(name="userDao")//等于@AutoWired+@Qualifeied,按名称注入
private UserDao userDao;
public void sayHello(){ //System.out.println("Hello Spring Annotation.....");
System.out.println("Hello Spring Annotation....."+info);
}
//@Override
// public String toString() {
// return "UserService [info=" + info + ", userDao=" + userDao + "]";
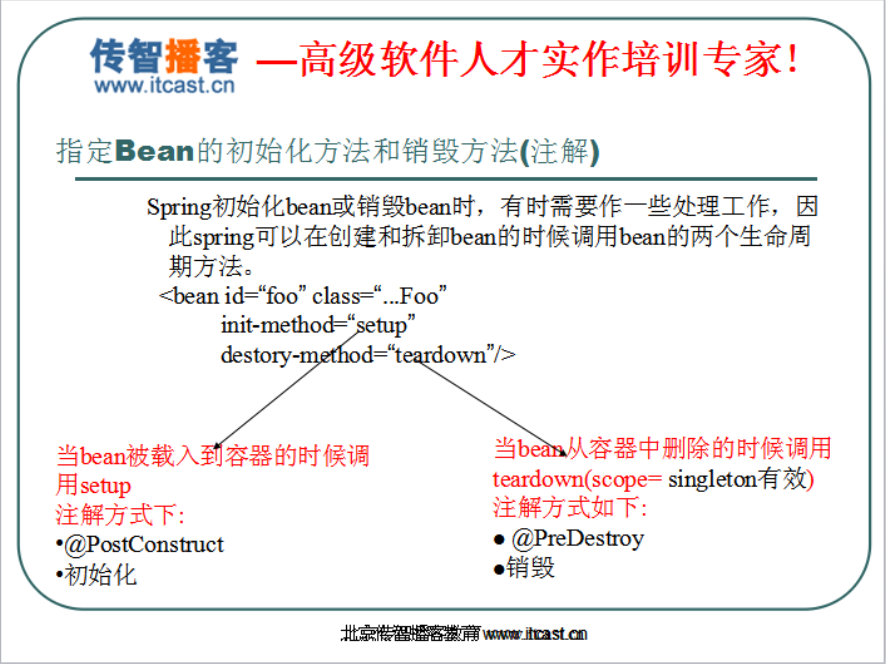
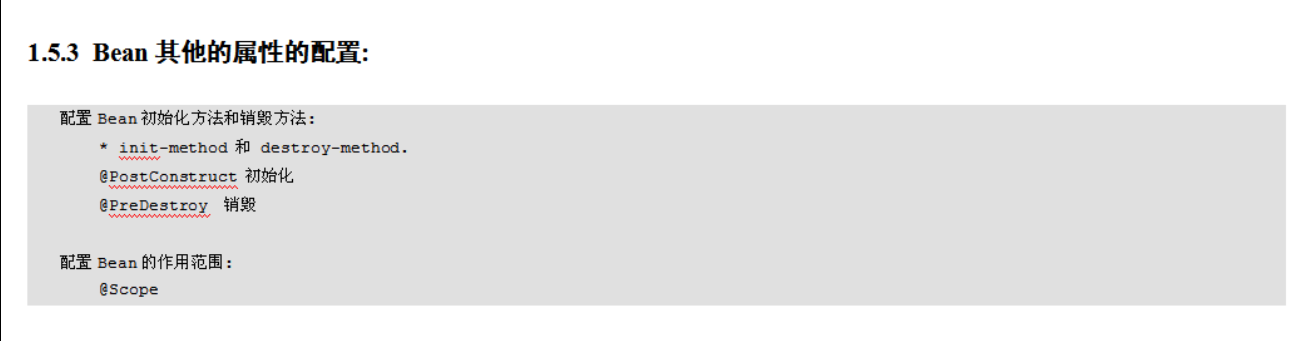
// } @PostConstruct //初始化
public void setup(){
System.out.println("初始化.....");
}
@PreDestroy
public void teardown(){
System.out.println("销毁......");//销毁只对单例有效,多例就没有输出.
}
}
package cn.itcast.spring3.demo1;

//import org.springframework.stereotype.Component;

import org.springframework.stereotype.Repository;

//Dao这个类正常也应该交由Spring管理.

//@Component

//@Repository//按类型注入

@Repository("userDao")//按名称注入

public class UserDao {

}
package cn.itcast.spring3.demo1;

import org.junit.Test;

import org.springframework.context.ApplicationContext;

import org.springframework.context.support.ClassPathXmlApplicationContext;

//注解的方式:都是将类装载到容器中.

public class SpringTest1 {

   @Test

   public void demo1(){

      //ApplicationContext  applicationContext  = new ClassPathXmlApplicationContext("applicationContext.xml");

       ClassPathXmlApplicationContext  applicationContext  = new ClassPathXmlApplicationContext("applicationContext.xml");

      UserService userService = (UserService) applicationContext.getBean("userService");

      //userService.sayHello();

       System.out.println(userService);

       UserService userService2 = (UserService) applicationContext.getBean("userService");

       System.out.println(userService2);//注入了一个dao,dao是一样的.不是Service创建是一样的.

       //多例的话是初始化两次.每次输出的Service地址都是不一样的.

       applicationContext.close();//销毁只对单例有效.多例就没有输出销毁.

   }

}
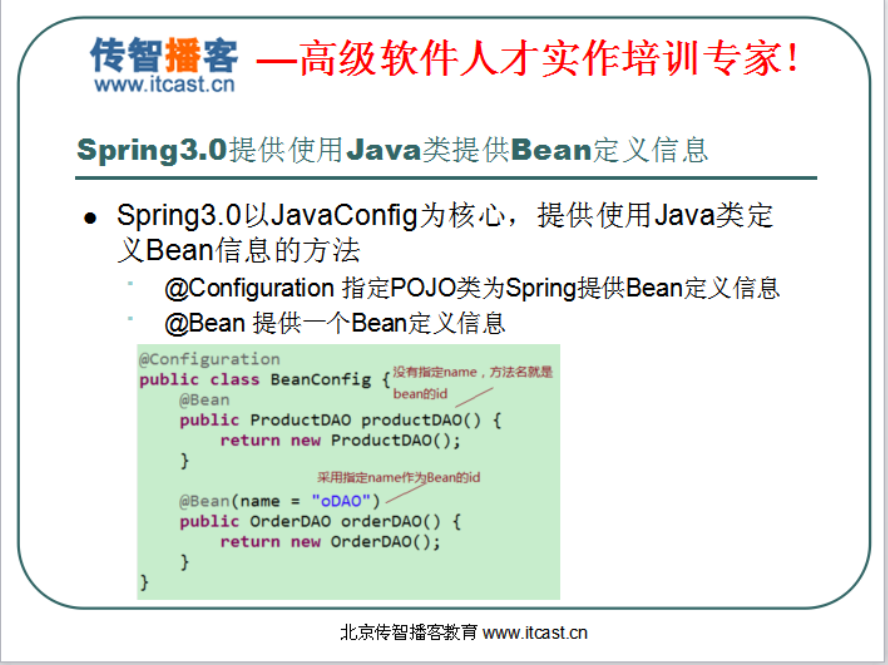
package cn.itcast.spring3.demo2;

import org.springframework.context.annotation.Bean;

import org.springframework.context.annotation.Configuration;

//配置信息

@Configuration//代表BeanConfig是一个配置类.

//一般很少使用BeanConfig,除非类的构造特别复杂.在核心配置文件中配置起来或者是用注解的方式写起来比较麻烦的时候才会使用BeanConfig这种方式.

//类越多越能看出这种方式的好处.一个类是看不出来的.

public class BeanConfig {

    //@Bean

    @Bean(name="car")

     public Car showCar(){

         Car car = new Car();

         car.setName("长安");

         car.setPrice(40000d);

         return car;

     }

    //@Bean

    @Bean(name="product")

     public Product initPorduct(){

        Product product = new Product();

        product.setName("空调");

        product.setPrice(3000d);

        return product;

     }

}
package cn.itcast.spring3.demo2;

public class Car {

   private String name;

   private Double price;

/*public String getName() {

    return name;

}*/

public void setName(String name) {

    this.name = name;

}

/*public Double getPrice() {

    return price;

}*/

public void setPrice(Double price) {

    this.price = price;

}

@Override

public String toString() {

    return "Car [name=" + name + ", price=" + price + "]";

}

}
package cn.itcast.spring3.demo2;

public class Product {

   private String name;

   private Double price;

/*public String getName() {

    return name;

}*/

public void setName(String name) {

    this.name = name;

}

/*public Double getPrice() {

    return price;

}*/

public void setPrice(Double price) {

    this.price = price;

}

@Override

public String toString() {

    return "Product [name=" + name + ", price=" + price + "]";

}

}
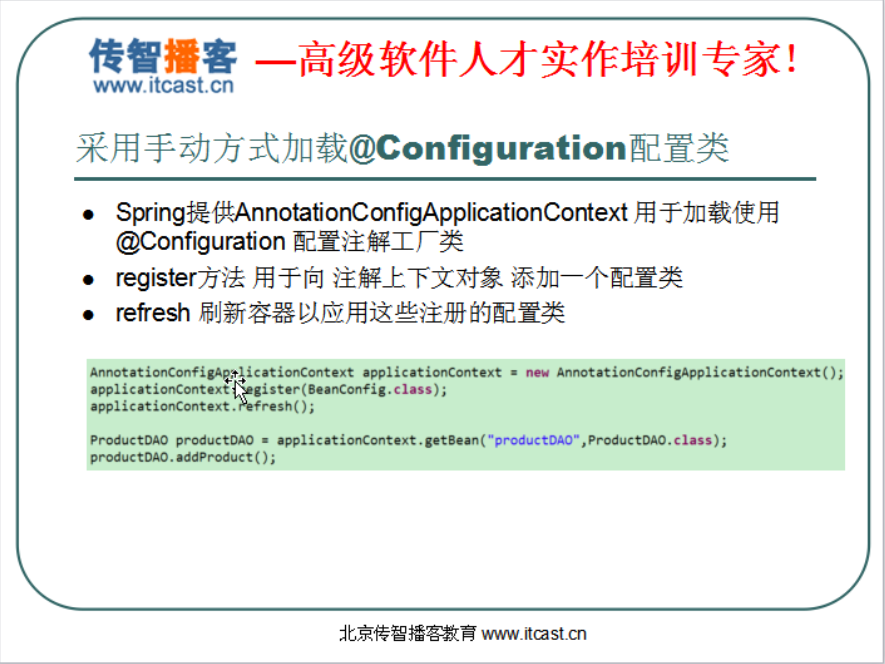
package cn.itcast.spring3.demo2;

import org.junit.Test;

import org.springframework.context.support.ClassPathXmlApplicationContext;

public class SpringTest {

    @Test

    public void demo1(){

     ClassPathXmlApplicationContext  applicationContext  = new ClassPathXmlApplicationContext("applicationContext.xml");

     Car car = (Car) applicationContext.getBean("car");

     Product product = (Product) applicationContext.getBean("product");

    System.out.println(car);

    System.out.println(product);

    }

}
package cn.itcast.spring3.demo3;

public class CustomerDao {

}
package cn.itcast.spring3.demo3;

public class OrderDao {

}
package cn.itcast.spring3.demo3;

import org.springframework.beans.factory.annotation.Autowired;

import org.springframework.beans.factory.annotation.Qualifier;

public class CustomerService {

    private CustomerDao customerDao;

    @Autowired

    @Qualifier("orderDao")//按名称注入.

    //这两个注解可以作用在属性上,也可以作用在setter方法上.

    //作用在属性上可以没有setter方法.

    private OrderDao   orderDao;

/*    public CustomerDao getCustomerDao() {

        return customerDao;

    }*/

    public void setCustomerDao(CustomerDao customerDao) {

        this.customerDao = customerDao;

    }

/*    public OrderDao getOrderDao() {

        return orderDao;

    }*/

/*    public void setOrderDao(OrderDao orderDao) {

        this.orderDao = orderDao;

    }*/

    @Override

    public String toString() {

        return "CustomerService [customerDao=" + customerDao + ", orderDao="

                + orderDao + "]";

    }

}
package cn.itcast.spring3.demo3;

import org.junit.Test;

import org.springframework.context.ApplicationContext;

import org.springframework.context.support.ClassPathXmlApplicationContext;

public class SpringTest3 {

     @Test

     public void demo1(){

        ApplicationContext  applicationContext  = new ClassPathXmlApplicationContext("applicationContext2.xml");

         CustomerService customerService = (CustomerService) applicationContext.getBean("customerService");

       System.out.println(customerService);

     }

}
<?xml version="1.0" encoding="UTF-8"?>
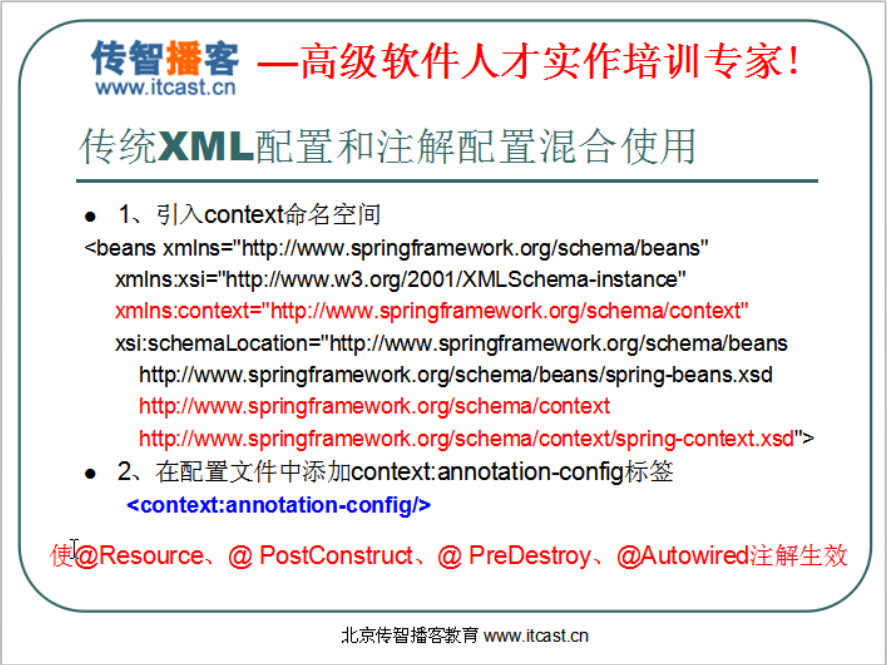
<!-- 基于注解的开发需要引入context命名空间。它就是用来配置去扫描哪些包的. -->
<beans xmlns="http://www.springframework.org/schema/beans"
xmlns:p="http://www.springframework.org/schema/p"
xmlns:xsi="http://www.w3.org/2001/XMLSchema-instance"
xmlns:context="http://www.springframework.org/schema/context"
xsi:schemaLocation="
http://www.springframework.org/schema/beans http://www.springframework.org/schema/beans/spring-beans.xsd
http://www.springframework.org/schema/context http://www.springframework.org/schema/context/spring-context.xsd">
<!--
context:component-scan标签不用加,因为这个标签是用来扫描类上的注解的.
例如@Component等等..但是这些类已经由XML注册了,所以不用使用这个标签了. <context:component-scan base-package=""></context:component-scan>
-->
<!-- context:annotation-config标签是使得@AutoWired、@Qualifier、@Resource、@PostConstruct、@PreDestroy等标签生效.-->
<context:annotation-config></context:annotation-config><!-- -->
<bean id="customerDao" class="cn.itcast.spring3.demo3.CustomerDao"></bean>
<bean id="orderDao" class="cn.itcast.spring3.demo3.OrderDao"></bean> <bean id="customerService" class="cn.itcast.spring3.demo3.CustomerService">
<property name="customerDao" ref="customerDao"></property>
<!--
<property name="orderDao" ref="orderDao"></property>
-->
</bean>
</beans>
<?xml version="1.0" encoding="UTF-8"?>

<!-- 基于注解的开发需要引入context命名空间。它就是用来配置去扫描哪些包的. -->

<beans xmlns="http://www.springframework.org/schema/beans"

       xmlns:p="http://www.springframework.org/schema/p"

       xmlns:xsi="http://www.w3.org/2001/XMLSchema-instance"

        xmlns:context="http://www.springframework.org/schema/context"

       xsi:schemaLocation="

http://www.springframework.org/schema/beans http://www.springframework.org/schema/beans/spring-beans.xsd

http://www.springframework.org/schema/context http://www.springframework.org/schema/context/spring-context.xsd">

<context:annotation-config></context:annotation-config><!-- XML和注解混搭的时候用的 -->

<!-- 告诉Spring你要扫描哪些包下的东西 -->

<!--

<context:component-scan base-package="cn.itcast.spring3.demo1">

-->

<!--

<context:component-scan base-package="cn.itcast.spring3.demo1,cn.itcast.spring3.demo2">

-->

<context:component-scan base-package="cn.itcast.spring3">

<!-- 纯注解用扫描的就行 -->

</context:component-scan>

</beans>
day38 18-Spring的XML和注解的结合使用的更多相关文章
- spring 基于XML和注解的两种事务配置方式
<?xml version="1.0" encoding="UTF-8"?> <beans xmlns="http://www.sp ...
- 曹工说Spring Boot源码(15)-- Spring从xml文件里到底得到了什么(context:load-time-weaver 完整解析)
写在前面的话 相关背景及资源: 曹工说Spring Boot源码(1)-- Bean Definition到底是什么,附spring思维导图分享 曹工说Spring Boot源码(2)-- Bean ...
- Spring 通过XML配置文件以及通过注解形式来AOP 来实现前置,环绕,异常通知,返回后通知,后通知
本节主要内容: 一.Spring 通过XML配置文件形式来AOP 来实现前置,环绕,异常通知 1. Spring AOP 前置通知 XML配置使用案例 2. Spring AOP ...
- 【转】Spring学习---Bean配置的三种方式(XML、注解、Java类)介绍与对比
[原文]https://www.toutiao.com/i6594205115605844493/ Spring学习Bean配置的三种方式(XML.注解.Java类)介绍与对比 本文将详细介绍Spri ...
- 二十 Spring的事务管理及其API&事务的传播行为,编程式&声明式(xml式&注解式,底层AOP),转账案例
Spring提供两种事务方式:编程式和声明式(重点) 前者需要手写代码,后者通过配置实现. 事务的回顾: 事务:逻辑上的一组操作,组成这组事务的各个单元,要么全部成功,要么全部失败 事务的特性:ACI ...
- 【Spring】Spring中的Bean - 5、Bean的装配方式(XML、注解(Annotation)、自动装配)
Bean的装配方式 简单记录-Java EE企业级应用开发教程(Spring+Spring MVC+MyBatis)-Spring中的Bean 文章目录 Bean的装配方式 基于XML的装配 基于注解 ...
- 【Spring】XML方式实现(无参构造 有参构造)和注解方式实现 IoC
文章目录 Spring IoC的实现方式 XML方式实现 通过无参构造方法来创建 1.编写一个User实体类 2.编写我们的spring文件 3.测试类 UserTest.java 4.测试结果 通过 ...
- 使用spring框架时,使用xml还是注解
1 xml的优缺点 1.1 优点 解耦合,方便维护.xml不入侵代码,方便代码阅读. 1.2 缺点 开发速度慢. 2 注解的优缺点 2.1 优点 能够加快开发速度,因为它将常用的主体逻辑隐藏在注解中了 ...
- 八 Spring的IOC的XML和注解的区别及其整合开发
xml和注解的区别 xml和注解整合开发 注解:取消扫描配置开启注解配置 扫描:<context:component-scan base-package="" /> ...
随机推荐
- PageHelper原理
1.要是用pagehelper,首先maven项目,要引入 <dependency> <groupId>com.github.pagehelper</groupId> ...
- Shell 语法之用户输入
bash shell 提供了一些不同的方法从用户处获取数据,这些方法包括命令行参数.命令行选项和直接读取键盘输入. 命令行参数 bash shell 将在命令行中输入的所有参数赋值给一些特殊变量,称为 ...
- 开源代码分析-react-native-eyepetizer
目录结构: app----imgs --- pages ------ home ------ explore ------ follow ------ profile ------ selected ...
- 为什么@RestController返回的Date类型是Long型
最近项目中发现一个好玩的事情:本地调试时,返回的date是日期格式yyyy-MM-dd HH:mm:ss,但发布到服务器后就变为Long型的时间戳了 最后查到的原因很简单,因为发布服务器启动时的脚本加 ...
- hibernate一对一关联手动改表后No row with the given identifier exists:
articleId手动改了一个并不存在的值 把被控端的id改成存在的就好了
- Python的几个高级编程技巧
Python有一些技巧对你来说是新知识,但是还有一些技巧会让你的代码效率大幅提升. 本文总结了一下自己用到的一些Python高级编程技巧,希望对大家有帮助. 列表生成器 a=[1,2,3] [x*x ...
- Java下利用Jackson进行JSON解析和序列化1
Java下常见的Json类库有Gson.JSON-lib和Jackson等,Jackson相对来说比较高效,在项目中主要使用Jackson进行JSON和Java对象转换,下面给出一些Jackson的J ...
- day18-事务与连接池 7.事务隔离级别总结
- pc端样式重置以及常用样式规范class
//reset html, body, div, span, applet, object, iframe, h1, h2, h3, h4, h5, h6, p, blockquote, pre, a ...
- 20190725-Silly
$ \mathsf{You\ think\ about\ what\ you\ want\ because\ you're\ just\ alive}$ ——C418-Alive 我不能yuanlia ...