mac系统PHP 7.1.12安装xhprof并使用[View Full Callgraph]小记
前几天从php7.0.x 升级到了php7.2.0版本, 结果装xhprof没有找到能支持对应版本的xhprof
于是又安装了一个php7.1.2的版本(brew install h)
接着安装xhprof扩展
git clone https://github.com/longxinH/xhprof

cd xhprof/extension/

/usr/local/bin/phpize

./configure --with-php-config=/usr/local/bin//php-config

make && sudo make install
启用扩展
vim /usr/local/etc/php/7.1/php.in

最后引入扩展,并自定义输出目录

[xhprof]

extension = xhprof.so

xhprof.output_dir = /Users/liugx/work/php/xhprof
将 上面下载的 xhprof 文件夹中的这两个目录复制一份到 /Users/liugx/work/php/xhprof 目录下
cd ..

cp -r xhprof_lib/ /Users/liugx/work/php/xhprof/xhprof_lib/

cp -r xhprof_html/ /Users/liugx/work/php/xhprof/xhprof_html/
并在/Users/liugx/work/php/xhprof根目录下添加文件 inject.php,如下:
<?php

/**

 * User: szliugx@gmail.com

 * Date: 17/12/20

 * Time: 上午11:32

 */

//开启xhprof

xhprof_enable(XHPROF_FLAGS_MEMORY | XHPROF_FLAGS_CPU);

//在程序结束后收集数据

register_shutdown_function(function() {

    $xhprof_data   = xhprof_disable();

    //让数据收集程序在后台运行

    if (function_exists('fastcgi_finish_request')) {

        fastcgi_finish_request();

    }

    //保存xhprof数据

    $XHPROF_ROOT = '/Users/liugx/work/php/xhprof';

    include_once $XHPROF_ROOT . "/xhprof_lib/utils/xhprof_lib.php";

    include_once $XHPROF_ROOT . "/xhprof_lib/utils/xhprof_runs.php";

    // save raw data for this profiler run using default

    // implementation of iXHProfRuns.

    $xhprof_runs = new XHProfRuns_Default();

    // save the run under a namespace "xhprof_foo"

    $run_id = $xhprof_runs->save_run($xhprof_data, "xhprof_foo");

    echo $run_id;

});
将 /Users/liugx/work/php/xhprof 目录设置称web站点,监控站点nginx配置
server {

       listen ;

       server_name xhprof-view.com;

       #root  /Users/liugx/work/php/xhprof;

        location / {

            root   /Users/liugx/work/php/xhprof;

            #try_files $uri $uri/ /index.php?$query_string;

            index  index.php index.html index.htm;

        }

        # pass the PHP scripts to FastCGI server listening on 127.0.0.1:

        #

        location ~ \.php$ {

            root           /Users/liugx/work/php/xhprof;

            fastcgi_pass   127.0.0.1:;

            fastcgi_index  index.php;

            fastcgi_param  SCRIPT_FILENAME  /scripts$fastcgi_script_name;

            fastcgi_param  SCRIPT_FILENAME  $document_root$fastcgi_script_name;

            #fastcgi_param PHP_VALUE "auto_prepend_file=/Users/liugx/work/php/xhprof/inject.php"; #(此配置文件中不用加,需要监控哪个站点加上这一行就行)

            include        fastcgi_params;

        }

}
### ⚠ 这样监控站点和被监控站点的配置(被监控站点nginx配置只需要加一行代码
fastcgi_param PHP_VALUE "auto_prepend_file=/Users/liugx/work/php/xhprof/inject.php";
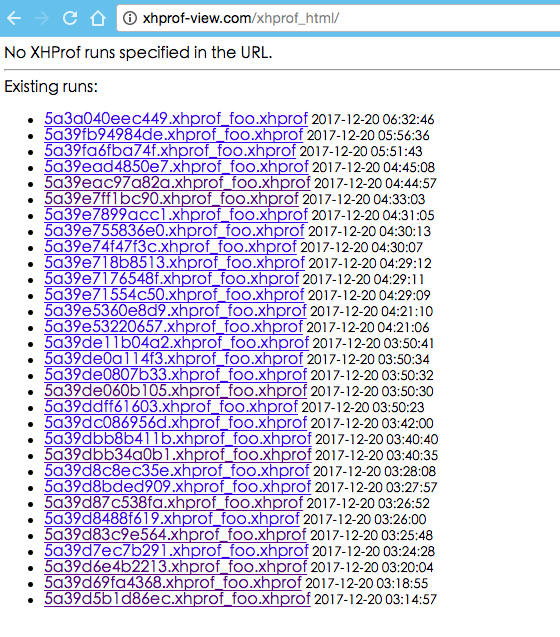
)就完了,重启php-fpm和nginx,访问被监控站点,访问http://xhprof-view.com/xhprof_html/ 就能得到一些监控信息列表,如下:
然后点击一条详情,输出如下:
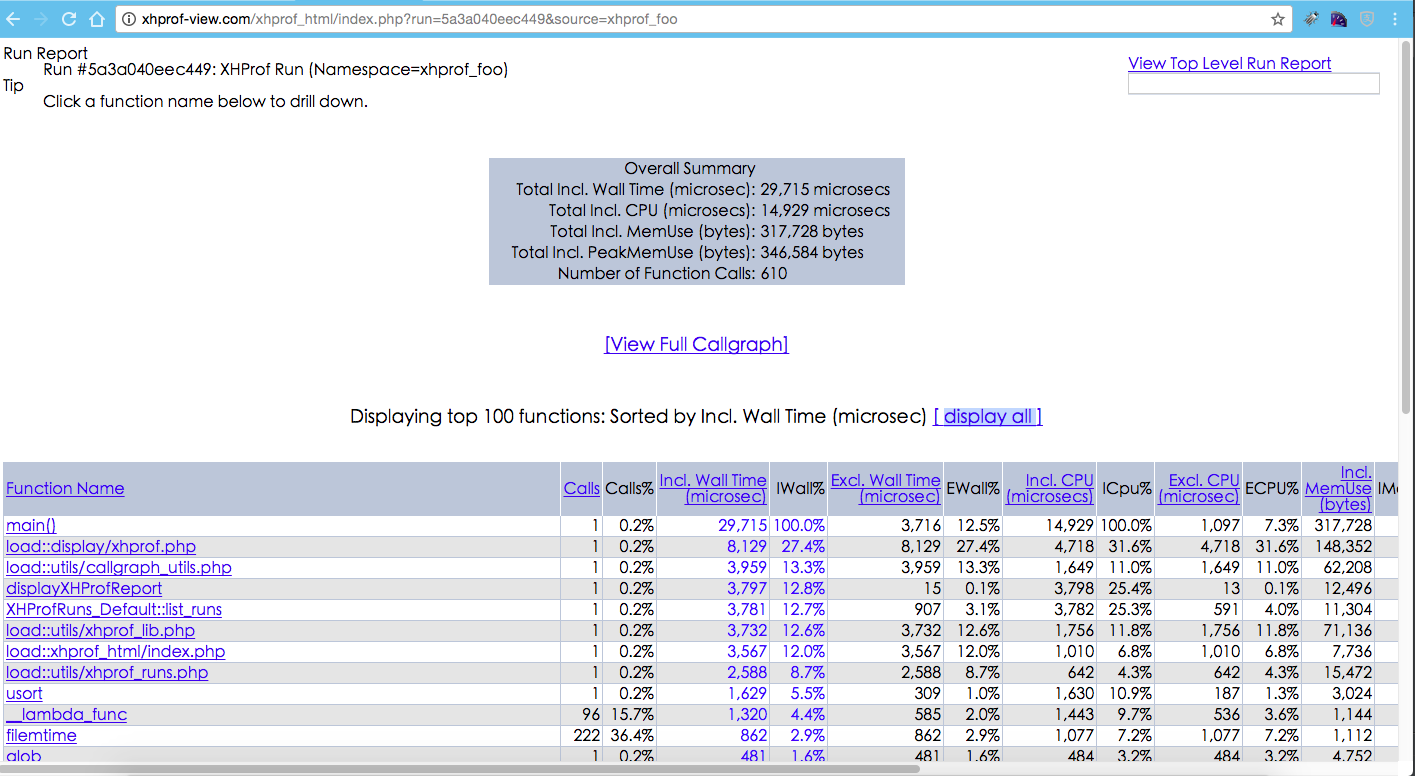
展示详细的硬件消耗和时间消耗信息,如果想更直观的看,可以已图片的形式看调用过程情况,点击页面中的 [View Full Callgraph]

红色区域就是耗时最多的地方,但是这个功能需要安装 Graphviz
一开始准备直接 brew install graphviz,结果失败了,因为安装时,里面有个依赖webp是Google的源
于是上http://graphviz.org/download/官网,介绍还可以MacPorts 方式安装,这次安装成功了
先下载安装MacPorts,找到系统对应的版本
http://distfiles.macports.org/MacPorts/MacPorts-2.4.0-10.10-Yosemite.pkg
下载安装完后,终端执行
sudo port -v selfupdate

sudo port install graphviz
安装完后,如下说明安装成功并且执行文件已经加入了环境变量
liugx@liugx ~$ dot -V
dot - graphviz version 2.40.1 (20161225.0304)
这时,如果点击[View Full Callgraph]如果还是出现,mac sh: dot: command not found 这样的信息,直接改/Users/liugx/work/php/xhprof/xhprof_lib/utils/callgraph_utils.php
中的
$cmd = " dot -T".$type; 改成 $cmd = " /opt/local/bin/dot -T".$type; 相当于给了绝对路径,不怕找错地方(此方法不推荐)
我是直接建了个链接从原文件到目标文件
ln /opt/local/bin/dot /usr/local/bin/dot
mac系统PHP 7.1.12安装xhprof并使用[View Full Callgraph]小记的更多相关文章
- Mac系统下使用VirtualBox虚拟机安装win7--第一步 安装vbox虚拟机
Mac系统下使用VirtualBox虚拟机安装win7操作步骤: 第一步 安装vbox虚拟机 1.先下载vbox,下载地址:: https://www.virtualbox.org/wiki/Down ...
- Mac系统下使用VirtualBox虚拟机安装win7--第五步 共享文件夹设置
1.启动virtualbox--选中win7虚拟机--点击设置--点击共享文件夹--点击右侧按钮添加共享文件夹
- Mac系统下使用VirtualBox虚拟机安装win7--第三步 在虚拟机上安装 Windows 7
第三步 在虚拟机上安装 Windows 7 等待虚拟机进入 Windows 7 的安装界面以后,在语言,货币,键盘输入法这一面,建议保持默认设置,直接点击“下一步”按钮,如图所示
- Mac系统下使用VirtualBox虚拟机安装win7--第四步 安装虚拟机硬件扩展包支持
如 果想要在虚拟机上使用连接在 Mac 上的硬件外设,比如 U 盘,iPhone 等,需要我们在 Virtual Box 官网下载一个硬件支持扩展安装包.同样地,我们先打开虚拟机的下载页面: http ...
- Mac系统下使用VirtualBox虚拟机安装win7--第二步 创建win7系统
第二步 创建win7系统 启动 Virtual Box 以后,点击窗口左上角的“新建”按钮,如图所示
- Mac系统下源码编译安装MySQL 5.7.17
1.下载并解压到:/Users/xiechunping/Softwares/mysql-5.7.17下载地址:http://ftp.ntu.edu.tw/pub/MySQL/Downloads/MyS ...
- [视频]mac系统下虚拟机parallels安装ubuntu 14.04视频教程
此文是http://www.mr-wu.cn/install-ubuntu-14-04-on-parallels-for-mac/这篇博文的补充,为整个ubuntu 14.04安装过程的视频录像. m ...
- mac系统下虚拟机parallels安装ubuntu 14.04
mac系统很棒,mac下的开发环境也很棒,但有时你还得需要ubuntu开发环境,比如进行嵌入式Linux交叉编译,使用Linaro toolchain… 其实mac系统下使用parallels虚拟机安 ...
- Windows和Mac系统下安装Docker
在windows和mac系统中使用Docker Desktop安装Docker对系统的要求是很高的. 对于 Windows 系统来说,安装 Docker for Windows 需要符合以下条件: 必 ...
随机推荐
- 使用samba初始化开发环境
一.系统环境 [root@host-172-20-3-66 samba]# cat /etc/redhat-release CentOS Linux release 7.2.1511 (Core) 搞 ...
- javascript打开新窗体
open -- 打开(弹出)一个新的窗体 open,中文"打开"的意思 引用网址:http://www.dreamdu.com/javascript/window.open Jav ...
- 八、dbms_rls(实现精细访问控制)
1.概述 本报只适用于Oracle Enterprise Edition,它用于实现精细访问控制,并且精细访问控制是通过在SQL语句中动态增加谓词(WHERE子句)来实现的.通过使用ORACLE的精细 ...
- C#笔记 -- 协变、逆变
协变 理解:在泛型和委托中, 让使用某个泛型参数A的类型可以用一个使用由A派生的泛型参数B的类型实例化,(小=> 大)如 // IEnumerable<Animal> 与 Lis ...
- Flask框架中特有的变量/函数及上下文
模板中特有的变量和函数 你可以在自己的模板中访问一些 Flask 默认内置的函数和对象 config 你可以从模板中直接访问Flask当前的config对象: {{config.SQLALCHEMY_ ...
- Linux系统在启动过程中grub引导文件丢失的解决方法
在/boot/grub2目录下有一个grub.cfg文件:该文件主要是用来自动地引导系统启动内核程序和系统的初始化程序. 问题一:当系统在启动的情况下,我们不小心删除/boot/grub2/grub. ...
- linux 下 iscsi的简单使用
一.准备工作 1.1.(服务端和客户端都需要设置) 系统使用的是CentOS6.8 禁用防火墙: 查看状态:# service iptables status 停止:# systemctl sto ...
- C++ writestring 为什么不能写进中文 CStdioFile向无法向文本中写入中文【二】
本地化设置需要具备三个条件:a. 语言代码 (Language Code)b. 国家代码 (Country Code) c. 编码(Encoding)本地名字可以用下面这些部分来构造:语言代码_国家代 ...
- Unity内存优化技术测试案例
笔者介绍:姜雪伟,IT公司技术合伙人,IT高级讲师,CSDN社区专家,特邀编辑,畅销书作者,已出版书籍:<手把手教你架构3D游戏引擎>电子工业出版社和<Unity3D实战核心技术详解 ...
- BGP选路原则
bgp选路原则 1 最高有weight优先,默认为0(思科特有,选大的) 2 本地优先级高的优先(只可以在IBGP邻居之间传递) 3 起源本路由器上的路由(network.aggregate-addr ...