android实现左右滑动菜单
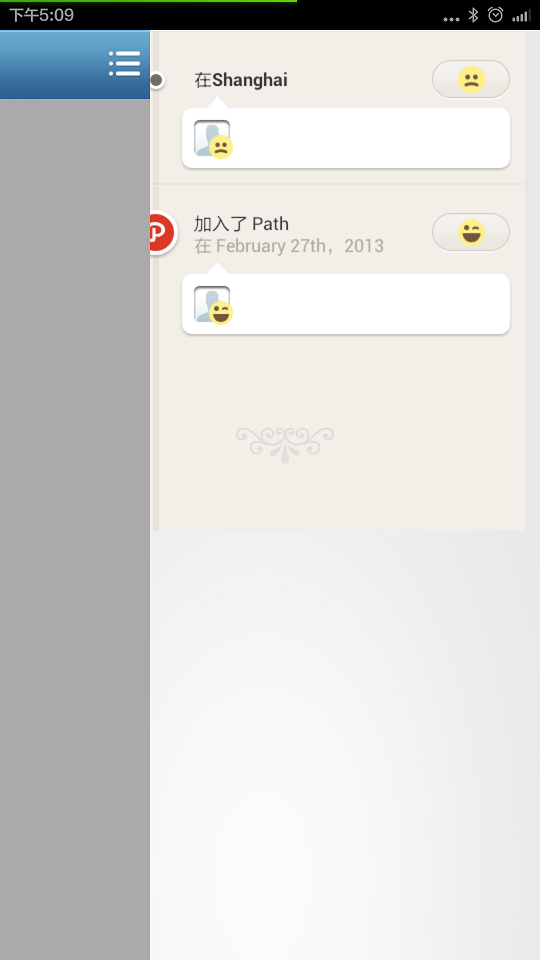
直接看效果图:
主要实现代码:
package com.way.view;

import android.content.Context;

import android.media.DeniedByServerException;

import android.util.AttributeSet;

import android.util.Log;

import android.view.MotionEvent;

import android.view.View;

import android.view.ViewConfiguration;

import android.view.WindowManager;

import android.view.animation.AnimationUtils;

import android.widget.LinearLayout;

import android.widget.RelativeLayout;

import android.widget.Scroller;

public class HomeCenterLayout extends RelativeLayout {

    private final static String TAG = "HomeCenterLayout";

    public static final int LEFT = 0x001;

    public static final int RIGHT = 0x002;

    public static final int MIDDLE = 0x000;

    private int mCurState = MIDDLE;// 当前显示的view

    public int MENU_border_Width = 100;

    private Scroller mScroller;

    private RelativeLayout leftLayout, rightLayout, childLayout;

    private Context context;

    private boolean fling;

    private boolean mIsBeingDragged = false;

    private int mTouchSlop;

    /**

     * Position of the last motion event.

     */

    private float mLastMotionX, mLastMotionY;

    /**

     * ID of the active pointer. This is used to retain consistency during

     * drags/flings if multiple pointers are used.

     */

    private int mActivePointerId = INVALID_POINTER;

    /**

     * Sentinel value for no current active pointer. Used by

     * {@link #mActivePointerId}.

     */

    private static final int INVALID_POINTER = -1;

    int menuWidth = 0;

    int moveWidth = 0;

    public HomeCenterLayout(Context context, AttributeSet attrs) {

        super(context, attrs);

        initView(context);

    }

    public HomeCenterLayout(Context context) {

        super(context);

        initView(context);

    }

    public Scroller getScroller() {

        return mScroller;

    }

    public void initView(Context context) {

        MENU_border_Width = DensityUtils.dp2px(context, 100);

        this.context = context;

        this.menuWidth = MENU_border_Width;

        this.mScroller = new Scroller(context, AnimationUtils.loadInterpolator(

                context, android.R.anim.overshoot_interpolator));

        final ViewConfiguration configuration = ViewConfiguration.get(context);

        mTouchSlop = configuration.getScaledTouchSlop();

        mCurState = MIDDLE;

    }

    public void addChildView(View child) {

        this.childLayout.addView(child);

    }

    /**

     * 获取屏幕宽度

     *

     * @param context

     * @return

     */

    private int getViewWidthInPix(Context context) {

        int viewWidthInPix = -1;

        if (viewWidthInPix == -1) {

            WindowManager manager = (WindowManager) context

                    .getSystemService(Context.WINDOW_SERVICE);

            viewWidthInPix = manager.getDefaultDisplay().getWidth();

        }

        return viewWidthInPix;

    }

    @Override

    protected void onLayout(boolean changed, int left, int top, int right,

            int bottom) {

        super.onLayout(changed, left, top, right, bottom);

        for (int i = 0; i < getChildCount(); i++) {

            View child = getChildAt(i);

            child.layout(child.getLeft() + moveWidth, child.getTop(),

                    child.getRight() + moveWidth, child.getBottom());

        }

    }

    @Override

    public void computeScroll() {

        if (mScroller.computeScrollOffset()) {

            scrollTo(mScroller.getCurrX(), 0);

            postInvalidate();

        }

    }

    @Override

    public boolean onInterceptTouchEvent(MotionEvent ev) {

        // TODO Auto-generated method stub

        // Log.i(TAG, "onInterceptTouchEvent------>" + ev.getAction());

        final int action = ev.getAction();

        if ((action == MotionEvent.ACTION_MOVE) && (mIsBeingDragged)) {

            return true;// 拦截不传递给child view

        }

        switch (action & MotionEvent.ACTION_MASK) {

        case MotionEvent.ACTION_DOWN: {

            final float x = ev.getX();

            final float y = ev.getY();

            if (!inChild((int) x, (int) y)) {

                mIsBeingDragged = false;

                break;

                // 超出边界,return false传递给子view处理

            }

            /*

             * Remember location of down touch. ACTION_DOWN always refers to

             * pointer index 0.

             */

            mLastMotionX = x;

            mLastMotionY = y;

            mActivePointerId = ev.getPointerId(0);

            /*

             * If being flinged and user touches the screen, initiate drag;

             * otherwise don't. mScroller.isFinished should be false when being

             * flinged.

             */

            mIsBeingDragged = !mScroller.isFinished();

            break;

        }

        case MotionEvent.ACTION_MOVE: {

            /*

             * mIsBeingDragged == false, otherwise the shortcut would have

             * caught it. Check whether the user has moved far enough from his

             * original down touch.

             */

            /*

             * Locally do absolute value. mLastMotionY is set to the y value of

             * the down event.

             */

            final int activePointerId = mActivePointerId;

            if (activePointerId == INVALID_POINTER) {

                // If we don't have a valid id, the touch down wasn't on

                // content.

                break;

            }

            final int pointerIndex = ev.findPointerIndex(activePointerId);

            final float x = ev.getX(pointerIndex);

            final float y = ev.getY(pointerIndex);

            final int xDiff = (int) Math.abs(x - mLastMotionX);

            final int yDiff = (int) Math.abs(y - mLastMotionY);

            if (xDiff > mTouchSlop && yDiff < xDiff) {

                mIsBeingDragged = true;

            }

            break;

        }

        case MotionEvent.ACTION_CANCEL:

        case MotionEvent.ACTION_UP:

            mIsBeingDragged = false;

            mActivePointerId = INVALID_POINTER;

            scrollToScreen();

            break;

        }

        return mIsBeingDragged;

    }

    @Override

    public boolean onTouchEvent(MotionEvent event) {

        // Log.i(TAG, "onTouchEvent ---->>>>>" + event.getAction());

        if (event.getAction() == MotionEvent.ACTION_DOWN

                && !inChild((int) event.getX(), (int) event.getY())) {

            // Don't handle edge touches immediately -- they may actually belong

            // to one of our

            // descendants.

            return false;

        }

        switch (event.getAction() & MotionEvent.ACTION_MASK) {

        case MotionEvent.ACTION_DOWN:

            return true; // 本VIEW消化掉

        case MotionEvent.ACTION_MOVE:

            final int activePointerIndex = event

                    .findPointerIndex(mActivePointerId);

            final float x = event.getX(activePointerIndex);

            final float y = event.getY(activePointerIndex);

            final int distanceX = (int) /* Math.abs */-(x - mLastMotionX);

            // 在滑动过程中,就需要显示新的brotherView,不然显示的还是之前的brotherView,最后松开手时会突然变称新brotherView,影响体验

            if (distanceX < 0 && getScrollX() < 0 && leftLayout != null) {

                setBrotherVisibility(LEFT);

            } else if (distanceX > 0 && getScrollX() > 0 && rightLayout != null) {

                setBrotherVisibility(RIGHT);

            } else {

                setBrotherVisibility(MIDDLE);

            }

            scrollBy((int) distanceX, 0);

            mLastMotionX = x;

            mLastMotionY = y;

            break;

        case MotionEvent.ACTION_UP:

            mIsBeingDragged = false;

            mActivePointerId = INVALID_POINTER;

            scrollToScreen();

            break;

        default:

            return super.onTouchEvent(event);

        }

        return mIsBeingDragged;

    }

    @Override

    protected void onScrollChanged(int l, int t, int oldl, int oldt) {

        // TODO Auto-generated method stub

        super.onScrollChanged(l, t, oldl, oldt);

    }

    private void scrollToScreen() {

        int scrollDistance = 0;

        if (Math.abs(getScrollX()) > getWidth() / 2)

            scrollDistance = (getScrollX() > 0) ? getWidth() - menuWidth

                    - getScrollX() : -(getWidth() - menuWidth - Math

                    .abs(getScrollX()));

        else

            scrollDistance = -getScrollX();

        int distance = scrollDistance + getScrollX();

        Log.i(TAG, " distance = " + distance);

        if (distance > 0) {

            mCurState = RIGHT;

        } else if (distance < 0) {

            mCurState = LEFT;

        } else {

            mCurState = MIDDLE;

        }

        mScroller.startScroll(getScrollX(), 0, scrollDistance, 0,

                Math.abs(scrollDistance) * 2);

        invalidate();

    }

    public boolean onFling(MotionEvent e1, MotionEvent e2, float velocityX,

            float velocityY) {

        if (Math.abs(velocityX) > ViewConfiguration.get(context)

                .getScaledMinimumFlingVelocity()) {

            fling = true;

            scrollToScreen();

        }

        return fling;

    }

    private boolean inChild(int x, int y) {

        if (getChildCount() > 0) {

            final int scrollX = mScroller.getCurrX();

            final View child = getChildAt(0);

            return !(scrollX + x < 0 || scrollX + x > getWidth() || y < 0 || y > getHeight());

        }

        return false;

    }

    /**

     * 设置当前显示的view

     *

     * @param whichpg

     */

    public void setPage(int whichpg) {

        int targetX = 0, moveDistance = 0;

        if (whichpg == LEFT) {

            targetX = -(getViewWidthInPix(context) - menuWidth);

            mCurState = LEFT;

        } else if (whichpg == RIGHT) {

            targetX = getViewWidthInPix(context) - menuWidth;

            mCurState = RIGHT;

        } else {

            mCurState = MIDDLE;

        }

        setBrotherVisibility(whichpg);

        moveDistance = targetX - getScrollX();

        mScroller.startScroll(getScrollX(), 0, moveDistance, 0,

                Math.abs(moveDistance) * 2);

        invalidate();

    }

    /**

     * 返回当前显示的view

     *

     * @return

     */

    public int getPage() {

        return mCurState;

    }

    /**

     * 设置BrotherView

     *

     * @param left

     * @param right

     */

    public void setBrotherLayout(RelativeLayout left, RelativeLayout right) {

        this.leftLayout = left;

        this.rightLayout = right;

    }

    /**

     * 根据当前状态显示或隐藏view

     *

     * @param state

     */

    private void setBrotherVisibility(int state) {

        switch (state) {

        case LEFT:

            rightLayout.setVisibility(View.GONE);

            leftLayout.setVisibility(View.VISIBLE);

            break;

        case RIGHT:

            rightLayout.setVisibility(View.VISIBLE);

            leftLayout.setVisibility(View.GONE);

            break;

        case MIDDLE:

            break;

        default:

            break;

        }

    }

}
xml:
<?xml version="1.0" encoding="utf-8"?>
<RelativeLayout xmlns:android="http://schemas.android.com/apk/res/android"
android:layout_width="fill_parent"
android:layout_height="fill_parent"
android:orientation="vertical" > <FrameLayout
android:layout_width="fill_parent"
android:layout_height="fill_parent" > <RelativeLayout
android:id="@+id/homeLeft"
android:layout_width="fill_parent"
android:layout_height="fill_parent"
android:background="@drawable/friend_list_bg_repeat" >
<TextView
android:layout_width="match_parent"
android:layout_height="match_parent"
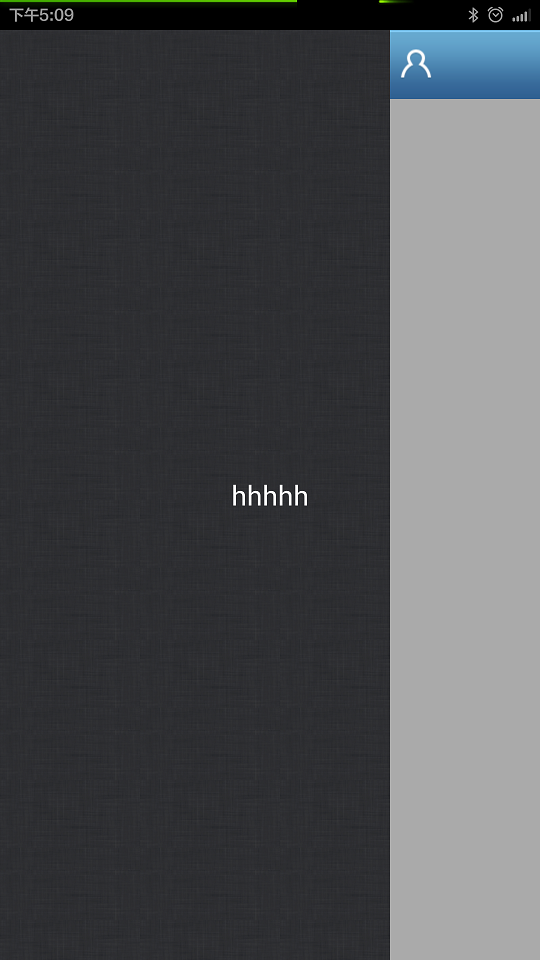
android:text="hhhhh"
android:gravity="center"
android:textSize="18sp"
android:textColor="#fff"/>
</RelativeLayout> <RelativeLayout
android:id="@+id/homeRight"
android:layout_width="fill_parent"
android:layout_height="fill_parent"
android:layout_marginLeft="30dp"
> <ImageView
android:id="@+id/iv1"
android:layout_width="wrap_content"
android:layout_height="0dp"
android:layout_weight="1"
android:scaleType="center"
android:src="@drawable/bg" /> <ImageView
android:id="@+id/iv"
android:layout_width="wrap_content"
android:layout_height="wrap_content"
android:src="@drawable/bottom" />
</RelativeLayout> <com.way.view.HomeCenterLayout
android:id="@+id/homeCenter"
android:layout_width="fill_parent"
android:layout_height="fill_parent" >
<!-- 特别注意: HomeCenterLayout标签下面是不能放背景的,否则你看看效果-->
<LinearLayout
android:layout_width="fill_parent"
android:layout_height="fill_parent"
android:background="@android:color/darker_gray" > <include layout="@layout/common_title_bg" />
</LinearLayout>
</com.way.view.HomeCenterLayout>
</FrameLayout> </RelativeLayout>
demo下载地址:http://files.cnblogs.com/files/feijian/QQmini2.rar
android实现左右滑动菜单的更多相关文章
- Android 侧滑(双向滑动菜单)效果
下面看看我们如何使用它,达到我们想要的效果 public class MainActivity extends Activity { /** * 双向滑动菜单布局 */ private SliderM ...
- 超酷的Android 侧滑(双向滑动菜单)效果
下面看看我们如何使用它,达到我们想要的效果 public class MainActivity extends Activity { /** * 双向滑动菜单布局 */ private SliderM ...
- Android之 左右滑动菜单
近来学习了极客学院有关于界面左右滑动的视频,就在这里写个博客,巩固一下知识点,以免忘了. 这里主要介绍界面是如何左右滑动的: 1.首先我们应该设置好将要滑动的三个界面,即leftMenu.middle ...
- Android 3D滑动菜单完全解析,实现推拉门式的立体特效
转载请注明出处:http://blog.csdn.net/guolin_blog/article/details/10471245 在上一篇文章中,我们学习了Camera的基本用法,并借助它们编写了一 ...
- Android双向滑动菜单完全解析,教你如何一分钟实现双向滑动特效
转载请注明出处:http://blog.csdn.net/guolin_blog/article/details/9671609 记得在很早之前,我写了一篇关于Android滑动菜单的文章,其中有一个 ...
- Android 学习笔记之AndBase框架学习(七) SlidingMenu滑动菜单的实现
PS:努力的往前飞..再累也无所谓.. 学习内容: 1.使用SlidingMenu实现滑动菜单.. SlidingMenu滑动菜单..滑动菜单在绝大多数app中也是存在的..非常的实用..Gith ...
- android 自定义ViewGroup和对view进行切图动画实现滑动菜单SlidingMenu
示意图就不展示了,和上一节的一样,滑动菜单SlidingMenu效果如何大家都比较熟悉,在这里我简单说明一下用自定义ViewGroup来实现. 实现方法:我们自定义一个ViewGroup实现左右滑动, ...
- Android 滑动菜单SlidingMenu
首先我们看下面视图: 这种效果大家都不陌生,网上好多都说是仿人人网的,估计人家牛逼出来的早吧,我也参考了一一些例子,实现起来有三种方法,我下面简单介绍下: 方法一:其实就是对GestureDetect ...
- android 自定义ViewGroup和对view进行切图动画实现滑动菜单SlidingMenu[转]
http://blog.csdn.net/jj120522/article/details/8095852 示意图就不展示了,和上一节的一样,滑动菜单SlidingMenu效果如何大家都比较熟悉,在这 ...
随机推荐
- 用IKVMC将jar转成dll供c#调用
用IKVMC将jar转成dll供c#调用 ikvmc c# dll jar 用IKVMC将jar转成dll供c#调用 前言 ikvmc介绍 ikvmc下载安装 下载并解压 设置环境变量 jar-> ...
- js ajax乱码查看\u8fdb\u53e3
document.write('\u8fdb\u53e3') //在页面上看乱码转为中文 或在按F12 在console里查看 直接打'\u8fdb\u53e3'
- 【转】一个高端.NET技术人才的2014年度总结
[转]一个高端.NET技术人才的2014年度总结 本人在一家公司做技术负责人.主要从事的是.net方面的开发与管理,偏重开发. 弹指一挥间,时间飘然而过,转眼又是一年. 回顾2014年,是我人生中最 ...
- ASP.NET中实现页面间的参数传递
ASP.NET中实现页面间的参数传递 编写人:CC阿爸 2013-10-27 l 近来在做泛微OA与公司自行开发的系统集成登录的问题.在研究泛微页面间传递参为参数,综合得了解了一下现行页面间传参 ...
- 小菜的系统框架界面设计-灰姑娘到白雪公主的蜕变(工具条OutLookBar)
灰姑娘本身也有自已的优点,但是却可能因为外貌不讨人喜欢,要变成白雪公主却需要有很多勇气和决心去改变自已: 有一颗善良的心 讨人喜爱的外貌 --蜕变--> 我这里讲的是一个工具条的蜕变过程, ...
- Maven的HTTP代理设置
http://blog.sina.com.cn/s/blog_4f925fc30102ed3y.html 第一.检测本地网络是否不能直接访问Maven的远程仓库,命令为ping repo1.mav ...
- sql,插入最大值加1
insert into aa (id,name) values((select case when max(id) is null then 1 else max(id)+1 end from aa) ...
- onClick事件实现方式(打电话为例子)
1.在button 中 android:onclick="call" 注意事项:①.方法的名字必须是call ②.区别大小写 ③.call方法必须接收一个View类型的参数 ④.方 ...
- Firebird 修改表名
UPDATE RDB$RELATIONS SET RDB$RELATION_NAME='NEWNAME' where RDB$RELATION_NAME='OLDNAME'; UPDATE RDB$ ...
- python网络画图——networkX
networkX tutorial 绘制基本网络图 用matplotlib绘制网络图 基本流程: 1. 导入networkx,matplotlib包 2. 建立网络 3. 绘制网络 nx.draw() ...