WPF 自定义路由事件
如何:创建自定义路由事件
首先自定义事件支持事件路由,需要使用 RegisterRoutedEvent 方法注册 RoutedEvent
public static RoutedEvent RegisterRoutedEvent(

	string name,

	RoutingStrategy routingStrategy,

	Type handlerType,

	Type ownerType

)
参数
- name
- 类型:System.String 路由事件的名称。该名称在所有者类型中必须是唯一的,并且不能为 null 或空字符串。
- routingStrategy
- 类型:System.Windows.RoutingStrategy 作为枚举值的事件的路由策略。
- handlerType
- 类型:System.Type 事件处理程序的类型。该类型必须为委托类型,并且不能为 null。
- ownerType
- 类型:System.Type 路由事件的所有者类类型。该类型不能为 null。
先看下xaml文件,我们可以看到button中并没有click事件
<Window x:Class="简单自定义路由事件.MainWindow"

        xmlns="http://schemas.microsoft.com/winfx/2006/xaml/presentation"

        xmlns:x="http://schemas.microsoft.com/winfx/2006/xaml"

        Title="MainWindow" Height="" Width="">

    <Grid>

        <Button Content="获取时间" Height="" HorizontalAlignment="Left" Margin="192,170,0,0" Name="button1" VerticalAlignment="Top" Width="" />

        <TextBox Height="" HorizontalAlignment="Left" Margin="89,80,0,0" Name="textBox1" VerticalAlignment="Top" Width="" />

        <Label Content="自定义路由事件演示" Height="" HorizontalAlignment="Left" Margin="141,26,0,0" Name="label1" VerticalAlignment="Top" Width="" FontSize="" Background="BlanchedAlmond" />

    </Grid>

</Window>
后台代码简单展示:
using System;

using System.Collections.Generic;

using System.Linq;

using System.Text;

using System.Windows;

using System.Windows.Controls;

using System.Windows.Data;

using System.Windows.Documents;

using System.Windows.Input;

using System.Windows.Media;

using System.Windows.Media.Imaging;

using System.Windows.Navigation;

using System.Windows.Shapes;

namespace 简单自定义路由事件

{

    /// <summary>

    /// MainWindow.xaml 的交互逻辑

    /// </summary>

    public partial class MainWindow : Window

    {

        public MainWindow()

        {

            InitializeComponent();

            this.button1.AddHandler(Button.ClickEvent,//处理的事件

                new RoutedEventHandler(RoutedEvent)); //事件委托

            this.MEvent += new RoutedEventHandler(MainWindow_MEvent);

        }

        void MainWindow_MEvent(object sender, RoutedEventArgs e)

        {

            this.textBox1.Text = System.DateTime.Now.ToString();

        }

        private static readonly RoutedEvent MyEvent = EventManager.RegisterRoutedEvent("Event",//路由事件的名称

            RoutingStrategy.Direct,//事件的路由策略

            typeof(RoutedEvent), //事件处理程序的类型。该类型必须为委托类型

            typeof(RoutedEventArgs));//路由事件的所有者类类型

        //事件访问器,进行事件提供添加和移除。

        public event RoutedEventHandler MEvent

        {

            add

            {

                AddHandler(MyEvent, value);

            }

            remove

            {

                RemoveHandler(MyEvent, value);

            }

        }

        void RoutedEvent(object o, RoutedEventArgs e)

        {

            //关联路由事件

            RoutedEventArgs args = new RoutedEventArgs(MyEvent);

            this.RaiseEvent(args);

        }

    }

}
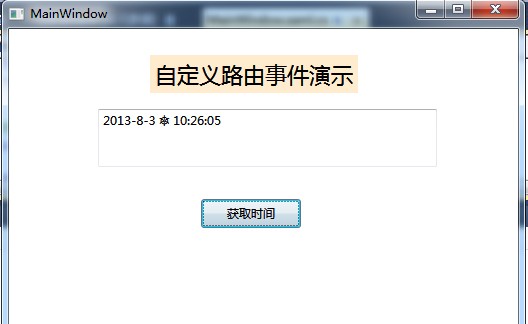
效果展示:
上面详细的说明建自定义路由事件的基本原理的原理,我们可以通过这样的方式来实现自己的路由事件,这样的代码移致性很高,我们可以需要的时候直接移植.
WPF 自定义路由事件的更多相关文章
- WPF:自定义路由事件的实现
路由事件通过EventManager,RegisterRoutedEvent方法注册,通过AddHandler和RemoveHandler来关联和解除关联的事件处理函数:通过RaiseEvent方法来 ...
- WPF自定义路由事件(二)
WPF中的路由事件 as U know,和以前Windows消息事件区别不再多讲,这篇博文中,将首先回顾下WPF内置的路由事件的用法,然后在此基础上自定义一个路由事件. 1.WPF内置路由事件 WPF ...
- 细说WPF自定义路由事件
WPF中的路由事件 as U know,和以前Windows消息事件区别不再多讲,这篇博文中,将首先回顾下WPF内置的路由事件的用法,然后在此基础上自定义一个路由事件. 1.WPF内置路由事件 W ...
- Wpf自定义路由事件
创建自定义路由事件大体可以分为三个步骤: ①声明并注册路由事件. ②为路由事件添加CLR事件包装. ③创建可以激发路由事件的方法. 以ButtonBase类中代码为例展示这3个步骤: public a ...
- WPF自定义路由事件(一)
首先自定义事件支持事件路由,需要使用 RegisterRoutedEvent 方法注册 RoutedEvent C#语法 public static RoutedEvent RegisterRoute ...
- WPF 自定义路由事件 与 附加路由事件
为student添加附件事件
- WPF自学入门(四)WPF路由事件之自定义路由事件
在上一遍博文中写到了内置路由事件,其实除了内置的路由事件,我们也可以进行自定义路由事件.接下来我们一起来看一下WPF中的自定义路由事件怎么进行创建吧. 创建自定义路由事件分为3个步骤: 1.声明并注册 ...
- WPF路由事件三:自定义路由事件
与依赖项属性类似,WPF也为路由事件提供了WPF事件系统这一组成.为一个类型添加一个路由事件的方式与为类型添加依赖项属性的方法类似,添加一个自定义路由事件的步骤: 一.声明路由事件变量并注册:定义只读 ...
- WPF的路由事件、冒泡事件、隧道事件(预览事件)
本文摘要: 1:什么是路由事件: 2:中断事件路由: 3:自定义路由事件: 4:为什么需要自定义路由事件: 5:什么是冒泡事件和预览事件(隧道事件): 1:什么是路由事件 WPF中的事件为路由事件,所 ...
随机推荐
- 【python自动化第三篇:python入门进阶】
鸡汤: 多学习,多看书. 推荐书籍:<追风筝的人>,<林达看美国>,<白鹿原> 本节知识点 集合及其操作 文件操作 函数与函数式编程 递归 一.集合及其操作 集合( ...
- MySQL忘记密码 办法
在my.ini配置文件中,[mysqld]下面加上一句话,skip-grant-tables:然后重启mysql ,在cmd 页面中,直接进入mysql数据库 mysql -uroot -p不需要输入 ...
- try与finally返回结果执行先后详解
先看一段代码: @Test public void test1(){ System.out.println(testf1()); } int testf1() { int x = 1; try { r ...
- C#面向对象基础:virtual方法,abstract方法,区别
virtual 关键字用于修饰方法.属性.索引器或事件声明,并使它们可以在派生类中被重写.默认情况下,类中的方法是非虚的,非虚的方法不能在子类中被覆盖(override),但是可以隐藏(new),但这 ...
- Linux主机安全配置的几个脚本【转载】
标签:linux Linux主机安全配置的几个脚本 职场 休闲原创作品,允许转载,转载时请务必以超链接形式标明文章 原始出处 .作者信息和本声明.否则将追究法律责任.http://hx100.blog ...
- jQuery练习实例(四)
最近写的jquery实例--jQuery图片九宫格样式鼠标悬停图片滑动切换效果 有兴趣的同学可以参考一下,这幅效果,个人觉得挺不错的 <%@ page language="java&q ...
- Lua 5.2 中文参考手册
闲来无事,发现Lua更新到了5.2.2,参考手册也更到了5.2,在网上发现只有云风翻译的5.1版,花了几天时间翻译了一些. 参考手册有点长,又要随时修改,所以在github上建了项目,有需要的朋友可以 ...
- Swipecards
https://github.com/Diolor/Swipecards https://github.com/kikoso/Swipeable-Cards
- 【转】cocos2d-x游戏开发(八)各类构造器
欢迎转载:http://blog.csdn.net/fylz1125/article/details/8521997 这篇写cocos2d-x的构造器. cocos2d-x引入自动释放机制后,创建的对 ...
- web前端url传递值 js加密解密
一:Js的Url中传递中文参数乱码问题,重点:encodeURI编码,decodeURI解码: 1.传参页面Javascript代码: <script type=”text/javascript ...