(二)学习了解OrchardCore笔记——开篇:OrchardCore的中间件
现在开始看Starpup的中间件。这是一个扩展方法app.UseOrchardCore()
        public void Configure(IApplicationBuilder app, IHostEnvironment env)

        {

            if (env.IsDevelopment())

            {

                app.UseDeveloperExceptionPage();

            }

            app.UseStaticFiles();

            app.UseOrchardCore();

        }
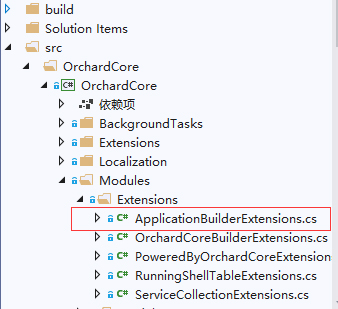
直接查看扩展方法,vs都是直接按住ctrl键+鼠标左键就可以跳转到具体方法,下面我我们定位到方法里面去。
可以清楚的看到下面代码又是很熟悉的结构。
    public static class ApplicationBuilderExtensions

    {

        /// <summary>

        /// Enables multi-tenant requests support for the current path.

        /// </summary>

        public static IApplicationBuilder UseOrchardCore(this IApplicationBuilder app, Action<IApplicationBuilder> configure = null)

        {

            var env = app.ApplicationServices.GetRequiredService<IHostEnvironment>();

            var appContext = app.ApplicationServices.GetRequiredService<IApplicationContext>();

            env.ContentRootFileProvider = new CompositeFileProvider(

                new ModuleEmbeddedFileProvider(appContext),

                env.ContentRootFileProvider);

            // Init also the web host 'ContentRootFileProvider'.

            app.ApplicationServices.GetRequiredService<IWebHostEnvironment>()

                .ContentRootFileProvider = env.ContentRootFileProvider;

            app.UseMiddleware<PoweredByMiddleware>();

            // Ensure the shell tenants are loaded when a request comes in

            // and replaces the current service provider for the tenant's one.

            app.UseMiddleware<ModularTenantContainerMiddleware>();

            configure?.Invoke(app);

            app.UseMiddleware<ModularTenantRouterMiddleware>(app.ServerFeatures);

            return app;

        }

    }
OrchardCore自己也注释的很清楚:为当前路径启用多租户请求支持。网上很多都介绍OrchardCore是一个多租户的cms,那么什么是租户呢?我的理解就是像虚拟主机一类的东西。都知道Program的main方法就是构建一个kestrel主机运行起来(这里我直接当作iis运行起来,这样比较好理解),kestrel是一个很简陋的主机,很多功能都没有,比如像iis那样的服务器能创建虚拟主机它是没办法的,它只能提供一个主机服务,而多租户就是类似于iis上的虚拟主机了,也就是可以提供多个web站点服务。当然我表述比较土,换个角度,我们要开通web服务,就必须像服务商租用web主机,服务商有一台服务器,而我们只要开一个web服务,因此只要租用一个虚拟主机就够了而不用租用整台服务器,当然我们朋友要多开个web服务就可以多租一个虚拟主机就够了。OrchardCore就是web服务器,而我们可以开n个web服务,OrchardCore提供足够的虚拟主机给我们租用。也就是说每个租户都是独立不干扰的虚拟主机,各自提供自己的web服务。我语文比较差,大概就这么个意思。
开始看代码,前面这几行没啥好说的,看过asp.net core源码的都能直接跳过了!就是获取环境变量,初始化Web主机“ ContentRootFileProvider”。好像很难理解,其实就是指定租户的wwwroot文件夹。后面有空再追踪下这段,先跳过。
var env = app.ApplicationServices.GetRequiredService<IHostEnvironment>();

            var appContext = app.ApplicationServices.GetRequiredService<IApplicationContext>();

            env.ContentRootFileProvider = new CompositeFileProvider(

                new ModuleEmbeddedFileProvider(appContext),

                env.ContentRootFileProvider);

            // Init also the web host 'ContentRootFileProvider'.

            app.ApplicationServices.GetRequiredService<IWebHostEnvironment>()

                .ContentRootFileProvider = env.ContentRootFileProvider;
前面跳过是因为下面这几行才是整个OrchardCore的灵魂,先搞懂这几行,其它先旁支忽略吧
            app.UseMiddleware<PoweredByMiddleware>();

            // Ensure the shell tenants are loaded when a request comes in

            // and replaces the current service provider for the tenant's one.

            app.UseMiddleware<ModularTenantContainerMiddleware>();

            configure?.Invoke(app);

            app.UseMiddleware<ModularTenantRouterMiddleware>(app.ServerFeatures);
app.UseMiddleware多么熟悉的结构,就是加了三个中间件PoweredByMiddleware、ModularTenantContainerMiddleware和ModularTenantRouterMiddleware,从名称上已经可以大致明白他们的作用。分别是版权、模块化租户容器和模块化租户路由。
PoweredByMiddleware比较简单,基本点进去直接看源码就明白了。
    /// <summary>

    /// Adds the X-Powered-By header with values OrchardCore.

    /// </summary>

    public class PoweredByMiddleware

    {

        private readonly RequestDelegate _next;

        private readonly IPoweredByMiddlewareOptions _options;

        public PoweredByMiddleware(RequestDelegate next, IPoweredByMiddlewareOptions options)

        {

            _next = next;

            _options = options;

        }

        public Task Invoke(HttpContext httpContext)

        {

            if (_options.Enabled)

            {

                httpContext.Response.Headers[_options.HeaderName] = _options.HeaderValue;

            }

            return _next.Invoke(httpContext);

        }

    }
asp.net core中间件熟悉的界面,一个构造函数和一个Invoke(或者异步的InvokeAsync),options也是下面的接口和类直接注入。也就是把Headers[X-Powered-By]的值设置为“OrchardCore”写入上下文对象。
    public interface IPoweredByMiddlewareOptions

    {

        bool Enabled { get; set; }

        string HeaderName { get; }

        string HeaderValue { get; set; }

    }

    internal class PoweredByMiddlewareOptions : IPoweredByMiddlewareOptions

    {

        private const string PoweredByHeaderName = "X-Powered-By";

        private const string PoweredByHeaderValue = "OrchardCore";

        public string HeaderName => PoweredByHeaderName;

        public string HeaderValue { get; set; } = PoweredByHeaderValue;

        public bool Enabled { get; set; } = true;

    }
ModularTenantContainerMiddleware这个中间件就是整个OrchardCore所有能力的体现了。这个Invoke比PoweredByMiddleware的复杂多了,感觉拆开可以讲三天三夜,而且坑也很多(是我知识水平太低被坑,而不是说项目不好),下次就篇再分析吧,简单说就租户主机没创建的创建,没开启的启动,收到请求的如何处理请求等等。这个Shell我是翻译不出意思,直接理解成具体某一个吧,说错请纠正,这也是我发学习笔记的原因。
    /// <summary>

    /// This middleware replaces the default service provider by the one for the current tenant

    /// </summary>

    public class ModularTenantContainerMiddleware

    {

        private readonly RequestDelegate _next;

        private readonly IShellHost _shellHost;

        private readonly IRunningShellTable _runningShellTable;

        public ModularTenantContainerMiddleware(

            RequestDelegate next,

            IShellHost shellHost,

            IRunningShellTable runningShellTable)

        {

            _next = next;

            _shellHost = shellHost;

            _runningShellTable = runningShellTable;

        }

        public async Task Invoke(HttpContext httpContext)

        {

            // Ensure all ShellContext are loaded and available.

            await _shellHost.InitializeAsync();

            var shellSettings = _runningShellTable.Match(httpContext);

            // We only serve the next request if the tenant has been resolved.

            if (shellSettings != null)

            {

                if (shellSettings.State == TenantState.Initializing)

                {

                    httpContext.Response.Headers.Add(HeaderNames.RetryAfter, "");

                    httpContext.Response.StatusCode = StatusCodes.Status503ServiceUnavailable;

                    await httpContext.Response.WriteAsync("The requested tenant is currently initializing.");

                    return;

                }

                // Makes 'RequestServices' aware of the current 'ShellScope'.

                httpContext.UseShellScopeServices();

                var shellScope = await _shellHost.GetScopeAsync(shellSettings);

                // Holds the 'ShellContext' for the full request.

                httpContext.Features.Set(new ShellContextFeature

                {

                    ShellContext = shellScope.ShellContext,

                    OriginalPath = httpContext.Request.Path,

                    OriginalPathBase = httpContext.Request.PathBase

                });

                await shellScope.UsingAsync(scope => _next.Invoke(httpContext));

            }

        }
最后ModularTenantRouterMiddleware这个中间件一看就跟路由有关,具体代码自己ctrl+鼠标左键点吧,简单的可以理解成asp.net core web应用程序或者asp.net core web api里的app.UseEndpoints,当然不是这么简单,毕竟是模块化,所以有个StartupBase的自定义类要理解下,这也是说OrchardCore的模块化多租户不是asp.net core的原因。开始接触我也想怎么有这么矛盾的事情,明明OrchardCore就是一个asp.net core的程序,怎么有很多观点说它只是类似于asp.net core而不是asp.net core呢?现在我才明白,没错,OrchardCore是asp.net core,但是他提供模块化多租户的形式并不是跟asp.net core一样(不然哪里来的多租户,废话)。这个后面有时间再说,下一篇笔记应该是开始读上面那个ModularTenantContainerMiddleware中间件了。
(二)学习了解OrchardCore笔记——开篇:OrchardCore的中间件的更多相关文章
- (一)学习了解OrchardCore笔记——开篇:基于asp.net core的OrchardCore
想深入了解OrchadCore源码许久了,但是读源码的时候遇到很多问题而网上的参考资料太少了(几乎都是OrchadCms不带OrchardCore的),现在解决得差不多了,做下笔记方便自己查看,有错误 ...
- (三)学习了解OrchardCore笔记——灵魂中间件ModularTenantContainerMiddleware的第一行①的模块部分
了解到了OrchardCore主要由两个中间件(ModularTenantContainerMiddleware和ModularTenantRouterMiddleware)构成,下面开始了解Modu ...
- (四)学习了解OrchardCore笔记——将模块的名字添加到程序集的ModuleName
关于如何将模块名添加到程序集的ModuleName说简单吧也简单,说不简单吧也不简单. 简单的原因是代码只有几行,不简单的原因是这些都不是c#,都是MSbuild的代码.这可真难为我了,所以这个地方我 ...
- 【Head-First设计模式】C#版-学习笔记-开篇及文章目录
原文地址:[Head-First设计模式]C#版-学习笔记-开篇及文章目录 最近一年断断续续的在看技术书,但是回想看的内容,就忘了书上讲的是什么东西了,为了记住那些看过的东西,最好的办法就是敲代码验证 ...
- hadoop2.5.2学习及实践笔记(二)—— 编译源代码及导入源码至eclipse
生产环境中hadoop一般会选择64位版本,官方下载的hadoop安装包中的native库是32位的,因此运行64位版本时,需要自己编译64位的native库,并替换掉自带native库. 源码包下的 ...
- Python学习笔记开篇
已经快30岁了,中专学历,不会什么技术,因为好吃懒做最喜欢的就是吃肉睡觉. 每次想学习技术如PhotoShop,绘声绘影,PHP,易语言,按键精灵都只是3分钟热血. 今天我想在业余时间学习Python ...
- Python学习的个人笔记(基础语法)
Python学习的个人笔记 题外话: 我是一个大二的计算机系的学生,这份python学习个人笔记是趁寒假这一周在慕课网,w3cschool,还有借鉴了一些博客,资料整理出来的,用于自己方便的时候查阅, ...
- hadoop2.5.2学习及实践笔记(四)—— namenode启动过程源码概览
对namenode启动时的相关操作及相关类有一个大体了解,后续深入研究时,再对本文进行补充 >实现类 HDFS启动脚本为$HADOOP_HOME/sbin/start-dfs.sh,查看star ...
- Elasticsearch7.X 入门学习第二课笔记----基本api操作和CRUD
原文:Elasticsearch7.X 入门学习第二课笔记----基本api操作和CRUD 版权声明:本文为博主原创文章,遵循CC 4.0 BY-SA版权协议,转载请附上原文出处链接和本声明. 本文链 ...
随机推荐
- Python--循环--for && while
for循环示例:猜数字游戏 winning_number = 38 for i in range(3): guess_num = int(input("guess num:") ) ...
- 【华为云技术分享】数据库开发:MySQL Seconds_Behind_Master简要分析
[摘要]对于mysql主备实例,seconds_behind_master是衡量master与slave之间延时的一个重要参数.通过在slave上执行"show slave status;& ...
- mysql where与 having的区别
where是针对磁盘的数据文件,having是针对存在内存的结果集的筛选. 例如: select name ,(xxx - xxx) as a from table where a > 10; ...
- 在c++MFC下用PCL显示操作点云文件 MFC对话框显示操作PCL点云
原文作者:aircraft 原文地址:https://www.cnblogs.com/DOMLX/p/13115873.html 第一步 下载PCL库 我的版本是1.8.1的 你都要MFC下跑PCL ...
- Ubuntu18.04下MySQL8.0和Navicat15的安装与使用
目录 一.MySQL8.0安装 二.Navicat安装并与MySQL连接 一.MySQL8.0安装 注意:若直接 sudo apt install mysql-server,你会发现安装后的版本是5. ...
- numpy.stack和numpy.concatenate的区别
在使用numpy进行矩阵运算的时候踩到的坑,原因是不能正确区分numpy.concatenate和numpy.stack在功能上的差异. 先说numpy.concatenate,直接看文档: nump ...
- sockaddr_in与sockaddr区别
先粘代码 struct sockaddr { __SOCKADDR_COMMON (sa_); /* Common data: address family and length. */ char s ...
- C#多线程编程(一)进程与线程
一. 进程 简单来说,进程是对资源的抽象,是资源的容器,在传统操作系统中,进程是资源分配的基本单位,而且是执行的基本单位,进程支持并发执行,因为每个进程有独立的数据,独立的堆栈空间.一个程序想要并发执 ...
- 2.WebPack初始化
一.Package.json 在项目中输入: npm init 之后会提示你一步一步输入信息,我输入的信息如下: 生成的Package.json文件如下 我们也可以在初始时省略这些步骤,让脚本使用默认 ...
- 【原创】Linux中断子系统(四)-Workqueue
背景 Read the fucking source code! --By 鲁迅 A picture is worth a thousand words. --By 高尔基 说明: Kernel版本: ...