Spring Boot (二):模版引擎 Thymeleaf 渲染 Web 页面
Spring Boot (二):模版引擎 Thymeleaf 渲染 Web 页面

在《Spring Boot(一):快速开始》中介绍了如何使用 Spring Boot 构建一个工程,并且提供 RESTful API ,本节我们继续介绍如何使用 Spring Boot 渲染 Web 页面。
1. 什么是 Thymeleaf ?
虽然我们目前拥有许多十分优秀的前端框架,例如: Vue 、 React 等,非常适用于前后端分离的场景,前端可以独立部署成为服务,前后端从物理上完全进行隔离,降低程序耦合度。但是 Spring Boot 官方依然为我们提供了模版引擎用于一些无需前后端分离的场景。 Thymeleaf 是新一代的模板引擎,在 Spring Boot 中,官方推荐使用 Thymeleaf 来做前端模版引擎。打开 https://start.spring.io/ 可以看到,在当前Spring Boot 的版本中( 2.1.8.RELEASE ), 官方提供的模版引擎有以下几种:
- Thymeleaf
- FreeMarker
- Mustache
- Groovy
Spring Boot 建议使用这些模版引擎,而并不推荐我们继续使用 JSP 。
Thymeleaf 具体特性如下:
- Thymeleaf 在有网络和无网络的环境下皆可运行,即它可以让美工在浏览器查看页面的静态效果,也可以让程序员在服务器查看带数据的动态页面效果。这是由于它支持 html 原型,然后在 html 标签里增加额外的属性来达到模板+数据的展示方式。浏览器解释 html 时会忽略未定义的标签属性,所以 Thymeleaf 的模板可以静态地运行;当有数据返回到页面时,Thymeleaf 标签会动态地替换掉静态内容,使页面动态显示。
- Thymeleaf 开箱即用的特性。它提供标准和 Spring 标准两种方言,可以直接套用模板实现 JSTL、 OGNL表达式效果,避免每天套模板、改 Jstl、改标签的困扰。同时开发人员也可以扩展和创建自定义的方言。
- Thymeleaf 提供 Spring 标准方言和一个与 SpringMVC 完美集成的可选模块,可以快速的实现表单绑定、属性编辑器、国际化等功能。
2. 快速入门
这里我们先正常构建一个 Spring Boot 工程: spring-boot-thymeleaf ,在 pom.xml 文件中引入 Thymeleaf 的相关依赖,如下:
<dependency>

    <groupId>org.springframework.boot</groupId>

    <artifactId>spring-boot-starter-thymeleaf</artifactId>

</dependency>
工程的配置文件 application.yml 如下:
server:

  port: 8080

spring:

  application:

    name: spring-boot-thymleaf

  thymeleaf:

    # 关闭thymeleaf缓存 开发时使用 否则没有实时画面

    cache: false

    # 检查模板是否存在,然后再呈现

    check-template-location: true

    # Content-Type value.

    servlet:

      content-type: text/html

    # 启用MVC Thymeleaf视图分辨率

    enabled: true

    # Template encoding.

    encoding: UTF-8

    # 关闭严格模式

    mode: LEGACYHTML5

    # Prefix that gets prepended to view names when building a URL.

    prefix: classpath:/templates/

    # Suffix that gets appended to view names when building a URL.

    suffix: .html

  mvc:

    # 指定静态资源处理路径

    static-path-pattern: /static/**

    view:

      suffix: .html
有关 thymeleaf 都写明了注释,这里需要注意的有以下几点:
- spring.thymeleaf.mode :这里是配置当前模版的解析模式的,默认值为 HTML ,这时会开启严格模式,所有的 HTML 必须有头有尾,很多地方并不符合我们平时的书写习惯,这里最好关闭严格模式。
- spring.thymeleaf.cache :这里是 thymeleaf 的缓存,在平时的练习中最好关闭,否则页面修改后刷新浏览器将会无效,而在生产环境中,视具体的业务场景而定。
- spring.mvc.static-path-pattern :这里是配置我们静态资源的路径,一般默认是配置
/static/**路径,这里用于存放我们的 js 、 css 、图片等静态资源。
配置通用 404 和 500 页面,直接在 templates\error 创建对应页面即可,这里可以看一下 Spring Boot 错误页面转发的源码 org.springframework.boot.autoconfigure.web.servlet.error.DefaultErrorViewResolver,如下:
@Override

public ModelAndView resolveErrorView(HttpServletRequest request, HttpStatus status, Map<String, Object> model) {

    ModelAndView modelAndView = resolve(String.valueOf(status.value()), model);

    if (modelAndView == null && SERIES_VIEWS.containsKey(status.series())) {

        modelAndView = resolve(SERIES_VIEWS.get(status.series()), model);

    }

    return modelAndView;

}

private ModelAndView resolve(String viewName, Map<String, Object> model) {

    String errorViewName = "error/" + viewName;

    TemplateAvailabilityProvider provider = this.templateAvailabilityProviders.getProvider(errorViewName,

            this.applicationContext);

    if (provider != null) {

        return new ModelAndView(errorViewName, model);

    }

    return resolveResource(errorViewName, model);

}
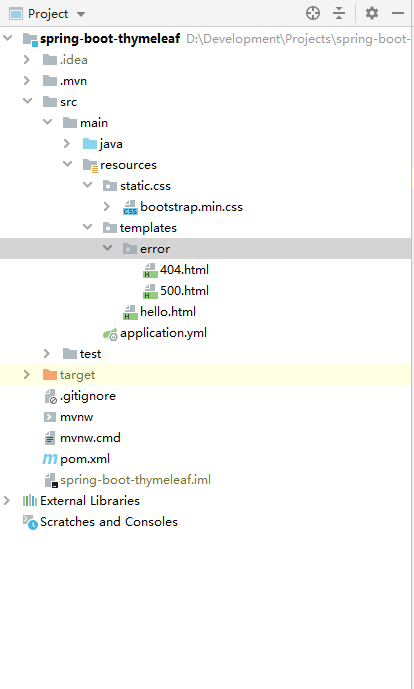
可以看到这里会根据当前的状态响应码转发到对应的页面,路由为 error/** 。笔者这里简单创建两个错误页面,如图:
创建测试 Controller ,如下:
@Controller

public class HelloController {

    @GetMapping("/hello")

    public String hello(HttpServletRequest request) {

        // 构建测试数据

        Map<String, Object> map = new HashMap<>();

        UserModel userModel = new UserModel();

        userModel.setId(1L);

        userModel.setName("Spring Boot");

        userModel.setAge(18);

        map.put("user", userModel);

        List<CourseModel> list = new ArrayList<>();

        for (int i = 0; i < 2; i++) {

            CourseModel courseMode = new CourseModel();

            courseMode.setId((long) i);

            courseMode.setName("Spring Boot:" + i);

            courseMode.setAddress("课程地点:" + i);

            list.add(courseMode);

        }

        map.put("list", list);

        map.put("flag", true);

        request.setAttribute("data", map);

        return "hello";

    }

}
在此注册测试类中,进行数据初始化并输出至页面。
- Thymeleaf 默认的模板路径
src/main/resources/templates,只需要在这个这个路径下编写模版文件即可。
Thymeleaf 模版文件如下:
<!DOCTYPE html>

<html xmlns="http://www.w3.org/1999/xhtml"

      xmlns:th="http://www.thymeleaf.org">

<head>

    <meta charset="UTF-8">

    <meta name="viewport" content="width=device-width, initial-scale=1, shrink-to-fit=no">

    <title>Hello Spring Boot</title>

    <link rel="stylesheet" th:href="@{/static/css/bootstrap.min.css}">

</head>

<body>

<div class="container">

    <div>用户信息:</div>

    <table class="table table-dark">

        <thead>

        <tr>

            <th scope="col">#</th>

            <th scope="col">姓名</th>

            <th scope="col">年龄</th>

        </tr>

        </thead>

        <tbody>

        <tr>

            <th scope="row" th:text="${data.user.id}"></th>

            <td th:text="${data.user.name}"></td>

            <td th:text="${data.user.age}"></td>

        </tr>

        </tbody>

    </table>

    <div>课程信息:</div>

    <table class="table table-dark">

        <thead>

        <tr>

            <th scope="col">#</th>

            <th scope="col">课程名称</th>

            <th scope="col">课程地点</th>

        </tr>

        </thead>

        <tbody>

        <tr th:each="course, iterStat : ${data.list}">

            <th scope="row" th:text="${course.id}"></th>

            <td th:text="${course.name}"></td>

            <td th:text="${course.address}"></td>

        </tr>

        </tbody>

    </table>

    <div th:if="${data.flag == true}">如果 flag 为 true 你将可以看到这行字:)</div>

</div>

</body>

</html>
Thymeleaf 部分常用 th 标签如下:
| 关键字 | 功能介绍 | 案例 |
|---|---|---|
| th:id | 替换id | <input th:id="'xxx' + ${collect.id}"/> |
| th:text | 文本替换 | <p th:text="${collect.description}">description</p> |
| th:utext | 支持html的文本替换 | <p th:utext="${htmlcontent}">conten</p> |
| th:object | 替换对象 | <div th:object="${session.user}"> |
| th:value | 属性赋值 | <input th:value="${user.name}" /> |
| th:with | 变量赋值运算 | <div th:with="isEven=${prodStat.count}%2==0"></div> |
| th:style | 设置样式 | th:style="'display:' + @{(${sitrue} ? 'none' : 'inline-block')} + ''" |
| th:onclick | 点击事件 | th:onclick="'getCollect()'" |
| th:each | 属性赋值 | tr th:each="user,userStat:${users}"> |
| th:if | 判断条件 | <a th:if="${userId == collect.userId}" > |
| th:unless | 和th:if判断相反 | <a th:href="@{/login}" th:unless=${session.user != null}>Login</a> |
| th:href | 链接地址 | <a th:href="@{/login}" th:unless=${session.user != null}>Login</a> /> |
| th:switch | 多路选择 配合th:case 使用 | <div th:switch="${user.role}"> |
| th:case | th:switch的一个分支 | <p th:case="'admin'">User is an administrator</p> |
| th:fragment | 布局标签,定义一个代码片段,方便其它地方引用 | <div th:fragment="alert"> |
| th:include | 布局标签,替换内容到引入的文件 | <head th:include="layout :: htmlhead" th:with="title='xx'"></head> /> |
| th:replace | 布局标签,替换整个标签到引入的文件 | <div th:replace="fragments/header :: title"></div> |
| th:selected | selected选择框 选中 | th:selected="(${xxx.id} == ${configObj.dd})" |
| th:src | 图片类地址引入 | <img class="img-responsive" alt="App Logo" th:src="@{/img/logo.png}" /> |
| th:inline | 定义js脚本可以使用变量 | <script type="text/javascript" th:inline="javascript"> |
| th:action | 表单提交的地址 | <form action="subscribe.html" th:action="@{/subscribe}"> |
| th:remove | 删除某个属性 | <tr th:remove="all"> 1.all:删除包含标签和所有的孩子。2.body:不包含标记删除,但删除其所有的孩子。3.tag:包含标记的删除,但不删除它的孩子。4.all-but-first:删除所有包含标签的孩子,除了第一个。5.none:什么也不做。这个值是有用的动态评估。 |
| th:attr | 设置标签属性,多个属性可以用逗号分隔 | 比如 th:attr="src=@{/image/aa.jpg},title=#{logo}" ,此标签不太优雅,一般用的比较少。 |
3. 测试
启动当前工程,打开浏览器访问路径: http://localhost:8080/hello ,结果如图:

5. 代码示例
6. 参考
Spring Boot (二):模版引擎 Thymeleaf 渲染 Web 页面的更多相关文章
- SpringBoot系列:Spring Boot使用模板引擎Thymeleaf
一.Java模板引擎 模板引擎(这里特指用于Web开发的模板引擎)是为了使用户界面与业务数据(内容)分离而产生的,它可以生成特定格式的文档,用于网站的模板引擎就会生成一个标准的HTML文档. 在jav ...
- Spring boot 梳理 - 模版引擎 -freemarker
开发环境中关闭缓存 spring: thymeleaf: cache: false freemarker: cache: false Spring boot 集成 freemarker <dep ...
- Spring Boot整合模板引擎thymeleaf
项目结构 引入依赖pom.xml <!-- 引入 thymeleaf 模板依赖 --> <dependency> <groupId>org.springframew ...
- Spring Boot 2.x基础教程:使用 Thymeleaf开发Web页面
通过本系列教程的前几章内容(API开发.数据访问).我们已经具备完成一个涵盖数据存储.提供HTTP接口的完整后端服务了.依托这些技能,我们已经可以配合前端开发人员,一起来完成一些前后端分离的Web项目 ...
- Spring Boot 2.0 整合Thymeleaf 模板引擎
本节将和大家一起实战Spring Boot 2.0 和thymeleaf 模板引擎 1. 创建项目 2. 使用Spring Initlizr 快速创建Spring Boot 应用程序 3. 填写项目配 ...
- Spring Boot 2.x教程-Thymeleaf 原理是什么
layout: post title: Spring Boot 2.x教程-Thymeleaf 原理是什么 categories: SpringBoot description: Spring Boo ...
- spring boot: freemarket模板引擎
spring boot: freemarket模板引擎 freemarket模板引擎,可以和thymeleaf模板引擎共存 pom.xml引入 <!-- Freemarket --> &l ...
- Spring Boot + MyBatis + Druid + Redis + Thymeleaf 整合小结
Spring Boot + MyBatis + Druid + Redis + Thymeleaf 整合小结 这两天闲着没事想利用**Spring Boot**加上阿里的开源数据连接池**Druid* ...
- Spring Boot(二十):使用spring-boot-admin对spring-boot服务进行监控
Spring Boot(二十):使用spring-boot-admin对spring-boot服务进行监控 Spring Boot Actuator提供了对单个Spring Boot的监控,信息包含: ...
随机推荐
- 使用CefSharp在.NET中嵌入Chromium
使用CefSharp可以在.NET轻松的嵌入Html,不用担心WPF与Winform 控件与它的兼容性问题,CefSharp大部分的代码是C#,它可以在VB或者其他.NET平台语言中来进行使用. 近几 ...
- pickle 基础用法
def save_obj_to_file(path, target_obj): file = open(path,'wb') pickle.dump(target_obj) file.close() ...
- PostgreSQL入门教程(命令行)
初次安装完成后 1.默认生成一个名为postgres的数据库 2.一个名为postgres的数据库用户 3.这里需要注意的是,同时还生成了一个名为postgres的Linux系统用户. 下面,我们使用 ...
- 关于selenium自动化对窗口句柄的处理
首先什么是句柄?句柄就是你点击一个页面,跳转了一个新的窗口.你要操作的元素可能在原窗口上,也有可能在新窗口上. 看下图句柄1 句柄2 由这2张图可知,url不一样,证明他们是处于不同的界面,我要操作的 ...
- HandlerMethodArgumentResolver(二):Map参数类型和固定参数类型【享学Spring MVC】
每篇一句 黄金的导电性最好,为什么电脑主板还是要用铜? 飞机最快,为什么还有人做火车? 清华大学最好,为什么还有人去普通学校? 因为资源都是有限的,我们现实生活中必须兼顾成本与产出的平衡 前言 上文 ...
- vue当图片加载失败时,用一个默认图片替换;
原理就是给img绑定error事件,替换原有的src地址. 首先在data中创建一个defaultImg(随便起的),里面的值是该默认图片的地址: 在html页面的img标签上绑定该属性 这样默认图片 ...
- 一个简单的Python调度器Schedule
关于我 一个有思想的程序猿,终身学习实践者,目前在一个创业团队任team lead,技术栈涉及Android.Python.Java和Go,这个也是我们团队的主要技术栈. Github:https:/ ...
- JDBC之LOB数据类型
JDBC之LOB数据类型 一.Oracle LOB LOB,即Large Objects(大对象),是用来存储大量的二进制和文本数据的一种数据类型(一个LOB字段可存储可多达4GB的数据). LOB ...
- ASP.NET Core实现对象自动映射-AgileMapper
我们为什么要在对象之间做映射 处于耦合性或者安全性考虑或者性能考虑我们不希望将Model模型传递给他们,我们会在项目中创建一些DTO(Data transfer object数据传输对象),进行数据的 ...
- 怎样使用U盘安装Windows系统
准备工作 一个8G及以上的U盘: 软碟通UltraISO,下载地址,非免费,但试用就够了: 系统镜像,推荐去MSDN下载: 安装过程 利用U盘制作启动盘,准备好上述的东西,然后开始制作启动盘: 注意: ...