ABP Framework:移除 EF Core Migrations 项目,统一数据上下文
原文:Unifying DbContexts for EF Core / Removing the EF Core Migrations Project
导读:软件开发的一切都需要平衡
在 ABP Framework V4.4 RC 新增功能介绍 中,对应用程序启动解决方案模板做了一个重要改变:删除 EntityFrameworkCore.DbMigrations 项目。
本文将详细解读背后的原因和解决方案。
- 理解动机很重要:为什么先前的版本要将要数据上下文进行分离,而现在为什么要合并?
- 合并之后存在什么缺陷,以及如何解决?
这篇文件演示如何将解决方案中 EntityFrameworkCore.DbMigrations 项目移除,并实现使用 单个 DbContext 进行数据实体映射和数据迁移。
本篇文章项目源码
关注 ABP Framework 最新开发进度,后面还会陆续发布新功能详解、新功能示例等系列文章,敬请关注!
ABP Framework 研习社(QQ群:726299208)
专注 ABP Framework 学习,经验分享、问题讨论、示例源码、电子书共享,欢迎加入!
动机
如果使用启动模板生成解决方案,数据库提供程序是 Entity Framework Core,那么在解决方案中会存在依赖 EF Core的两个项目:
- .EntityFrameworkCore
- .EntityFrameworkCore.DbMigrations
.EntityFrameworkCore项目:包含应用程序真实的 DbContext、数据库映射和仓储实现。
.EntityFrameworkCore.DbMigrations项目:包含另一个 DbContext 只用于创建和数据迁移。包含所有正在使用的模块的数据实体映射,生成统一的数据库表结构。
分离的原因有两个:
- 让真实 DbContext 保持简单和专注。只包含当前项目相关的实体,而与在应用程序使用的模块的实体和数据上下文无关,因为每个模块都有自己的 DbContext ,而将模型创建方法单独放在
EntityFrameworkCore.DbMigrations项目中。 - 复用依赖模块中的表,通过创建自己的类,映射到依赖模块中的表。举例,自定义
AppUser实体映射到数据库中AbpUsers表,实际上该表由 Identity 模块 的IdentityUser实体映射生成。他们共用相同的数据库表。和IdentityServer实体相比AppUser包含的属性更少,可以根据需要在AppUser中添加所需的属性,只需要设置好数据库映射,新增字段会添加到映射表中。
我们详细的描述了这种结构。然而,对于开发者,仍然存在问题,因为当需要复用依赖模块中的表时,这种结构会使的数据实体映射变得复杂。
许多开发者在映射这些类时容易产生误解或犯错,特别是当试图使用的实体与其他实体存在关联关系时。
所以我们在 V4.4 版本中决定取消这种分离,删除 EntityFrameworkCore.DbMigrations 项目。新的启动方案将带只有一个 EntityFrameworkCore 项目和一个 DbContext 类。
如果你想在你的解决方案中加入今天的内容,请遵循本文的步骤。
警告
新的设计有一个缺点。我们必须删除 AppUser 实体,因为不能在同一个 DbContext 中很好地处理没有继承关系的两个类映射到同一张表中。在本文的后面会介绍这个问题,并提供处理它的建议。
如果您使用 ABP Commercial 商业版,ABP套件代码生成功能还不会采用本文中提到的设计方法,建议等待下一个版本。
步骤
我们的目标是删除 EntityFrameworkCore.DbMigrations 项目,在 EntityFrameworkCore 项目中启用数据库迁移,替换迁移项目的依赖。
原解决方案是基于 v4.3 创建一个新的解决方案,然后在 pull request 中记录所有的修改,所以你可以逐行看到所有的修改。虽然这篇文章将涵盖所有的内容,但如果你在实现过程中遇到问题,你可能想检查这个PR中所做的修改。
第一步:添加 Microsoft.EntityFrameworkCore.Tools 包到 EntityFrameworkCore 项目
将下面代码添加到 EntityFrameworkCore.csproj 文件:
<ItemGroup>

  <PackageReference Include="Microsoft.EntityFrameworkCore.Tools" Version="5.0.*">

    <IncludeAssets>runtime; build; native; contentfiles; analyzers</IncludeAssets>

    <PrivateAssets>compile; contentFiles; build; buildMultitargeting; buildTransitive; analyzers; native</PrivateAssets>

  </PackageReference>

</ItemGroup>
第二步:创建设计时 DbContext 工厂
在 EntityFrameworkCore 项目中创建实现 IDesignTimeDbContextFactory<T> 接口的数据上下文工厂
using System.IO;

using Microsoft.EntityFrameworkCore;

using Microsoft.EntityFrameworkCore.Design;

using Microsoft.Extensions.Configuration;

namespace UnifiedContextsDemo.EntityFrameworkCore

{

    public class UnifiedContextsDemoDbContextFactory : IDesignTimeDbContextFactory<UnifiedContextsDemoDbContext>

    {

        public UnifiedContextsDemoDbContext CreateDbContext(string[] args)

        {

            UnifiedContextsDemoEfCoreEntityExtensionMappings.Configure();

            var configuration = BuildConfiguration();

            var builder = new DbContextOptionsBuilder<UnifiedContextsDemoDbContext>()

                .UseSqlServer(configuration.GetConnectionString("Default"));

            return new UnifiedContextsDemoDbContext(builder.Options);

        }

        private static IConfigurationRoot BuildConfiguration()

        {

            var builder = new ConfigurationBuilder()

                .SetBasePath(Path.Combine(Directory.GetCurrentDirectory(), "../UnifiedContextsDemo.DbMigrator/"))

                .AddJsonFile("appsettings.json", optional: false);

            return builder.Build();

        }

    }

}
基本上是从 EntityFrameworkCore.DbMigrations 项目中复制的,重命名并使用应用程序的实际 DbContext 。
第三步:创建 数据库模式迁移器
复制 EntityFrameworkCore...DbSchemaMigrator(省略号表示项目命名)类到 EntityFrameworkCore 项目中,修改 MigrateAsync 方法中的代码,以使用真实 DbContext 。
using System;

using System.Threading.Tasks;

using Microsoft.EntityFrameworkCore;

using Microsoft.Extensions.DependencyInjection;

using UnifiedContextsDemo.Data;

using Volo.Abp.DependencyInjection;

namespace UnifiedContextsDemo.EntityFrameworkCore

{

    public class EntityFrameworkCoreUnifiedContextsDemoDbSchemaMigrator

        : IUnifiedContextsDemoDbSchemaMigrator, ITransientDependency

    {

        private readonly IServiceProvider _serviceProvider;

        public EntityFrameworkCoreUnifiedContextsDemoDbSchemaMigrator(

            IServiceProvider serviceProvider)

        {

            _serviceProvider = serviceProvider;

        }

        public async Task MigrateAsync()

        {

            /* We intentionally resolving the UnifiedContextsDemoMigrationsDbContext

             * from IServiceProvider (instead of directly injecting it)

             * to properly get the connection string of the current tenant in the

             * current scope.

             */

            await _serviceProvider

                .GetRequiredService<UnifiedContextsDemoDbContext>()

                .Database

                .MigrateAsync();

        }

    }

}
第四步 转移数据库实体映射配置
在 迁移 DbContext 中包含 builder.ConfigureXXX() 对应每个使用的模块的数据实体映射配置。移动这些配置到 EntityFrameworkCore 项目的 真实 DbContext 中,并移除 AppUser 数据库实体映射。
可以选择将自己定义的实体数据库映射代码从...DbContextModelCreatingExtensions类中移到 真实 DbContext 的 OnModelCreating 方法中,并删除该静态扩展类。
示例解决方案中,最终 DbContext 代码如下:
using Microsoft.EntityFrameworkCore;

using UnifiedContextsDemo.Users;

using Volo.Abp.AuditLogging.EntityFrameworkCore;

using Volo.Abp.BackgroundJobs.EntityFrameworkCore;

using Volo.Abp.Data;

using Volo.Abp.EntityFrameworkCore;

using Volo.Abp.FeatureManagement.EntityFrameworkCore;

using Volo.Abp.Identity.EntityFrameworkCore;

using Volo.Abp.IdentityServer.EntityFrameworkCore;

using Volo.Abp.PermissionManagement.EntityFrameworkCore;

using Volo.Abp.SettingManagement.EntityFrameworkCore;

using Volo.Abp.TenantManagement.EntityFrameworkCore;

namespace UnifiedContextsDemo.EntityFrameworkCore

{

    [ConnectionStringName("Default")]

    public class UnifiedContextsDemoDbContext

        : AbpDbContext<UnifiedContextsDemoDbContext>

    {

        public DbSet<AppUser> Users { get; set; }

        /* Add DbSet properties for your Aggregate Roots / Entities here.

         * Also map them inside UnifiedContextsDemoDbContextModelCreatingExtensions.ConfigureUnifiedContextsDemo

         */

        public UnifiedContextsDemoDbContext(

            DbContextOptions<UnifiedContextsDemoDbContext> options)

            : base(options)

        {

        }

        protected override void OnModelCreating(ModelBuilder builder)

        {

            base.OnModelCreating(builder);

            builder.ConfigurePermissionManagement();

            builder.ConfigureSettingManagement();

            builder.ConfigureBackgroundJobs();

            builder.ConfigureAuditLogging();

            builder.ConfigureIdentity();

            builder.ConfigureIdentityServer();

            builder.ConfigureFeatureManagement();

            builder.ConfigureTenantManagement();

            /* Configure your own tables/entities inside here */

            //builder.Entity<YourEntity>(b =>

            //{

            //    b.ToTable(UnifiedContextsDemoConsts.DbTablePrefix + "YourEntities", UnifiedContextsDemoConsts.DbSchema);

            //    b.ConfigureByConvention(); //auto configure for the base class props

            //    //...

            //});

        }

    }

}
第五步:从解决方案中移除 EntityFrameworkCore.DbMigrations 项目
从解决方案中移除 EntityFrameworkCore.DbMigrations 项目,将对该项目的引用替换为 EntityFrameworkCore 项目引用。
同样地,将模块依赖 ...EntityFrameworkCoreDbMigrationsModule 替换为 ...EntityFrameworkCoreModule 。
示例项目中,涉及的项目为 DbMigrator Web 和 Web and EntityFrameworkCore.Tests 。
第六步:移除 AppUser 实体
我们需要将 AppUser 这个实体移除,因为 EF Core 不能两个非继承关系的类映射到单个表。所以,删除这个类和所有的对该类的使用。如果你需要在应用程序代码中查询用户,可以用 IdentityUser 替换。更多信息请参见 AppUser 实体和自定义属性部分。
第七步:创建数据迁移
如果需要使用数据迁移历史记录,可以直接将 EntityFrameworkCore.DbMigrations 项目中生成的 migrations 复制到 EntityFrameworkCore 项目,并手动修改其中的 DbContext 类型。
如果需要在已经应用了数据迁移的数据库中,继续应用新的数据迁移,在 EntityFrameworkCore 项目中,创建新的数据库迁移,执行命令:
dotnet ef migrations add InitialUnified
你可以指定一个不同的迁移名称,这将创建一个迁移类,其中包含你在数据库中已有的所有数据库表。注意,删除 Up 和 Down 方法中的所有内容,然后就可以将迁移应用到数据库中。
dotnet ef database update
数据库不会有任何变化,因为迁移是空的,什么都不做。从现在开始,可以在改变实体时,创建新的迁移,就像平时做的那样。
DbContext 合并已经完成。接下来将解决如何基于这种设计为依赖模块的实体添加自定义属性。
AppUser 实体 和自定义属性
数据库映射逻辑、解决方案结构和数据迁移,变得简单和易于管理。
带来的弊端是,我们必须移除 AppUser 实体,因为其与 Identity 模块中 IdentityUser 实体共享 AbpUsers 表。幸运的是,ABP提供了一个灵活的系统来 扩展现有的实体 ,如果你需要定义一些自定义属性的话。
在本节中,我将展示如何向 IdentityUser 实体添加一个自定义属性,并在你的应用程序代码和数据库查询中使用它。
我已经把这部分的所有修改作为一个单独的PR完成了,所以如果你在实现上有问题,你可能想检查这个PR中的修改。
定义一个自定义属性
应用程序启动模板提供一个配置点,为实体添加自定义属性,位于 Domain.Shared 项目中 ...ModuleExtensionConfigurator.cs 类,在 ConfigureExtraProperties 方法中,添加代码:
ObjectExtensionManager.Instance.Modules()

    .ConfigureIdentity(identity =>

    {

        identity.ConfigureUser(user =>

        {

            user.AddOrUpdateProperty<string>( //属性类型: string

                "SocialSecurityNumber", //属性名

                property =>

                {

                    //validation rules

                    property.Attributes.Add(new RequiredAttribute());

                    property.Attributes.Add(new StringLengthAttribute(64));

                }

            );

        });

    });
设置完成后,只要运行应用程序就可以看到用户表上的新属性。
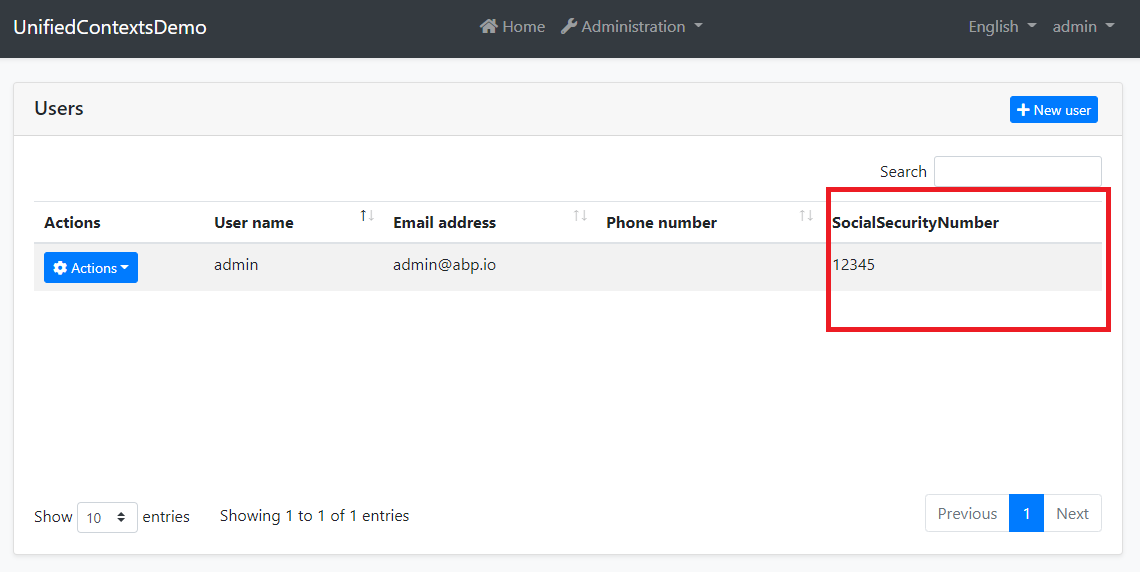
新的SocialSecurityNumber属性也将在创建和编辑模式中应用添加的验证规则。
参看 模块实体扩展 文档,理解和使用自定义属性。
映射到数据库表
ABP默认将所有自定义属性作为一个 Json 对象保存到 ExtraProperties 字段。如果要为自定义属性创建表字段,可以在 EntityFrameworkCore 项目 ...EfCoreEntityExtensionMappings.cs 中配置,在该类(OneTimeRunner.Run)中添加如下代码:
ObjectExtensionManager.Instance

    .MapEfCoreProperty<IdentityUser, string>(

        "SocialSecurityNumber",

        (entityBuilder, propertyBuilder) =>

        {

            propertyBuilder.HasMaxLength(64).IsRequired().HasDefaultValue("");

        }

    );
然后,直接在 EntityFrameworkCore 项目中执行添加数据迁移命令:
dotnet ef migrations add Added_SocialSecurityNumber_To_IdentityUser
将在项目汇总添加一个新的数据迁移类,接着可以通过运行 .DbMigrator 应用或如下命令应用修改到数据库:
dotnet ef database update
将会在数据库 AbpUsers 表中添加字段 SocialSecurityNumber 。
使用自定义属性
现在,可以使用 IdentityUser 实体中 GetProperty 和 SetProperty 方法操作新添加的属性。下面示例代码演示如何获取和设置自定义属性:
public class MyUserService : ITransientDependency

{

    private readonly IRepository<IdentityUser, Guid> _userRepository;

    public MyUserService(IRepository<IdentityUser, Guid> userRepository)

    {

        _userRepository = userRepository;

    }

    public async Task SetSocialSecurityNumberDemoAsync(string userName, string number)

    {

        var user = await _userRepository.GetAsync(u => u.UserName == userName);

        user.SetProperty("SocialSecurityNumber", number);

        await _userRepository.UpdateAsync(user);

    }

    public async Task<string> GetSocialSecurityNumberDemoAsync(string userName)

    {

        var user = await _userRepository.GetAsync(u => u.UserName == userName);

        return user.GetProperty<string>("SocialSecurityNumber");

    }

}
提示:使用 SetProperty 和 GetProperty 使用字符串属性名可能会很繁琐,而且容易出错。建议创建以下扩展方法:
public static class MyUserExtensions

{

    public const string SocialSecurityNumber = "SocialSecurityNumber";

    public static void SetSocialSecurityNumber(this IdentityUser user, string number)

    {

        user.SetProperty(SocialSecurityNumber, number);

    }

    public static string GetSocialSecurityNumber(this IdentityUser user)

    {

        return user.GetProperty<string>(SocialSecurityNumber);

    }

}
然后我们可以改变之前的演示方法,如下图所示。
public async Task SetSocialSecurityNumberDemoAsync(string userName, string number)

{

    var user = await _userRepository.GetAsync(u => u.UserName == userName);

    user.SetSocialSecurityNumber(number); //Using the new extension property

    await _userRepository.UpdateAsync(user);

}

public async Task<string> GetSocialSecurityNumberDemoAsync(string userName)

{

    var user = await _userRepository.GetAsync(u => u.UserName == userName);

    return user.GetSocialSecurityNumber(); //Using the new extension property

}
基于自定义属性查询
添加自定义属性之后,我们可能需要基于自定义属性查询。是否可以基于 Entity Framework 的 API 来实现?有两种方式实现在应用程序中使用EF Core API:(这与自定义属性无关,与 EF Core有关。)
- 领域层或应用层引用 Microsoft.EntityFrameworkCore Nuget包,在那个项目中引用取决于你要在哪需要使用 EF Core API。(DDD中数据提供程序无关性原则冲突)
- 在领域层创建仓储接口,然后在
EntityFrameworkCore项目中实现接口。
推荐使用第二种方式,在 Domain 项目中定义一个新的仓储接口:
using System;

using System.Threading.Tasks;

using Volo.Abp.Domain.Repositories;

using Volo.Abp.Identity;

namespace UnifiedContextsDemo.Users

{

    public interface IMyUserRepository : IRepository<IdentityUser, Guid>

    {

        Task<IdentityUser> FindBySocialSecurityNumber(string number);

    }

}
在 EntityFrameworkCore 项目中实现接口:
using System;

using System.Linq;

using System.Threading.Tasks;

using Microsoft.EntityFrameworkCore;

using UnifiedContextsDemo.EntityFrameworkCore;

using Volo.Abp.Domain.Repositories.EntityFrameworkCore;

using Volo.Abp.EntityFrameworkCore;

using Volo.Abp.Identity;

namespace UnifiedContextsDemo.Users

{

    public class MyUserRepository

        : EfCoreRepository<UnifiedContextsDemoDbContext, IdentityUser, Guid>,

          IMyUserRepository

    {

        public MyUserRepository(

            IDbContextProvider<UnifiedContextsDemoDbContext> dbContextProvider)

            : base(dbContextProvider)

        {

        }

        public async Task<IdentityUser> FindBySocialSecurityNumber(string number)

        {

            var dbContext = await GetDbContextAsync();

            return await dbContext.Set<IdentityUser>()

                .Where(u => EF.Property<string>(u, "SocialSecurityNumber") == number)

                .FirstOrDefaultAsync();

        }

    }

}
提示:应该使用一个常量代替SocialSecurityNumber魔术字符串。(不会产生拼写错误)
现在,我可以在应用服务中依赖注入 IMyUserRepository 使用仓储接口:
public class MyUserService : ITransientDependency

{

    private readonly IMyUserRepository _userRepository;

    public MyUserService(IMyUserRepository userRepository)

    {

        _userRepository = userRepository;

    }

    //...other methods

    public async Task<IdentityUser> FindBySocialSecurityNumberDemoAsync(string number)

    {

        return await _userRepository.FindBySocialSecurityNumber(number);

    }

}
使用自定义仓储接口 IMyUserRepository 代替泛型仓储接口 IRepository<IdentityUser, Guid>。
讨论 Github
这篇文章演示了,如何将 EntityFrameworkCore.DbMigrations 项目从解决方案中移除,以简化数据库实体映射、数据迁移和应用程序中的代码。
在下一个版本(4.4),将作为默认处理。
讨论:Consider to remove EntityFrameworkCore.DbMigrations project from the solution #8776
dotNET兄弟会-公众号
专注.Net开源技术及跨平台开发!致力于构建完善的.Net开放技术文库!为.Net爱好者提供学习交流家园!

ABP Framework:移除 EF Core Migrations 项目,统一数据上下文的更多相关文章
- EF Core利用Transaction对数据进行回滚保护
What? 首先,说一下什么是EF Core中的Transaction Transaction允许以原子方式处理多个数据库操作,如果事务已提交,则所有操作都应用于数据库,如果事务回滚,则没有任何操作应 ...
- Dapper, Ef core, Freesql 插入大量数据性能比较(一)
需求:导入9999行数据时Dapper, Ef core, Freesql 谁的性能更优,是如何执行的,级联增加谁性能更佳. 确认方法:sql server 的 sys.dm_exec_query_s ...
- IOC+EF+Core搭建项目框架(三)
/// <summary> /// 表示类别映射配置 /// </summary> public partial class sys_UserMap : NopEntityTy ...
- Dapper, Ef core, Freesql 插入大量数据性能比较(二)
在上一篇文章中,我们比较出单表插入9999行数据,Dapper > EfCore > Freesql.在本文中,我们来看看级联插入 构建9999行数据 List<Entity> ...
- [翻译 EF Core in Action 1.10] 应该在项目中使用EF Core吗?
Entity Framework Core in Action Entityframework Core in action是 Jon P smith 所著的关于Entityframework Cor ...
- 张高兴的 Entity Framework Core 即学即用:(一)创建第一个 EF Core 应用
写在前面 Entity Framework Core (EF Core) 是 .NET 平台流行的对象关系映射(ORM)框架.虽然 .NET 平台中 ORM 框架有很多,比如 Dapper.NHibe ...
- Cookies 初识 Dotnetspider EF 6.x、EF Core实现dynamic动态查询和EF Core注入多个上下文实例池你知道有什么问题? EntityFramework Core 运行dotnet ef命令迁移背后本质是什么?(EF Core迁移原理)
Cookies 1.创建HttpCookies Cookie=new HttpCookies("CookieName");2.添加内容Cookie.Values.Add(&qu ...
- Asp.net core 学习笔记 ( ef core )
更新 : 2018-11-26 这里记入一下关于 foreignKey cascade action 默认情况下如果我们使用 data annotation required + foreginkey ...
- [翻译] EF Core in Action 关于这本书
Entity Framework Core in Action Entityframework Core in action是 Jon P smith 所著的关于Entityframework Cor ...
随机推荐
- [DB] mysql windows 安装
参考 mysql安装 https://www.cnblogs.com/zhangkanghui/p/9613844.html navicat for mysql 中文破解版(无需激活码) https: ...
- Alien 魔法:RPM 和 DEB 互转
Alien 魔法:RPM 和 DEB 互转 作者: Gabriel Cánepa 译者: LCTT joeren | 2015-08-31 10:45 评论: 6 收藏: 10 正如我确信,你们一 ...
- SpringBoot 上传文件如何获取项目工程路径
上传文件时,需要将上传的文件存放于工程路径中,以便前端能够获取文件资源,那如何获取工程路径呢? //获取 SpringBoot 工程中 static 的绝对路径 String serverpath= ...
- 安全漏洞扫描工具 burpsuite V1.7.32 资料
安装包下载地址:http://www.downxia.com/downinfo/229728.html 实战教程:https://t0data.gitbooks.io/burpsuite/conten ...
- error – Public key for *.rpm is not installed (--nogpgcheck)
docker容器删除的东西比较多,有很多东西都没有,配置上源后发现有也问题 第一是源的选择不对应系统版本,第二是找不到gpgcheck文件 如果一时半会找不到gpgchenck file,使用 --n ...
- MarkDown笔记一
目录 目录 字体 标题 下划线标题 #号标题 加重与斜体 高亮 删除线 上标与下标 脚注 转义字符 分割线 段落 空行 结尾两个空格 区域引用 每行> 每段> 可嵌套 目录 把文档中所有标 ...
- 离散傅里叶变换的衍生,负频率、fftshift、实信号、共轭对称
封面是福州的福道,从高处往下看福道上的人在转圈圈.从傅里叶变换后的频域角度来看,我们的生活也是一直在转圈圈,转圈圈也是好事,说明生活有规律,而我们应该思考的是,如何更有效率地转圈圈--哦别误会,我真不 ...
- Jmeter 录制 https协议是出现“您访问的不是安全链接”提示时
解决方法参考: https://blog.csdn.net/test_leader/article/details/112274549
- CVPR2019:无人驾驶3D目标检测论文点评
CVPR2019:无人驾驶3D目标检测论文点评 重读CVPR2019的文章,现在对以下文章进行点评. Stereo R-CNN based 3D Object Detection for Autono ...
- 适用于CUDA GPU的Numba例子
适用于CUDA GPU的Numba例子 矩阵乘法 这是使用CUDA内核的矩阵乘法的简单实现: @cuda.jit def matmul(A, B, C): """Perf ...