2、Qt Project之鼠标事件监控
鼠标事件监控:
对于鼠标时间监控的相关操作,我们在简历工程的时候需要选择的是QWidget基类,不选择QMainWindow基类,如下所示:
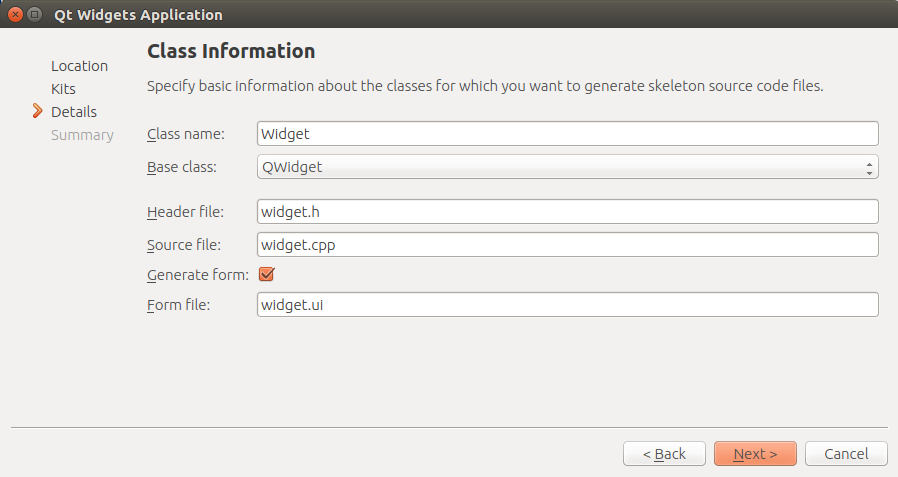 Base class:QWidget
Step1:我们首先定义的是整个Qt软件界面的UI设计:
根据设计的情况,Qt Creator自动帮我们生成了如下的HTML脚本:
<?xml version="1.0" encoding="UTF-8"?>

<ui version="4.0">

 <class>Widget</class>

 <widget class="QWidget" name="Widget">

  <property name="geometry">

   <rect>

    <x>0</x>

    <y>0</y>

    <width>400</width>

    <height>300</height>

   </rect>

  </property>

  <property name="windowTitle">

   <string>Widget</string>

  </property>

  <widget class="QPushButton" name="pushButton">

   <property name="geometry">

    <rect>

     <x>190</x>

     <y>230</y>

     <width>101</width>

     <height>27</height>

    </rect>

   </property>

   <property name="text">

    <string>PushButton</string>

   </property>

  </widget>

  <widget class="QLabel" name="label">

   <property name="geometry">

    <rect>

     <x>-10</x>

     <y>200</y>

     <width>171</width>

     <height>17</height>

    </rect>

   </property>

   <property name="font">

    <font>

     <italic>true</italic>

     <strikeout>false</strikeout>

    </font>

   </property>

   <property name="text">

    <string>     PressMove-axisEvent</string>

   </property>

  </widget>

  <widget class="QLabel" name="label_2">

   <property name="geometry">

    <rect>

     <x>0</x>

     <y>256</y>

     <width>171</width>

     <height>31</height>

    </rect>

   </property>

   <property name="font">

    <font>

     <italic>true</italic>

     <strikeout>false</strikeout>

    </font>

   </property>

   <property name="text">

    <string>  ReleaseMouse-axisEvent</string>

   </property>

  </widget>

  <widget class="QPushButton" name="pushButton_2">

   <property name="geometry">

    <rect>

     <x>190</x>

     <y>200</y>

     <width>98</width>

     <height>27</height>

    </rect>

   </property>

   <property name="text">

    <string>PushButton</string>

   </property>

  </widget>

  <widget class="QPushButton" name="pushButton_3">

   <property name="geometry">

    <rect>

     <x>190</x>

     <y>260</y>

     <width>98</width>

     <height>27</height>

    </rect>

   </property>

   <property name="text">

    <string>PushButton</string>

   </property>

  </widget>

  <widget class="QLabel" name="label_3">

   <property name="geometry">

    <rect>

     <x>0</x>

     <y>226</y>

     <width>171</width>

     <height>31</height>

    </rect>

   </property>

   <property name="font">

    <font>

     <italic>true</italic>

     <strikeout>false</strikeout>

    </font>

   </property>

   <property name="text">

    <string>  PressMouse-axisEvent</string>

   </property>

  </widget>

  <widget class="QLabel" name="label_4">

   <property name="geometry">

    <rect>

     <x>0</x>

     <y>60</y>

     <width>211</width>

     <height>51</height>

    </rect>

   </property>

   <property name="font">

    <font>

     <pointsize>22</pointsize>

     <italic>true</italic>

     <underline>false</underline>

     <strikeout>false</strikeout>

    </font>

   </property>

   <property name="cursor">

    <cursorShape>BlankCursor</cursorShape>

   </property>

   <property name="text">

    <string>Mouse Monitor</string>

   </property>

   <property name="alignment">

    <set>Qt::AlignCenter</set>

   </property>

  </widget>

  <widget class="QLabel" name="label_5">

   <property name="geometry">

    <rect>

     <x>20</x>

     <y>120</y>

     <width>171</width>

     <height>21</height>

    </rect>

   </property>

   <property name="font">

    <font>

     <pointsize>10</pointsize>

     <italic>true</italic>

     <underline>false</underline>

     <strikeout>false</strikeout>

    </font>

   </property>

   <property name="cursor">

    <cursorShape>BlankCursor</cursorShape>

   </property>

   <property name="text">

    <string>Designed by : mm1994uestc</string>

   </property>

   <property name="alignment">

    <set>Qt::AlignCenter</set>

   </property>

  </widget>

  <widget class="QLabel" name="label_6">

   <property name="geometry">

    <rect>

     <x>0</x>

     <y>10</y>

     <width>321</width>

     <height>51</height>

    </rect>

   </property>

   <property name="font">

    <font>

     <pointsize>28</pointsize>

     <italic>true</italic>

     <underline>false</underline>

     <strikeout>false</strikeout>

    </font>

   </property>

   <property name="cursor">

    <cursorShape>BlankCursor</cursorShape>

   </property>

   <property name="text">

    <string>Qt interface Demo!</string>

   </property>

   <property name="alignment">

    <set>Qt::AlignCenter</set>

   </property>

  </widget>

 </widget>

 <layoutdefault spacing="6" margin="11"/>

 <resources/>

 <connections/>

</ui>
实际的界面的效果如下所示:

Step2:我们根据设计的实际情况对每一个界面上的Button进行相关的触发机制:
a)我们需要包含Mouse鼠标相关的头文件进来
#include <QMouseEvent>
b)鼠标事件的相关函数都封装在Widget基类当中,针对上面的三类事件Event,我们将列举如下:
void Widget::mousePressEvent(QMouseEvent *e)

void Widget::mouseMoveEvent(QMouseEvent *e)

void Widget::mouseReleaseEvent(QMouseEvent *e)
c)这里我们需要在widget.cpp文件中对每一个事件函数进行实现:(具体实现如下所示)
void Widget::mousePressEvent(QMouseEvent *e)

{

    qDebug() << "  X , Y"; // 输出X Y字符串

    qDebug() << tr("%1,%2").arg(e->x()).arg(e->y()); // e是我们取得的鼠标对象,我们在对象中取得鼠标对象的相关参数,如x坐标和y坐标

    ui->pushButton->setText(tr("(%1,%2)").arg(e->x()).arg(e->y())); // 我们将取得的xy的坐标更新到我们的Button的内容当中

}

void Widget::mouseMoveEvent(QMouseEvent *e)

{

    ui->pushButton_2->setText(tr("%1,%2").arg(e->x()).arg(e->y())); // 与上同理

}

void Widget::mouseReleaseEvent(QMouseEvent *e)

{

    ui->pushButton_3->setText(tr("%1,%2").arg(e->x()).arg(e->y())); // 与上同理

}
d)我们需要在头文件widget.h文件当中声明我们实现的鼠标的相关函数:
protected:

    void mousePressEvent(QMouseEvent *);

    void mouseMoveEvent(QMouseEvent *);

    void mouseReleaseEvent(QMouseEvent *);
以上就基本完成了整个程序的所有功能,详细的工程代码请参考我博客园文件中的内容(文件名称MouseMonitor.tar.gz):https://i.cnblogs.com/Files.aspx
2、Qt Project之鼠标事件监控的更多相关文章
- 5、Qt Project之键盘数据监控
键盘数据监控: 同样的,键盘的检测和鼠标的情形很类似,都是以QWidget为基类的工程 Step1:在UI设计中添加该模块需要使用的相关组件,如下所示: <width>141</wi ...
- Qt事件系统之二:鼠标事件和滚轮事件
在Qt中,事件作为一个对象,继承自 QEvent 类,常见的有键盘事件 QKeyEvent.鼠标事件 QMouseEvent 和定时器事件 QTimerEvent 等,与 QEvent 类的继承关系图 ...
- Qt 隐藏标题栏 窗口移动 鼠标事件
摘要 隐藏标题栏 头文件声明鼠标移动虚函数 .cpp文件实现功能 1 setWindowFlags(Qt::FramelessWindowHint | windowFlags()); 无标题栏移动窗体 ...
- Qt窗口添加鼠标移动拖拽事件
1. .h文件中添加 private: QPoint dragPosition; 2. 在cpp文件中重写鼠标点击和拖拽函数 void ShapeWidget::mousePressEvent( ...
- qt实现类似QQ伸缩窗口--鼠标事件应用
原创文章,引用请保证原文完整性,尊重作者劳动,原文地址http://blog.csdn.net/hiwubihe/article/details/38678305,qq:1269122125. 上一章 ...
- qt鼠标事件总结(坐标,跟踪,点击判断)
1.QMouseEvent中的坐标QMouseEvent中保存了两个坐标,一个是全局坐标,当然另外一个是局部坐标.全局坐标(globalPos())即是桌面屏幕坐标(screen coordinate ...
- 浅谈Qt事件的路由机制:鼠标事件
请注意,本文是探讨文章而不是教程,是根据实验和分析得出的结果,可能是错的,因此欢迎别人来探讨和纠正. 这几天对于Qt的事件较为好奇,平时并不怎么常用,一般都是用信号,对于事件的处理,一般都是需要响应键 ...
- QT学习笔记5:QMouseEvent鼠标事件简介
一.QMouseEvent的详细描述 首先请注意,Qt中的QMouseEvent一般只涉及鼠标左键或右键的单击.释放等操作,而对鼠标滚轮的响应则通过QWheeEvent来处理. QMouseEvent ...
- Extjs 窗体居中,双重窗体弹出时清除父窗体的鼠标事件
这个是监控窗体缩放的事件 缩放中居中主要在 'beforeshow' 和 'destroy'两个事件里面监控 var EditTempWindow; Ext.EventManager.onWindow ...
随机推荐
- hbase搭建
0. 软件版本下载 http://mirror.bit.edu.cn/apache/hbase/ 1. 集群环境 Master 172.16.11.97 Slave1 172.16.11.98 S ...
- 小程序---textarea踩坑
1.小程序中textarea不能在scroll-view.swiper.picker-view等等里面运用. 2.不在fixed布局的页面中,placeholder也会随着页面滚动,解决方法:顶级父元 ...
- 数据库技术丛书:SQL Server 2016 从入门到实战(视频教学版) PDF
1:书籍下载方式: SQL Server2016从入门到实战 PDF 下载 链接:https://pan.baidu.com/s/1sWZjdud4RosPyg8sUBaqsQ 密码:8z7w 学习 ...
- RHCE认证考前辅导
一一:Linux认证题库详细说明 注意事项 (1) RHCSA上午2.5小时,RHCE下午3.5小时,考生需对题目非常熟练. (2) 5样东西必带(身份证.1支黑色水笔.常用邮箱.姓名拼音.聪明的脑袋 ...
- Confluence 6 当前使用的数据库状态
进入 > 基本配置(General Configuration) > 问题检查和支持工具(Troubleshooting and support tools) 你就可以看到当前使用的数据 ...
- Eclipse中部署Android开发环境插件安装问题方案
1.添加第一个插件ADT之后出现eclipse原有的SDK管理问题.需要重新安装SDK 2.一种方式按照系统提示直接联网自动搜索安装,另一种就是下载好之后import. 1.用接口声明的变量称为接口变 ...
- 解决Xshell不从22端口连接服务器
xshell默认是22端口 如果服务器给的ssh端口不是22,会连接失败 需要去指定连接 新建 设置ip和端口,点下面的确定 双击刚创建的会话 输入用户名密码 连接成功
- Jumpserver里常用的sudo权限控制模板
ALL,!/bin/bash,!/bin/tcsh,!/bin/su,!/usr/bin/passwd,!/usr/bin/passwd root,!/bin/vim /etc/sudoers,!/u ...
- Pthon面向对象之基础
命名空间 class Course: language = 'Chinese' def __init__(self,teacher,name,period,price): self.teacher = ...
- 在 Python 中使用 JSON
在 Python 中使用 JSON 本教程将会教我们如何使用 Python 编程语言编码和解码 JSON.让我们先来准备环境以便针对 JSON 进行 Python 编程. 环境 在我们使用 Pytho ...