SonarQube Scanner for MSBuild
到现在为止,已经将sonarQube服务器搭建好,服务器是Linux服务器,基于sonarQube6.1配置的
原理关于sonarQube的工作原理,暂时还不是太清楚,据同事的分析,是在本机调用服务器对本地的原代码进行扫描,扫描完成之后,将结果保存至服务器,开发同事再登陆至服务器,查看报告并处理问题等
使用MSBuild扫描
针对是源码已经存在本地的同事
参考官方文档:http://docs.sonarqube.org/display/SCAN/From+the+Command+Line
下载:http://docs.sonarqube.org/display/SCAN/Analyzing+with+SonarQube+Scanner+for+MSBuild
(1)下载并解压SonarQube Scanner for MSBuild
将https://github.com/SonarSource-VisualStudio/sonar-scanner-msbuild/releases/download/2.2/sonar-scanner-msbuild-2.2.0.24.zip 下载至本地,并解压至一个路径,例如"D:\ms\"中

(2)修改SonarQube.Analysis.xml文件
要修改的地方只是关于sonarQube服务器的一些配置,关于服务器URL、USER、PASSWORD等
注意,这里的参数User/PassWord是登陆sonarQube平台的用户名和密码,请不要与sonarQube的DB登陆用户名和密码搞混淆。
<?xml version="1.0" encoding="utf-8" ?>

<!--

  This file defines properties which would be understood by the SonarQube Scanner for MSBuild, if not overridden (see below)

  By default the MSBuild.SonarQube.Scanner.exe picks-up a file named SonarQube.Analysis.xml in the folder it

  is located (if it exists). It is possible to use another properties file by using the /s:filePath.xml flag

  The overriding strategy of property values is the following:

  - A project-specific property defined in the MSBuild *.*proj file (corresponding to a SonarQube module) can override:

  - A property defined in the command line (/d:propertyName=value) has which can override:

  - A property defined in the SonarQube.Analysis.xml configuration file [this file] which can override:

  - A property defined in the SonarQube User Interface at project level which can override:

  - A property defined in the SonarQube User Interface at global level which can't override anything.

  Note that the following properties cannot be set through an MSBuild project file or an SonarQube.Analysis.xml file:

  sonar.projectName, sonar.projectKey, sonar.projectVersion

  The following flags need to be used to set their value: /n:[SonarQube Project Name] /k:[SonarQube Project Key] /v:[SonarQube Project Version]

-->

<SonarQubeAnalysisProperties  xmlns:xsi="http://www.w3.org/2001/XMLSchema-instance" xmlns:xsd="http://www.w3.org/2001/XMLSchema" xmlns="http://www.sonarsource.com/msbuild/integration/2015/1">

  <Property Name="sonar.host.url">sonarQubeServerURL</Property>

  <Property Name="sonar.login">admin</Property>

  <Property Name="sonar.password">password</Property>

  <!-- Required only for versions of SonarQube prior to 5.2 -->

  <!--

  <Property Name="sonar.jdbc.url">jdbc:jtds:sqlserver://mySqlServer/sonar;instance=SQLEXPRESS;SelectMethod=Cursor</Property>

  <Property Name="sonar.jdbc.username">sonar</Property>

  <Property Name="sonar.jdbc.password">sonar</Property>

  -->

</SonarQubeAnalysisProperties>
(3)打开源代码文件夹,例如”F:\test\ArasCheckItem\ArasCheckItem“,在当前的路径打开cmd(按住Shift键并鼠标右键),或者打开cmd窗口,并通过命令进入至该源码目录
(3.1)运行命令MSBuild.SonarQube.Runner.exe,本文示例运行命令时加入路径是因为我没有将MSBuild的路径加入至环境变量,如加入了环境变量,可以直接运行MSBuild.SonarQube.Runner.exe,请注意,参数请使用双引号
参数说明:
/key(简写k):对应projectKey即项目的唯一代码,如两套源代码使用同一个projectKey那扫描的结果将混在一起,所以一个项目需要有一个单独的projectKey
/name(简写n):对应projectName即项目的名称,为项目的一个显示的名称,建立使用完整的项目名称
/version(简写v):对应projectVersion即项目的版本,项目在不同的时期版本也是不一样的,如果方便,可以在sonarQube的服务器中查看到不同的版本代码其中问题的变化
以下为完整参数与简写参数命令
"d:\ms\MSBuild.SonarQube.Runner.exe" begin /k:"testproject" /n:"mytestproject" /v:"1.9"
"d:\ms\MSBuild.SonarQube.Runner.exe" begin /key:"testproject" /name:"mytestproject" /version:"1.9"

(3.2)运行命令MSBuild.exe,这个MSBuild是系统安装过VS后会存在的一个编译器,以Visual Studio 2013为例,地址是:C:\Program Files (x86)\MSBuild\12.0\Bin
"C:\Program Files (x86)\MSBuild\12.0\Bin\MSBuild.exe" /t:Rebuild (这里的参数/t如果不指定也是可以扫描出来的,看下图)


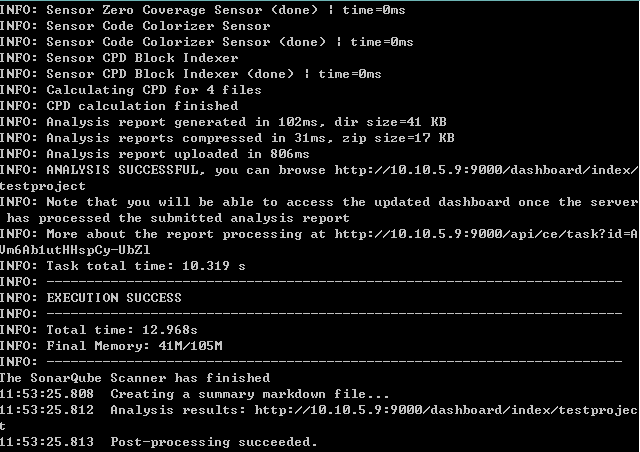
(3.3)运行命令MSBuild.SonarQube.Runner.exe,告诉sonarQube运行完成了,将报告上传
"d:\ms\MSBuild.SonarQube.Runner.exe" end


SonarQube Scanner for MSBuild的更多相关文章
- Analyzing .net core application with SonarQube Scanner for MSBuild
SonarQube是管理代码质量一个开放平台,省略安装过程,下面介绍下如何使用sonarqube去扫描c# 代码. 前提:下载SonarQube Scanner for MSBuild.https:/ ...
- (持续集成)win7上部署Jenkins+MSBuild+Svn+SonarQube+SonarQube Scanner for MSBuild (第二发)
这一篇进入实战,走起.... 登录jenkins,如下图 点击上图中的“新建”按钮,进入下图 输入项目名称,选择“构建一个自由风格的软件项目”即可,点击“ok”,跳转到下图 svn源代码管理(选择代码 ...
- (持续集成)win7上部署Jenkins+MSBuild+Svn+SonarQube+SonarQube Scanner for MSBuild (一)
一.Jenkins介绍 jenkins是一个广泛用于持续构建的可视化web工具,持续构建说得更直白点,就是各种项目的”自动化”编译.打包.分发部署.jenkins可以很好的支持各种语言(比如:java ...
- sonarQube Scanner
到现在为止,已经将sonarQube服务器搭建好,服务器是Linux服务器,基于sonarQube6.1配置的 原理关于sonarQube的工作原理,暂时还不是太清楚,据同事的分析,是在本机调用服务器 ...
- sonarqube+Scanner代码质量管理工具
本文相关描述基于sonarqube 6.2版本. 下载地址: sonarqube下载网址:https://www.sonarqube.org/downloads/ Scanner下载网址(用于扫描项目 ...
- SonarQube Scanner的配置与使用简介
一.下载 下载地址: https://sonarsource.bintray.com/Distribution/sonar-scanner-cli/sonar-scanner-cli-3.0.3.77 ...
- Jenkins 集成 SonarQube Scanner
1. 安装Jenkins 下载安装包,这里我们下载war包 https://jenkins.io/download/ 运行jenkins.war的方式有两种: 第一种:将其放到tomcat中运行( ...
- 持续代码质量管理-SonarQube Scanner部署
1. SonarQube Scanner地址 上一篇文章我们安装了SonarQube-7.3,让我们可以在页面查看代码质量.但是具体的扫描工作则需要SonarQube Scanner完成. 下载页面 ...
- CentOS6.8配置SonarQube Scanner配合SonarQube使用
下载最新的SonarQube Scanner压缩包 https://docs.sonarqube.org/display/SCAN/Analyzing+with+SonarQube+Scanner ...
随机推荐
- phantomjs 无法打开https网站
最近一直在用phantomjs 自动登陆并爬取一些数据,突然发现爬取https类型的网站的时候无法正常操作了 困扰了两天的问题在经过google和stackoverflow的一番搜索后发现原来Phan ...
- 51Nod 1095 Anigram单词 | Hash
Input示例 5 add dad bad cad did 3 add cac dda Output示例 1 0 2 题意:一系列字符串,查询字符串S,能通过其他字符串交换串内字符顺序得到的字符串个数 ...
- js 拖动滑块验证
备注:拖动滑块时尽量平移,chrome浏览器上没有卡顿情况,但是搜狗极速模式和360极速模式都遇到了卡顿,拖不动情况,应是浏览器内部对事件响应速度导致吧. JS代码: ;(function ($,wi ...
- CAS单点登录原理
转自 https://www.cnblogs.com/lihuidu/p/6495247.html 1.基于Cookie的单点登录的回顾 基于Cookie的单点登录核心原理: 将用户名密 ...
- 【BZOJ】1754: [Usaco2005 qua]Bull Math
[算法]高精度乘法 #include<cstdio> #include<algorithm> #include<cstring> using namespace s ...
- wce.exe getpass.exe 读取密码
http://www.ampliasecurity.com/research/wce_v1_4beta_x32.zip http://www.ampliasecurity.com/research/w ...
- [Leetcode Week12]Unique Paths II
Unique Paths II 题解 原创文章,拒绝转载 题目来源:https://leetcode.com/problems/unique-paths-ii/description/ Descrip ...
- 【bzoj3224】普通平衡树
看有没有人能发现咯. #include<bits/stdc++.h> #define N 300005 #define rat 4 #define pushup(o) if(o->l ...
- linux指令和文件系统
linux root用户的主目录是 /root , 其余用户在 /home 中: tar 常用 tar -zxvf : 安装使用 yum or wget website: mv a.g b.g 重命名 ...
- HighGUI图形图像界面初步——鼠标操作
OpenCV中的鼠标操作和滑动条的消息映射方式很类似,都是通过一个中介函数配合一个回调函数来实现的,创建和指定滑动条回调函数为createTrackbar, 而指定鼠标操作消息回调函数的函数为setM ...