Android中Fragment的Hide和Show
我们都知道,Fragment动态添加的时候我们可以使用FragmentTransaction的add和replace方法,replace方法就等效于对这个Fragment先执行remove(),再执行add()。但是在实际的项目中,有很多时候我们会用到底部是一个RadioGroup包裹的RadioButton,上面用Fragment的情况,因为我们是从网络上获取的数据,这种时候我们不希望点击加载过的页面(也就是加载过的Fragment)的时候,每次都重新加载。也就是使用FragmentTransaction#replace()或者是add()方法行不通了,影响用户体验,这个时候就要用到FragmentTracsaction中的另两个方法了,也就是今天要提到的hide()和show()方法。这两个方法简单地说是会隐藏指定的Fragment,并不会销毁此Fragment,所以也就是可以保存下来之前在此Fragment中加载的数据了~。下面来看一下这个Demo吧:
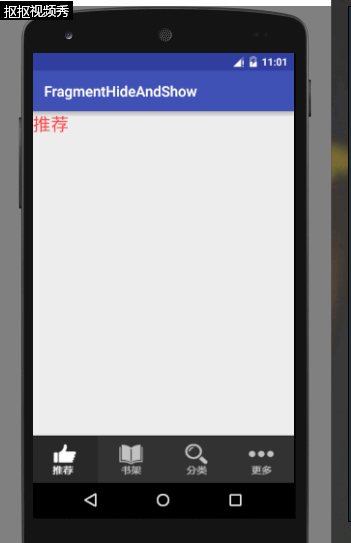
我们要实现的就是这样一个效果:
其实不在网络上加载数据的话看不出来什么具体的效果,不过我们还是先看一下代码吧:
主页面的布局如下:
 <?xml version="1.0" encoding="utf-8"?>

 <LinearLayout xmlns:android="http://schemas.android.com/apk/res/android"

     android:layout_width="match_parent"

     android:layout_height="match_parent"

     android:orientation="vertical"

     >

     <LinearLayout

         android:id="@+id/layout_main_fragment"

         android:layout_weight="1"

         android:layout_width="match_parent"

         android:layout_height="0dp"

         android:orientation="vertical">

     </LinearLayout>

     <RadioGroup

         android:id="@+id/rg"

         android:layout_width="match_parent"

         android:layout_height="wrap_content"

         android:gravity="center"

         android:layout_alignParentBottom="true"

         android:orientation="horizontal">

         <RadioButton

             android:id="@+id/rb_tj"

             android:layout_width="0dp"

             android:layout_height="65dp"

             android:layout_weight="1"

             android:background="@drawable/rb_tuijian"

             android:button="@null"

             android:checked="true" />

         <RadioButton

             android:id="@+id/rb_sj"

             android:layout_width="0dp"

             android:layout_height="65dp"

             android:layout_weight="1"

             android:background="@drawable/rb_shujia"

             android:button="@null" />

         <RadioButton

             android:id="@+id/rb_fl"

             android:layout_width="0dp"

             android:layout_height="65dp"

             android:layout_weight="1"

             android:background="@drawable/rb_fenlei"

             android:button="@null" />

         <RadioButton

             android:id="@+id/rb_gd"

             android:layout_width="0dp"

             android:layout_height="65dp"

             android:layout_weight="1"

             android:background="@drawable/rb_gengduo"

             android:button="@null" />

     </RadioGroup>

 </LinearLayout>
这里用到了四个selector选择器作为RadioButton的背景,其他的没有什么,很简单的布局。当然,为了展示,我们还需要一个Fragment以及其对应的布局:
 <?xml version="1.0" encoding="utf-8"?>

 <LinearLayout xmlns:android="http://schemas.android.com/apk/res/android"

     android:layout_width="match_parent"

     android:layout_height="match_parent"

     android:orientation="vertical">

     <TextView

         android:id="@+id/tv"

         android:layout_width="wrap_content"

         android:layout_height="wrap_content"

         android:textSize="25sp"

         android:textColor="@android:color/holo_red_light"

         android:text="哈哈哈"/>

 </LinearLayout>
由于只是一个小Demo,这里就没有写多个Fragment,而是复用了这一个Fragment,通过Fragment#setArgument(Bundle bundle)方法和getArgument()方法来复用该Fragment:
 package ggcomic.rabbit.lx.fragmenthideandshow.fragment;

 import android.os.Bundle;

 import android.support.annotation.Nullable;

 import android.support.v4.app.Fragment;

 import android.view.LayoutInflater;

 import android.view.View;

 import android.view.ViewGroup;

 import android.widget.TextView;

 import ggcomic.rabbit.lx.fragmenthideandshow.R;

 /**

  * Created by Lx on 2016/9/20.

  */

 public class MyFragment extends Fragment {

     private TextView tv;

     @Nullable

     @Override

     public View onCreateView(LayoutInflater inflater, @Nullable ViewGroup container, @Nullable Bundle savedInstanceState) {

         View view = inflater.inflate(R.layout.fragment_page, null);

         tv = (TextView) view.findViewById(R.id.tv);

         Bundle bundle = getArguments();

         int tag = bundle.getInt("tag");

         switch (tag) {

             case 1:

                 tv.setText("推荐");

                 break;

             case 2:

                 tv.setText("书架");

                 break;

             case 3:

                 tv.setText("分类");

                 break;

             case 4:

                 tv.setText("更多");

                 break;

         }

         return view;

     }

 }
最主要的就是在MainActivity中的处理:
 package ggcomic.rabbit.lx.fragmenthideandshow.main;

 import android.support.v4.app.Fragment;

 import android.support.v4.app.FragmentManager;

 import android.support.v4.app.FragmentTransaction;

 import android.support.v7.app.AppCompatActivity;

 import android.os.Bundle;

 import android.view.View;

 import android.widget.LinearLayout;

 import android.widget.RadioButton;

 import ggcomic.rabbit.lx.fragmenthideandshow.R;

 import ggcomic.rabbit.lx.fragmenthideandshow.fragment.MyFragment;

 public class MainActivity extends AppCompatActivity implements View.OnClickListener {

     private Fragment currentFragment=new Fragment();

     private LinearLayout layout;

     private RadioButton rb_tj,rb_sj,rb_fl, rb_gd;

     private Fragment fragment_tj,fragment_sj,fragment_fl, fragment_gd;

     private FragmentManager manager;

     @Override

     protected void onCreate(Bundle savedInstanceState) {

         super.onCreate(savedInstanceState);

         setContentView(R.layout.activity_main);

         initView();

         initFragment();

         initEvent();

         showFragment(fragment_tj);

     }

     /**

      * 初始化监听

      */

     private void initEvent() {

         rb_tj.setOnClickListener(this);

         rb_sj.setOnClickListener(this);

         rb_fl.setOnClickListener(this);

         rb_gd.setOnClickListener(this);

     }

     /**

      * 初始化Fragment

      */

     private void initFragment() {

         manager = getSupportFragmentManager();

         Bundle bundle = new Bundle();

         bundle.putInt("tag", 1);

         fragment_tj = new MyFragment();

         fragment_tj.setArguments(bundle);

         bundle = new Bundle();

         bundle.putInt("tag", 2);

         fragment_sj = new MyFragment();

         fragment_sj.setArguments(bundle);

         bundle = new Bundle();

         bundle.putInt("tag", 3);

         fragment_fl = new MyFragment();

         fragment_fl.setArguments(bundle);

         bundle = new Bundle();

         bundle.putInt("tag", 4);

         fragment_gd = new MyFragment();

         fragment_gd.setArguments(bundle);

     }

     /**

      * 展示Fragment

      */

     private void showFragment(Fragment fragment) {

         if (currentFragment!=fragment) {

             FragmentTransaction transaction = manager.beginTransaction();

             transaction.hide(currentFragment);

             currentFragment = fragment;

             if (!fragment.isAdded()) {

                 transaction.add(R.id.layout_main_fragment, fragment).show(fragment).commit();

             } else {

                 transaction.show(fragment).commit();

             }

         }

     }

     /**

      * 初始化控件

      */

     private void initView() {

         rb_tj = (RadioButton) findViewById(R.id.rb_tj);

         rb_sj = (RadioButton) findViewById(R.id.rb_sj);

         rb_fl = (RadioButton) findViewById(R.id.rb_fl);

         rb_gd = (RadioButton) findViewById(R.id.rb_gd);

     }

     @Override

     public void onClick(View v) {

         switch (v.getId()) {

             case R.id.rb_tj:

                 showFragment(fragment_tj);

                 break;

             case R.id.rb_sj:

                 showFragment(fragment_sj);

                 break;

             case R.id.rb_fl:

                 showFragment(fragment_fl);

                 break;

             case R.id.rb_gd:

                 showFragment(fragment_gd);

                 break;

         }

     }

 }
可以看到,我们定义了一个全局Fragment,currentFragment,用来标示当前是哪一个Fragment。其中initFragment()方法只是为了初始化所有的Fragment,相信大家也看得出来,最主要的方法是showFragment(),下面我就来说一下这个方法:
 /**

  71      * 展示Fragment

  72      */

  73     private void showFragment(Fragment fragment) {

  74         if (currentFragment!=fragment) {

  75             FragmentTransaction transaction = manager.beginTransaction();

  76             transaction.hide(currentFragment);

  77             currentFragment = fragment;

  78             if (!fragment.isAdded()) {

  79                 transaction.add(R.id.layout_main_fragment, fragment).show(fragment).commit();

  80             } else {

  81                 transaction.show(fragment).commit();

  82             }

  83         }

  84     }
这个方法主要完成Fragment的隐藏和展示,也就是完成Fragment的切换功能。可以看到,在方法的开始我们先判断一下传入的Fragment是不是当前currentFragment,如果不是的话,我们就隐藏currentFragment,并且将我们传入的Fragment赋值给currentFragment。然后再调用Fragment#isAdded()方法,判断传入的Fragment是否已经被add()过了,如果已经被add()过了,那么就直接FragmentTransaction#show()并且commit()即可,否则的话先add()当前fragment,然后在show()展示出来。这样我们就成功实现了保存加载过的Fragment中的内容了(其实不算保存,只是不让加载过的内容销毁),是不是很简单呢?快下一个小Demo尝试一下吧~
Android中Fragment的Hide和Show的更多相关文章
- Android中Fragment和ViewPager那点事儿(仿微信APP)
在之前的博文<Android中使用ViewPager实现屏幕页面切换和引导页效果实现>和<Android中Fragment的两种创建方式>以及<Android中Fragm ...
- Android中Fragment与Activity之间的交互(两种实现方式)
(未给Fragment的布局设置BackGound) 之前关于Android中Fragment的概念以及创建方式,我专门写了一篇博文<Android中Fragment的两种创建方式>,就如 ...
- Android 中Fragment使用
Android 中Fragment使用 public class MainActivity extends Activity { public static String[] array = { &q ...
- Android中Fragment的两种创建方式
fragment是Activity中用户界面的一个行为或者是一部分.你可以在一个单独的Activity上把多个Fragment组合成为一个多区域的UI,并且可以在多个Activity中再使用.你可以认 ...
- Android中fragment之间和Activity的传值、切换
功能介绍:通过一个activity下方的三个按钮,分别是发送消息(sendButton).聊天记录(chatButton).常用语(commonButton).当单击按钮是,来切换上方的fragmen ...
- android中Fragment的使用
android中的Fragment跟网页中的iframe很像,用于在界面上嵌入局部动态内容,我的描述可能不准确,只是我的理解吧 创建Fragment很简单,在Android Studio中是这么创建的 ...
- Android中Fragment生命周期和基本用法
1.基本概念 1. Fragment是什么? Fragment是可以让你的app纵享丝滑的设计,如果你的app想在现在基础上性能大幅度提高,并且占用内存降低,同样的界面Activity占用内存比Fra ...
- Android中Fragment+ViewPager的配合使用
官方推荐 ViewPager与Fragment一起使用,可以更加方便的管理每个Page的生命周期,这里有标准的适配器实现用于ViewPager和Fragment,涵盖最常见的用例.FragmentPa ...
- Android中Fragment的简单介绍
Android是在Android 3.0 (API level 11)引入了Fragment的,中文翻译是片段或者成为碎片(个人理解),可以把Fragment当成Activity中的模块,这个模块有自 ...
随机推荐
- c# vue 跨域get post cookie等问题
背景介绍: 开发微信公共号时前后端分离,后台用C#开发,前端使用vue框架,数据采用axios传输 具体问题: 1:前后端分离造成的跨域访问问题 2:跨域后cookie传输和设置问题 解决方案: 1: ...
- 160621、Java注解教程及自定义注解
Java注解提供了关于代码的一些信息,但并不直接作用于它所注解的代码内容.在这个教程当中,我们将学习Java的注解,如何定制注解,注解的使用以及如何通过反射解析注解. Java1.5引入了注解,当前许 ...
- Android Log工具之Luffy
Luffy Luffy可以在手机端实时显示你App中的logcat输出.并且具有Log等级与Tag过滤功能.另外Luffy还支持收集Log,保存Log和查看本地log功能. 使用方法 1.Gradle ...
- Pycharm创建Django admin用户名和密码
1.Tools>Run manage.py Task 2.依次输入: makemigrations migrate createsuperuser 如: manage.py@production ...
- 为何不分类---失效的google image
w满屏的框架,甚至翻页了还是框架,起始user是想看下bootstrap在框架出来前是什么东西.
- MySQL前后台交互登录系统设计
1.首先我们做一个前台的注册页面 <!DOCTYPE html> <html> <head> <meta charset="UTF-8"& ...
- centos6.5关闭防火墙命令
1.永久性生效,重启后不会复原 开启: chkconfig iptables on 关闭: chkconfig iptables off 2.即时生效,重启后复原 开启: service iptabl ...
- PHP的几种排序方法
<?php /** * PHP最常用的四个排序方法及二种查找方法 * 下面的排序方法全部都通过测试 * auther : soulence * date : 2015/06/20 */ //PH ...
- 【我的Android进阶之旅】解决SVN Cleanup错误: Failed to run the WC DB work queue associated with
错误描述 在Android Studio中点击VCS向下箭头使用SVN Update功能更新代码的时候,报错如下所示: 错误描述信息: Error:svn: E155037: Previous ope ...
- 转载一篇pandas和,mysql
http://pandas.pydata.org/pandas-docs/stable/comparison_with_sql.html#compare-with-sql-join http://bl ...