Redis多机多节点集群实验
第一步:环境准备
我们搞两台虚拟机
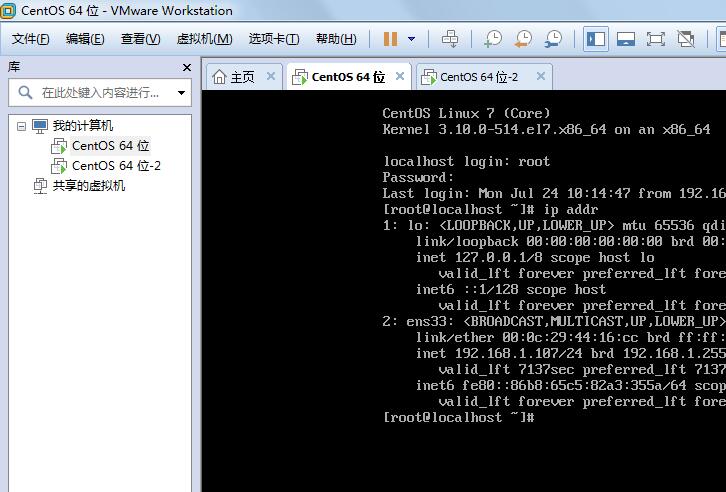
局域网IP 分别是 192.168.1.109和192.168.1.110
我们约定把192.168.1.109作为集群控制端,需要安装redis-trib.rb
第二步:安装Redis
前面已经安装过了 不解释,
192.168.1.109虚拟机里,Reids安装包里有个集群工具,要复制到/usr/local/bin里去
cp redis-3.2.9/src/redis-trib.rb /usr/local/bin
第三步:修改配置,创建节点
首先我们在192.168.1.109虚拟机里创建三个节点,端口分别是7001,7002,7003
我们先在root目录下新建一个redis_cluster目录,然后该目录下再创建3个目录,
分别是7001,7002,7003,用来存redis配置文件;
这里我们要使用redis集群,要先修改redis的配置文件redis.conf
mkdir redis_cluster 新建目录
[root@localhost ~]# cd redis_cluster/
[root@localhost redis_cluster]# mkdir 7001 7002 7003
[root@localhost redis_cluster]# ll
总用量 0
drwxr-xr-x. 2 root root 6 7月 27 19:49 7001
drwxr-xr-x. 2 root root 6 7月 27 19:49 7002
drwxr-xr-x. 2 root root 6 7月 27 19:49 7003
[root@localhost redis_cluster]#
先复制一份配置文件到7001目录下
[root@localhost redis_cluster]# cd
[root@localhost ~]# cp redis-3.2.9/redis.conf redis_cluster/7001/
我们修改下这个配置文件
vi redis_cluster/7001/redis.conf
修改一下几个
port 7001 //六个节点配置文件分别是7001-7003
bind 192.168.1.109 //默认ip为127.0.0.1 需要改为其他节点机器可访问的ip 否则创建集群时无法访,和单机集群有区别
daemonize yes //redis后台运行
pidfile /var/run/redis_7001.pid //pidfile文件对应7001-7003
cluster-enabled yes //开启集群
cluster-config-file nodes_7001.conf //保存节点配置,自动创建,自动更新对应7001-7003
cluster-node-timeout 5000 //集群超时时间,节点超过这个时间没反应就断定是宕机
appendonly yes //存储方式,aof,将写操作记录保存到日志中
7001下的修改完后,我们把7001下的配置分别复制到7002-7003 然后对应的再修改下配置即可;
[root@localhost ~]# cp redis_cluster/7001/redis.conf redis_cluster/7002/
[root@localhost ~]# cp redis_cluster/7001/redis.conf redis_cluster/7003/
[root@localhost ~]# vi redis_cluster/7002/redis.conf
[root@localhost ~]# vi redis_cluster/7003/redis.conf
[root@localhost ~]# vi redis_cluster/7004/redis.conf
编辑后面5个配置文件,把 port ,pidfile,cluster-config-file 分别修改下即可;
同理 192.168.1.110机器,也搞一个redis_cluster目录,然后再新建7004,7005,7006目录,
复制三份配置文件 其他一样,就端口和bind地址改下即可;这里不啰嗦了;
第四步:启动两台机器的六个节点
192.168.1.109机器
[root@localhost ~]# /usr/local/redis/bin/redis-server redis_cluster/7001/redis.conf
[root@localhost ~]# /usr/local/redis/bin/redis-server redis_cluster/7002/redis.conf
[root@localhost ~]# /usr/local/redis/bin/redis-server redis_cluster/7003/redis.conf
[root@localhost ~]# ps -ef | grep redis
root 2242 1 0 19:55 ? 00:00:00 /usr/local/redis/bin/redis-server 192.168.1.109:7001 [cluster]
root 2252 1 0 19:59 ? 00:00:00 /usr/local/redis/bin/redis-server 192.168.1.109:7002 [cluster]
root 2256 1 0 19:59 ? 00:00:00 /usr/local/redis/bin/redis-server 192.168.1.109:7003 [cluster]
root 2260 2214 0 19:59 pts/0 00:00:00 grep --color=auto redis
192.168.1.110机器
[root@localhost ~]# /usr/local/redis/bin/redis-server redis_cluster/7004/redis.conf
[root@localhost ~]# /usr/local/redis/bin/redis-server redis_cluster/7005/redis.conf
[root@localhost ~]# /usr/local/redis/bin/redis-server redis_cluster/7006/redis.conf
[root@localhost ~]# ps -ef | grep redis
root 2347 1 0 20:31 ? 00:00:00 /usr/local/redis/bin/redis-server 192.168.1.110:7004 [cluster]
root 2351 1 0 20:31 ? 00:00:00 /usr/local/redis/bin/redis-server 192.168.1.110:7005 [cluster]
root 2355 1 0 20:31 ? 00:00:00 /usr/local/redis/bin/redis-server 192.168.1.110:7006 [cluster]
root 2363 2270 0 20:32 pts/0 00:00:00 grep --color=auto redis
说明都启动OK
第五步:设置防火墙,开放集群端口
两台机器的防火墙我们直接关掉
systemctl stop firewalld.service
第六步:创建集群
192.168.1.109机器作为集群控制端
redis官方提供了redis-trib.rb工具,第一步里已经房到里bin下 ;
但是在使用之前 需要安装ruby,以及redis和ruby连接
yum -y install ruby ruby-devel rubygems rpm-build
gem install redis
redis-trib.rb create --replicas 1 192.168.1.109:7001 192.168.1.109:7002 192.168.1.109:7003 192.168.1.110:7004 192.168.1.110:7005 192.168.1.110:7006
创建集群
>>> Creating cluster
>>> Performing hash slots allocation on 6 nodes...
Using 3 masters:
192.168.1.109:7001
192.168.1.110:7004
192.168.1.109:7002
Adding replica 192.168.1.110:7005 to 192.168.1.109:7001
Adding replica 192.168.1.109:7003 to 192.168.1.110:7004
Adding replica 192.168.1.110:7006 to 192.168.1.109:7002
M: 08d5f59fa053d79e3cc71fc5bb8759bec191ff41 192.168.1.109:7001
slots:0-5460 (5461 slots) master
M: 4bda83bae0aeb9988aeb7d34eff2cc75226a0edd 192.168.1.109:7002
slots:10923-16383 (5461 slots) master
S: b782f527ead6f63c8278c1b0713b92a9fd4fe995 192.168.1.109:7003
replicates 86c8cb7975f85a859147fef9672d44b24c5a718b
M: 86c8cb7975f85a859147fef9672d44b24c5a718b 192.168.1.110:7004
slots:3671,5461-10922,11797,15924 (5465 slots) master
S: 2d44accacb1bb4cd1eef5f98f7af64a43f01544d 192.168.1.110:7005
replicates 08d5f59fa053d79e3cc71fc5bb8759bec191ff41
S: 2c42433953bcd3ad47015d9f8ac72e7a7cf447c5 192.168.1.110:7006
replicates 4bda83bae0aeb9988aeb7d34eff2cc75226a0edd
Can I set the above configuration? (type 'yes' to accept):
从运行结果看 主节点就是7001 7004 7002 从节点分别是7005 7003 7006
7001分配到的哈希槽是 0-5460
7004分配到的哈希槽是 5461-10922
7002分配到的哈希槽是 10923-16383
最后问我们是否接受上面的设置,输入yes 就表示接受,我们输入yes
然后显示:
>>> Nodes configuration updated
>>> Assign a different config epoch to each node
>>> Sending CLUSTER MEET messages to join the cluster
Waiting for the cluster to join...
>>> Performing Cluster Check (using node 192.168.1.109:7001)
M: d06aebf92e99169864893decc371e34cd321640f 192.168.1.109:7001
slots:0-5460 (5461 slots) master
1 additional replica(s)
M: 189dc189dd743f9fc61c439d44cc3379d8cbe535 192.168.1.110:7004
slots:5461-10922 (5462 slots) master
1 additional replica(s)
S: fe2b0038304c02bc807c38fe006338bd5dd85a70 192.168.1.110:7006
slots: (0 slots) slave
replicates 25a6be3b62fa675a3835e6c62641c3784ec62257
M: 25a6be3b62fa675a3835e6c62641c3784ec62257 192.168.1.109:7002
slots:10923-16383 (5461 slots) master
1 additional replica(s)
S: df28512d63af4a3e6dc1739e1c267ba916f3a579 192.168.1.110:7005
slots: (0 slots) slave
replicates d06aebf92e99169864893decc371e34cd321640f
S: aaa3310d3c30cc9a7f235db27e3c395a5e180a52 192.168.1.109:7003
slots: (0 slots) slave
replicates 189dc189dd743f9fc61c439d44cc3379d8cbe535
[OK] All nodes agree about slots configuration.
>>> Check for open slots...
>>> Check slots coverage...
[OK] All 16384 slots covered.
显示配置哈希槽,以及集群创建成功,可以用了;
第七步:集群数据测试
我们先连接任意一个节点,然后添加一个key:
redis-cli是redis默认的客户端工具,启动时加上`-c`参数,`-p`指定端口,就可以连接到集群。
这里还得加-h 指定机器IP
连接任意一个节点端口:
[root@localhost ~]# /usr/local/redis/bin/redis-cli -h 192.168.1.109 -c -p 7002
192.168.1.109:7002>
连接到7002节点
192.168.1.109:7002> set xxx 'fadfa'
-> Redirected to slot [4038] located at 192.168.1.109:7001
OK
前面说过Redis Cluster值分配规则,所以分配key的时候,它会使用CRC16(‘my_name’)%16384算法,来计算,将这个key 放到哪个节点,这里分配到了4038slot 就分配到了7001(0-5460)这个节点上。所以有:
Redirected to slot [4038] located at 192.168.1.109:7001
我们从其他集群节点 ,都可以获取到数据
[root@localhost ~]# /usr/local/redis/bin/redis-cli -h 192.168.1.110 -c -p 7005
192.168.1.110:7005>
192.168.1.110:7005> get xxx
-> Redirected to slot [4038] located at 192.168.1.109:7001
"fadfa"
192.168.1.109:7001>
第八步:集群宕机测试
假如我们干掉一个节点,比如7002 这个主节点
[root@localhost ~]# ps -ef | grep redis
root 9799 1 0 21:33 ? 00:00:02 /usr/local/redis/bin/redis-server 192.168.1.109:7001 [cluster]
root 9803 1 0 21:33 ? 00:00:02 /usr/local/redis/bin/redis-server 192.168.1.109:7002 [cluster]
root 9807 1 0 21:33 ? 00:00:03 /usr/local/redis/bin/redis-server 192.168.1.109:7003 [cluster]
root 9830 2214 0 21:53 pts/0 00:00:00 grep --color=auto redis
[root@localhost ~]# kill -9 9803
[root@localhost ~]# ps -ef | grep redis
root 9799 1 0 21:33 ? 00:00:02 /usr/local/redis/bin/redis-server 192.168.1.109:7001 [cluster]
root 9807 1 0 21:33 ? 00:00:03 /usr/local/redis/bin/redis-server 192.168.1.109:7003 [cluster]
root 9832 2214 0 21:54 pts/0 00:00:00 grep --color=auto redis
[root@localhost ~]#
然后我们查看下集群情况
[root@localhost ~]# redis-trib.rb check 192.168.1.109:7001
>>> Performing Cluster Check (using node 192.168.1.109:7001)
M: d06aebf92e99169864893decc371e34cd321640f 192.168.1.109:7001
slots:0-5460 (5461 slots) master
1 additional replica(s)
M: 189dc189dd743f9fc61c439d44cc3379d8cbe535 192.168.1.110:7004
slots:5461-10922 (5462 slots) master
1 additional replica(s)
M: fe2b0038304c02bc807c38fe006338bd5dd85a70 192.168.1.110:7006
slots:10923-16383 (5461 slots) master
0 additional replica(s)
S: df28512d63af4a3e6dc1739e1c267ba916f3a579 192.168.1.110:7005
slots: (0 slots) slave
replicates d06aebf92e99169864893decc371e34cd321640f
S: aaa3310d3c30cc9a7f235db27e3c395a5e180a52 192.168.1.109:7003
slots: (0 slots) slave
replicates 189dc189dd743f9fc61c439d44cc3379d8cbe535
[OK] All nodes agree about slots configuration.
>>> Check for open slots...
>>> Check slots coverage...
[OK] All 16384 slots covered.
我们发现 7006本来是从节点,由于他对应的主节点挂了,就自动变成主节点master,所有会有最后一个说明
All 16384 slots covered. 所有哈希槽都可覆盖了; 集群可以正常使用;
假如我们把7006也干掉,试试看
[root@localhost ~]# ps -ef | grep redis
root 2578 1 0 21:33 ? 00:00:03 /usr/local/redis/bin/redis-server 192.168.1.110:7004 [cluster]
root 2582 1 0 21:33 ? 00:00:03 /usr/local/redis/bin/redis-server 192.168.1.110:7005 [cluster]
root 2586 1 0 21:33 ? 00:00:03 /usr/local/redis/bin/redis-server 192.168.1.110:7006 [cluster]
root 2623 2270 0 21:56 pts/0 00:00:00 grep --color=auto redis
[root@localhost ~]# kill -9 2586
[root@localhost ~]# ps -ef | grep redis
root 2578 1 0 21:33 ? 00:00:03 /usr/local/redis/bin/redis-server 192.168.1.110:7004 [cluster]
root 2582 1 0 21:33 ? 00:00:03 /usr/local/redis/bin/redis-server 192.168.1.110:7005 [cluster]
root 2625 2270 0 21:56 pts/0 00:00:00 grep --color=auto redis
[root@localhost ~]#
[root@localhost ~]# redis-trib.rb check 192.168.1.109:7001
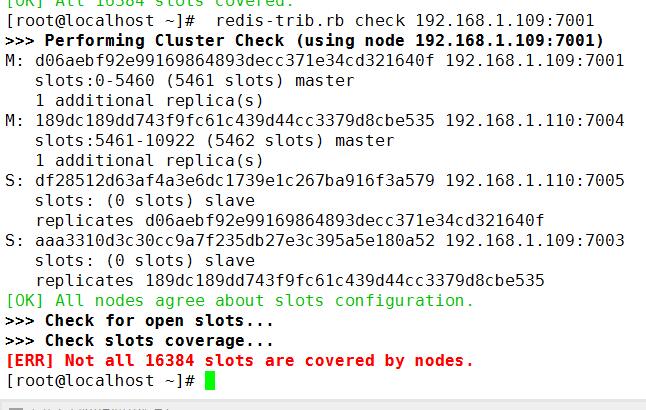
这里我们发现 出事了,因为主从节点都挂了 所以有一部分哈希槽没得分配,最后一句
[ERR] Not all 16384 slots are covered by nodes. 没有安全覆盖;
所以不能正常使用集群
Redis多机多节点集群实验的更多相关文章
- Redis单机多节点集群实验
第一步:安装Redis 前面已经安装过了 不解释, Reids安装包里有个集群工具,要复制到/usr/local/bin里去 cp redis-3.2.9/src/redis-trib.rb /usr ...
- 峰Redis学习(10)Redis 集群(单机多节点集群和多机多节点集群)
单机多节点集群:参考博客:http://blog.java1234.com/blog/articles/326.html 多机多节点集群:参考博客:http://blog.java1234.com/b ...
- RabbitMQ-rabbitmqctl多机多节点和单机多节点集群搭建(五)
准备 1.准备3台物理机 我这里通过本地机和2台虚拟模拟我是mac通过(Parallel Desktop 实现) 2.按照签名的liux安装步骤在3台机器都安装rabiitMq 3.将任意一节点的co ...
- Redis 实战篇之搭建集群
Redis 集群简介# Redis Cluster 即 Redis 集群,是 Redis 官方在 3.0 版本推出的一套分布式存储方案.完全去中心化,由多个节点组成,所有节点彼此互联.Redis 客户 ...
- redis主从同步故障切换及集群配置
一.redis是一中高性能的缓存数据库, 原理:1. 从服务器向主服务器发送 SYNC 命令.2. 接到 SYNC 命令的主服务器会调用BGSAVE 命令,创建一个 RDB 文件,并使用缓冲区记录接下 ...
- redis主从架构,分片集群详解
写在前面:这篇笔记有点长,如果你认真看完,收获会不少,如果你只是忘记了相关命令,请翻到末尾. redis的简单介绍: 一个提供多种数据类类型储存,整个系统都在内存中运行的, 定期通过异步的方式把数据刷 ...
- Redis之高可用、集群、云平台搭建
原文:Redis之高可用.集群.云平台搭建 文章大纲 一.基础知识学习二.Redis常见的几种架构及优缺点总结三.Redis之Redis Sentinel(哨兵)实战四.Redis之Redis Clu ...
- Redis高可用-主从,哨兵,集群
主从复制 Master-Slave主从概念 同时运行多个redis服务端,其中一个作为主(master),其他的一个或多个作为从(slave),主从之间通过网络进行通讯,slave通过复制master ...
- redis(二)redis的主从模式和集群模式
redis(二)redis的主从模式和集群模式 主从模式 集群模式 主从模式 redis的主从模式,指的是针对多台redis实例时候,只存在一台主服务器master,提供读写的功能,同时存在依附在这台 ...
随机推荐
- 如何在Window下安装node\npm\cnpm,并安装vue.js,创建项目
1.安装node.js node.js的官方地址为:https://nodejs.org/en/download/. 根据windows版本后,选择要下载的安装包,下载完毕,按照windows一般应用 ...
- Js的那些事
先说说 var array = new Array(10); 和 var array = Array.apply(null, {length:10});这两个有啥区别,乍一看两个都是生成长度是10的 ...
- Python 通用爬虫 和讯博客 scrapy
目标站点需求分析 通用爬虫,获取和讯博客所有博文 涉及的库 scrapy,re,requests,mysql URL RULE 解析单页源码 保存到数据库 结果
- Android开发之字体设置
默认字体 Android SDK自带了四种字体:"normal"“monospace",“sans”, “serif”,如下: 字体 看这四兄弟长的还是蛮像,我是看不 ...
- Codeforces 809E Surprise me! [莫比乌斯反演]
洛谷 Codeforces 非常套路的一道题,很适合我在陷入低谷时提升信心-- 思路 显然我们需要大力推式子. 设\(p_{a_i}=i\),则有 \[ \begin{align*} n(n-1)an ...
- 《剑指offer》第一个只出现一次的字符
本题来自<剑指offer> 反转链表 题目: 思路: C++ Code: Python Code: 总结:
- jenkins命令行修改时间
前言:有时jenkins上的时间和系统时间不同步,但是jenkins又在运行状态,不可重启修改 方法:在jenkins界面上,输入命令 system.setProperty('org.apache.c ...
- 饮冰三年-人工智能-Python-19 Python网络编程
Socket:套接字.作用:我们只需要安照socket的规定去编程,就不需要深入理解tcp/udp协议也可以实现 1:TCP协议 1.1 客户端服务端循环收发消息 # 1:引入stock模块(导包) ...
- Jmeter性能测试之Monitor监控(四)
使用Jmeter(该篇文章使用的版本最高为3.1, 3.1+的版本存在兼容性问题)做性能测试, 要监控服务器硬件资源消耗情况, 可以使用扩展插件完成. 1. 服务端插件下载agent, 点击这里 , ...
- zt 正则
http://deerchao.net/tutorials/regex/regex.htm 正则表达式30分钟入门教程 版本:v2.3.5 (2017-6-12) 作者:deerchao 转载 ...