Spring Cloud 快速入门
Spring Cloud快速入门
代码地址:
https://gitee.com/gloryxu/spring-cloud-test
EureKa:服务注册中心
添加依赖
     <dependency>

            <groupId>org.springframework.cloud</groupId>

            <artifactId>spring-cloud-starter-netflix-eureka-server</artifactId>

        </dependency>
开启Eureka Server
@EnableEurekaServer

@SpringBootApplication

public class EurekaApplication {

    public static void main(String[] args) {

        SpringApplication.run(EurekaApplication.class, args);

    }

}
配置
#设置tomcat服务端口号

server.port=

# 本地调试环境下关闭自我保护机制

eureka.server.enable-self-preservation=false

# 清理间隔时间,单位为毫秒

eureka.server.eviction-interval-timer-in-ms=

#设置服务名称

spring.application.name=eureka-service

eureka.instance.hostname=localhost

#注册中心不需要注册自己

eureka.client.register-with-eureka=false

#注册中心不需要去发现服务

eureka.client.fetch-registry=false

#设置服务注册中心的URL

eureka.client.serviceUrl.defaultZone=http://${eureka.instance.hostname}:${server.port}/eureka
启动成功

2.创建一个服务提供者
添加依赖
<dependency>

            <groupId>org.springframework.cloud</groupId>

            <artifactId>spring-cloud-starter-netflix-eureka-client</artifactId>

        </dependency>
@EnableDiscoveryClient // 声明这是一个Eureka Client

@SpringBootApplication

public class Server1Application {

    public static void main(String[] args) {

        SpringApplication.run(Server1Application.class, args);

    }

}
添加配置
server.port=

#设置服务名

spring.application.name=hello-service

#设置服务注册中心的URL,本服务要向该服务注册中心注册自己

eureka.client.serviceUrl.defaultZone=http://localhost:8101/eureka
添加Controller
@RestController

public class HelloController {

    Logger logger = LoggerFactory.getLogger(HelloController.class);

    @RequestMapping("/hello")

    public String hello() {

        return "hello";

    }

}
启动注册成功


3.创建一个消费者
添加依赖
    <dependency>

            <groupId>org.springframework.cloud</groupId>

            <artifactId>spring-cloud-starter-netflix-eureka-client</artifactId>

        </dependency>

        <dependency>

            <groupId>org.springframework.cloud</groupId>

            <artifactId>spring-cloud-starter-openfeign</artifactId>

        </dependency>
LoadBalanced 方式可实现负载均衡
@EnableFeignClients

@EnableDiscoveryClient

@SpringBootApplication

public class ConsumerApplication {

    @Bean

    @LoadBalanced

    public RestTemplate restTemplate() {

        return new RestTemplate();

    }

    public static void main(String[] args) {

        SpringApplication.run(ConsumerApplication.class, args);

    }

}
添加配置
server.port=

spring.application.name=hello-consumer

eureka.client.serviceUrl.defaultZone=http://localhost:8101/eureka/
声明Feign方式 ,value为注册的服务名
@FeignClient(value = "hello-service")

public interface HelloService {

    @RequestMapping(value = "/hello")

    String hello();

}
以下以两种方式调用服务提供者,一种是以Rest方式,另一种以Feign方式
@RestController
public class ConsumerController { Logger logger = LoggerFactory.getLogger(ConsumerController.class); @Autowired
private RestTemplate restTemplate;
@Autowired
HelloService helloService; @GetMapping("/getserver")
public String getserver() {
String xx=restTemplate.getForObject("http://hello-service/hello", String.class);
return "consumer finish result:"+xx;
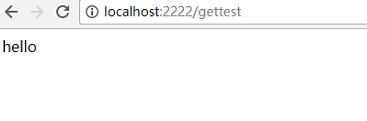
} @GetMapping("/gettest")
public String gettest(){
return helloService.hello();
}
}
启动


4.创建Zuul路由
添加依赖
<dependency>

            <groupId>org.springframework.cloud</groupId>

            <artifactId>spring-cloud-starter-netflix-eureka-client</artifactId>

        </dependency>

        <dependency>

            <groupId>org.springframework.cloud</groupId>

            <artifactId>spring-cloud-starter-netflix-zuul</artifactId>

        </dependency>
加入注解,以便注册到注册中心
@EnableZuulProxy

@SpringBootApplication

public class ZuulApplication {

    public static void main(String[] args) {

        SpringApplication.run(ZuulApplication.class, args);

    }

}
配置路由,以下是以服务的方式调用
spring.application.name=eureka-zuul

server.port=

zuul.routes.hello-service.path=/hello-service/**

zuul.routes.hello-service.serviceId=hello-service

eureka.client.serviceUrl.defaultZone=http://localhost:8101/eureka/
启动 注册成功,调用成功


Spring Cloud 快速入门的更多相关文章
- spring boot入门教程——Spring Boot快速入门指南
Spring Boot已成为当今最流行的微服务开发框架,本文是如何使用Spring Boot快速开始Web微服务开发的指南,我们将使创建一个可运行的包含内嵌Web容器(默认使用的是Tomcat)的可运 ...
- Spring Boot 快速入门
Spring Boot 快速入门 http://blog.csdn.net/xiaoyu411502/article/details/47864969 今天给大家介绍一下Spring Boot MVC ...
- Spring Boot快速入门(二):http请求
原文地址:https://lierabbit.cn/articles/4 一.准备 postman:一个接口测试工具 创建一个新工程 选择web 不会的请看Spring Boot快速入门(一):Hel ...
- Spring Cloud Gateway入门
1.什么是Spring Cloud GatewaySpring Cloud Gateway是Spring官方基于Spring 5.0,Spring Boot 2.0和Project Reactor等技 ...
- Spring Cloud Alibaba入门实战之nacos(一)
Spring Cloud Alibaba入门实战之nacos(一) 前情介绍 Spring Cloud Alibaba 是阿里巴巴提供的新一代的微服务解决方案,相信会有越来越多采用微服务架构的公司 ...
- Spring Cloud 从入门到精通
Spring Cloud 是一套完整的微服务解决方案,基于 Spring Boot 框架,准确的说,它不是一个框架,而是一个大的容器,它将市面上较好的微服务框架集成进来,从而简化了开发者的代码量. 本 ...
- 主流微服务一站式解决方案Spring Cloud Alibaba入门看这篇就足够了
学习路线 **本人博客网站 **IT小神 www.itxiaoshen.com 生态概述 架构演进 什么是微服务 https://martinfowler.com/microservices/ Mic ...
- Spring Cloud Ribbon入门
一.简介 Spring Cloud Ribbon是一个基于Http和TCP的客户端负载均衡工具,它是基于Netflix Ribbon实现的.它不像服务注册中心.配置中心.API网关那样独立部署,但是它 ...
- Spring Boot 快速入门 史上最简单
1.Spring Boot 概述 Spring Boot 是所有基于 Spring 开发的项目的起点.Spring Boot 的设计是为了让你尽可能快的跑起来 Spring 应用程序并且尽可能减少你的 ...
随机推荐
- How to Change Error Message Colors in Windows 10 PowerShell Console
While this was a really easy way to change some of the settings, what if you want to do more extensi ...
- Java基础 -- 深入理解泛型
一般的类和方法,只能使用具体的类型:要么是基本类型,要么是自定义的类.如果要编写可以应用于多种类型的代码,这种刻板的限制对代码的束缚就会很大. 而泛型很好的解决了这个问题,这也是Java SE5的重大 ...
- CentOS安装glibc-2.14
CentOS安装glibc-2.14 到http://ftp.gnu.org/gnu/glibc/下载glibc-2.14.tar.gz wget https://ftp.gnu.org/gnu/ ...
- Springboot-async(异步)初识
通过@Async注解实现一个简单的异步任务处理 首先,假设一个全自动化的工厂车间每天需要开启四台互不影响的机器开关来完成生产量,于是车间主任A委派“同步甲”和“异步乙”轮 流完成每天打开机器开关的任务 ...
- flask 基础语法学习
回顾 #6行flask from flask import Flask app = Flask(__name__) @app.route("/") def index(): ret ...
- postgreSql 基本操作总结
0. 启动pgsl数据库 pg_ctl -D /xx/pgdata start 1. 命令行登录数据库 1 psql -U username -d dbname -h hostip -p po ...
- 并发编程之volatile
用代码描述这么一个场景,在main方法中开启两个线程,其中一个线程t1往list里循环添加元素,另一个线程t2监听list中的size,当size等于5时,t2线程结束,t1线程继续执行,直到循环结束 ...
- JGUI源码:实现蒙版层显示(18)
有的时候需要显示一个蒙版层,蒙版层显示的主要原理是在指定元素比如div上创建一个子元素div,设置absolute.宽高100%.设置z-index置于顶层,设置半透明效果,fadein,fadeou ...
- (一)初探Maven之本地安装与配置本地仓库
引言: 大多数IDE都会自带maven,如果你打开c盘用户目录,你会看到一个.m2文件这就是编译器自带maven的仓库父目录,但由于其在C盘和其他原因,一般我们会自己重新安装mave ...
- Python的一些高级特性以及反序列化漏洞
0x01 简述 文章主要记录一下python高级特性以及安全相关的问题 python作为脚本语言,其作为高级语言是由c语言开发的,关于python的编译和链接可以看向这里https://github. ...