Springboot集成Swagger操作步骤
1、问题描述
随着互联网技术的发展,现在的网站架构基本都由原来的后端渲染,变成了:前端渲染、先后端分离的形态,而且前端技术和后端技术在各自的道路上越走越远。 前端和后端的唯一联系,变成了API接口;API文档变成了前后端开发人员联系的纽带,变得越来越重要,swagger就是一款让你更好的书写API文档的框架,而且swagger可以完全模拟http请求,入参出参和实际情况差别几乎为零。
没有API文档工具之前,大家都是手写API文档的(维护起来相当困难),在什么地方书写的都有,有在confluence上写的,有在对应的项目目录下readme.md上写的,每个公司都有每个公司的玩法,无所谓好坏。但是能称之为“框架”的,估计也只有swagger了
2、操作步骤
2.1配置pom.xml
<parent>

       <groupId>org.springframework.boot</groupId>

       <artifactId>spring-boot-starter-parent</artifactId>

       <version>1.4.0.RELEASE</version>

   </parent>

  <properties>

    <project.build.sourceEncoding>UTF-8</project.build.sourceEncoding>

  </properties>

  <dependencies>

  	<!-- junit -->

    <dependency>

      <groupId>junit</groupId>

      <artifactId>junit</artifactId>

      <scope>test</scope>

    </dependency>

    <!-- spring boot -->

    <dependency>

          <groupId>org.springframework.boot</groupId>

          <artifactId>spring-boot-starter-web</artifactId>

    </dependency>

    <!-- swagger -->

    <dependency>

		<groupId>io.springfox</groupId>

		<artifactId>springfox-swagger2</artifactId>

		<version>2.5.0</version>

	</dependency>

	<!-- swagger-ui -->

	<dependency>

		<groupId>io.springfox</groupId>

		<artifactId>springfox-swagger-ui</artifactId>

		<version>2.5.0</version>

	</dependency>

  </dependencies>
2.2启动类
package com.mao.swagger;

import org.springframework.boot.SpringApplication;

import org.springframework.boot.autoconfigure.EnableAutoConfiguration;

import org.springframework.boot.autoconfigure.SpringBootApplication;

/**

 * Hello world!

 *

 */

@EnableAutoConfiguration

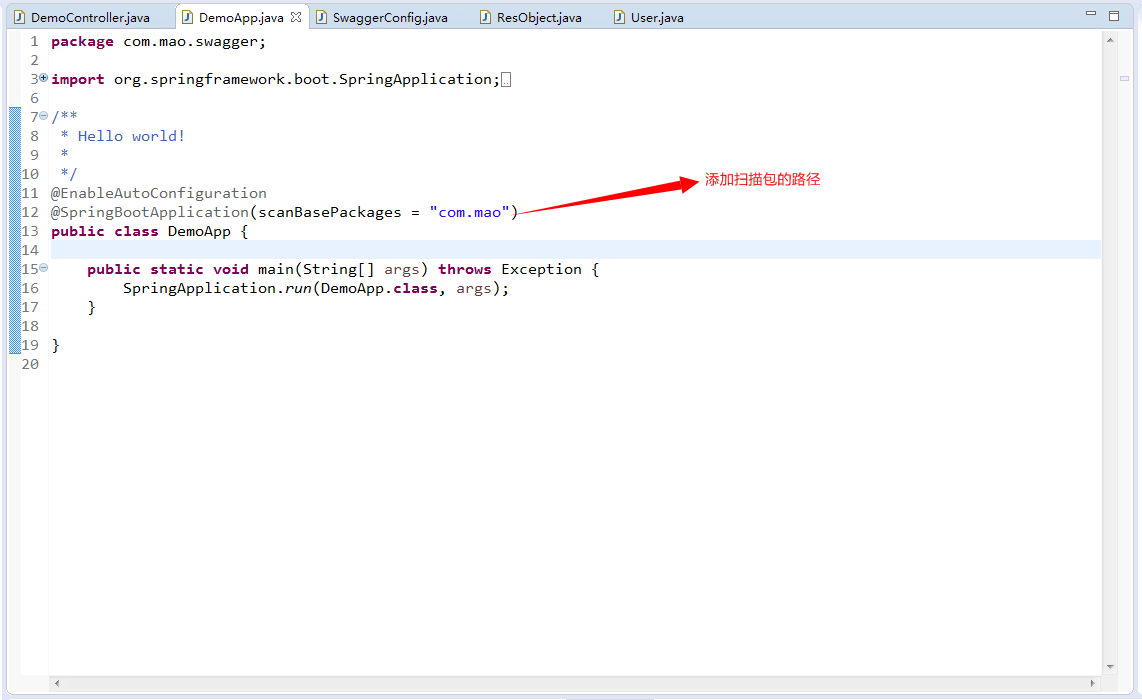
@SpringBootApplication(scanBasePackages = "com.mao")

public class DemoApp {

    public static void main(String[] args) throws Exception {

        SpringApplication.run(DemoApp.class, args);

    }

}
2.3配置config
package com.mao.swagger.config;

import org.springframework.context.annotation.Bean;

import org.springframework.context.annotation.Configuration;

import io.swagger.annotations.ApiOperation;

import springfox.documentation.builders.RequestHandlerSelectors;

import springfox.documentation.spi.DocumentationType;

import springfox.documentation.spring.web.plugins.Docket;

import springfox.documentation.swagger2.annotations.EnableSwagger2;

@Configuration

@EnableSwagger2

public class SwaggerConfig {

    @Bean

    public Docket swaggerSpringMvcPlugin() {

        return new Docket(DocumentationType.SWAGGER_2).select().apis(RequestHandlerSelectors.withMethodAnnotation(ApiOperation.class)).build();

    }

}
2.4配置controller
package com.mao.swagger.controller;

import org.springframework.http.HttpStatus;

import org.springframework.http.MediaType;

import org.springframework.web.bind.annotation.RequestBody;

import org.springframework.web.bind.annotation.RequestMapping;

import org.springframework.web.bind.annotation.RequestMethod;

import org.springframework.web.bind.annotation.RequestParam;

import org.springframework.web.bind.annotation.RestController;

import com.mao.swagger.beans.ResObject;

import com.mao.swagger.beans.User;

import io.swagger.annotations.Api;

import io.swagger.annotations.ApiImplicitParam;

import io.swagger.annotations.ApiImplicitParams;

import io.swagger.annotations.ApiOperation;

/**

 * Hello world!

 *

 */

@Api(description = "用户接口")

@RestController

@RequestMapping("/demoController")

public class DemoController {

    @ApiOperation(value = "新增用户" ,  notes="新增注册")

    @RequestMapping(value="/createUser",method=RequestMethod.POST,consumes= MediaType.APPLICATION_JSON_VALUE)

    public ResObject createUser(@RequestBody User user){

    	System.out.println("createUser:::"+user.toString());

        return new ResObject(HttpStatus.OK.value(), "新增成功.");

    }

    @ApiOperation(value = "修改用户" ,  notes="修改用户")

    @RequestMapping(value="/updateUser",method=RequestMethod.POST,consumes= MediaType.APPLICATION_JSON_VALUE)

    public ResObject updateUser(@RequestBody User user){

    	System.out.println("updateUser:::"+user.toString());

    	return new ResObject(HttpStatus.OK.value(), "修改成功.");

    }

    @ApiOperation(value = "删除用户" ,  notes="删除用户")

    @ApiImplicitParams({

        @ApiImplicitParam(name = "userId", value = "用户标识", required = true, paramType = "query", dataType = "String")

    })

    @RequestMapping(value="/deleteUser",method=RequestMethod.DELETE)

    public ResObject deleteUser(@RequestParam("userId") String userId){

    	System.out.println("deleteUser:::"+userId);

    	return new ResObject(HttpStatus.OK.value(), "删除成功.");

    }

    @ApiOperation(value = "查询用户" ,  notes="查询用户")

    @ApiImplicitParams({

        @ApiImplicitParam(name = "userId", value = "用户标识", required = true, paramType = "query", dataType = "String")

    })

    @RequestMapping(value="/queryUser",method=RequestMethod.GET)

    public ResObject queryUser(@RequestParam("userId") String userId){

    	System.out.println("queryUser:::"+userId);

    	User user = new User(userId, "张三", "******", "mao2080@sina.com");

        return new ResObject(HttpStatus.OK.value(), user);

    }

}
3、效果展示
按照上面的启动之后访问:http://localhost:8080/swagger-ui.html 发现找不到接口
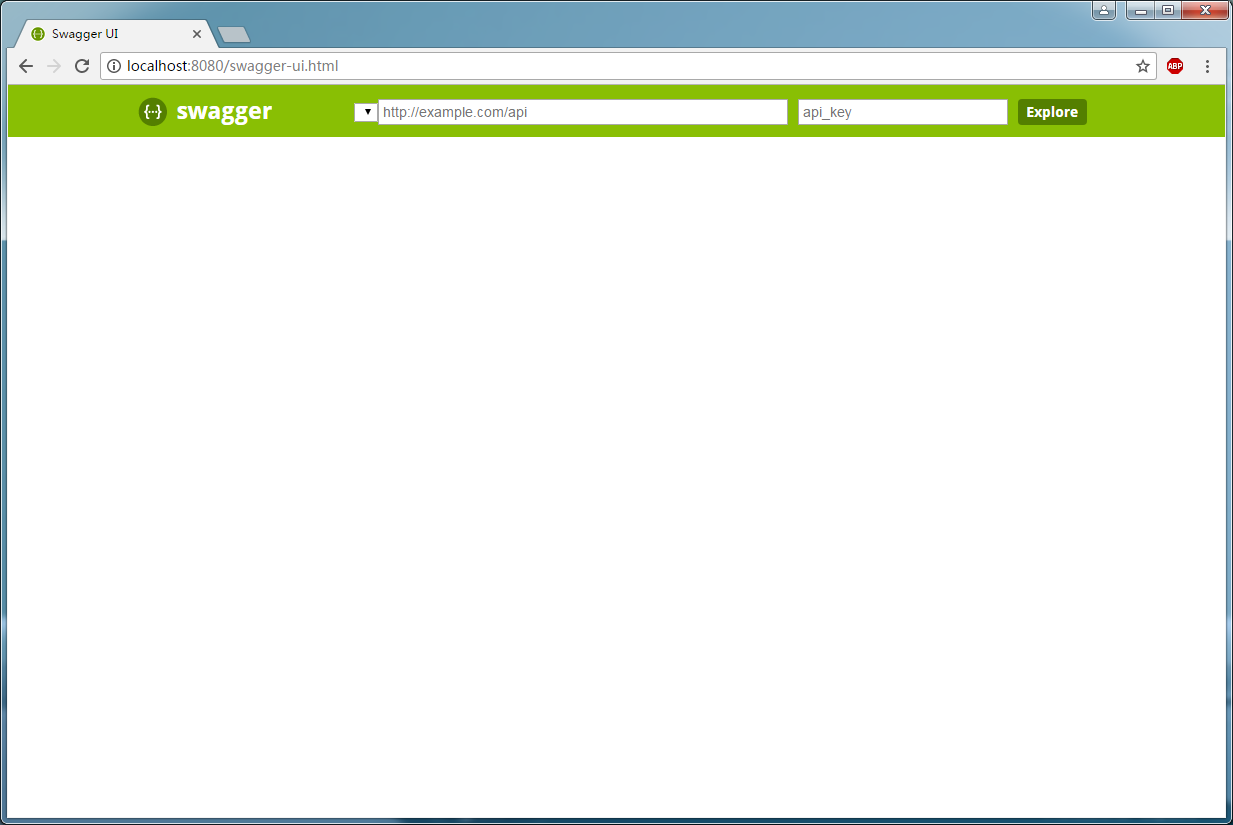
后面排查是因为没有添加扫描包
重启之后再刷新即可
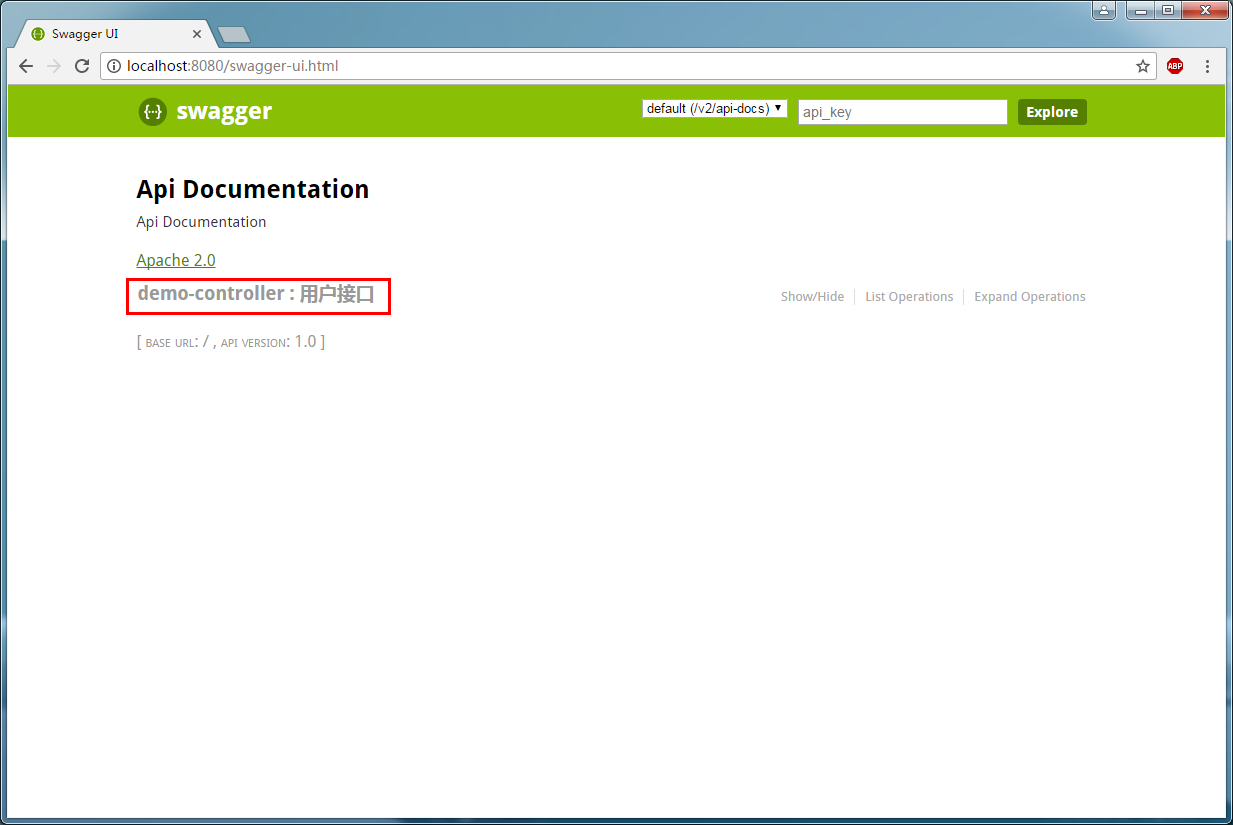
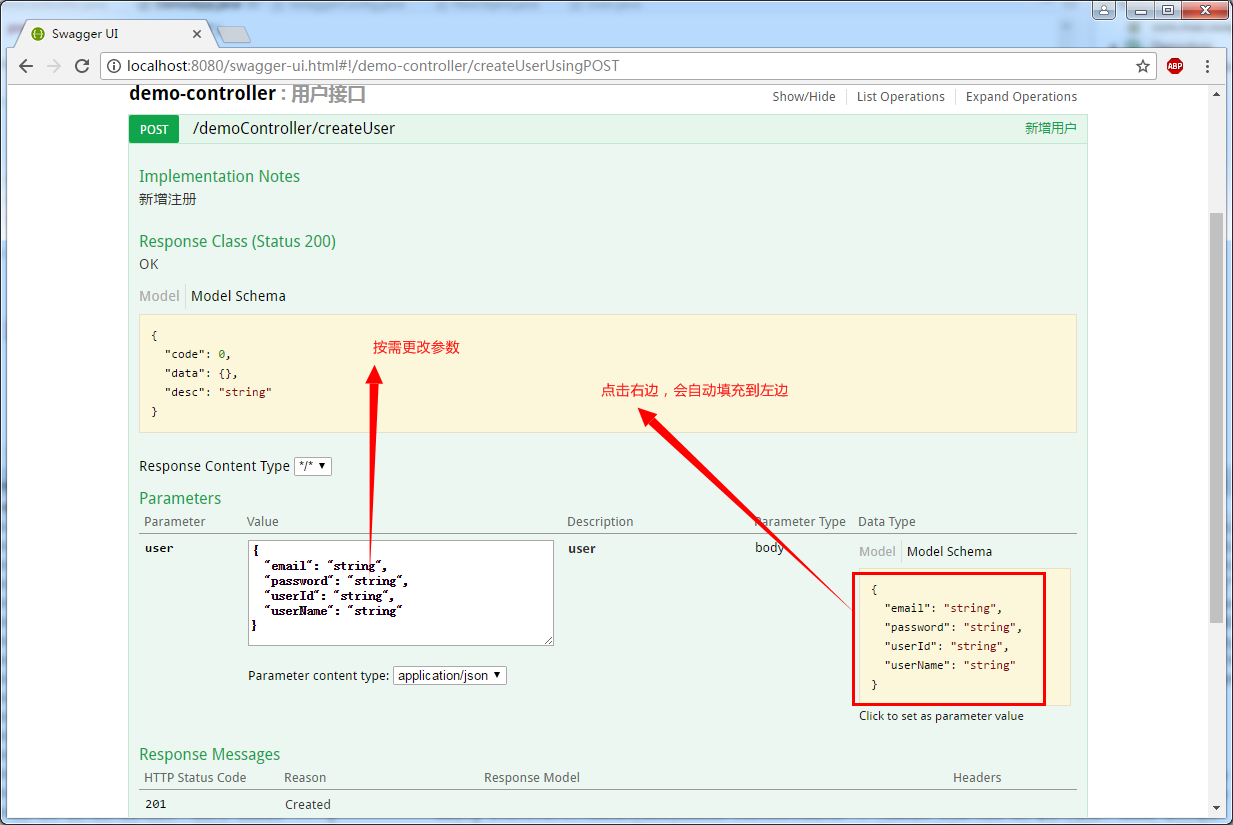
点击demo-controller可以看到详细接口
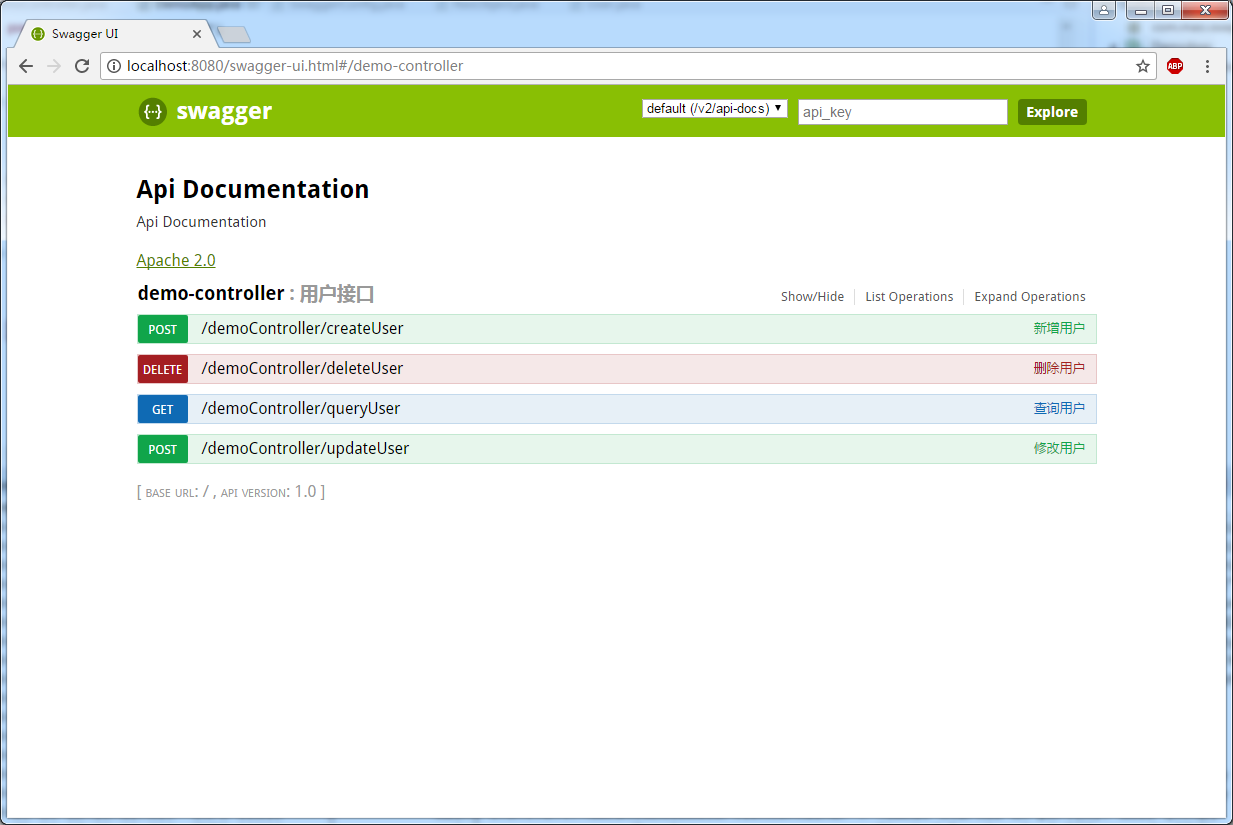
点击具体接口可以看到具体参数
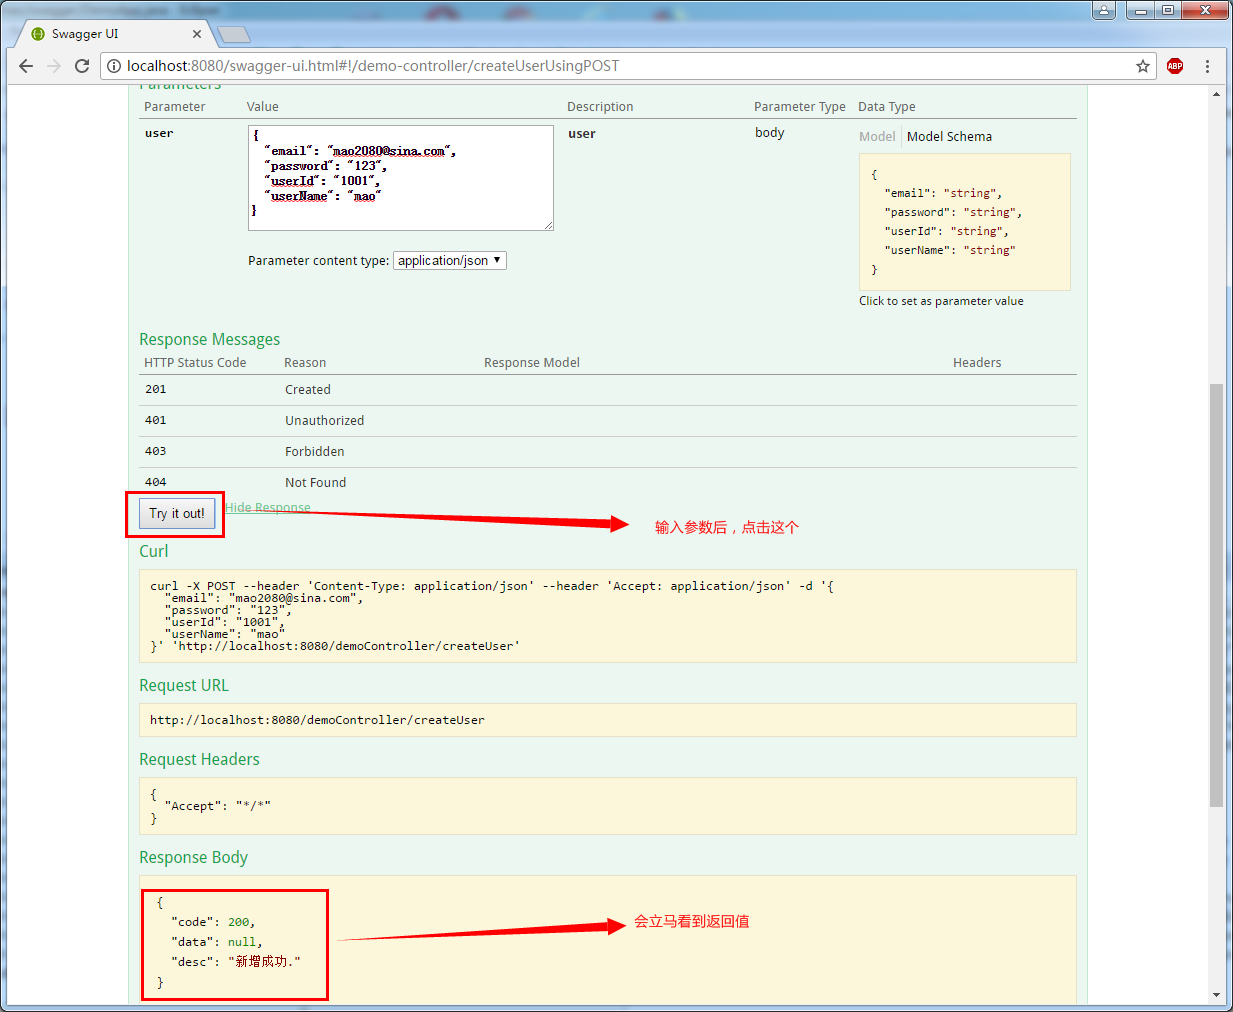
点击try it out! 可以测试接口。
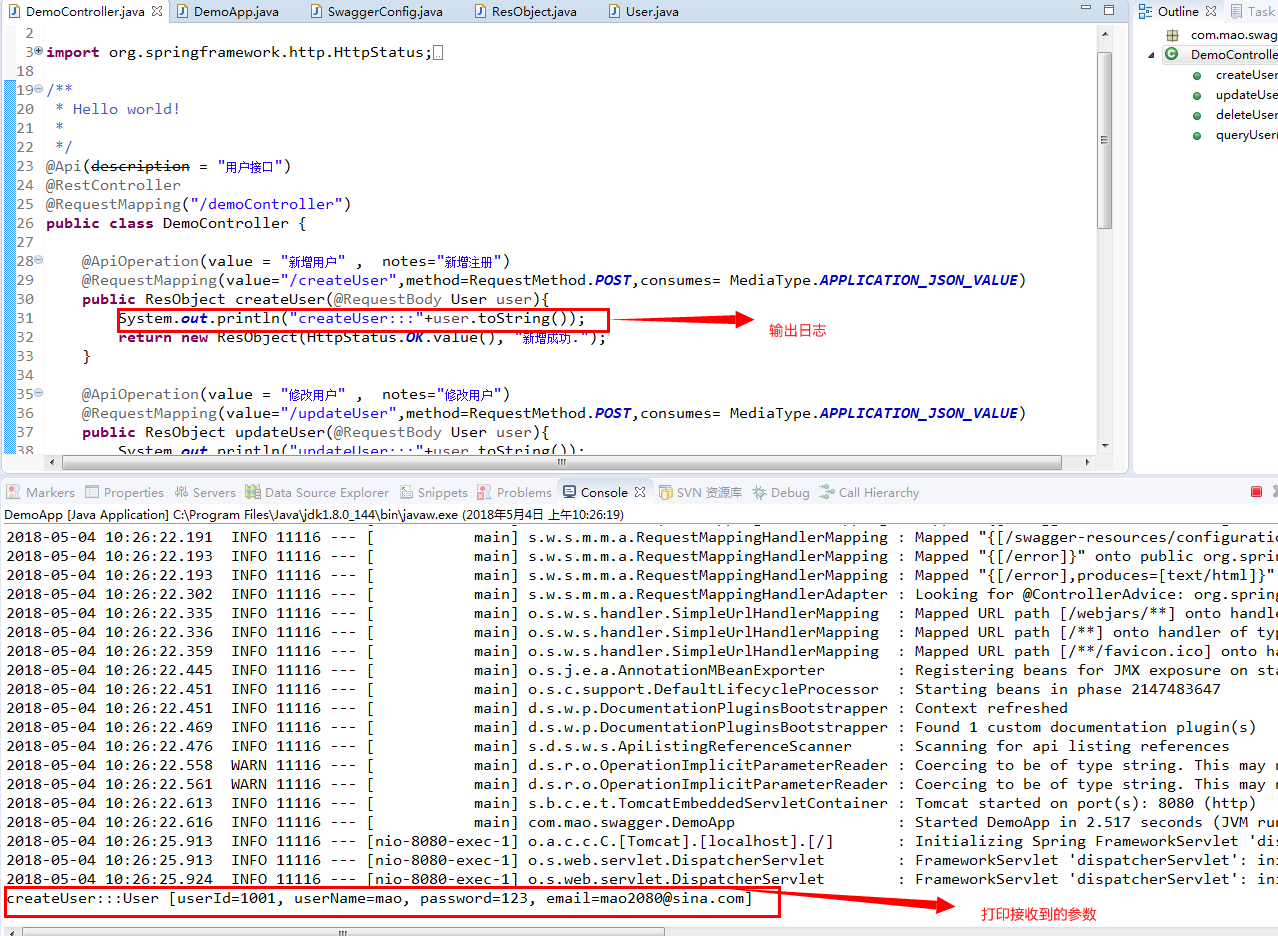
后台打印日志
4、附件下载
5、参考网站
https://blog.csdn.net/i6448038/article/details/77622977
https://blog.csdn.net/blackmambaprogrammer/article/details/72354007
6、推广阅读
Springboot集成Swagger操作步骤的更多相关文章
- SpringBoot集成Swagger,Postman,newman,jenkins自动化测试.
环境:Spring Boot,Swagger,gradle,Postman,newman,jenkins SpringBoot环境搭建. Swagger简介 Swagger 是一款RESTFUL接口的 ...
- spring-boot 集成 swagger 问题的解决
spring-boot 集成 swagger 网上有许多关于 spring boot 集成 swagger 的教程.按照教程去做,发现无法打开接口界面. 项目由 spring mvc 迁移过来,是一个 ...
- 20190909 SpringBoot集成Swagger
SpringBoot集成Swagger 1. 引入依赖 // SpringBoot compile('org.springframework.boot:spring-boot-starter-web' ...
- springboot集成swagger添加消息头(header请求头信息)
springboot集成swagger上篇文章介绍: https://blog.csdn.net/qiaorui_/article/details/80435488 添加头信息: package co ...
- springboot 集成 swagger 自动生成API文档
Swagger是一个规范和完整的框架,用于生成.描述.调用和可视化RESTful风格的Web服务.简单来说,Swagger是一个功能强大的接口管理工具,并且提供了多种编程语言的前后端分离解决方案. S ...
- springboot集成swagger实战(基础版)
1. 前言说明 本文主要介绍springboot整合swagger的全过程,从开始的swagger到Knife4j的进阶之路:Knife4j是swagger-bootstarp-ui的升级版,包括一些 ...
- SpringBoot集成Swagger接口管理工具
手写Api文档的几个痛点: 文档需要更新的时候,需要再次发送一份给前端,也就是文档更新交流不及时. 接口返回结果不明确 不能直接在线测试接口,通常需要使用工具,比如postman 接口文档太多,不好管 ...
- springboot 集成swagger ui
springboot 配置swagger ui 1. 添加依赖 <!-- swagger ui --> <dependency> <groupId>io.sprin ...
- springboot集成swagger
对于搬砖的同学来说,写接口容易,写接口文档很烦,接口变动,维护接口文档就更更更烦,所以经常能发现文档与程序不匹配. 等过一段时间就连开发者也蒙圈了 Swagger2快速方便的解决了以上问题.一个能与S ...
随机推荐
- [Next] 六.next的优化
导出 html 并开启服务 我们将 pages 下页面导出为静态 HTML 页面.首先,next.config.js 在应用程序的根目录中创建一个名为的文件,并添加以下内容 exportPathMap ...
- MySQL性能优化(六):分区
原文:MySQL性能优化(六):分区 版权声明:本文为博主原创文章,遵循CC 4.0 BY-SA版权协议,转载请附上原文出处链接和本声明. 本文链接:https://blog.csdn.net/vbi ...
- leetcode 1282. Group the People Given the Group Size They Belong To
There are n people whose IDs go from 0 to n - 1 and each person belongs exactly to one group. Given ...
- 098、Swarm 如何实现 Failover (Swarm05)
参考https://www.cnblogs.com/CloudMan6/p/7898245.html 故障是在所难免的,容器可能崩溃,Docker Host 可能宕机,不过幸运的是,Swarm 已 ...
- HDFS NFS Gateway
NFS网关支持NFSv3,并允许将HDFS作为客户端本地文件系统进行挂载.目前,NFS Gateway支持并启用以下使用模式: 用户可以通过NFSv3客户端兼容操作系统上的本地文件系统浏览HDFS文件 ...
- 详解Wox
Wox 是一款国产开源免费的软件快捷启动工具,它可以快速搜索并打开你电脑上的程序.文件.或是查词翻译.网站查找等其他操作,同时还支持插件安装. Tips: 如果你需要用到文件的快速搜索.打开功能,需要 ...
- js变量的作用域、变量的提升、函数的提升
变量的作用域在函数之外声明的变量,叫做全局变量,因为它可被当前文档中的任何其他代码所访问.在函数内部声明的变量,叫做局部变量,因为它只能在当前函数的内部访问. ECMAScript 6 之前的 Jav ...
- docker删除虚悬镜像(临时镜像文件)
在我们构建镜像的过程中,常常需要使用build命令根据Dockerfile进行构建镜像,并且会build很多次,镜像名字也是相同的,那么就会出来下面这种情况
- selenium入门学习
在写爬虫的学习过程中,经常会有一些动态加载,有些是可以动过接口直接获取到,但是实在没办法,所以学习下selenium. 首先百度一下: Selenium [1] 是一个用于Web应用程序测试的工具. ...
- idea逆向生成hibernate工程
1.创建maven工程 2.在resources下创建hibernate.cfg.xml文件 <?xml version='1.0' encoding='utf-8'?> <!DOC ...
