RedHat7.4最小化安装yum源不可用问题解决
本次安装的RedHat7.4是安装在Oracle VM VirtualBox5.2.8虚拟机上面的,本文不对安装虚拟机步骤做详细说明。
工具准备:
Oracle VM VirtualBox5.2.8
rhel-server-7.4-x86_64-dvd.iso
安装平台;
win10_x86_64
解决办法:
1、修改网络配置
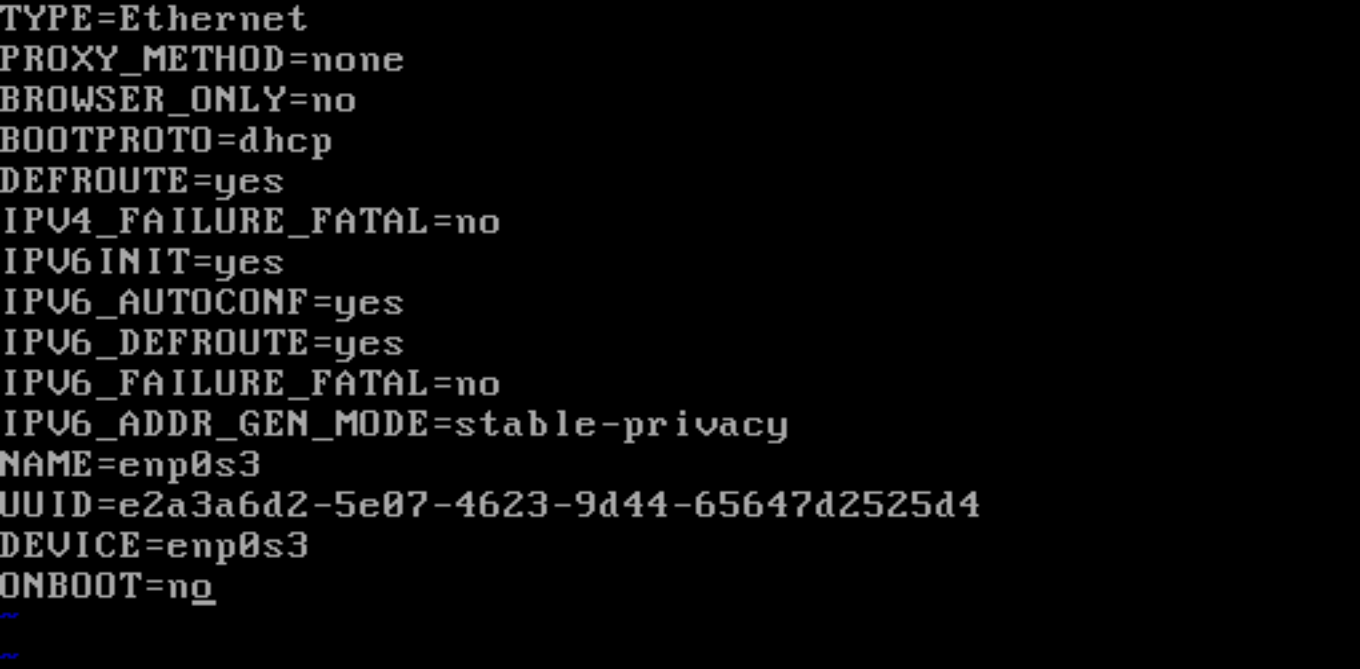
在RedHat7之后ifconfig命令查看网络命令受限,在登录系统后,可以使用下面的命令查看当前的一些ip地址等网络信息
[root@localhost ~]# ip addr
如果要修改网络配置,使用下面的命令
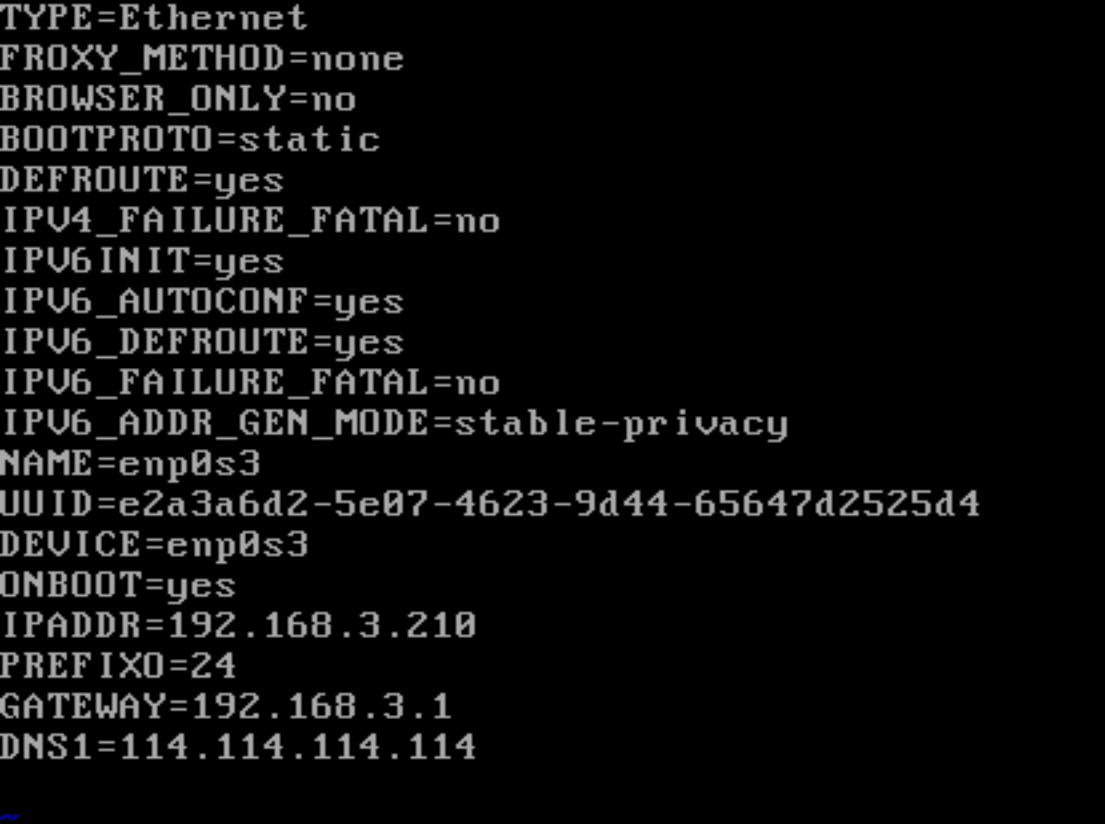
[root@localhost ~]# vi /etc/sysconfig/network-scripts/ifcfg-enp0s3
修改BOOTPRTO=static,ONBOOT=yes,然后在最下面加入下面的配置
IPADDR=192.168.3.210

PREFIXO=

GATEWAY=192.168.3.1

DNS1=114.114.114.114
修改之后的配置文件内容如下图所示:
保存并退出之后,使用命令
[root@localhost ~]# service network restart
Restarting network (via systemctl):                        [  OK  ]
测试外网能否请求:
[root@localhost ~]# ping www.baidu.com

PING www.a.shifen.com (61.135.169.121) () bytes of data.

 bytes from 61.135.169.121 (61.135.169.121): icmp_seq= ttl= time=42.8 ms

 bytes from 61.135.169.121 (61.135.169.121): icmp_seq= ttl= time=40.9 ms

 bytes from 61.135.169.121 (61.135.169.121): icmp_seq= ttl= time=41.6 ms

 bytes from 61.135.169.121 (61.135.169.121): icmp_seq= ttl= time=40.6 ms

^Z

[]+  Stopped                 ping www.baidu.com
此时,使用yum命令会出现问题
[root@localhost ~]# yum install lrzsz

Loaded plugins: product-id, search-disabled-repos, subscription-manager

This system is not registered with an entitlement server. You can use subscription-manager to register.
2、查看系统中的yum,如果有进行卸载
[root@localhost ~]# rpm -qa |grep yum

yum-metadata-parser-1.1.-.el7.x86_64

yum-rhn-plugin-2.0.-.el7.noarch

yum-3.4.-.el7.noarch
删除redhat自带的yum包
[root@localhost ~]# rpm -qa|grep yum|xargs rpm -e --nodeps
再进行检查,确认卸载完成
[root@localhost ~]# rpm -qa |grep yum

[root@localhost ~]#
3、下载163的yum安装包
在网站:http://mirrors.163.com/有相关的许多开源包下载,我们这儿需要的安装包在路径:http://mirrors.163.com/centos/7.4.1708/os/x86_64/Packages/ 中,需要下载的有下面的内容:
http://mirrors.163.com/centos/7.4.1708/os/x86_64/RPM-GPG-KEY-CentOS-7

http://mirrors.163.com/centos/7.4.1708/os/x86_64/Packages/yum-3.4.3-154.el7.centos.noarch.rpm

http://mirrors.163.com/centos/7.4.1708/os/x86_64/Packages/yum-metadata-parser-1.1.4-10.el7.x86_64.rpm

http://mirrors.163.com/centos/7.4.1708/os/x86_64/Packages/yum-plugin-fastestmirror-1.1.31-42.el7.noarch.rpm

http://mirrors.163.com/centos/7.4.1708/os/x86_64/Packages/python-iniparse-0.4-9.el7.noarch.rpm
除了上述文件之外,还需要一个CentOS6-Base-163.repo文件,可以通过百度云盘进行搜索下载,在下载完成后通过WinSCP上传到操作系统中。还需要将CentOS6-Base-163.repo文件的内容修改为如下所示:
# CentOS-Base.repo

#

# The mirror system uses the connecting IP address of the client and the

# update status of each mirror to pick mirrors that are updated to and

# geographically close to the client.  You should use this for CentOS updates

# unless you are manually picking other mirrors.

#

# If the mirrorlist= does not work for you, as a fall back you can try the

# remarked out baseurl= line instead.

#

#

[base]

name=CentOS-7.4.1708 - Base - 163.com

baseurl=http://mirrors.163.com/centos/7.4.1708/os/$basearch/

#mirrorlist=http://mirrorlist.centos.org/?release=7.4.1708&arch=$basearch&repo=os

gpgcheck=1

gpgkey=http://mirror.centos.org/centos/RPM-GPG-KEY-CentOS-7

#released updates

[updates]

name=CentOS-7.4.1708 - Updates - 163.com

baseurl=http://mirrors.163.com/centos/7.4.1708/updates/$basearch/

#mirrorlist=http://mirrorlist.centos.org/?release=7.4.1708&arch=$basearch&repo=updates

gpgcheck=1

gpgkey=http://mirror.centos.org/centos/RPM-GPG-KEY-CentOS-7

#additional packages that may be useful

[extras]

name=CentOS-7.4.1708 - Extras - 163.com

baseurl=http://mirrors.163.com/centos/7.4.1708/extras/$basearch/

#mirrorlist=http://mirrorlist.centos.org/?release=7.4.1708&arch=$basearch&repo=extras

gpgcheck=1

gpgkey=http://mirror.centos.org/centos/RPM-GPG-KEY-CentOS-7

#additional packages that extend functionality of existing packages

[centosplus]

name=CentOS-7.4.1708 - Plus - 163.com

baseurl=http://mirrors.163.com/centos/7.4.1708/centosplus/$basearch/

#mirrorlist=http://mirrorlist.centos.org/?release=7.4.1708&arch=$basearch&repo=centosplus

gpgcheck=1

enabled=0

gpgkey=http://mirror.centos.org/centos/RPM-GPG-KEY-CentOS-7

#contrib - packages by Centos Users

[contrib]

name=CentOS-7.4.1708 - Contrib - 163.com

baseurl=http://mirrors.163.com/centos/7.4.1708/cr/$basearch/

#mirrorlist=http://mirrorlist.centos.org/?release=7.4.1708&arch=$basearch&repo=contrib

gpgcheck=1

enabled=0

gpgkey=http://mirror.centos.org/centos/RPM-GPG-KEY-CentOS-7
使用下面的命令开始yum源的安装,本人安装的时候两个都用了,有的资料上只使用了其中的一个,本人安装使用第一个只安装了python相关的包,而且提示有警告,再使用第二个命令之后才安装完yum-抬头的相关包。
[root@localhost ~]# rpm -ivh *.rpm

[root@localhost ~]# rpm -ivh yum-*
如果安装时出现依赖包的问题,有可能会出现Python包安装冲突的问题。所以在此处命令可以加上两个参数强制安装:
- --force 即使覆盖属于其它包的文件也强迫安装
- --nodeps 如果该RPM包的安装依赖其它包,即使其它包没装,也强迫安装。
安装完成之后需要将上传的CentOS6-Base-163.repo文件以及RPM-GPG-KEY-CentOS-7文件移动到相应的位置中。
[root@localhost ~]# mv CentOS6-Base-163.repo /etc/yum.repos.d/
[root@localhost ~]# mv RPM-GPG-KEY-CentOS-7 /etc/pki/rpm-gpg/
经过这步之后经测试可以使用yum的相关命令的,可以安装SecureCRT上传下载相关的组件
[root@localhost yum.repos.d]# yum install lrzsz
但是既然有RPM-GPG-KEY-CentOS-7文档,我们应该将它也转入相关的目录下面,虽然现在测试不转好像也没有影响。根据百度查找RPM-GPG-KEY-CentOS-7文件应当放入目录/etc/pki/rpm-gpg/中。查看/etc/pki/rpm-gpg/中的内容并将RPM-GPG-KEY-CentOS-7文件移动到该目录中。
[root@localhost yum.repos.d]# cd

[root@localhost ~]# cd /etc/pki/rpm-gpg/

[root@localhost rpm-gpg]# ls

RPM-GPG-KEY-redhat-beta            RPM-GPG-KEY-redhat-legacy-rhx

RPM-GPG-KEY-redhat-legacy-former   RPM-GPG-KEY-redhat-release

RPM-GPG-KEY-redhat-legacy-release

[root@localhost rpm-gpg]# cd

[root@localhost ~]# mv RPM-GPG-KEY-CentOS-7 /etc/pki/rpm-gpg/
[root@localhost ~]# cd /etc/pki/rpm-gpg/
[root@localhost rpm-gpg]# ls
RPM-GPG-KEY-CentOS-7              RPM-GPG-KEY-redhat-legacy-release
RPM-GPG-KEY-redhat-beta           RPM-GPG-KEY-redhat-legacy-rhx
RPM-GPG-KEY-redhat-legacy-former  RPM-GPG-KEY-redhat-release
在上述完成之后
[root@localhost ~]# yum clear all

[root@localhost ~]# yum makecache
至此所有的配置完成。
RedHat7.4最小化安装yum源不可用问题解决的更多相关文章
- RedHat7.4最小化安装没有ifconfig命令
软件环境 VirtualBox 5.2.8 rhel-server-7.4-x86_64-dvd.iso 系统环境 Win10 64 位 8G内存 最小化安装了RedHat7.4之后,进入系统之后使用 ...
- cetos7最小化安装设置网络启动和更新yum源
1. 使用静态 IP 地址配置网络 你第一件要做的事情就是为你的 CentOS 服务器配置静态 IP 地址.路由以及 DNS.我们会使用 ip 命令代替 ifconfig 命令.当然,ifconfig ...
- CentOS 7 - 最小化安装后,解决无法使用yum命令问题!!
刚刚最小化方式安装了CentOS 7 后,说实话,真不习惯也不喜欢纯shell方式工作,使用root账号登入后,马上想安装GNOME,但是发现yum不能正常工作!!! 一,输入安装X Window命令 ...
- Centos最小化安装后,不能使用yum命令的解决办法
刚刚最小化方式安装了CentOS 7 后,想查看一下config,却发现没有config文件,就想用yum下载一个,但是发现yum不能正常工作!!! 一,输入安装X Window命令,安装出错!! 在 ...
- 生产服务器环境最小化安装后 Centos 6.5优化配置[转]
内容目录 centos6.5最小化安装后配置网络: IP地址, 网关, 主机名, DNS 更新系统源并且升级系统 系统时间更新和设定定时任 创建普通用户并进行sudo授权管理 修改SSH端口号和屏蔽r ...
- 最小化安装centos的init初始化脚本
#!/bin/bash #this script is appropriate .x(这脚本适合最小化安装6.x版本的系统) #you have already install the os read ...
- CentOS最小化安装后,增加GNOME桌面
背景:下载CentOS 7的安装包后,在虚拟机上安装. 上来就遇到一个问题:提示需要开启intel vt-x. 这个进入BIOS,在CPU的设置中开启即可. 然后怀着兴奋的心情,开始各种下一步的安装, ...
- centos7 最小化安装 无 ifconfig,netstat 的安装
centos7 最小化安装 无 ifconfig,netstat 的安装 centos7 最小化安装之后,默认是没有 ifconfig,netstat命令的: 我们可以直接使用 yum -y inst ...
- Centos6.4最小化安装后使用xfce桌面环境
由于我个人使用的Centos是在虚拟机中最小化安装的,gnome实在是不喜欢,所以自己装了个xfce,安装后启动不起来,才发现x window等依赖环境没装,为了少走弯路,在此写下安装过程. 1.yu ...
随机推荐
- plsql连接其他服务器的oracle
plsql除了连接本地的oracle还需要连接其他服务器上的oracle时 1.下载安装oracleClient:2.在oracleClient安装目录下:例如:D:/instantclient_11 ...
- elasticsearch的store属性 vs _source字段
众所周知_source字段存储的是索引的原始内容,那store属性的设置是为何呢?es为什么要把store的默认取值设置为no?设置为yes是否是重复的存储呢? 我们将一个field的值写入es中,要 ...
- linux mint19.1解决网易云音乐安装后打不开的问题
安装网易云音乐: sudo dpkg -i 文件路径#文件路径可以直接把刚才下载的软件包拖进终端sudo apt install -f 修复依赖关系 安装后打不开的问题: 1.sudo gedit / ...
- HDFS 手写mapreduce单词计数框架
一.数据处理类 package com.css.hdfs; import java.io.BufferedReader; import java.io.IOException; import java ...
- icomoon.io生成字体图标
1. 准备svg图片 2. 打开icomoon选择icomoon App 3. import icons 上传本地的svg图片 4. 点击选中以后点击generate fonts形成字体图标 5. p ...
- mac配置python自然语言处理环境
一.nltk安装 Ⅰ.工具安装步骤 1.根据python版本从 https://pypi.python.org/pypi/setuptools 下载对应版本的setuptools.然后,在终端下运行, ...
- java 多线程 day12 读写锁
import java.util.Random;import java.util.concurrent.locks.ReadWriteLock;import java.util.concurrent. ...
- Mediakit报告设备商的空间不足以执行此操作的纯MAC解法
使用Mac对磁盘进行分区,显示“Mediakit报告设备商的空间不足以执行此操作”,该怎么办? What 买了一个4TB的移动硬盘,准备进行分区给Time Machine用. 硬盘自带是HDFS的,所 ...
- Selenium2.0 Webdriver 随笔
Webdriver can't action the element when the element is out of view 1. Scroll to the element use Java ...
- select 自动选择 检查下拉列表
下面我们来看一下selenium webdriver是如何来处理select下拉框的,以Apple注册页面为例. https://appleid.apple.com/cgi-bin/WebObject ...