Spring Data Redis 框架
系统性学习,移步IT-BLOG
一、简介
对于类似于首页这种每天都有大量的人访问,对数据库造成很大的压力,严重时可能导致瘫痪。解决方法:一种是数据缓存、一种是网页静态化。今天就讨论数据缓存的实现
Redis:是一种开源的 Key-Value 数据库,运行在内存中,企业开发通常采用 Redis 来实现缓存。同类的产品还有 memcache、memchached、MongoDB 等。
Jedis:是 Redis 官方推出的一款面向 Java 的客户端,提供了很多接口以供 Java 语言调用。可以在 Redis 官网下载当然还有一些开源爱好者提供的客户端,如:Jredis、SRP 等等,推荐使用 Jedis
Spring Data Redis:是 Spring 大家族的一部分提供了在 Spring 应用中通过简单的配置访问 redis 服务,对 redis 底层开发包(Jedis,JRedis,RPC)进行了高度封装,RedisTemplate 提供了 redis 各种操作,异常处理及序列化,支持发布订阅
Spring-data-Redis 针对 jedis 提供了如下功能:
【1】连接池自动管理,提供了一个高度封装的 “RedisTemplate” 类。
【2】针对 jedis 客户端中大量 api 进行了归类封装,将同一类型操作封装为 operation 接口,例如:
ValueOperations:简单 K-V 操作
SetOperations:set 类型数据操作
ZSetOperations:zset 类型数据操作
HashOperations:针对 map 类型的数据操作
ListOperations:针对 list 类型的数据操作
二、需要依赖的 jar 包如下:(jedis 与 spring-data-redis 相关的 jar 包)
- 1 <!-- 缓存 -->
- 2 <dependency>
- 3 <groupId>redis.clients</groupId>
- 4 <artifactId>jedis</artifactId>
- 5 <version>2.8.1</version>
- 6 </dependency>
- 7 <dependency>
- 8 <groupId>org.springframework.data</groupId>
- 9 <artifactId>spring-data-redis</artifactId>
- 10 <version>1.7.2.RELEASE</version>
- 11 </dependency>
三、Spring Data Redis 入门案例
第一步:创建一个 maven project 项目,以 jar 包的形式创建。引入 Spring 及 Redis 的相关 Jar 包(pom.xml 文件内容如下)
- 1 <project xmlns="http://maven.apache.org/POM/4.0.0"
- 2 xmlns:xsi="http://www.w3.org/2001/XMLSchema-instance"
- 3 xsi:schemaLocation="http://maven.apache.org/POM/4.0.0
- 4 http://maven.apache.org/xsd/maven-4.0.0.xsd">
- 5 <modelVersion>4.0.0</modelVersion>
- 6 <groupId>com.pinyougou-itcast</groupId>
- 7 <artifactId>springDataRedis</artifactId>
- 8 <version>0.0.1-SNAPSHOT</version>
- 9
- 10 <!-- 集中定义依赖版本号 -->
- 11 <properties>
- 12 <spring.version>4.2.4.RELEASE</spring.version>
- 13 </properties>
- 14
- 15 <dependencies>
- 16 <!-- Spring -->
- 17 <dependency>
- 18 <groupId>org.springframework</groupId>
- 19 <artifactId>spring-context</artifactId>
- 20 <version>${spring.version}</version>
- 21 </dependency>
- 22 <dependency>
- 23 <groupId>org.springframework</groupId>
- 24 <artifactId>spring-beans</artifactId>
- 25 <version>${spring.version}</version>
- 26 </dependency>
- 27 <dependency>
- 28 <groupId>org.springframework</groupId>
- 29 <artifactId>spring-webmvc</artifactId>
- 30 <version>${spring.version}</version>
- 31 </dependency>
- 32 <dependency>
- 33 <groupId>org.springframework</groupId>
- 34 <artifactId>spring-jdbc</artifactId>
- 35 <version>${spring.version}</version>
- 36 </dependency>
- 37 <dependency>
- 38 <groupId>org.springframework</groupId>
- 39 <artifactId>spring-aspects</artifactId>
- 40 <version>${spring.version}</version>
- 41 </dependency>
- 42 <dependency>
- 43 <groupId>org.springframework</groupId>
- 44 <artifactId>spring-jms</artifactId>
- 45 <version>${spring.version}</version>
- 46 </dependency>
- 47 <dependency>
- 48 <groupId>org.springframework</groupId>
- 49 <artifactId>spring-context-support</artifactId>
- 50 <version>${spring.version}</version>
- 51 </dependency>
- 52 <dependency>
- 53 <groupId>org.springframework</groupId>
- 54 <artifactId>spring-test</artifactId>
- 55 <version>${spring.version}</version>
- 56 </dependency>
- 57 <!-- 缓存 -->
- 58 <dependency>
- 59 <groupId>redis.clients</groupId>
- 60 <artifactId>jedis</artifactId>
- 61 <version>2.8.1</version>
- 62 </dependency>
- 63 <dependency>
- 64 <groupId>org.springframework.data</groupId>
- 65 <artifactId>spring-data-redis</artifactId>
- 66 <version>1.7.2.RELEASE</version>
- 67 </dependency>
- 68 </dependencies>
- 69 </project>
第二步:启动 redis 服务端,并在项目的 src/main/resource 中创建 properties/redis-config.properties 配置文件
- 1 # Redis settings
- 2 # server IP
- 3 redis.host=192.168.88.131
- 4 # server port
- 5 redis.port=6379
- 6 # server pass
- 7 redis.pass=
- 8 # use dbIndex
- 9 redis.database=0
- 10 # \u63A7\u5236\u4E00\u4E2Apool\u6700\u591A\u6709\u591A\u5C11\u4E2A\u72B6\u6001\u4E3Aidle(\u7A7A\u95F2\u7684)\u7684jedis\u5B9E\u4F8B
- 11 redis.maxIdle=300
- 12 # \u8868\u793A\u5F53borrow(\u5F15\u5165)\u4E00\u4E2Ajedis\u5B9E\u4F8B\u65F6\uFF0C\u6700\u5927\u7684\u7B49\u5F85\u65F6\u95F4\uFF0C\u5982\u679C\u8D85\u8FC7\u7B49\u5F85\u65F6\u95F4(\u6BEB\u79D2)\uFF0C\u5219\u76F4\u63A5\u629B\u51FAJedisConnectionException\uFF1B
- 13 redis.maxWait=3000
- 14 # \u5728borrow\u4E00\u4E2Ajedis\u5B9E\u4F8B\u65F6\uFF0C\u662F\u5426\u63D0\u524D\u8FDB\u884Cvalidate\u64CD\u4F5C\uFF1B\u5982\u679C\u4E3Atrue\uFF0C\u5219\u5F97\u5230\u7684jedis\u5B9E\u4F8B\u5747\u662F\u53EF\u7528\u7684
- 15 redis.testOnBorrow=true
第三步:在 src/main/resource 中创建 spring/applicationContext-redis.xml 配置文件
- 1 <?xml version="1.0" encoding="UTF-8"?>
- 2 <beans xmlns="http://www.springframework.org/schema/beans"
- 3 xmlns:xsi="http://www.w3.org/2001/XMLSchema-instance" xmlns:p="http://www.springframework.org/schema/p"
- 4 xmlns:context="http://www.springframework.org/schema/context"
- 5 xmlns:mvc="http://www.springframework.org/schema/mvc"
- 6 xmlns:cache="http://www.springframework.org/schema/cache"
- 7 xsi:schemaLocation="http://www.springframework.org/schema/beans
- 8 http://www.springframework.org/schema/beans/spring-beans.xsd
- 9 http://www.springframework.org/schema/context
- 10 http://www.springframework.org/schema/context/spring-context.xsd
- 11 http://www.springframework.org/schema/mvc
- 12 http://www.springframework.org/schema/mvc/spring-mvc.xsd
- 13 http://www.springframework.org/schema/cache
- 14 http://www.springframework.org/schema/cache/spring-cache.xsd">
- 15
- 16 <context:property-placeholder location="classpath*:properties/*.properties" />
- 17
- 18 <!-- redis 相关配置 -->
- 19 <bean id="poolConfig" class="redis.clients.jedis.JedisPoolConfig">
- 20 <property name="maxIdle" value="${redis.maxIdle}" />
- 21 <property name="maxWaitMillis" value="${redis.maxWait}" />
- 22 <property name="testOnBorrow" value="${redis.testOnBorrow}" />
- 23 </bean>
- 24
- 25 <!-- Spring Data Redis 相关配置 -->
- 26 <bean id="JedisConnectionFactory" class="org.springframework.data.redis.connection.jedis.JedisConnectionFactory"
- 27 p:host-name="${redis.host}" p:port="${redis.port}" p:password="${redis.pass}" p:pool-config-ref="poolConfig"/>
- 28
- 29 <!-- 在业务配置中主要通过 此模板调用redis 进行数据操作 -->
- 30 <bean id="redisTemplate" class="org.springframework.data.redis.core.RedisTemplate">
- 31 <property name="connectionFactory" ref="JedisConnectionFactory" />
- 32 </bean>
- 33
- 34 </beans>
第四步:数据操作之 String 值类型操作
- 1 package com.yintong.test;
- 2
- 3 import org.junit.Test;
- 4 import org.junit.runner.RunWith;
- 5 import org.springframework.beans.factory.annotation.Autowired;
- 6 import org.springframework.data.redis.core.RedisTemplate;
- 7 import org.springframework.test.context.ContextConfiguration;
- 8 import org.springframework.test.context.junit4.SpringJUnit4ClassRunner;
- 9
- 10 @RunWith(SpringJUnit4ClassRunner.class)
- 11 @ContextConfiguration(locations="classpath:spring/applicationContext-redis.xml")
- 12 public class StringDemo {
- 13
- 14 @Autowired
- 15 private RedisTemplate redisTemplate;
- 16 @Test
- 17 public void setValue() {//redis中设置值
- 18 redisTemplate.boundValueOps("name").set("zzx");
- 19 }
- 20 @Test
- 21 public void getValue() {
- 22 String name = (String) redisTemplate.boundValueOps("name").get();
- 23 System.out.println(name);
- 24 }
- 25 @Test
- 26 public void deleteValue(){
- 27 redisTemplate.delete("name");;
- 28 }
- 29 }
第五步:Set 数据类型操作
- 1 package com.yintong.test;
- 2
- 3 import java.util.Set;
- 4
- 5 import org.junit.Test;
- 6 import org.junit.runner.RunWith;
- 7 import org.springframework.beans.factory.annotation.Autowired;
- 8 import org.springframework.data.redis.core.BoundSetOperations;
- 9 import org.springframework.data.redis.core.RedisTemplate;
- 10 import org.springframework.test.context.ContextConfiguration;
- 11 import org.springframework.test.context.junit4.SpringJUnit4ClassRunner;
- 12
- 13 @RunWith(SpringJUnit4ClassRunner.class)
- 14 @ContextConfiguration(locations="classpath:spring/applicationContext-redis.xml")
- 15 public class SetDemo {
- 16 @Autowired
- 17 private RedisTemplate redisTemplate;
- 18 /**
- 19 * 存入值:Bound系列操作示例,Bound系列操作的优势在于只需要绑定一次,然后可以进行一个系列的操作,代码十分精炼。
- 20 */
- 21 @Test
- 22 public void setValue() {//redis中设置值
- 23 BoundSetOperations boundSetOps = redisTemplate.boundSetOps("nameSet");
- 24 boundSetOps.add("zzx");
- 25 boundSetOps.add("love");
- 26 boundSetOps.add("fj");
- 27 }
- 28 /**
- 29 * 提取值
- 30 */
- 31 @Test
- 32 public void getValue() {
- 33 Set members = redisTemplate.boundSetOps("nameSet").members();
- 34 System.out.println(members);
- 35 }
- 36 /**
- 37 * 删除集合中的某一个值
- 38 */
- 39 @Test
- 40 public void deleteValue(){
- 41 redisTemplate.boundSetOps("nameset").remove("孙权");
- 42 }
- 43 /**
- 44 * 删除整个集合
- 45 */
- 46 @Test
- 47 public void deleteAllValue(){
- 48 redisTemplate.delete("nameset");
- 49 }
- 50 }
结果展示: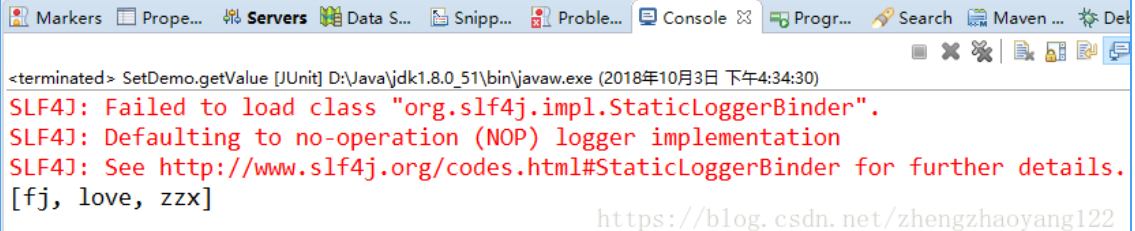
第六步:List 类型操作
- 1 package com.yintong.test;
- 2
- 3 import java.util.List;
- 4
- 5 import org.junit.Test;
- 6 import org.junit.runner.RunWith;
- 7 import org.springframework.beans.factory.annotation.Autowired;
- 8 import org.springframework.data.redis.core.RedisTemplate;
- 9 import org.springframework.test.context.ContextConfiguration;
- 10 import org.springframework.test.context.junit4.SpringJUnit4ClassRunner;
- 11
- 12 @RunWith(SpringJUnit4ClassRunner.class)
- 13 @ContextConfiguration(locations="classpath:spring/applicationContext-redis.xml")
- 14 public class TestList {
- 15 @Autowired
- 16 private RedisTemplate redisTemplate;
- 17 /**
- 18 * 右压栈:后添加的对象排在后边
- 19 */
- 20 @Test
- 21 public void setValueList() {
- 22 redisTemplate.boundListOps("nameList").rightPush("zzx");
- 23 redisTemplate.boundListOps("nameList").rightPush("fj");
- 24 }
- 25 /**
- 26 * 显示右压栈集合
- 27 */
- 28 @Test
- 29 public void getValueList() {
- 30 List range = redisTemplate.boundListOps("nameList").range(0, -1);
- 31 System.out.println(range);
- 32 }
- 33 /**
- 34 * 左压栈:后添加的对象排在前边
- 35 */
- 36 @Test
- 37 public void testSetValue2(){
- 38 redisTemplate.boundListOps("nameList").leftPush("love");
- 39 }
- 40 /**
- 41 * 查询集合某个元素
- 42 */
- 43 @Test
- 44 public void testSearchByIndex(){
- 45 Object index = redisTemplate.boundListOps("nameList").index(1);
- 46 System.out.println(index);
- 47 }
- 48 /**
- 49 * 移除集合某个元素
- 50 */
- 51 @Test
- 52 public void testRemoveByIndex(){
- 53 redisTemplate.boundListOps("nameList").remove(1, "zzx");
- 54 }
- 55 }
第七步:Hash 类型操作
- 1 package com.yintong.test;
- 2
- 3 import java.util.List;
- 4 import java.util.Set;
- 5
- 6 import org.junit.Test;
- 7 import org.junit.runner.RunWith;
- 8 import org.springframework.beans.factory.annotation.Autowired;
- 9 import org.springframework.data.redis.core.RedisTemplate;
- 10 import org.springframework.test.context.ContextConfiguration;
- 11 import org.springframework.test.context.junit4.SpringJUnit4ClassRunner;
- 12
- 13 @RunWith(SpringJUnit4ClassRunner.class)
- 14 @ContextConfiguration(locations="classpath:spring/applicationContext-redis.xml")
- 15 public class TestHash {
- 16 @Autowired
- 17 private RedisTemplate redisTemplate;
- 18 //插入值
- 19 @Test
- 20 public void setValue() {
- 21 redisTemplate.boundHashOps("nameHash").put("zzx", "boy");
- 22 redisTemplate.boundHashOps("nameHash").put("fj", "girl");
- 23 }
- 24 //提取所有的KEY
- 25 @Test
- 26 public void getKey() {
- 27 Set keys = redisTemplate.boundHashOps("nameHash").keys();
- 28 System.out.println(keys);
- 29 }
- 30 //获取所有值
- 31 @Test
- 32 public void getValues() {
- 33 List values = redisTemplate.boundHashOps("nameHash").values();
- 34 System.out.println(values);
- 35 }
- 36 @Test
- 37 //根据key获取值(常用)
- 38 public void getValueByKey() {
- 39 Object nameValue = redisTemplate.boundHashOps("nameHash").get("zzx");
- 40 System.out.println(nameValue);
- 41 }
- 42 @Test
- 43 //根据key溢出值
- 44 public void deleteKey() {
- 45 redisTemplate.boundHashOps("nameHash").delete("zzx");
- 46 }
- 47 }


----关注公众号,获取更多内容----
Spring Data Redis 框架的更多相关文章
- Spring Data Redis 详解及实战一文搞定
SDR - Spring Data Redis的简称. Spring Data Redis提供了从Spring应用程序轻松配置和访问Redis的功能.它提供了与商店互动的低级别和高级别抽象,使用户免受 ...
- spring mvc Spring Data Redis RedisTemplate [转]
http://maven.springframework.org/release/org/springframework/data/spring-data-redis/(spring-data包下载) ...
- Spring Data Redis简介以及项目Demo,RedisTemplate和 Serializer详解
一.概念简介: Redis: Redis是一款开源的Key-Value数据库,运行在内存中,由ANSI C编写,详细的信息在Redis官网上面有,因为我自己通过google等各种渠道去学习Redis, ...
- spring data redis 理解
前言 Spring Data Redis project,应用了Spring概念来开发使用键值形式的数据存储的解决方案.我们(官方)提供了一个 "template" ,这是一个高级 ...
- Spring Data Redis 让 NoSQL 快如闪电(2)
[编者按]本文作者为 Xinyu Liu,文章的第一部分重点概述了 Redis 方方面面的特性.在第二部分,将介绍详细的用例.文章系国内 ITOM 管理平台 OneAPM 编译呈现. 把 Redis ...
- Spring Data Redis 让 NoSQL 快如闪电 (1)
[编者按]本文作者为 Xinyu Liu,详细介绍了 Redis 的特性,并辅之以丰富的用例.在本文的第一部分,将重点概述 Redis 的方方面面.文章系国内 ITOM 管理平台 OneAPM 编译呈 ...
- spring data redis使用1——连接的创建
spring data redis集成了几个Redis客户端框架,Jedis , JRedis (Deprecated since 1.7), SRP (Deprecated since 1.7) a ...
- Spring Data Redis学习
本文是从为知笔记上复制过来的,懒得调整格式了,为知笔记版本是带格式的,内容也比这里全.点这里 为知笔记版本 Spring Data Redis 学习 Version 1.8.4.Release 前言 ...
- Redis(八):spring data redis 理解
前言 Spring Data Redis project,应用了Spring概念来开发使用键值形式的数据存储的解决方案.我们(官方)提供了一个 "template" ,这是一个高级 ...
- Spring Data Redis整体介绍 (一)
为什么使用Spring Data Redis 首先Spring Data Redis 是Spring 框架提供的用于操作Redis的客户端. Spring框架是一个全栈Java程序框架,通过DI.AO ...
随机推荐
- Communications link failure:The last packet successfully received from the server was 0 millisecond ago
出现这种错误的大致情况如下: 1.数据库连接长时间未使用,断开连接后,再去连接出现这种情况.这种情况常见于用连接池连接数据库出现的问题 2.数据库连接的后缀参数问题 针对上述两种情况,解决方案如下 1 ...
- 【JSON】Python读取JSON文件报错json.decoder.JSONDecodeError的问题
报错 json.decoder.JSONDecodeError: Expecting property name enclosed in double quotes: line * column * ...
- mac 安装 nginx 流程,并解决前端跨域问题
mac 安装 nginx 流程 首先mac安装brew包管理工具: /bin/zsh -c "$(curl -fsSL https://gitee.com/cunkai/HomebrewCN ...
- 升级openssl版本
一.安装步骤 1.下载openssl安装包 2.编译安装 3.备份旧版本openssl 4.添加软连接 5.添加OpenSSL动态链接库并使其生效 二.下载openssl安装包 [root@local ...
- Java中接口相关知识
1.接口 1.1接口概述 接口就是一种公共的规范标准,只要符合标准,大家都可以通用 Java中的接口更多的体现在对行为的抽象 1.2接口的特点 接口用关键字interface修饰,格式:public ...
- Linux 格式化 挂载 Gdisk
对磁盘进行格式化mkfs 创建文件系统 xfs ext4/2/3 mkfs -b 设定数据区块(block)占用空间大小,目前支持1024.2048.4096 bytes每个块.默认4K mkfs - ...
- 记 第一次linux下简易部署 django uwsgi nginx
1.首先确定django项目是跑起来的 2.装nginx uwsgi ,网上教程一大堆 3.uwsgi的配置了 我是通过ini启动的 随意找个顺手的文件夹创建uwsgi.ini文件 我是在/home ...
- Gridview控件的RowDataBound事件使用中 无法将类型为“System.Web.UI.LiteralControl”的对象强制转换为类型
无法将类型为"System.Web.UI.LiteralControl"的对象强制转换为类型 使用GridView的时候,相信很多朋友都遇到过"无法将类型为" ...
- 精通Spring 4.x 企业应用开发实战 文档链接总结
Spring在线文档 http://docs.spring.io/spring/docs/current/spring-framework-reference/htmlsingle
- 【Access】清空数据并重置自增主键
DELETE FROM tasks ALTER TABLE tasks ALTER COLUMN id COUNTER(1,1)