Google TV是啥玩意 ?
Google TV是支持自选图像、宽带网络、传统电视信号的综合平台,更附带电视节目搜索功能. 谷歌公布了其新版电视的两个版本, 第一个叫做Buddy Box, 由索尼代工的电视盒并且价格昂贵, 第二个是即将发布的集成电视, 将其电视盒内置到电视机内部.
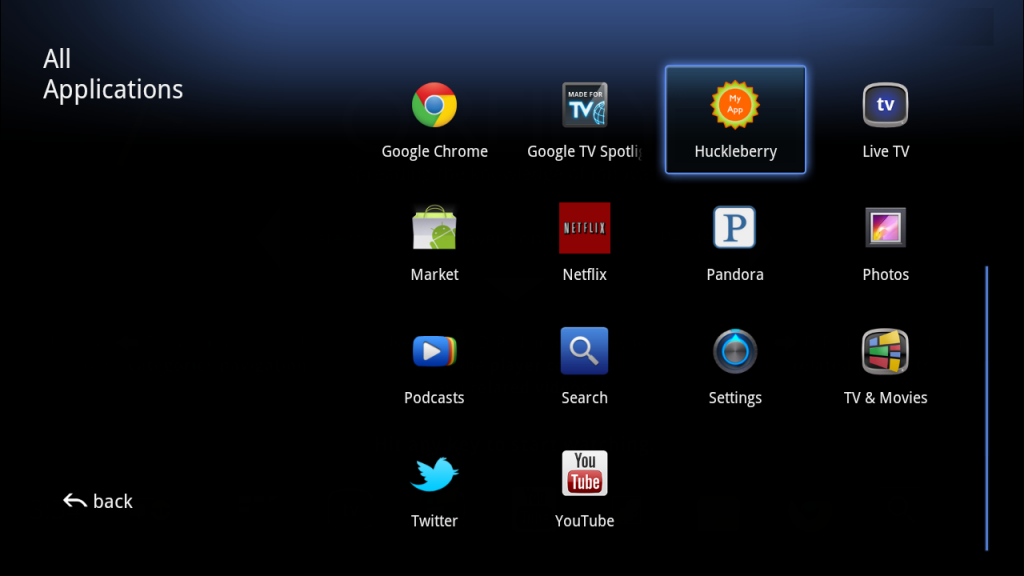
Google TV界面预览:
开发者: 可以为Google TV开发新的网页应用或者把已有的android应用改为适配大尺寸屏幕, 在谷歌的开发者网站可以看到详细介绍
搭建我们自己的Google TV
极客们就是喜欢重复发明轮子, 并且自得其乐. 所以我们使用下列开源技术来搭建我们自己的Google TV:
硬件:
软件:
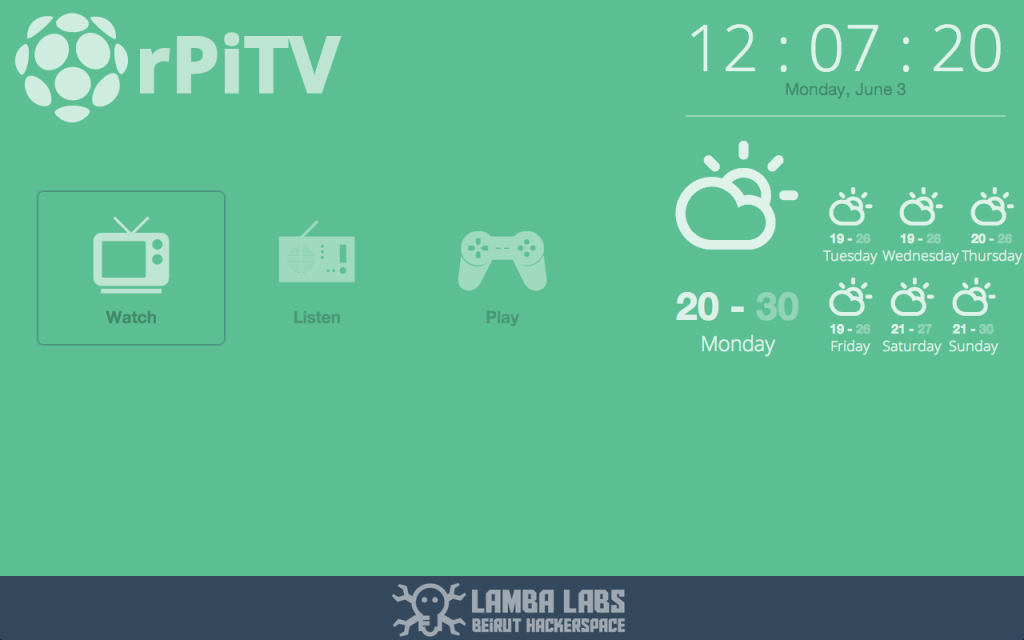
最终效果
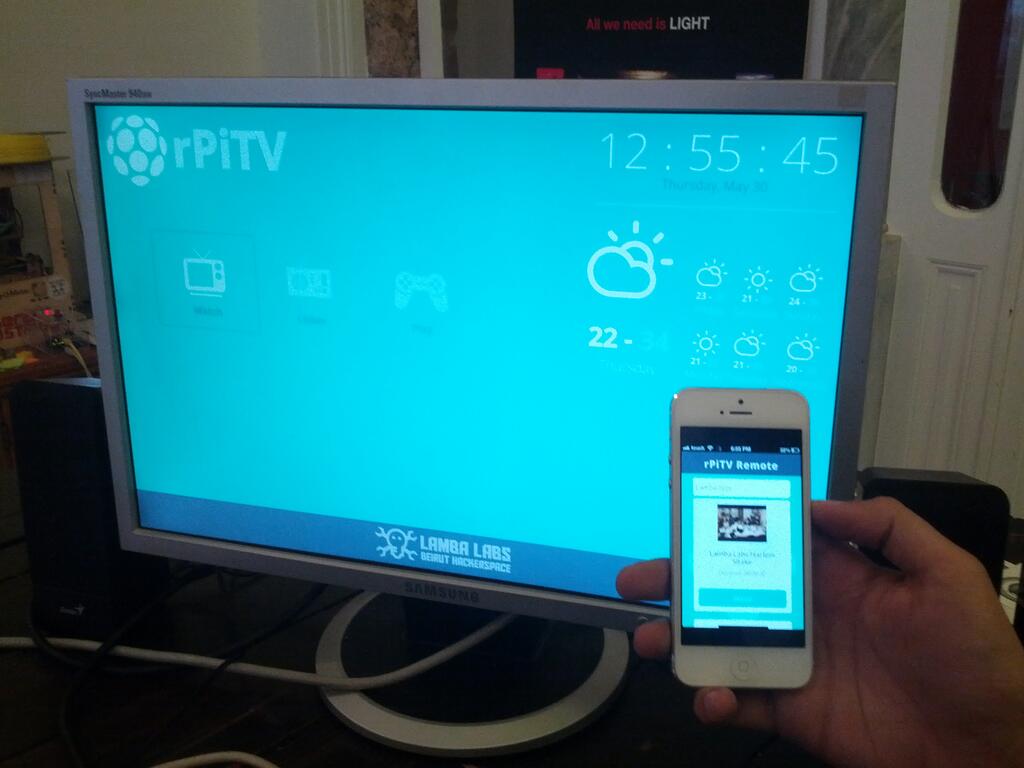
树莓派TV及其特殊的远程遥控器
步骤
主要分为4步:
- 安装软件
- shell命令及脚本
- 搭建后台: NodeJS + Express + Socket.io
- 搭建前端
安装软件:
安装Raspbian和NodeJS
按照这篇教程在树莓派上安装Raspbian和Node Js
安装Chromium和Youtube-dl
安装Chromium浏览器
1 |
sudo apt-get install chromium-browser |
为了显示效果更佳我们可以安装使用MC字体
1 |
sudo apt-get install ttf-mscorefonts-installer |
安装并升级Youtube下载器
1 |
sudo apt-get install youtube-dl |
注意-1: 现在还无法在树莓派上用Chromium看youtube的视频流, 因为在那种情况下视频并未通过GPU渲染, 会巨卡无比. Youtube-dl是不错的替代方案, 先将视频下载下来然后用OMXPlayer播放, 由于用GPU渲染了视频, 所以播放高清视频比较顺畅.
注意-2: Raspbian上默认就装了OMXPlayer.
shell命令及脚本
如果你在用SSH连接树莓派, 你需要先添加个环境变量“DISPLAY=:0.0″, 执行以下命令
执行以下命令可列出全部环境变量
在全屏模式下测试Chromium:
1 |
chromium

--kiosk http://www.google.com |
测试Youtube-dl
1 |
youtube-dl

youtube_video_url |
你可以给youtube-dl加几个参数, 比如添加“-o youtube ID [dot] the extension”会自动更改下载文件的名称, “-f /22/18 ”可以强制下载视频的720p版本. 这里有完整的参数格式列表.
1 |
youtube-dl

 -o
"%(id)s.%(ext)s" -f
/22/18 youtube_video_url |
下载视频完成后, 用OMXPLayer来播放
1 |
omxplayer

youtube_video_file |
可以用键盘快捷键来暂停/恢复视频, 更多快捷键说明看这里
太棒了! 下面就让我们用Node JS来自动化实现上面的整个过程
搭建后台: NodeJS + Express + Socket.io
下面是源码的目录结构:
- public
- js
- css
- images
- fonts
- index.html
- remote.html
- app.js
- package.json
Package.json – npm用来自动安装依赖的JSON文件, 并存储了一些基本信息
1 |
{

"name": "GoogleTV-rPi", |
4 |
"scripts":

{ "start": "node app.js" }, |
5 |
"dependencies":

{ "express": "3.1.1", |
在创建并修改文件之后, 在应用目录执行下列命令来安装依赖.
注意-3: 在安装依赖前会自动创建一个名为node_modules 的文件夹, 如果你使用git, 别忘了要创建一个.gitignore文件并把“ node_modules”写入其中,
在添加git项目时忽略这个文件夹.
新建一个名为app.js的文件来创建我们的本地HTTP访问服务
01 |
var express
= require('express') |
03 |
,

server = require('http').createServer(app) |
04 |
,

path = require('path') |
06 |
app.set('port',
process.env.TEST_PORT || 8080); |
07 |
app.use(express.favicon()); |
08 |
app.use(express.logger('dev'));
app.use(express.bodyParser()); |
09 |
app.use(express.methodOverride()); |
10 |
app.use(express.static(path.join(__dirname, 'public'))); |
12 |
app.get('/', function (req,
res) { |
13 |
res.sendfile(__dirname

+ '/public/index.html'); |
16 |
app.get('/remote', function (req,
res) { |
17 |
res.sendfile(__dirname

+ '/public/remote.html'); |
20 |
server.listen(app.get('port'), function(){ |
21 |
console.log('Express
server listening on port ' +
app.get('port')); |
上面已经配置了本地访问的路径. 现在我们来测试一下搭建是否成功, 在public/目录中创建index.html和remote.html文件, 写入“Hello, World”, 然后执行命令行
或
注意-4: 要在 package.json文件中添加:
当服务正常启动时会输出"Express server listening on port 8080"
执行下列命令来测试我们的“Hello, World”页面
这是在后台启动Node应用的最原始方法, 如果你熟悉node, 你可以用Forever.js这样的模块来自动执行这项简单的任务
我们的Node应用现在已经在后台启动了, 执行下列命令用chromium在全屏模式下打开我们的Hello, World页面.
1 |
chromium

--kiosk http://localhost:8080 |
添加Socket.io
我一直都认为WebSocket是现代web的基础, 对于Socket.io我认为其意义重大
当AJAX刚兴起的时候, 虽然很神往, 但是开发者总被不同浏览器处理异步JavaScript和XML请求时不同的方式所困扰. jQuery提供了统一的一组函数从而解决了这个噩梦. Socket.io对于WebSocket有同样作用, 甚至更多!
为了在所有浏览器上提供实时连接, Socket.IO会根据运行时选择传输能力最强的方式, 且不需要修改API. 下面是其支持的传输协议:
- WebSocket
- Adobe® Flash® Socket
- AJAX long
polling
- AJAX multipart streaming
- Forever Iframe
- JSONP Polling
把下列内容添加到app.js文件来整合Socket.io:
1 |
var express
= require('express') |
3 |
,

server = require('http').createServer(app) |
4 |
,

path = require('path') |
5 |
,

io = require('socket.io').listen(server) |
6 |
,

spawn = require('child_process').spawn |
并添加以下内容降低日志级别:
2 |
io.set('log
level',
1); |
现在我们的Socket.io就配好了, 但其还没有任何功能, 现在我们要实现如何处理从客户端发到服务端的消息和事件.
下面是实现服务端功能的方法, 对应的我们还要实现在客户端实现如何处理消息, 这会在下一章介绍.
1 |
io.sockets.on('connection', function (socket)
{ |
2 |
socket.emit('message',
{ message: 'welcome
to the chat' }); |
3 |
socket.on('send', function (data)
{ |
5 |
io.sockets.emit('message',
data); |
服务端现在会在有新客户端连接后发送消息“message”, 然后等待接收名为“send”的事件来处理数据再回复所有连接的客户端
在这里我们只有两种类型的客户端: 树莓派的显示器 (屏幕) 和移动Web应用 (远程控制)
01 |
var ss; //Socket.io
Server |
02 |
io.sockets.on('connection', function (socket)
{ |
03 |
socket.on("screen", function(data){ |
04 |
socket.type

= "screen"; |
05 |
//Save

the screen socket |
07 |
console.log("Screen
ready..."); |
10 |
socket.on("remote", function(data){ |
11 |
socket.type

= "remote"; |
12 |
console.log("Remote
ready..."); |
14 |
console.log("Synced..."); |
客户端处理Socket通信
在remote.html和index.html中添加下列内容:
1 |
<script src="/socket.io/socket.io.js">
</script> |
3 |
//use

http://raspberryPi.local if your using Avahi Service |
4 |
//or

use your RasperryPi IP instead |
5 |
var

socket = io.connect('http://raspberrypi.local:8080'); |
6 |
socket.on('connect',

function(data){ |
在Node服务器上执行Shell命令
Node允许我们新建子进程来运行系统命令, 并监听其输入输出. 还能给命令传递参数, 甚至能把一个命令的执行结果重定向给另一个命令.
在NodeJS中执行shell命令的基本方法:
1 |
spawn('echo',['foobar']); |
如果需要重定向输出, 我们需要把下列函数加到app.js文件中:
1 |
//Run

and pipe shell script output |
2 |
function run_shell(cmd,
args, cb, end) { |
3 |
var spawn
= require('child_process').spawn, |
4 |
child
= spawn(cmd, args), |
6 |
child.stdout.on('data', function (buffer)
{ cb(me, buffer) }); |
7 |
child.stdout.on('end',
end); |
添加OMXControl – 可以控制OMXPlayer的Node模块
我是偶然间在npmjs.org上发现可以控制OMXPlayer的模块!
把下列内容添加app.js文件中来使用这个模块.
1 |
var omx
= require('omxcontrol'); |
这个模块会为我们创建以下访问路径来控制视频的播放:
1 |
http://localhost:8080/omx/start/:filename |
3 |
http://localhost:8080/omx/pause |
5 |
http://localhost:8080/omx/quit |
太TM帅气鸟!
汇总
最终的app.js文件
02 |
*
Module dependencies. |
04 |
var express
= require('express') |
06 |
,
server = require('http').createServer(app) |
07 |
,
path = require('path') |
08 |
,
io = require('socket.io').listen(server) |
09 |
,
spawn = require('child_process').spawn |
10 |
,
omx = require('omxcontrol'); |
12 |
app.set('port',
process.env.TEST_PORT || 8080); |
13 |
app.use(express.favicon()); |
14 |
app.use(express.logger('dev')); |
15 |
app.use(express.bodyParser()); |
16 |
app.use(express.methodOverride()); |
17 |
app.use(express.static(path.join(__dirname, 'public'))); |
20 |
app.get('/', function (req,
res) { |
21 |
res.sendfile(__dirname
+ '/public/index.html'); |
23 |
app.get('/remote', function (req,
res) { |
24 |
res.sendfile(__dirname
+ '/public/remote.html'); |
27 |
io.set('log
level',
1); |
29 |
server.listen(app.get('port'), function(){ |
30 |
console.log('Express
server listening on port ' +
app.get('port')); |
32 |
//Run
and pipe shell script output |
33 |
function run_shell(cmd,
args, cb, end) { |
34 |
var spawn
= require('child_process').spawn, |
35 |
child

= spawn(cmd, args), |
37 |
child.stdout.on('data', function (buffer)
{ cb(me, buffer) }); |
38 |
child.stdout.on('end',
end); |
40 |
//Save

the Screen Socket in this variable |
43 |
io.sockets.on('connection', function (socket)
{ |
44 |
socket.on("screen", function(data){ |
45 |
socket.type

= "screen"; |
47 |
console.log("Screen
ready..."); |
49 |
socket.on("remote", function(data){
socket.type = "remote"; |
50 |
console.log("Remote
ready..."); |
53 |
socket.on("controll", function(data){ |
55 |
if(socket.type
=== "remote"){ |
56 |
if(data.action
=== "tap"){ |
58 |
ss.emit("controlling",
{action:"enter"}); |
60 |
} else if(data.action
=== "swipeLeft"){ |
62 |
ss.emit("controlling",
{action:"goLeft"}); |
64 |
} else if(data.action
=== "swipeRight"){ |
66 |
ss.emit("controlling",
{action:"goRight"}); |
72 |
socket.on("video", function(data){ |
73 |
if(
data.action === "play"){ |
74 |
var id
= data.video_id, |
75 |
url

= "http://www.youtube.com/watch?v="+id; |
76 |
var runShell
= new run_shell('youtube-dl', |
77 |
['-o','%(id)s.%(ext)s','-f','/18/22',url], |
78 |
function (me,
buffer) { |
79 |
me.stdout

+= buffer.toString(); |
80 |
socket.emit("loading",{output:
me.stdout}); |
81 |
console.log(me.stdout) |
84 |
//child

= spawn('omxplayer',[id+'.mp4']); |
搭建前端
树莓派TV前端屏幕显示样式:
关于如何编写这个前端的介绍超出了本教程的范围, 不过我想我会在不久之后发一些在开发中实用的小技巧.
在为大尺寸屏幕设计时, 你应当遵循一些设计上的考量, Google在其开发者网站上详述了一套他们的标准
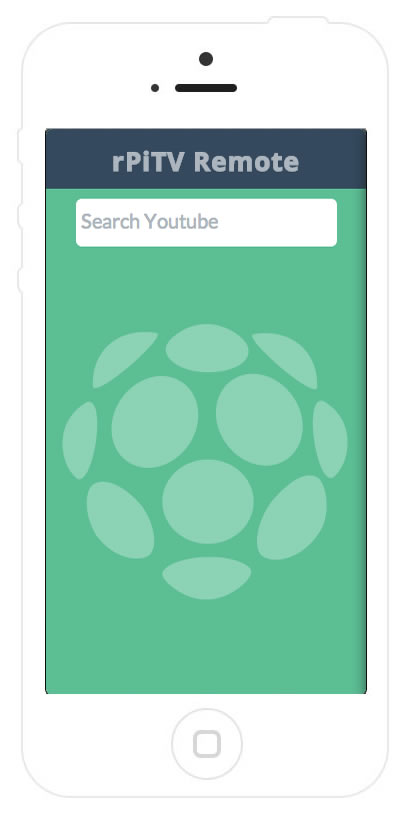
树莓派TV远程控制端样式:
大部分远程控制端设计粗糙, 充满了样式丑陋的按钮, 所以我决定使用QuoJS, 现在变得又帅气又易用!
1 |
$$(".r-container").swipeLeft(function(){ |
2 |
socket.emit('control',{action:"swipeLeft"}); |
这是如何用”swipeLeft”方法把“Control”消息传回服务器的示例.
服务器会把这条消息传到屏幕上, 然后根据选择框的指向(Watch, Listen, Play)进行处理
这里还有几个小技巧能让你的web应用在iphone上看起来像原生应用一样带有好看的Icon和启动画面.
只需要把下列内容加到HTML的 <head></head>块中
1 |
<link rel="apple-touch-icon" href="images/custom_icon.png"/> |
2 |
<link rel="apple-touch-startup-image" href="images/startup.png"> |
3 |
<meta name="viewport" content="width=device-width
initial-scale=1, maximum-scale=1, user-scalable=no" /> |
4 |
<meta name="apple-mobile-web-app-title" content="Remote"> |
5 |
<meta name="apple-mobile-web-app-capable" content="yes"> |
总结
这个项目仍在不断开发中, 不久之后便会有更新. 如果你喜欢本教程不妨上Github给项目加个星标. 视频也录好了!
请看here.