pygame-KidsCanCode系列jumpy-part9-使用spritesheet
做过前端的兄弟应该都知道css sprite(也称css精灵),这是一种常用的减少http请求次数的优化手段。把很多小图拼成一张大图,只加载1次,然后用css定位到不区的区域,从而展示不同的图片。游戏中也是类似的道理,如下图:
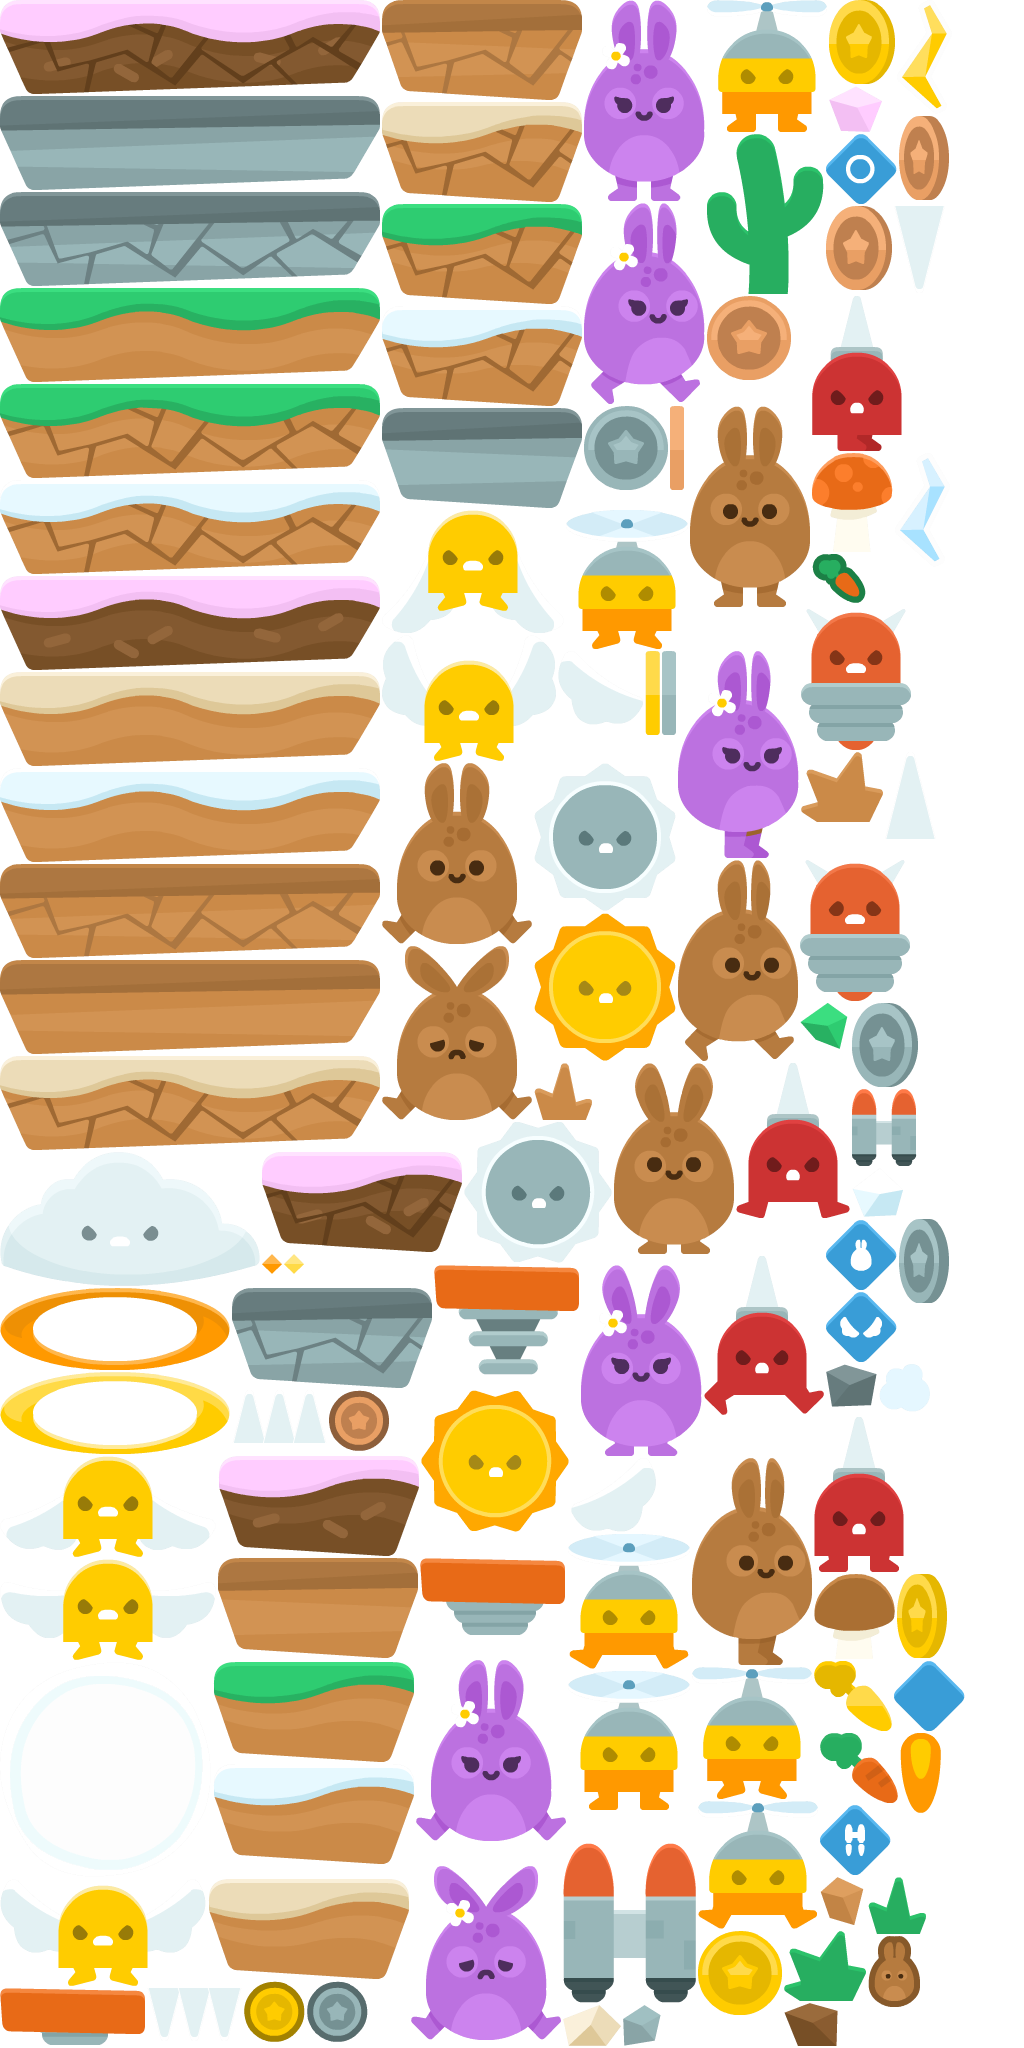
每一个小图片,都有自己的x,y,width,height信息,通常会放在一个xml中,类似:
 <TextureAtlas imagePath="sprites.png">

     <SubTexture name="bronze_1.png" x="707" y="296" width="84" height="84"/>

     <SubTexture name="bronze_2.png" x="826" y="206" width="66" height="84"/>

     <SubTexture name="bronze_3.png" x="899" y="116" width="50" height="84"/>

     <SubTexture name="bronze_4.png" x="670" y="406" width="14" height="84"/>

     <SubTexture name="bubble.png" x="0" y="1662" width="211" height="215"/>

     <SubTexture name="bunny1_hurt.png" x="382" y="946" width="150" height="174"/>

     <SubTexture name="bunny1_jump.png" x="382" y="763" width="150" height="181"/>

     <SubTexture name="bunny1_ready.png" x="614" y="1063" width="120" height="191"/>

     <SubTexture name="bunny1_stand.png" x="690" y="406" width="120" height="201"/>

     <SubTexture name="bunny1_walk1.png" x="678" y="860" width="120" height="201"/>

     <SubTexture name="bunny1_walk2.png" x="692" y="1458" width="120" height="207"/>

     <SubTexture name="bunny2_hurt.png" x="411" y="1866" width="150" height="174"/>

     <SubTexture name="bunny2_jump.png" x="416" y="1660" width="150" height="181"/>

     <SubTexture name="bunny2_ready.png" x="581" y="1265" width="121" height="191"/>

     <SubTexture name="bunny2_stand.png" x="584" y="0" width="121" height="201"/>

     <SubTexture name="bunny2_walk1.png" x="584" y="203" width="121" height="201"/>

     <SubTexture name="bunny2_walk2.png" x="678" y="651" width="121" height="207"/>

     <SubTexture name="cactus.png" x="707" y="134" width="117" height="160"/>

     <SubTexture name="carrot.png" x="820" y="1733" width="78" height="70"/>

     <SubTexture name="carrot_gold.png" x="814" y="1661" width="78" height="70"/>

     <SubTexture name="carrots.png" x="812" y="554" width="54" height="49"/>

     <SubTexture name="cloud.png" x="0" y="1152" width="260" height="134"/>

     <SubTexture name="coin_bronze.png" x="329" y="1390" width="60" height="61"/>

     <SubTexture name="coin_gold.png" x="244" y="1981" width="61" height="61"/>

     <SubTexture name="coin_silver.png" x="307" y="1981" width="61" height="61"/>

     <SubTexture name="flame.png" x="900" y="1733" width="41" height="80"/>

     <SubTexture name="flyMan_fly.png" x="566" y="510" width="122" height="139"/>

     <SubTexture name="flyMan_jump.png" x="568" y="1534" width="122" height="135"/>

     <SubTexture name="flyMan_stand.png" x="568" y="1671" width="122" height="139"/>

     <SubTexture name="flyMan_still_fly.png" x="692" y="1667" width="120" height="132"/>

     <SubTexture name="flyMan_still_jump.png" x="698" y="1801" width="120" height="128"/>

     <SubTexture name="flyMan_still_stand.png" x="707" y="0" width="120" height="132"/>

     <SubTexture name="gold_1.png" x="698" y="1931" width="84" height="84"/>

     <SubTexture name="gold_2.png" x="829" y="0" width="66" height="84"/>

     <SubTexture name="gold_3.png" x="897" y="1574" width="50" height="84"/>

     <SubTexture name="gold_4.png" x="645" y="651" width="15" height="84"/>

     <SubTexture name="grass1.png" x="868" y="1877" width="58" height="57"/>

     <SubTexture name="grass2.png" x="784" y="1931" width="82" height="70"/>

     <SubTexture name="grass_brown1.png" x="534" y="1063" width="58" height="57"/>

     <SubTexture name="grass_brown2.png" x="801" y="752" width="82" height="70"/>

     <SubTexture name="ground_cake.png" x="0" y="576" width="380" height="94"/>

     <SubTexture name="ground_cake_broken.png" x="0" y="0" width="380" height="94"/>

     <SubTexture name="ground_cake_small.png" x="218" y="1456" width="201" height="100"/>

     <SubTexture name="ground_cake_small_broken.png" x="262" y="1152" width="200" height="100"/>

     <SubTexture name="ground_grass.png" x="0" y="288" width="380" height="94"/>

     <SubTexture name="ground_grass_broken.png" x="0" y="384" width="380" height="94"/>

     <SubTexture name="ground_grass_small.png" x="213" y="1662" width="201" height="100"/>

     <SubTexture name="ground_grass_small_broken.png" x="382" y="204" width="200" height="100"/>

     <SubTexture name="ground_sand.png" x="0" y="672" width="380" height="94"/>

     <SubTexture name="ground_sand_broken.png" x="0" y="1056" width="380" height="94"/>

     <SubTexture name="ground_sand_small.png" x="208" y="1879" width="201" height="100"/>

     <SubTexture name="ground_sand_small_broken.png" x="382" y="102" width="200" height="100"/>

     <SubTexture name="ground_snow.png" x="0" y="768" width="380" height="94"/>

     <SubTexture name="ground_snow_broken.png" x="0" y="480" width="380" height="94"/>

     <SubTexture name="ground_snow_small.png" x="213" y="1764" width="201" height="100"/>

     <SubTexture name="ground_snow_small_broken.png" x="382" y="306" width="200" height="100"/>

     <SubTexture name="ground_stone.png" x="0" y="96" width="380" height="94"/>

     <SubTexture name="ground_stone_broken.png" x="0" y="192" width="380" height="94"/>

     <SubTexture name="ground_stone_small.png" x="382" y="408" width="200" height="100"/>

     <SubTexture name="ground_stone_small_broken.png" x="232" y="1288" width="200" height="100"/>

     <SubTexture name="ground_wood.png" x="0" y="960" width="380" height="94"/>

     <SubTexture name="ground_wood_broken.png" x="0" y="864" width="380" height="94"/>

     <SubTexture name="ground_wood_small.png" x="218" y="1558" width="200" height="100"/>

     <SubTexture name="ground_wood_small_broken.png" x="382" y="0" width="200" height="100"/>

     <SubTexture name="jetpack.png" x="563" y="1843" width="133" height="160"/>

     <SubTexture name="jetpack_item.png" x="852" y="1089" width="65" height="77"/>

     <SubTexture name="lifes.png" x="868" y="1936" width="52" height="71"/>

     <SubTexture name="lighting_blue.png" x="895" y="453" width="55" height="114"/>

     <SubTexture name="lighting_yellow.png" x="897" y="0" width="55" height="114"/>

     <SubTexture name="mushroom_brown.png" x="814" y="1574" width="81" height="85"/>

     <SubTexture name="mushroom_red.png" x="812" y="453" width="81" height="99"/>

     <SubTexture name="particle_beige.png" x="563" y="2005" width="58" height="41"/>

     <SubTexture name="particle_blue.png" x="852" y="1168" width="51" height="49"/>

     <SubTexture name="particle_brown.png" x="820" y="1877" width="44" height="48"/>

     <SubTexture name="particle_darkBrown.png" x="784" y="2003" width="54" height="43"/>

     <SubTexture name="particle_darkGrey.png" x="826" y="1364" width="51" height="43"/>

     <SubTexture name="particle_green.png" x="800" y="1003" width="48" height="46"/>

     <SubTexture name="particle_grey.png" x="623" y="2005" width="38" height="41"/>

     <SubTexture name="particle_pink.png" x="829" y="86" width="53" height="46"/>

     <SubTexture name="portal_orange.png" x="0" y="1288" width="230" height="82"/>

     <SubTexture name="portal_orangeParticle.png" x="262" y="1254" width="20" height="20"/>

     <SubTexture name="portal_yellow.png" x="0" y="1372" width="230" height="82"/>

     <SubTexture name="portal_yellowParticle.png" x="284" y="1254" width="20" height="20"/>

     <SubTexture name="powerup_bubble.png" x="826" y="134" width="71" height="70"/>

     <SubTexture name="powerup_bunny.png" x="826" y="1220" width="71" height="70"/>

     <SubTexture name="powerup_empty.png" x="894" y="1661" width="71" height="70"/>

     <SubTexture name="powerup_jetpack.png" x="820" y="1805" width="71" height="70"/>

     <SubTexture name="powerup_wings.png" x="826" y="1292" width="71" height="70"/>

     <SubTexture name="silver_1.png" x="584" y="406" width="84" height="84"/>

     <SubTexture name="silver_2.png" x="852" y="1003" width="66" height="84"/>

     <SubTexture name="silver_3.png" x="899" y="1219" width="50" height="84"/>

     <SubTexture name="silver_4.png" x="662" y="651" width="14" height="84"/>

     <SubTexture name="smoke.png" x="879" y="1364" width="51" height="48"/>

     <SubTexture name="spikeBall1.png" x="534" y="763" width="142" height="148"/>

     <SubTexture name="spikeBall_2.png" x="464" y="1122" width="148" height="141"/>

     <SubTexture name="spikeMan_jump.png" x="736" y="1063" width="114" height="155"/>

     <SubTexture name="spikeMan_stand.png" x="814" y="1417" width="90" height="155"/>

     <SubTexture name="spikeMan_walk1.png" x="704" y="1256" width="120" height="159"/>

     <SubTexture name="spikeMan_walk2.png" x="812" y="296" width="90" height="155"/>

     <SubTexture name="spike_bottom.png" x="894" y="206" width="51" height="87"/>

     <SubTexture name="spike_top.png" x="885" y="752" width="51" height="87"/>

     <SubTexture name="spikes_bottom.png" x="147" y="1988" width="95" height="53"/>

     <SubTexture name="spikes_top.png" x="232" y="1390" width="95" height="53"/>

     <SubTexture name="spring.png" x="420" y="1558" width="145" height="77"/>

     <SubTexture name="springMan_hurt.png" x="800" y="860" width="110" height="141"/>

     <SubTexture name="springMan_stand.png" x="801" y="609" width="110" height="141"/>

     <SubTexture name="spring_in.png" x="0" y="1988" width="145" height="57"/>

     <SubTexture name="spring_out.png" x="434" y="1265" width="145" height="110"/>

     <SubTexture name="sun1.png" x="534" y="913" width="142" height="148"/>

     <SubTexture name="sun2.png" x="421" y="1390" width="148" height="142"/>

     <SubTexture name="wingMan1.png" x="382" y="635" width="174" height="126"/>

     <SubTexture name="wingMan2.png" x="0" y="1879" width="206" height="107"/>

     <SubTexture name="wingMan3.png" x="0" y="1559" width="216" height="101"/>

     <SubTexture name="wingMan4.png" x="0" y="1456" width="216" height="101"/>

     <SubTexture name="wingMan5.png" x="382" y="510" width="182" height="123"/>

     <SubTexture name="wing_left.png" x="558" y="651" width="85" height="74"/>

     <SubTexture name="wing_right.png" x="571" y="1458" width="85" height="74"/>

 </TextureAtlas>
上面这张图+这份xml,在pygame中我们称为spritesheet,通过xml中的name,找到对应的坐标、尺寸信息,就能取出指定的小图片,先研究下如何用python解析xml:
 from os import path

 from xml.dom.minidom import parse

 xml_file_path = path.join(path.dirname(__file__), "../img/spritesheet_jumper.xml")

 print(xml_file_path)

 dom_tree = parse(xml_file_path)

 root_textures = dom_tree.documentElement

 sub_textures = root_textures.getElementsByTagName("SubTexture")

 for texture in sub_textures:

     print("name:", texture.getAttribute("name"), ",x:",

           texture.getAttribute("x"), ",y:", texture.getAttribute("y"),

           ",width:", texture.getAttribute("width"), ",height:", texture.getAttribute("height"))
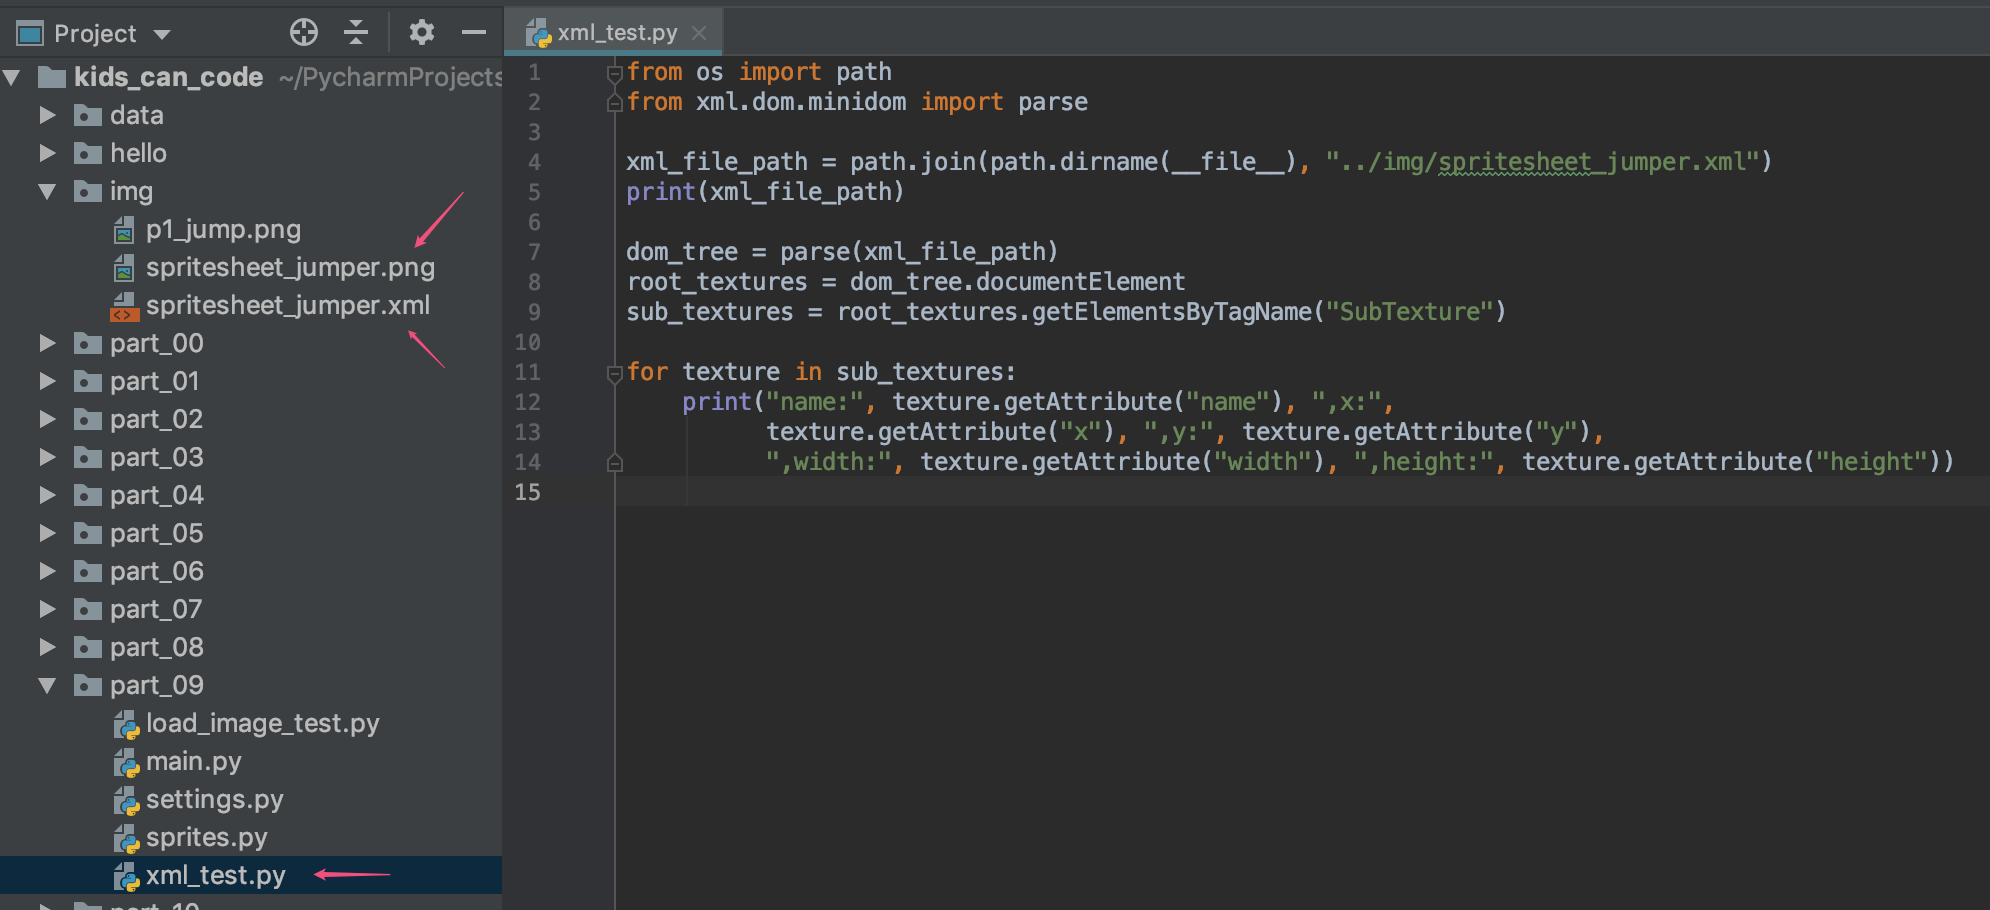
注:相对目录结构,参考下图:
上面这几行代码,就能把xml解析出来,输出类似下面这样:
...

name: bronze_1.png ,x: 707 ,y: 296 ,width: 84 ,height: 84

name: bronze_2.png ,x: 826 ,y: 206 ,width: 66 ,height: 84

name: bronze_3.png ,x: 899 ,y: 116 ,width: 50 ,height: 84

name: bronze_4.png ,x: 670 ,y: 406 ,width: 14 ,height: 84

...
知道了xml如何解析,下面就是如何取出指定小图片,借助pygame的最小框架,做一个测试:
 import pygame

 from os import path

 from xml.dom.minidom import parse

 # 游戏中的一些常量定义

 SIZE = (WIDTH, HEIGHT) = (380, 380)

 FPS = 10

 # 颜色常量定义

 BLACK = 0, 0, 0

 WHITE = 255, 255, 255

 # 初始化

 pygame.init()

 pygame.mixer.init()

 # 窗口、标题等初始化

 screen = pygame.display.set_mode(SIZE)

 pygame.display.set_caption("My Game")

 clock = pygame.time.Clock()

 spritesheet_image_file_name = path.join(path.dirname(__file__), "../img/spritesheet_jumper.png")

 spritesheet_xml_file_name = path.join(path.dirname(__file__), "../img/spritesheet_jumper.xml")

 spritesheet_image = pygame.image.load(spritesheet_image_file_name)

 spritesheet_image.set_colorkey(BLACK)

 spritesheet_dom_tree = parse(spritesheet_xml_file_name)

 root_textures = spritesheet_dom_tree.documentElement

 sub_textures = root_textures.getElementsByTagName("SubTexture")

 dic_image = {}

 # 解析xml,找出指定图片的坐标、尺寸信息

 def get_image_rect(img_name):

     if dic_image.get(img_name):

         return dic_image[img_name]

     for texture in sub_textures:

         name = texture.getAttribute("name")

         if img_name == name:

             dic_image[img_name] = pygame.Rect(

                 int(texture.getAttribute("x")),

                 int(texture.getAttribute("y")),

                 int(texture.getAttribute("width")),

                 int(texture.getAttribute("height"))

             )

             return dic_image[img_name]

 # 获取指定图片的Surface对象,同时支持旋转+缩放

 def get_image(img_name, angle=0, scale=1.0):

     rect = get_image_rect(img_name);

     image = pygame.Surface((rect.width, rect.height))

     image.blit(spritesheet_image, (0, 0), rect)

     image.set_colorkey(BLACK)

     new_image = pygame.transform.rotozoom(image, angle, scale)

     new_image.set_colorkey(BLACK)

     return new_image

 # 循环入口

 running = True

 while running:

     # 设置帧数

     clock.tick(FPS)

     # 事件处理

     for event in pygame.event.get():

         # 退出处理

         if event.type == pygame.QUIT:

             running = False

     # (update) 游戏更新逻辑(比如:改动角色的位置或一些重要变量等,这里仅演示更新当前时间)

     image1 = get_image("bunny1_hurt.png", 0, 0.5)

     image2 = get_image("bunny1_walk1.png", 45, 0.5)

     image3 = get_image("bunny2_stand.png", -45, 0.5)

     # (draw)渲染屏幕

     screen.fill(BLACK)  # 先准备一块黑布

     screen.blit(image1, (0, 0), image1.get_rect())

     screen.blit(image2, (200, 200), image2.get_rect())

     screen.blit(image3, (200, 50), image3.get_rect())

     # 屏幕内容刷新

     pygame.display.update()

 # 循环结束后,退出游戏

 pygame.quit()
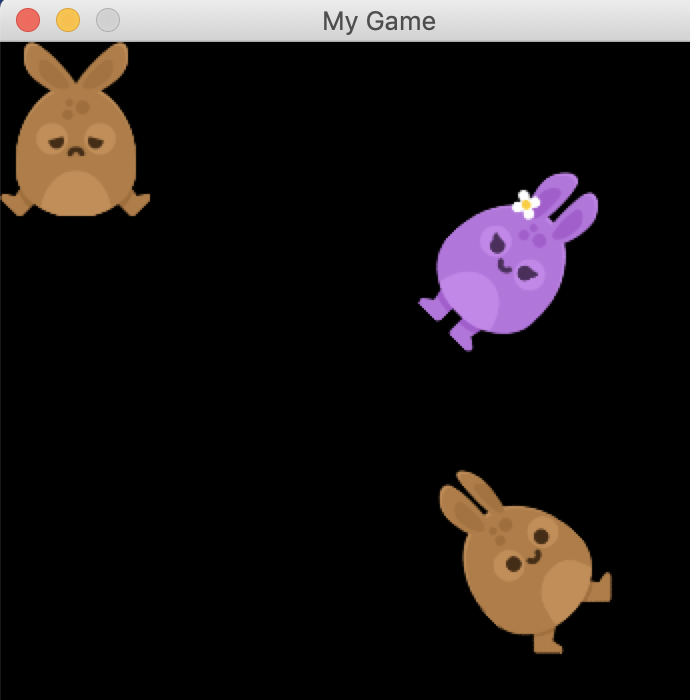
运行效果如下:
好了,前戏足够了,回到jumpy的游戏中来,在sprites.py中,新建一个类:
 class Spritesheet:

     def __init__(self, png_file_name, xml_file_name):

         self.sprite_sheet = pg.image.load(png_file_name)

         self.sprite_sheet_dom_tree = parse(xml_file_name)

         self.dic_image = {}

         self.root_textures = self.sprite_sheet_dom_tree.documentElement

         self.sub_textures = self.root_textures.getElementsByTagName("SubTexture")

     def get_image_rect(self, img_name):

         if self.dic_image.get(img_name):

             return self.dic_image[img_name]

         for texture in self.sub_textures:

             name = texture.getAttribute("name")

             if img_name == name:

                 self.dic_image[img_name] = pg.Rect(

                     int(texture.getAttribute("x")),

                     int(texture.getAttribute("y")),

                     int(texture.getAttribute("width")),

                     int(texture.getAttribute("height"))

                 )

                 return self.dic_image[img_name]

     def get_image(self, img_name):

         rect = self.get_image_rect(img_name)

         image = pg.Surface((rect.width, rect.height))

         image.blit(self.sprite_sheet, (0, 0), rect)

         image = pg.transform.scale(image, (rect.width // 3, rect.height // 3))

         image.set_colorkey(BLACK, 1)

         return image
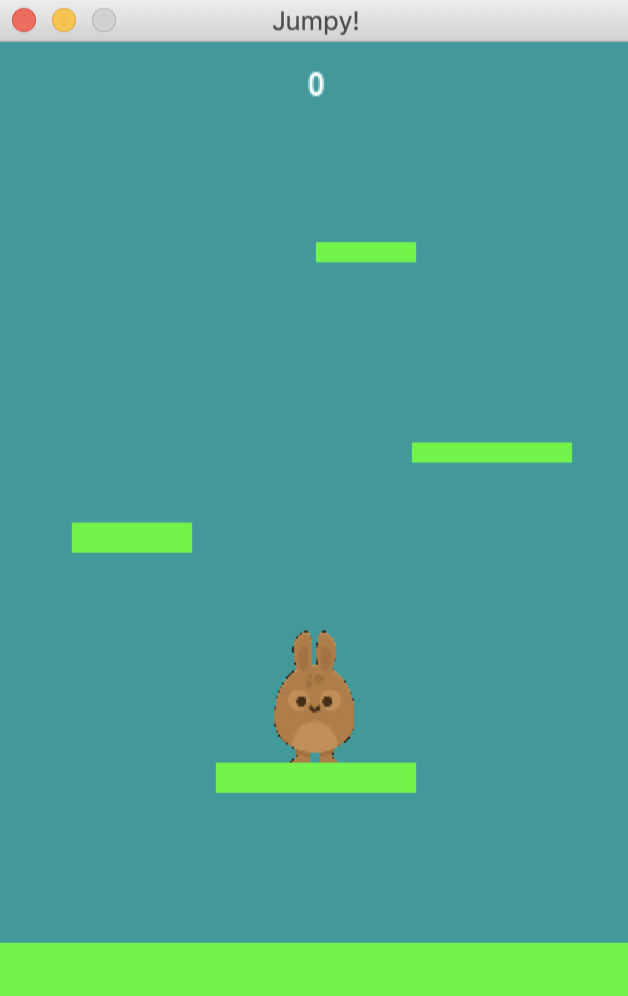
同时原有的Player.py类,初始化时,image换成加载图片(终于可以换掉单调的小方块了)
class Player(pg.sprite.Sprite):

    def __init__(self, game):

        ...

        self.image = self.game.spritesheet.get_image("bunny1_stand.png")

        self.rect = self.image.get_rect()

        ...
最后看看main.py这个主类,还记得上一回,为了加载历史最高得分,新增了一个load_data函数吗?现在又用到了它了:
     def load_data(self):

         # 加载历史最高分

         ...

         # load spritesheet

         self.spritesheet = Spritesheet(path.join(self.dir, "../img/spritesheet_jumper.png"),

                                        path.join(self.dir, "../img/spritesheet_jumper.xml"))
源码:https://github.com/yjmyzz/kids-can-code/tree/master/part_09
pygame-KidsCanCode系列jumpy-part9-使用spritesheet的更多相关文章
- pygame系列_原创百度随心听音乐播放器_完整版
程序名:PyMusic 解释:pygame+music 之前发布了自己写的小程序:百度随心听音乐播放器的一些效果图 你可以去到这里再次看看效果: pygame系列_百度随心听_完美的UI设计 这个程序 ...
- pygame系列
在接下来的blog中,会有一系列的文章来介绍关于pygame的内容,pygame系列偷自http://www.cnblogs.com/hongten/p/hongten_pygame_install. ...
- pygame系列_pygame安装
在接下来的blog中,会有一系列的文章来介绍关于pygame的内容,所以把标题设置为pygame系列 在这篇blog中,主要描述一下我们怎样来安装pygame 可能很多人像我一样,发现了pygame是 ...
- pygame系列_小球完全弹性碰撞游戏
之前做了一个基于python的tkinter的小球完全碰撞游戏: 今天利用业余时间,写了一个功能要强大一些的小球完全碰撞游戏: 游戏名称: 小球完全弹性碰撞游戏规则: 1.游戏初始化的时候,有5个不同 ...
- pygame系列_draw游戏画图
说到画图,pygame提供了一些很有用的方法进行draw画图. ''' pygame.draw.rect - draw a rectangle shape draw a rectangle shape ...
- pygame系列_mouse鼠标事件
pygame.mouse提供了一些方法获取鼠标设备当前的状态 ''' pygame.mouse.get_pressed - get the state of the mouse buttons get ...
- pygame系列_font游戏字体
在pygame游戏开发中,一个友好的UI中,漂亮的字体是少不了的 今天就给大伙带来有关pygame中字体的一些介绍说明 首先我们得判断一下我们的pygame中有没有font这个模块 1 if not ...
- pygame系列_游戏窗口显示策略
在这篇blog中,我将给出一个demo演示: 当我们按下键盘的‘f’键的时候,演示的窗口会切换到全屏显示和默认显示两种显示模式 并且在后台我们可以看到相关的信息输出: 上面给出了一个简单的例子,当然在 ...
- pygame系列_游戏中的事件
先看一下我做的demo: 当玩家按下键盘上的:上,下,左,右键的时候,后台会打印出玩家所按键的数字值,而图形会随之移动 这是客观上面存在的现象. 那么啥是事件呢? 你叫我做出定义,我不知道,我只能举个 ...
随机推荐
- 学习之"setjmp和longjmp函数"
Linux学习之"setjmp和longjmp函数" 转贴,原文地址:http://www.cnblogs.com/lq0729/archive/2011/10/23/2222 ...
- device not found解决方案
今天在使用cordova tools进行真机调试的,报了一个错:device not found; 字面意思就是没有发现设备,这时候可以首先尝试重启adb服务 C:\Users\username\Ap ...
- ELK5.3日志分析平台&部署
https://www.cnblogs.com/xing901022/p/6030296.html ELK简介: Elasticsearch是个开源分布式搜索引擎,它的特点有:分布式,零配置,自动发现 ...
- day8.python文件操作
打开和关闭文件 open函数 用Python内置的open()函数打开一个文件,创建一个file对象,相关的方法才可以调用它进行读写. file = open(file_name [, access_ ...
- ELK 环境搭建2-Kibana
一.安装前准备 1.节点 192.168.30.41 2.操作系统: Centos7.5 3.安装包 a.java8: jdk-8u181-linux-x64.tar.gz b.Kibana kiba ...
- 关闭PHP的opcache缓存
1.使用phpinfo();查看配置信息 2.搜索Additional .ini files parsed 3.查看opcache安装目录 4.打开文件将 opcache.enable=1 改成 ...
- 查看name的状态,是属于active还是standby
sudo -E -u hadoop /home/hadoop/bin/hdfs haadmin -getServiceState nn1 sudo -E -u hadoop /home/hadoop/ ...
- Activity插件化解决方案
--摘自<android插件化开发指南> 1.宿主App加载插件中的类 2.最简单的插件化方案就是在宿主的androidmanifest.xml中申明插件中的四大组件 把插件dex合并到宿 ...
- Python库: PrettyTable 模块
一,PrettyTable简介 PrettyTable是python中的一个第三方库,可用来生成美观的ASCII格式的表格: 二,PrettyTable安装 使用PIP即可十分方便的安装PrettyT ...
- Django模板之通用模板的使用
Django模板之通用模板的使用 转载:https://code.ziqiangxuetang.com/django/django-template.html 我们做网站有一些通用的部分,比如 导航, ...