【Ray Tracing The Next Week 超详解】 光线追踪2-4 Perlin noise
Preface
为了得到更好的纹理,很多人采用各种形式的柏林噪声(该命名来自于发明人 Ken Perlin)
柏林噪声是一种比较模糊的白噪声的东西:(引用书中一张图)
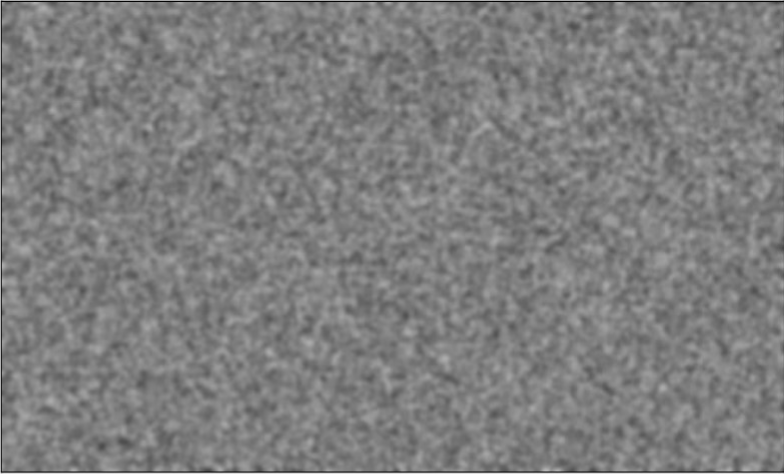
柏林噪声是用来生成一些看似杂乱无章其实有些变换规律的图形(更加贴近自然),比如海水、地形、雾等
当然这里面的原理涉及分形几何等相关的知识
例如,2D柏林噪声可以生成

以及一些网上的总结:
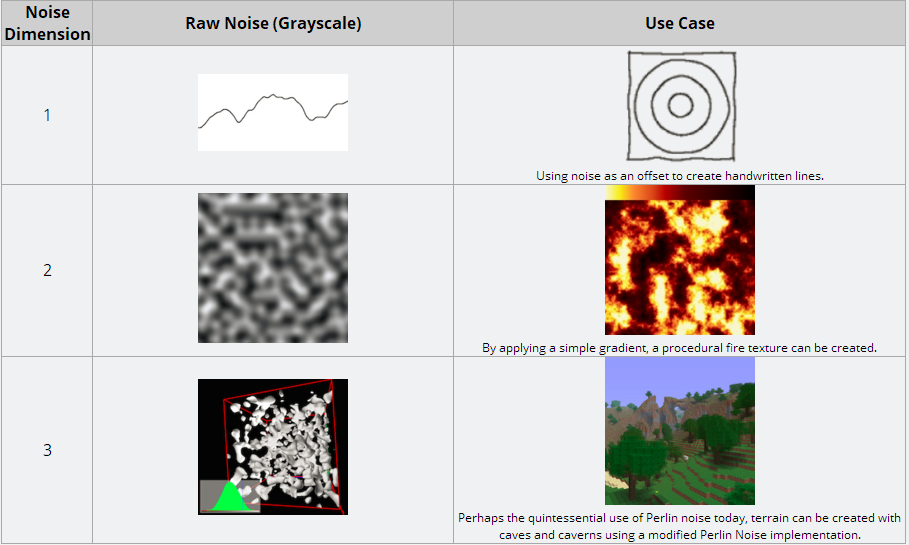
还有一些其他的图


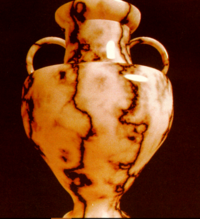
是不是看起来自然多了
那么今天,我们就来领略一下随机技术带来的自然之美~
Chapter 4:Perlin Noise
柏林噪声有2个关键的特点:
第一,输入相同的3D点,总能返回相同的随机值
第二,简单快捷,使用一些hack的方法,达到快速近似的效果。
关于随机数:
许多人在他们的程序中使用“随机数产生器”,以使得物体的运动行为更加自然,或者用来生成纹理。随机数产生器在一些情况下很有用,比如用在模拟自然物体的地方,如地形,海水等。
自然物体通常是分形的,有各种各样的层次细节,比如山的轮廓,通过高度区分就有高山(mountain,高度变化大)、山丘(hill,高度变化适中)、巨石(高度变化小) 、石头(高度变化很小)等。另外,比如草地、海浪、跑动的蚂蚁、摇晃的树枝、风、大理石的花纹等等,这些都呈现出了或大或小的细节变化。Perlin噪声函数通过噪声函数来模拟这些自然景观。
要构造一个Perlin函数,首先需要一个噪声函数和一个插值函数。
我们第一步当然是构建一个Perlin的类
class Perlin

    {

public:

    inline rtvar noise(const rtvec& p)const;

    inline static rtvar* randomvalue() { return _randomvalue; }

    inline static int* perm_x() { return _perm_x; }

    inline static int* perm_y() { return _perm_y; }

    inline static int* perm_z() { return _perm_z; }

public:

    static rtvar* perlin_generate();

    static int* perlin_generate_perm();

    static void permute(int* p, int n);

private:

    static rtvar* _randomvalue;

    static int* _perm_x;

    static int* _perm_y;

    static int* _perm_z;

    };
我们来介绍一下,第一个public包含的是和该类相关的成员函数
第二个public是我们的随机数生成函数,它们按理说应该和此类无关,但是放在类外,担心污染命名空间,所以暂时列为静态函数成员,毕竟它们和Perlin类有很大关系,最后的时候,再把所有的功能性全局函数封装到3D泛型库里面
类数据成员:分别是Perlin随机函数生成的随机序列以及三个方向的辅助随机分量序列
我们如下设置这三个随机函数
rtvar * Perlin::perlin_generate()

    {

    rtvar* p = new rtvar[];

    for (int i = ; i < ; ++i)    p[i] = lvgm::rand01();

    return p;

    }

int* Perlin::perlin_generate_perm()

    {

    int * p = new int[];

    for (int i = ; i < ; ++i)    p[i] = i;

    permute(p, );

    return p;

    }

void Perlin::permute(int * p, int n)

    {

    for (int i = n - ; i > ; --i)

        {

        int target = int(lvgm::rand01() * (i + ));

        stds swap(p[i], p[target]);

        }

    }
然后用它们初始化静态数据成员
rtvar* Perlin::_randomvalue = Perlin::perlin_generate();

int* Perlin::_perm_x = Perlin::perlin_generate_perm();

int* Perlin::_perm_y = Perlin::perlin_generate_perm();

int* Perlin::_perm_z = Perlin::perlin_generate_perm();
其中,总随机序列由第一种方法生成,序列中的每一个元素均为0~1的随机数
分量的随机序列由第二种方法生成,即,初始序列为1-255,之后遍历整个序列,当前位置和一个随机生成的位置进行交换,已达到序列随机化
随机函数讲完了,我们来看一下产生噪声值的函数

u,v,w是插值时候用的,目前暂时不用
参数p为空间某点的位置(未经归一化或单位化)
上面的函数也很好懂,就不细说了
我们暂时先不管插值函数,我们先用这个试一下效果
class noise_texture :public texture

    {

public:

    noise_texture() {  }

    virtual rtvec value(rtvar u, rtvar v, const rtvec& p)const override;

private:

    Perlin _noise;

    };

rtvec noise_texture::value(rtvar u, rtvar v, const rtvec& p)const

    {

    return rtvec(, , ) * _noise.noise(p);

    }
就是把原来的噪声值腾个地方,转个手,没什么变化
然后主函数中

相机参数依然是:(以后默认是这个)

得到的效果是这样的:
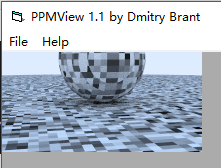
其实还有个中间产品,之前把noise中的最后一行写成了
return _randomvalue[_perm_x[i] ^ _perm_y[i] ^ _perm_z[i]];
结果得到了下图(未做到完全随机)
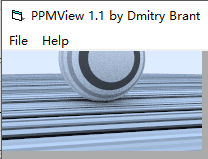
感觉这个手误形成图也挺好看的
第一个图片看起来有点生硬粗糙,不是很光滑,所以,我们采用线性插值光滑一下
rtvar Perlin::trilinear_interp(rtvar c[][][], rtvar u, rtvar v, rtvar w)

    {

    rtvar accumulate = ;

    for (int i = ; i < ; ++i)

        for (int j = ; j < ; ++j)

            for (int k = ; k < ; ++k)

                accumulate +=

                (i * u + ( - i)*( - u))*

                (j * v + ( - j)*( - v))*

                (k * w + ( - k)*( - w))*

                c[i][j][k];

    return accumulate;

    }
我们把插值函数加入到noise函数中,当然你也可以尝试其他的插值函数
inline rtvar Perlin::noise(const rtvec& p)const

    {

    int i = floor(p.x());

    int j = floor(p.y());

    int k = floor(p.z());

    rtvar u = p.x() - i;

    rtvar v = p.y() - j;

    rtvar w = p.z() - k;

    rtvar list[][][];

    for (int a = ; a < ; ++a)

        for (int b = ; b < ; ++b)

            for (int c = ; c < ; ++c)

                list[a][b][c] = _randomvalue[_perm_x[(i + a) & ] ^ _perm_y[(j + b) & ] ^ _perm_z[(k + c) & ]];

    return trilinear_interp(list, u, v, w);

    }
我们同时采用了随机生成函数和插值函数

我们还可以再尝试一下利用Hermit Cubic来进行舍入插值
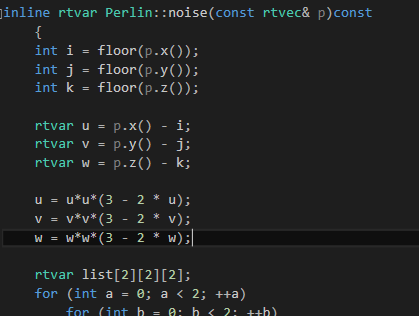

它的频率依旧有点低,我们可以对参数施加一定的缩放比例,加速它的变化
也就是图像中的颜色更迭的太慢(I think)
class noise_texture :public texture

    {

public:

    noise_texture() {  }

    noise_texture(const rtvar scale);

    virtual rtvec value(rtvar u, rtvar v, const rtvec& p)const override;

private:

    Perlin _noise;

    rtvar _scale;

    };

noise_texture::noise_texture(const rtvar scale)

    :_scale(scale)

    {

    }

rtvec noise_texture::value(rtvar u, rtvar v, const rtvec& p)const

    {

    return rtvec(, , ) * _noise.noise(_scale * p);

    }
下面是scale 为 15 的图像

看起来密集多了,颜色变换频率也快了
下面是scale 为 1.5 的图像

显然,上面的图像格点还是很明晰的,可能是因为最小值和最大值总是精确地落在整数x / y / z上。 Ken Perlin采用了另一种技巧,将随机单位向量(而不仅仅是浮点数)放在格点上,并使用点积来移动格子的最小值和最大值。
所以,首先我们需要将随机浮点数更改为随机向量,试一试新的方法
下面是书上的代码,你运行之后打不开图像文件,因为里面是错的,我们边看边数说哪里错了
我们需要把数据成员_randomvalue改为static rtvec*
所以初始化语句也要改
rtvec * Perlin::_randomvalue = Perlin::perlin_generate();

int * Perlin::_perm_x = Perlin::perlin_generate_perm();

int * Perlin::_perm_y = Perlin::perlin_generate_perm();

int * Perlin::_perm_z = Perlin::perlin_generate_perm();
rtvec * Perlin::perlin_generate()

{

    rtvec * p = new rtvec[];

    for (int i = ; i < ; ++i)

        p[i] = rtvec(- +  * lvgm::rand01(), - +  * lvgm::rand01(), - +  * lvgm::rand01()).ret_unitization();

    return p;

}
且看上面这段代码, -1 + 2*lvgm::rand01(),返回的区间为-1~1
inline rtvar Perlin::noise(const rtvec& p)const

{

    int i = floor(p.x());

    int j = floor(p.y());

    int k = floor(p.z());

    rtvar u = p.x() - i;

    rtvar v = p.y() - j;

    rtvar w = p.z() - k;

    rtvec list[][][];

    for (int a = ; a < ; ++a)

        for (int b = ; b < ; ++b)

            for (int c = ; c < ; ++c)

            {

                list[a][b][c] = _randomvalue[_perm_x[(i + a) & ], _perm_y[(j + b) & ], _perm_z[(k + c) & ]];

#ifdef listtest

                if (list[a][b][c].x() < )stds cout << "list.x < 0 " << stds endl;

                if (list[a][b][c].y() < )stds cout << "list.y < 0 " << stds endl;

                if (list[a][b][c].z() < )stds cout << "list.z < 0 " << stds endl;

#endif

            }

    return perlin_interp(list, u, v, w);
上述测试部分可能会输出信息,因为list中有负值,然后Perlin向量插值就可能会是负值
rtvar Perlin::perlin_interp(rtvec list[][][], rtvar u, rtvar v, rtvar w)

{

    rtvar uu = u*u*( -  * u);

    rtvar vv = v*v*( -  * v);

    rtvar ww = w*w*( -  * w);

    rtvar accumulate = ;

    for (int i = ; i < ; ++i)

        for (int j = ; j < ; ++j)

            for (int k = ; k < ; ++k)

            {

                rtvec weight(u - i, v - j, w - k);

                accumulate +=

                    (i*uu + ( - i) * ( - uu))*

                    (j*vv + ( - j) * ( - vv))*

                    (k*ww + ( - k) * ( - ww))*

                    lvgm::dot(list[i][j][k], weight);

#ifdef accumulatetest

                if (accumulate < )stds cout << "accumulate < 0 " << stds endl;

#endif

            }

    return (accumulate);

}
****************************** 为什么是“错”的 ***************************************
如果noise返回一个负值,那么
rtvec noise_texture::value(rtvar u, rtvar v, const rtvec& p)const

    {

    return rtvec(., ., .) *_noise.noise(p);

    }
它返回的就是一个负值
bool lambertian::scatter(const ray& rIn, const hitInfo& info, rtvec& attenuation, ray& scattered)const

    {

    rtvec target = info._p + info._n + lvgm::random_unit_sphere();

    scattered = ray{ info._p, target - info._p };

    attenuation = _albedo->value(.,.,info._p);

    return true;

    }
scatter传出去的attenuation就是负值
主函数中
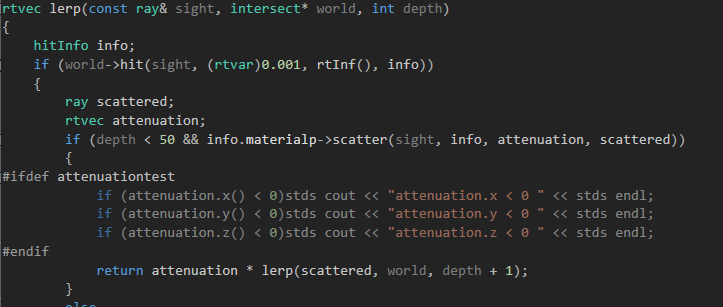
错误信息会输出成功,lerp函数返回含有负值的向量

gamma校正负值开根号为出现无穷
你的图像文件数据读取会报错!
****************************** 插曲结束 ***************************************
那么如果把随机生成函数改为
rtvec * Perlin::perlin_generate()

{

    rtvec * p = new rtvec[];

    for (int i = ; i < ; ++i)

        p[i] = rtvec(abs(- +  * lvgm::rand01()), abs(- +  * lvgm::rand01()), abs(- +  * lvgm::rand01())).ret_unitization();

    return p;

}
还不行,因为noise会返回负值,那么我们把Perlin插值的返回值改为正值即可
rtvar Perlin::perlin_interp(rtvec list[][][], rtvar u, rtvar v, rtvar w)

{

    rtvar uu = u*u*( -  * u);

    rtvar vv = v*v*( -  * v);

    rtvar ww = w*w*( -  * w);

    rtvar accumulate = ;

    for (int i = ; i < ; ++i)

        for (int j = ; j < ; ++j)

            for (int k = ; k < ; ++k)

            {

                rtvec weight(u - i, v - j, w - k);

                accumulate +=

                    (i*uu + ( - i) * ( - uu))*

                    (j*vv + ( - j) * ( - vv))*

                    (k*ww + ( - k) * ( - ww))*

                    lvgm::dot(list[i][j][k], weight);

#ifdef accumulatetest

                if (accumulate < )stds cout << "accumulate < 0 " << stds endl;

#endif

            }

    return abs(accumulate);        //!!!

}
那么我们的图片将是这个样子的
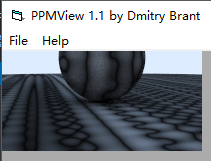
如果我们不改动随机数生成器,只保证noise函数最后的返回值为正值
那么也是上面那个图
改动间还得到了如下图:
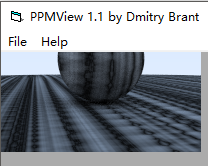
上面两个图是因为noise函数中list的值每次取得都和z有关,所以造成了上述线条现象

不小心重新抄写的时候将^写成了逗号,不过改为^也是错,因为不管怎么选择下标,该数组中的元素值始终都是-1~1
真正的解法是value取值的时候对noise的返回值做处理
下面是Perlin.hpp
/// Perlin.hpp

// -----------------------------------------------------

// [author]        lv

// [begin ]        2019.1

// [brief ]        the Perlin-class for the ray-tracing project

//                from the 《ray tracing the next week》

// -----------------------------------------------------

#pragma once

namespace rt

{

class Perlin

    {

public:

    inline rtvar noise(const rtvec& p)const;

    inline rtvar turb(const rtvec& p, int depth) const;

    inline rtvec* randomvalue()const { return _randomvalue; }

    inline int* perm_x()const { return _perm_x; }

    inline int* perm_y()const { return _perm_y; }

    inline int* perm_z()const { return _perm_z; }

public:

    static rtvec * perlin_generate();

    static void permute(int * p, int n);

    static int * perlin_generate_perm();

    static rtvar perlin_interp(rtvec list[][][], rtvar u, rtvar v, rtvar w);

private:

    static rtvec * _randomvalue;

    static int * _perm_x;

    static int * _perm_y;

    static int * _perm_z;

    };

rtvec * Perlin::_randomvalue = Perlin::perlin_generate();

int * Perlin::_perm_x = Perlin::perlin_generate_perm();

int * Perlin::_perm_y = Perlin::perlin_generate_perm();

int * Perlin::_perm_z = Perlin::perlin_generate_perm();

rtvec * Perlin::perlin_generate()

    {

    rtvec * p = new rtvec[];

    for (int i = ; i < ; ++i)

        p[i] = rtvec(- +  * lvgm::rand01(), - +  * lvgm::rand01(), - +  * lvgm::rand01()).ret_unitization();

    return p;

    }

int* Perlin::perlin_generate_perm()

    {

    int * p = new int[];

    for (int i = ; i < ; ++i)    p[i] = i;

    permute(p, );

    return p;

    }

void Perlin::permute(int* p, int n)

    {

    for (int i = n - ; i; i--)

        {

        int tar = int(lvgm::rand01() * (i + ));

        stds swap(p[i], p[tar]);

        }

    }

rtvar Perlin::turb(const rtvec& p, int depth = ) const

    {

    rtvar accumulate = ;

    rtvec t = p;

    rtvar weight = 1.0;

    for (int i = ; i < depth; i++)

        {

        accumulate += weight*noise(t);

        weight *= 0.5;

        t *= ;

        }

    return abs(accumulate);

    }

inline rtvar Perlin::noise(const rtvec& p)const

    {

    int i = floor(p.x());

    int j = floor(p.y());

    int k = floor(p.z());

    rtvar u = p.x() - i;

    rtvar v = p.y() - j;

    rtvar w = p.z() - k;

    rtvec list[][][];

    for (int a = ; a < ; ++a)

        for (int b = ; b < ; ++b)

            for (int c = ; c < ; ++c)

                {

                list[a][b][c] = _randomvalue[_perm_x[(i + a) & ] ^ _perm_y[(j + b) & ] ^ _perm_z[(k + c) & ]];

#ifdef listtest

                if (list[a][b][c].x() < )stds cout << "list.x < 0 " << stds endl;

                if (list[a][b][c].y() < )stds cout << "list.y < 0 " << stds endl;

                if (list[a][b][c].z() < )stds cout << "list.z < 0 " << stds endl;

#endif

                }

    return perlin_interp(list, u, v, w);

    }

rtvar Perlin::perlin_interp(rtvec list[][][], rtvar u, rtvar v, rtvar w)

    {

#ifdef uvwtest

    if (u < )stds cout << "u < 0 " << stds endl;

    if (v < )stds cout << "v < 0 " << stds endl;

    if (w < )stds cout << "w < 0 " << stds endl;

    if (u > )stds cout << "u > 1 " << stds endl;

    if (v > )stds cout << "v > 1 " << stds endl;

    if (w > )stds cout << "w > 1 " << stds endl;

#endif

    rtvar uu = u*u*( -  * u);

    rtvar vv = u*v*( -  * v);

    rtvar ww = u*w*( -  * w);

    rtvar accumulate = ;

    for (int i = ; i < ; ++i)

        for (int j = ; j < ; ++j)

            for (int k = ; k < ; ++k)

                {

                rtvec weight(u - i, v - j, w - k);

                accumulate +=

                    (i*uu + ( - i) * ( - uu))*

                    (j*vv + ( - j) * ( - vv))*

                    (k*ww + ( - k) * ( - ww))*

                    lvgm::dot(list[i][j][k], weight);

#ifdef accumulatetest

                if (accumulate < )stds cout << "accumulate < 0 " << stds endl;

#endif

                }

    return accumulate;

    }

}
Perlin.hpp
以及noise_texture.hpp中的value函数,如下:

方可解决noise中返回为负的情况,_scale 为 5 的时候做出的图如下:

同样,我们可以将光线追踪提高图片质量的惯用伎俩——采样,用在噪声值生成上面,即:使用具有多个相加频率的复合噪声。 这通常称为turbulence
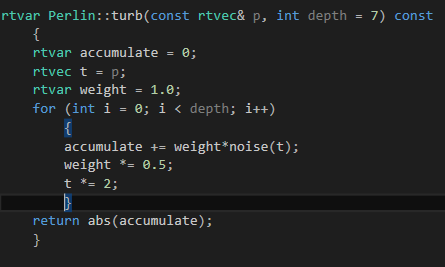
用turb函数来代替noise函数,编者在turb返回的时候取了绝对值,而noise中的负值任由不管,不知为何。。

得到如下图:

既然,编者已经将turb返回值取了绝对值,我们大可试一下之前的value函数

_scale 为 5 时候
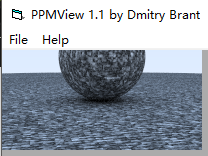
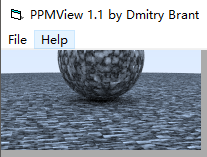
看着有点密集,和书上的不太像,把_scale调为3,得到如下图,看着差不多了
程序纹理的入门是大理石纹理, 基本思想是使颜色与正弦函数成比例,并使用turbulence来调整相位,能使条纹起伏

y = sin(wx + φ)
_scale就是w值,我实在调不出来书上的纹理
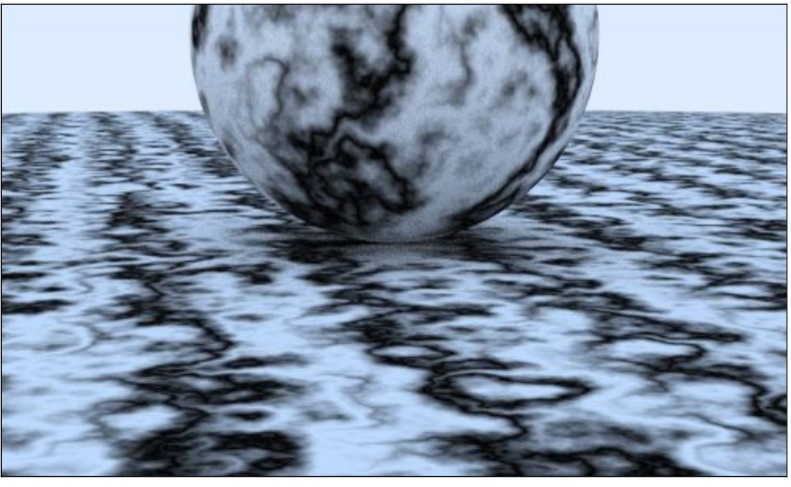
我把_scale的值调成6.3,结果如下:
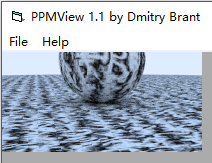
_scale 值越大,图像上的正弦曲线波动幅度越小
如果谁调整出来书上的_scale值了,请于下方评论区留言
我们不妨把value函数中的turb改为原来的noise


则得到下面这幅图
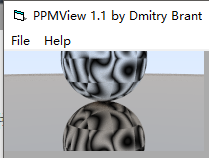
可以看到比较明显的格块状,所以turb还是好一点
今天就到这儿了,感谢您的阅读,生活愉快~
【Ray Tracing The Next Week 超详解】 光线追踪2-4 Perlin noise的更多相关文章
- 【Ray Tracing The Next Week 超详解】 光线追踪2-9
我们来整理一下项目的代码 目录 ----include --hit --texture --material ----RTdef.hpp ----ray.hpp ----camera.hpp ---- ...
- 【Ray Tracing The Next Week 超详解】 光线追踪2-6 Cornell box
Chapter 6:Rectangles and Lights 今天,我们来学习长方形区域光照 先看效果 light 首先我们需要设计一个发光的材质 /// light.hpp // ------- ...
- 【Ray Tracing in One Weekend 超详解】 光线追踪1-4
我们上一篇写了Chapter5 的第一个部分表面法线,那么我们来学剩下的部分,以及Chapter6. Chapter5:Surface normals and multiple objects. 我们 ...
- 【Ray Tracing The Next Week 超详解】 光线追踪2-7 任意长方体 && 场景案例
上一篇比较简单,很久才发是因为做了一些好玩的场景,后来发现这一章是专门写场景例子的,所以就安排到了这一篇 Preface 这一篇要介绍的内容有: 1. 自己做的光照例子 2. Cornell box画 ...
- 【Ray Tracing The Next Week 超详解】 光线追踪2-8 Volume
Preface 今天有两个东东,一个是体积烟雾,一个是封面图 下一篇我们总结项目代码 Chapter 8:Volumes 我们需要为我们的光线追踪器添加新的物体——烟.雾,也称为participat ...
- 【Ray Tracing The Next Week 超详解】 光线追踪2-5
Chapter 5:Image Texture Mapping 先看效果: 我们之前的纹理是利用的是撞击点p处的位置信息,比如大理石纹理 而我们今天的图片映射纹理采用2D(u,v)纹理坐标来进行. 在 ...
- 【Ray Tracing in One Weekend 超详解】 光线追踪1-8 自定义相机设计
今天,我们来学习如何设计自定义位置的相机 ready 我们只需要了解我们之前的坐标体系,或者说是相机位置 先看效果 Chapter10:Positionable camera 这一章我们直接用概念 ...
- 【Ray Tracing The Next Week 超详解】 光线追踪2-3
Preface 终于到了激动人心的纹理章节了 然鹅,看了下,并不激动 因为我们之前就接触过 当初有一个 attenuation 吗? 对了,这就是我们的rgb分量过滤器,我们画出的红色.蓝色.绿色等 ...
- 【Ray Tracing The Next Week 超详解】 光线追踪2-2
Chapter 2:Bounding Volume Hierarchies 今天我们来讲层次包围盒,乍一看比较难,篇幅也多,但是咱们一步一步来,相信大家应该都能听懂 BVH 和 Perlin text ...
随机推荐
- Openstack运维指南文档整理
非常全面的运维指南整理http://zjzone.cc/index.php/2017/07/31/openstack-yun-wei-wen-dang-zheng-li/
- jQueryCDN
分享几个jquery的几个国内国外的CDN加速节点,方便广大的开发设计者调用和节约空间,官网的总是最新版本的jquery所以不用去担心版本更新问题,其他加速节点可能不会在更新版本,所以取舍问题自己决定 ...
- 使用 Nginx 和 Gunicorn 部署 Django 博客(转)
原文:http://zmrenwu.com/post/20/ http://www.siar.me/post/9/ 针对很多朋友反映按照教程的做法始终只能看到 Nginx 欢迎页面的问题,Tian ...
- OpenStack 计算服务 Nova计算节点部署(八)
如果使用vmware虚拟机进行部署,需要开启虚拟化:如果是服务器需要在bios上开启. nova计算节点IP是192.168.137.12 环境准备 安装时间同步 yum install ntpdat ...
- create-react-app脚手架使用
1.安装脚手架和路由 npm i -g create-react-app npm i -S react-router react-router-dom 2.创建新项目 create-react-app ...
- Java基础-二进制以及字符编码简介
Java基础-二进制以及字符编码简介 作者:尹正杰 版权声明:原创作品,谢绝转载!否则将追究法律责任. 想必计算机毕业的小伙伴或是从事IT的技术人员都知道数据存储都是以二进制的数字存储到硬盘的.从事开 ...
- ajax实现输入用户名异步提示是否可用
<script type="text/javascript"> //页面加载完毕后执行 $(document).ready(function(){ //用户名输入框绑定 ...
- JavaScript中函数和类(以及this的使用<重点>,以及js和jquery讲解,原生js实现jquery)
1.javascript中以函数来表示类: 一般函数是小写开头:function foo() 类开头是大写:function Foo() 实例化类: obj = new Foo() 其他属性就同类是一 ...
- C#_界面程序_数码游戏
using System; using System.Collections.Generic; using System.ComponentModel; using System.Data; usin ...
- 通达信zig函数的python实现
通达信zig函数的python实现 代码 # coding: utf-8 """ Created on Sat Jan 05 18:53:39 2019 http://w ...
