maven使用实战
maven使用实战
创建项目
在eclipse中创建maven项目之后,会生成.classpath / .setting / .project 三个文件或者文件夹
.classpath
这个文件是用来说明这个工程的项目环境的
比如
- kind=src: 用来表示源文件地址
- kind=con: 表示运行的系统环境
- kind=lib: 表示工程的library具体位置
- kind=output: 表示工程的输出目录
.project
这个文件表示说明这个工程的描述信息
比如:
- name: 表示工程名字
- comment: 表示工程描述
.settings
描述各种插件的配置文件
pom.xml
这个就是maven的配置文件了
eclipse使用maven
创建
当使用eclipse创建一个maven项目的时候,pom如下:
<project xmlns="http://maven.apache.org/POM/4.0.0" xmlns:xsi="http://www.w3.org/2001/XMLSchema-instance"

  xsi:schemaLocation="http://maven.apache.org/POM/4.0.0 http://maven.apache.org/xsd/maven-4.0.0.xsd">

  <modelVersion>4.0.0</modelVersion>

  <groupId>com.yejianfeng</groupId>

  <artifactId>maventest</artifactId>

  <version>0.0.1-SNAPSHOT</version>

  <packaging>jar</packaging>

  <name>maventest</name>

  <url>http://maven.apache.org</url>

  <properties>

    <project.build.sourceEncoding>UTF-8</project.build.sourceEncoding>

  </properties>

  <dependencies>

    <dependency>

      <groupId>junit</groupId>

      <artifactId>junit</artifactId>

      <version>3.8.1</version>

      <scope>test</scope>

    </dependency>

  </dependencies>

</project>
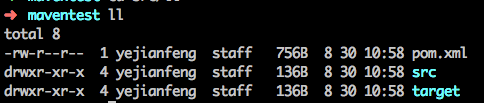
看文件目录,其实只有两个文件夹src和target
maven install
当我们调用
mvn install
的时候,我们看到下面的信息
➜  maventest mvn install

[INFO] Scanning for projects...

[INFO]

[INFO] ------------------------------------------------------------------------

[INFO] Building maventest 0.0.1-SNAPSHOT

[INFO] ------------------------------------------------------------------------

[INFO]

[INFO] --- maven-resources-plugin:2.6:resources (default-resources) @ maventest ---

[INFO] Using 'UTF-8' encoding to copy filtered resources.

[INFO] skip non existing resourceDirectory /Users/yejianfeng/Documents/didi/workspace/maventest/src/main/resources

[INFO]

[INFO] --- maven-compiler-plugin:3.1:compile (default-compile) @ maventest ---

[INFO] Changes detected - recompiling the module!

[INFO] Compiling 1 source file to /Users/yejianfeng/Documents/didi/workspace/maventest/target/classes

[INFO]

[INFO] --- maven-resources-plugin:2.6:testResources (default-testResources) @ maventest ---

[INFO] Using 'UTF-8' encoding to copy filtered resources.

[INFO] skip non existing resourceDirectory /Users/yejianfeng/Documents/didi/workspace/maventest/src/test/resources

[INFO]

[INFO] --- maven-compiler-plugin:3.1:testCompile (default-testCompile) @ maventest ---

[INFO] Changes detected - recompiling the module!

[INFO] Compiling 1 source file to /Users/yejianfeng/Documents/didi/workspace/maventest/target/test-classes

[INFO]

[INFO] --- maven-surefire-plugin:2.12.4:test (default-test) @ maventest ---

[INFO] Surefire report directory: /Users/yejianfeng/Documents/didi/workspace/maventest/target/surefire-reports

Downloading: http://maven.aliyun.com/nexus/content/groups/public/org/apache/maven/surefire/surefire-junit3/2.12.4/surefire-junit3-2.12.4.pom

Downloaded: http://maven.aliyun.com/nexus/content/groups/public/org/apache/maven/surefire/surefire-junit3/2.12.4/surefire-junit3-2.12.4.pom (1.7 kB at 3.4 kB/s)

Downloading: http://maven.aliyun.com/nexus/content/groups/public/org/apache/maven/surefire/surefire-providers/2.12.4/surefire-providers-2.12.4.pom

Downloaded: http://maven.aliyun.com/nexus/content/groups/public/org/apache/maven/surefire/surefire-providers/2.12.4/surefire-providers-2.12.4.pom (2.3 kB at 9.1 kB/s)

Downloading: http://maven.aliyun.com/nexus/content/groups/public/org/apache/maven/surefire/surefire-junit3/2.12.4/surefire-junit3-2.12.4.jar

Downloaded: http://maven.aliyun.com/nexus/content/groups/public/org/apache/maven/surefire/surefire-junit3/2.12.4/surefire-junit3-2.12.4.jar (26 kB at 95 kB/s)

-------------------------------------------------------

 T E S T S

-------------------------------------------------------

Running com.yejianfeng.maventest.AppTest

Tests run: 1, Failures: 0, Errors: 0, Skipped: 0, Time elapsed: 0.012 sec

Results :

Tests run: 1, Failures: 0, Errors: 0, Skipped: 0

[INFO]

[INFO] --- maven-jar-plugin:2.4:jar (default-jar) @ maventest ---

[INFO] Building jar: /Users/yejianfeng/Documents/didi/workspace/maventest/target/maventest-0.0.1-SNAPSHOT.jar

[INFO]

[INFO] --- maven-install-plugin:2.4:install (default-install) @ maventest ---

[INFO] Installing /Users/yejianfeng/Documents/didi/workspace/maventest/target/maventest-0.0.1-SNAPSHOT.jar to /Users/yejianfeng/.m2/repository/com/yejianfeng/maventest/0.0.1-SNAPSHOT/maventest-0.0.1-SNAPSHOT.jar

[INFO] Installing /Users/yejianfeng/Documents/didi/workspace/maventest/pom.xml to /Users/yejianfeng/.m2/repository/com/yejianfeng/maventest/0.0.1-SNAPSHOT/maventest-0.0.1-SNAPSHOT.pom

[INFO] ------------------------------------------------------------------------

[INFO] BUILD SUCCESS

[INFO] ------------------------------------------------------------------------

[INFO] Total time: 4.993 s

[INFO] Finished at: 2017-08-30T11:06:34+08:00

[INFO] Final Memory: 21M/208M

[INFO] ------------------------------------------------------------------------
可以清晰看到,这个install经过了:
- resources
- compile
- testResources
- testCompile
- test
- package(jar)
- install
环节,这个是packaging为jar的默认构建阶段,我们使用mvn install, 就执行到install为止
增加依赖库
我们引用了一个json依赖包,修改pom增加json库:
<dependency>

    <groupId>org.json</groupId>

    <artifactId>json</artifactId>

    <version>20160810</version>

</dependency>
增加了对应的代码:
public class App

{

    public static void main( String[] args )

    {

        System.out.println( "Hello World!" );

        String json = "{'name':'yejianfeng','age':20}";

        String name = getName(json);

        System.out.println("name is " + name);

    }

    public static String getName(String json)

    {

    	JSONObject jsonobj = new JSONObject(json);

    	String name = jsonobj.getString("name");

    	return name;

    }

}
和测试代码:
public class AppTest extends TestCase

{

    ...

    public void testGetName()

    {

    	 String json = "{'name':'yejianfeng','age':20}";

         String name = App.getName(json);

         assertEquals("yejianfeng", name);

    }

}
我们再运行mvn install,看到执行了2个测试用例。
测试覆盖率报告
我们想知道这个测试覆盖了哪些代码,这个时候就需要有测试覆盖率了。我们使用jacoco来生成测试覆盖率报告。JaCoCo的官网在:http://www.eclemma.org/jacoco/
我们可以通过maven-help-plugin来查看这个jacoco插件的goal和具体的参数
mvn help:describe -Dplugin=org.jacoco:jacoco-maven-plugin -Ddetail
我们着重看两个goal,一个是prepare-agent,一个是report
prepare-agent的说明文档,它的目标就是为测试的JVM设置属性和参数,做一些遇上线之前的操作。jacoco的原理大概就是在JVM前面启动一个agent,这个agent负责传递参数给JVM,和收集JVM的运行结果到本地。这个goal就是启动agent的过程。即使你没有需要传递的额外的参数,也需要在execute里面设置这个goal。
report的说明文档,它的目标是为了使用agent的运行结果生成一个测试报告。也是必要的。当然,我们可以配置各个参数来设置这个结果的覆盖文件,编码,报告生成地址等。
我们把pom里面的plugin改为下面的形式:
<plugin>

    <groupId>org.jacoco</groupId>

    <artifactId>jacoco-maven-plugin</artifactId>

    <version>0.7.9</version>

    <executions>

        <execution>

            <id>pre-test</id>

            <goals>

              <goal>prepare-agent</goal>

            </goals>

          </execution>

        <execution>

          <id>post-test</id>

          <phase>test</phase>

          <goals>

                <goal>report</goal>

          </goals>

        </execution>

   </executions>

</plugin>
好,下面运行maven install, 就看到了生成的测试覆盖率报告了。

主清单属性
当我们在命令行要运行这个jar的时候
java -jar target/maventest-0.0.1-SNAPSHOT.jar
发现提示错误:
target/maventest-0.0.1-SNAPSHOT.jar中没有主清单属性
这里提示我们没有设置主清单属性,就是没有设置主函数。
(当然我们可以使用
java -cp target/maventest-0.0.1-SNAPSHOT.jar com.yejianfeng.maventest.App
来指定运行哪个类)
我们需要一个插件来设置主清单,让我们的这个jar包变成可执行jar包(也叫uber-jar 或者 fat-jar)。这个插件的主页在:https://maven.apache.org/plugins/maven-shade-plugin/
通过看文档,我们知道这个插件有两个goal,除了help目标之外,最有用的是shade目标。它默认绑定在package阶段的。这个goal有一个trasformer的配置,可以设置manifestEntity。这个实体可以告知这个库使用的主类是什么。
  <plugin>

    <groupId>org.apache.maven.plugins</groupId>

    <artifactId>maven-shade-plugin</artifactId>

    <version>3.1.0</version>

    <configuration>

      <!-- put your configurations here -->

    </configuration>

    <executions>

      <execution>

        <phase>package</phase>

        <goals>

          <goal>shade</goal>

        </goals>

        <configuration>

        	<transformers>

        		<transformer implementation="org.apache.maven.plugins.shade.resource.ManifestResourceTransformer">

        			<manifestEntries>

        				<Main-Class>com.yejianfeng.maventest.App</Main-Class>

        			</manifestEntries>

        		</transformer>

        	</transformers>

        </configuration>

      </execution>

    </executions>

  </plugin>
好了,现在可以生成可执行jar包了
➜  maventest java -jar target/maventest-0.0.1-SNAPSHOT.jar

Hello World!

name is yejianfeng
而且这个jar包也包含了所有的依赖包。
maven使用实战的更多相关文章
- maven Eclipse实战材料整理
最近在看github上面的项目,发现好多的源码都是maven组织的,但又要去使用maven,因此找资料学习,但是效果很不好,直到昨天晚上看了mooc上面的视频,理清了自己的思路,特将资料列表如下: 视 ...
- Maven最佳实战
Maven中内置的隐藏变量: http://www.cnblogs.com/quanyongan/category/471332.html Maven提供了三个隐式的变量可以用来访问环境变量,POM信 ...
- Maven项目实战(1)
一.maven的好处? 同样的项目使用maven工程来实现,它的项目源码很小: 1.依赖管理 就是对jar 包管理的过程 2.项目的一键构建 (编译-----测试----- 运行 --打包------ ...
- 前后端分离开发,基于SpringMVC符合Restful API风格Maven项目实战(附完整Demo)!
摘要: 本人在前辈<从MVC到前后端分离(REST-个人也认为是目前比较流行和比较好的方式)>一文的基础上,实现了一个基于Spring的符合REST风格的完整Demo,具有MVC分层结构并 ...
- Maven - Maven3实战学习笔记(2)坐标和依赖
1.maven坐标元素 maven坐标元素包括:groupId.artifactId.version.packaging.classifier. classifier:定义输出的附属构件.groupI ...
- Maven - Maven3实战学习笔记(1)Maven使用入门
1.maven安装 1>http://maven.apache.org/download.cgi下载apache-maven-3.6.1 2>解压缩安装包到指定的文件夹,如C:\fyliu ...
- 【Maven】maven 插件开发实战
前言 众所周知,maven 实质上是一个插件执行框架,所有的工作都是通过插件完成的.包括我们日常使用到的类似 install.clean.deploy.compiler...这些命令,其实底层都是一个 ...
- Maven - Maven3实战学习笔记(3)使用maven构建Web应用
1.jetty-maven-plugin自动化测试Web应用工具 <plugin> <groupId>org.mortbay.jetty</groupId> < ...
- 读书笔记-《Maven实战》-2018/4/17
第五章 坐标和依赖 1.如同笛卡尔坐标系一样,Maven也通过坐标三元素定位一个资源. <groupId>com.dengchengchao.test</groupId> &l ...
随机推荐
- 我JAVA修炼之路
今天起,我会不定期更新我的java修炼之路, 2017.7.10,星期一 我参见了河南青云的培训班,这一天是我们的开班典礼. 我会不定期的总结我的学习笔记,大家喜欢的可以看看,不喜勿喷. 写代码: 1 ...
- Python 批量翻译 使用有道api;
妹子是做翻译相关的,遇到个问题,要求得到句子中的所有单词的 音标; 有道翻译只能对单个单词翻译音标,不能对多个单词或者句子段落翻译音标; 手工一个一个翻的话那就要累死人了.....于是就让我写个翻译音 ...
- Java 多态的实现原理
一个对象变量可以指示多种实际类型的现象称为多态 允许不同类的对象对同一消息做出响应.方法的重载.类的覆盖正体现了多态. 1.多态的机制 1.1 本质上多态分两种 .编译时多态(又称静态多态) .运行时 ...
- 【firefox】关闭firefox缓存
在Firefox中关闭缓存 看看这里 在地址栏输入:about:config 然后在过滤器中输入:browser.cache.disk.enable 解释:When a page is loaded, ...
- 【PHP】 安装参数
1. 配置参数 './configure' '--prefix=/usr/local/php5.2' '--with-apxs2=/usr/sbin/apxs' '--with-mysql=/usr/ ...
- 阿里云服务器怎么运行多个项目(Nginx)
server { listen 80; server_name yy.test.cn; access_log /data/wwwlogs/access_nginx.log combined; root ...
- super 与 this 同时使用问题
大家都知道this 和 super 调用构造函数时都必须放在第一句,今天同学问我的一个问题有点意思. 那么:我怎么在子类中 显式的用 super 初始化父类同时用 this 初始化子类? ------ ...
- zookeeper+dubbo简单使用
首先下载zookeeper,直接百度官网下载即可! 下载完之后,把cfg配置文件改名为zoo.cfg,如下: 在bin目录下启动zkServer即可! 项目结构: 简单讲解:首先dubbo是一个mav ...
- year:2017 month:08 day:03
2017-08-03 JAVAse 继承 继承:通过extends关键字可实现类与类之间的继承 父类:基类/超类 子类:派生类 1.继承的特点:单继承[一个类只能有一个父类]多层次[父类还可有父类] ...
- Open-Falcon第二步安装绘图组件Transfer(小米开源互联网企业级监控系统)
----安装绘图组件---- 安装Transfer transfer默认监听在:8433端口上,agent会通过jsonrpc的方式来push数据上来. cd /usr/local/open-falc ...