【后台管理系统】—— Ant Design Pro页面相关(二)
一、弹框Modal表单
- 使用Form.create()包装得到一个含有this.props.form属性的CreatForm自组件
- 从页面主(父)组件获得props数据和propsMethod方法
- return渲染一个Modal中嵌入Form包裹着多个FormItem的弹框表单
const CreateForm = Form.create()(props => {
const { form, current, detail, imgList, introImgList, visible,
previewVisible, previewImage, handleImgChange, handleImgRemove,
handleImgPreview, handleImgCancel, beforeUpload, initImgList, handleFileThumb,
introPreviewVisible, introPreviewImage, handleIntroImgChange, handleIntroImgRemove,
handleIntroImgPreview, handleIntroImgCancel, beforeIntroUpload, handleIntroFileThumb,
handleSubmit, handleCancel,
handleContentChange, handleEditPreview } = props;
const previewArr = previewImage.split('/');
const previewType = previewArr[previewArr.length-2];
const controls = [ 'undo', 'redo', 'separator',
'font-size', 'line-height', 'letter-spacing', 'separator',
'text-color', 'bold', 'italic', 'underline', 'strike-through', 'separator',
'superscript', 'subscript', 'remove-styles', 'emoji', 'separator', 'text-indent', 'text-align', 'separator',
'headings', 'list-ul', 'list-ol', 'separator',
'link', 'separator', 'hr', 'separator',
'media', 'separator',
'clear'
];
const { getFieldDecorator, getFieldValue, setFieldsValue } = form;
const formLayout = {
labelCol: { span: 5 },
wrapperCol: { span: 16 },
};
const formLayoutWithOutLabel = {
wrapperCol: { span: 16, offset: 5 }
}
const extendControls = [
{
key: 'custom-button',
type: 'button',
text: '预览',
onClick: handleEditPreview
}
];
const initKeys = (detail) => {
let defaultKeys = [];
detail.param.forEach((val, index) => defaultKeys.push(index))
return defaultKeys;
}
getFieldDecorator('keys', { initialValue: current && detail && detail.param.length ? initKeys(detail) : [0] });
const keys = getFieldValue('keys');
const ImgUpButton = (
<div>
<Icon type="plus" />
<div className="ant-upload-text">Upload</div>
</div>
);
const okHandle = () => {
form.validateFields((err, fieldsValue) => {
if (err) return;
form.resetFields();
handleSubmit(fieldsValue);
});
}
const add = () => {
const keys = getFieldValue('keys');
if (keys.length === 5) {
message.info('产品参数最多5个')
return;
}
let nextKeys = keys;
let nextKeyValue = keys[keys.length-1]+1;
nextKeys = nextKeys.concat(nextKeyValue);
setFieldsValue({
keys: nextKeys,
});
};
const remove = index => {
const keys = getFieldValue('keys');
let param = getFieldValue('param');
if (keys.length === 1) {
return;
}
if(param[index]){
param.splice(index, 1)
}
setFieldsValue({
keys: keys.filter((keyItem, i) => i !== index),
param
});
};
const handleUploadFn = (param) => {
const { file } = param;
handleImageUpload(file, 'tutorial').then(res => {
param.success({
url: `${setFileHost()+res}`,
meta: {
id: new Date().getTime(),
loop: false,
autoPlay: false,
controls: true
}
})
})
}
const handleValidateFn = (file) => {
return file.size < 1024 * 1024 * 100
}
const defaultContent = (content) => {
let contentObj = JSON.parse(BraftEditor.createEditorState(content).toRAW());
let urlArr;
Object.keys(contentObj.entityMap).forEach((key) => {
if(contentObj.entityMap[key].data.url){
urlArr = contentObj.entityMap[key].data.url.split('/')
if(urlArr.length == 3){
urlArr.splice(0,1);
contentObj.entityMap[key].data.url = `${setFileHost()}`+ 'sys/' + urlArr.join('/');
}
}
});
let contentRaw = JSON.stringify(contentObj);
return contentRaw;
}
const initParamValue = (detail, index) => {
let defaultParamValue = {};
detail.param.forEach((p, i) => {
if(i === index){
defaultParamValue = p
}
})
return defaultParamValue;
}
const handleParamChange = (newValue, index) => {
let param = getFieldValue('param');
setFieldsValue({
param: param.map((p, i) => i == index ? newValue : p)
});
}
const paramsFormItems = keys.map((k, index) => (
<FormItem
{...(index === 0 ? formLayout : formLayoutWithOutLabel)}
label={index === 0 ? '参数信息' : ''}
key={k}
>
{getFieldDecorator(`param[${index}]`, {
validateTrigger: ['onChange', 'onBlur'],
rules: [
{
type: 'object',
required: true,
validator: (_, value, callback) => {
if (!value.key || !value.value || (value.key && value.key.length > 10) || (value.value && value.value.length > 20)) {
callback('请输入1-10字参数及1-20参数信息或删除此输入框')
} else {
callback()
}
}
},
],
initialValue: current && detail && detail.param.length ? initParamValue(detail, index) : {}
})(
<ParamsInputArray keys={keys} index={index} add={add} remove={remove} onChange={handleParamChange}/>
)}
</FormItem>
));
return (
<Modal
destroyOnClose
width={1200}
bodyStyle={{height: 750, overflow: 'auto'}}
style={{ top: 0 }}
title={`${Object.keys(current).length ? '编辑' : '添加'}产品`}
visible={visible}
keyboard={false}
maskClosable={false}
okText="确定"
cancelText="取消"
onOk={okHandle}
onCancel={handleCancel}
>
<Form onSubmit={handleSubmit}>
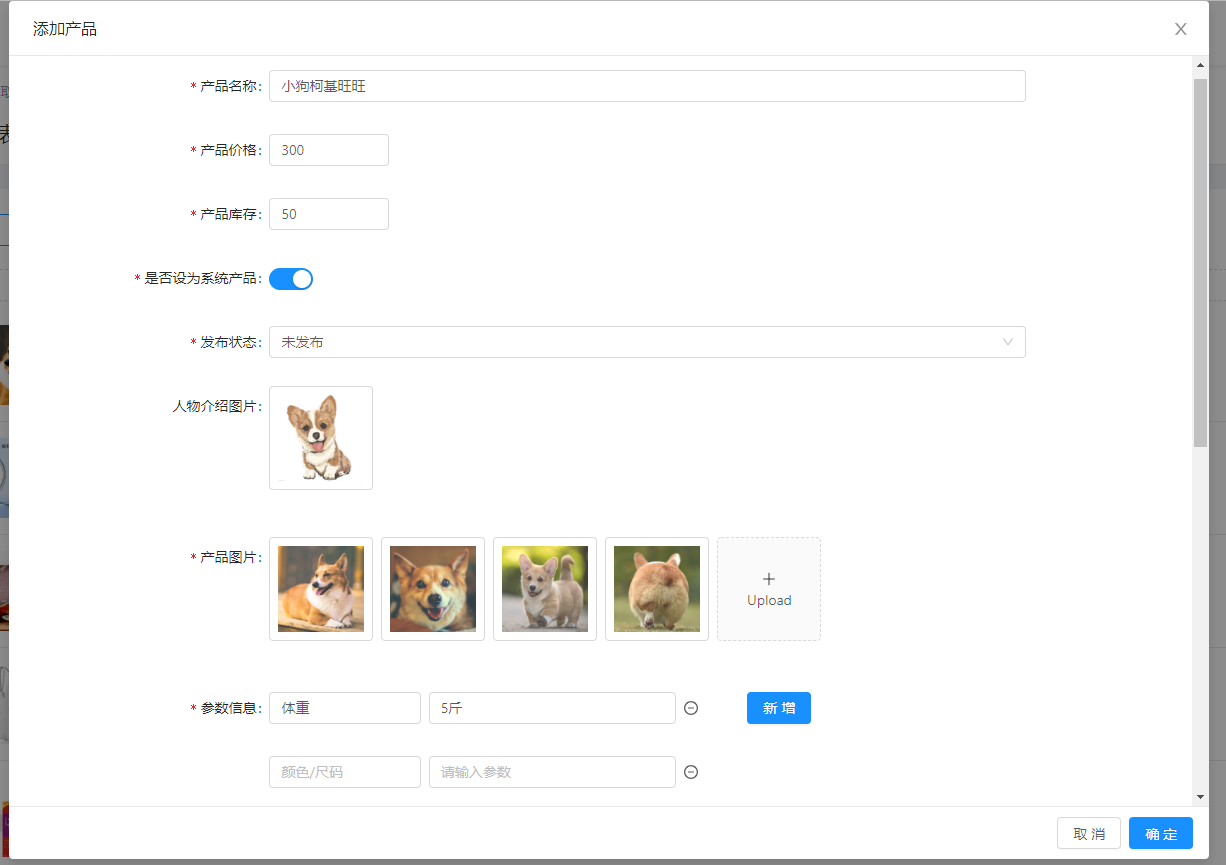
<FormItem label="产品名称" {...formLayout}>
{getFieldDecorator('name', {
rules: [{ required: true, message: '请输入5-20字产品名称', min: 5, max: 20}],
initialValue: current && detail ? detail.name : ''
})(<Input placeholder="请输入" />)}
</FormItem>
<FormItem label="产品价格" {...formLayout}>
{getFieldDecorator('price', {
rules: [
{ type: 'number', required: true, message: '请输入1-100000元整数产品价格'},
{ pattern: /^[0-9]*[1-9][0-9]*$/, message: '请输入1-100000元整数产品价格'}
],
initialValue: current && detail ? detail.price/100 : ''
})(<InputNumber
min={1}
max={100000}
style={{width: 120}}
placeholder="请输入"
/>)}
</FormItem>
<FormItem label="产品库存" {...formLayout}>
{getFieldDecorator('stock', {
rules: [{ type: 'number', required: true, message: '请输入5-100000产品库存', min:5, max:100000}],
initialValue: current && detail ? detail.stock : ''
})(<InputNumber
min={5}
max={100000}
style={{width: 120}}
placeholder="请输入"
formatter={value => `${value}`.replace(/\B(?=(\d{3})+(?!\d))/g, ',')}
parser={value => value.replace(/\$\s?|(,*)/g, '')}
/>)}
</FormItem>
<FormItem label="是否设为系统产品" {...formLayout}>
{getFieldDecorator('fromSystem', {
rules: [{ required: true, message: '请选择是否设为系统产品'}],
initialValue: current && detail ? detail.fromSystem : false
})(<Switch defaultChecked={current && detail ? detail.fromSystem : false} />)}
</FormItem>
<FormItem label="发布状态" {...formLayout}>
{getFieldDecorator('publishStatus', {
rules: [{ type: 'number', required: true, message: '请选择发布状态'}],
initialValue: current && detail ? Number(detail.publishStatus) : ''
})(<Select placeholder="请选择">
<SelectOption value={0}>未发布</SelectOption>
<SelectOption value={1}>已发布</SelectOption>
</Select>)}
</FormItem>
<FormItem label="人物介绍图片" {...formLayout}>
{getFieldDecorator('introPic', {
initialValue: current && detail && detail.introPic
? [{
uid: '-1',
status: 'done',
name: detail.introPic,
url: `${setFileHost()+detail.introPic}`,
thumbUrl: `${setFileHost()+detail.introPic}`
}] : ''
})(
<div>
<Upload
accept="image/*"
// action={(file) => handleImageUpload(file, 'image').then(res => {
// handleIntroFileThumb(res)
// })}
listType="picture-card"
fileList={introImgList}
onPreview={handleIntroImgPreview}
onRemove={handleIntroImgRemove}
beforeUpload={beforeIntroUpload}
// onChange={handleIntroImgChange}
>
{introImgList.length >= 1 ? null : ImgUpButton}
</Upload>
<Modal visible={introPreviewVisible} footer={null} onCancel={handleIntroImgCancel} style={{textAlign: 'center'}}>
<img alt="人物介绍图片" style={{ width: '100%' }} src={introPreviewImage} />
</Modal>
</div>
)}
</FormItem>
<FormItem label="产品图片" {...formLayout}>
{getFieldDecorator('rotationChart', {
rules: [{ required: true, message: '请上传1-7张图片'}],
initialValue: current && detail && detail.rotationChart && detail.rotationChart.length
? initImgList(detail) : []
})(
<div>
<Upload
accept="image/*"
// action={(file) => handleImageUpload(file, 'image').then(res => {
// handleFileThumb(res, file, imgList)
// })}
listType="picture-card"
fileList={imgList}
onPreview={handleImgPreview}
onRemove={handleImgRemove}
beforeUpload={beforeUpload}
// onChange={handleImgChange}
>
{imgList.length >= 7 ? null : ImgUpButton}
</Upload>
<Modal visible={previewVisible} footer={null} onCancel={handleImgCancel} style={{textAlign: 'center'}}>
{previewType == 'liveWallPaper' ?
<video src={previewImage} style={{ width: '50%' }} controls="controls" autoPlay="autoplay">
您的浏览器不支持 video 标签。
</video>
: <img alt="产品图片" style={{ width: '100%' }} src={previewImage} />}
</Modal>
</div>
)}
</FormItem>
{paramsFormItems}
<FormItem label="产品详情" {...formLayout}>
{getFieldDecorator('content', {
validateTrigger: 'onBlur',
rules: [{
required: true,
validator: (_, value, callback) => {
if (value.toHTML().length < 50 || value.toHTML().length > 15000000) {
callback('请输入50-15000000字产品详情')
} else {
callback()
}
}
}],
initialValue: current && detail ? BraftEditor.createEditorState(defaultContent(detail.content)) : ''
})(
<BraftEditor // 富文本插件组件
className="my-editor"
controls={controls}
extendControls={extendControls}
placeholder="请输入50-15000000字产品详情"
media={{
uploadFn: handleUploadFn,
validateFn: handleValidateFn,
accepts: {
image: 'image/png, image/jpeg, image/jpg, image/gif, image/webp, image/apng, image/svg',
video: 'video/mp4, video/ogg, video/webm',
audio: 'audio/mp3, audio/mp4, audio/ogg, audio/mpeg'
}
}}
onChange={handleContentChange}
/>
)}
</FormItem>
</Form>
</Modal>
);
});
主(父)组件中<CreatForm />的使用,props数据和propsMethods方法的传递
const parentMethods = {

      initImgList: this.initImgList,

      handleFileThumb: this.handleFileThumb,

      handleImgChange: this.handleImgChange,

      handleImgRemove: this.handleImgRemove,

      handleImgPreview: this.handleImgPreview,

      handleImgCancel: this.handleImgCancel,

      handleContentChange: this.handleContentChange,

      handleEditPreview: this.handleEditPreview,

      beforeUpload: this.beforeUpload,

      handleIntroFileThumb: this.handleIntroFileThumb,

      handleIntroImgChange: this.handleIntroImgChange,

      handleIntroImgRemove: this.handleIntroImgRemove,

      handleIntroImgPreview: this.handleIntroImgPreview,

      handleIntroImgCancel: this.handleIntroImgCancel,

      beforeIntroUpload: this.beforeIntroUpload,

      handleSubmit: this.handleSubmit,

      handleCancel: this.handleCancel

}

// state数据、model层的props数据

const parentProps = {

      current,

      detail,

      imgList,

      introImgList,

      visible,

      previewVisible,

      previewImage,

      introPreviewVisible,

      introPreviewImage,

      contentVisible

}

return (

      <PageHeaderWrapper title="产品列表">

        <div className={styles.standardList}>

             //  页面展示的列表 、表格

        </div>

        <CreateForm {...parentMethods} {...parentProps}></CreateForm>

        // 其它简单Modal 直接在此处使用<Modal />

      </PageHeaderWrapper>

    );

  }

}
通过组件内定义方法,生成Modal弹框内容Content,直接使用<Modal />
const getModalContent = () => {
const controls = [ 'undo', 'redo', 'separator',
'font-size', 'line-height', 'letter-spacing', 'separator',
'text-color', 'bold', 'italic', 'underline', 'strike-through', 'separator',
'superscript', 'subscript', 'remove-styles', 'emoji', 'separator', 'text-indent', 'text-align', 'separator',
'headings', 'list-ul', 'list-ol', 'separator',
'link', 'separator', 'hr', 'separator',
'media', 'separator',
'clear'
];
const formLayout = {
labelCol: { span: 5 },
wrapperCol: { span: 16 },
};
const handleUploadFn = (param) => {
const { file } = param;
const fileTypeArr = file.type.split('/');
const fileType = fileTypeArr[0];
if(fileType == 'video'){
handleImageUpload(file, 'tutorialVideo').then(res => {
param.success({
url: `${setFileHost()+res}`,
meta: {
id: new Date().getTime(),
loop: false,
autoPlay: false,
controls: true
}
})
})
}else{
handleImageUpload(file, 'tutorial').then(res => {
param.success({
url: `${setFileHost()+res}`,
meta: {
id: new Date().getTime(),
loop: false,
autoPlay: false,
controls: true
}
})
})
}
}
const handleValidateFn = (file) => {
return file.size < 1024 * 1024 * 100
}
const defaultContent = (content) => {
let contentObj = JSON.parse(BraftEditor.createEditorState(content).toRAW());
let urlArr;
Object.keys(contentObj.entityMap).forEach((key) => {
if(contentObj.entityMap[key].data.url){
urlArr = contentObj.entityMap[key].data.url.split('/')
console.log('默认内容', urlArr);
if(urlArr.length == 2){ //ios视频前缀yihezo
urlArr.splice(0,1);
contentObj.entityMap[key].data.url = `${setFileHost()}`+ 'yihezo/' + urlArr.join('/');
}
if(urlArr.length == 3){ //其它媒体文件前缀sys/tutorail
urlArr.splice(0,1);
contentObj.entityMap[key].data.url = `${setFileHost()}`+ 'sys/' + urlArr.join('/');
}
}
});
let contentRaw = JSON.stringify(contentObj);
return contentRaw;
}
const extendControls = [
{
key: 'custom-button',
type: 'button',
text: '预览',
onClick: this.handleEditPreview
}
];
return (
<Form onSubmit={this.handleSubmit}>
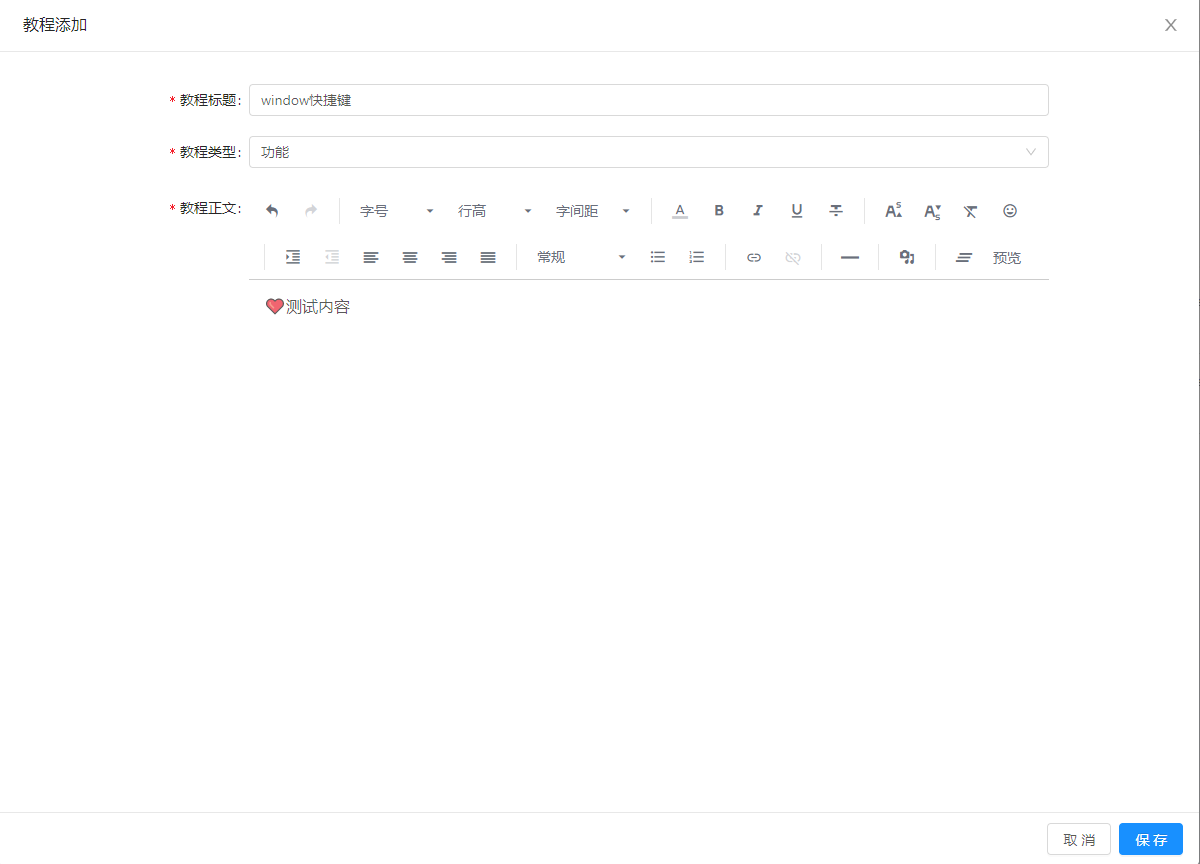
<FormItem label="教程标题" {...formLayout}>
{getFieldDecorator('title', {
rules: [{ required: true, message: '请输入至多10字标题', max: 10 }],
initialValue: current && detail ? detail.title : '',
})(<Input placeholder="请输入" />)}
</FormItem>
<FormItem label="教程类型" {...formLayout}>
{getFieldDecorator('kindId', {
rules: [{ required: true, message: '请选择类型' }],
initialValue: current && detail ? detail.kindId : undefined
})(
<TreeSelect
dropdownStyle={{ maxHeight: 400, overflow: 'auto' }}
treeData={typeData}
placeholder="请选择"
onChange={this.handleTypeChange}
/>
)}
</FormItem>
<FormItem label="教程正文" {...formLayout}>
{getFieldDecorator('content', {
validateTrigger: 'onBlur',
rules: [{
required: true,
validator: (_, value, callback) => {
if (value.isEmpty()) {
callback('请输入正文内容')
} else {
callback()
}
}
}],
initialValue: current && detail ? BraftEditor.createEditorState(defaultContent(detail.content)) : ''
})(
<BraftEditor
className="my-editor"
controls={controls}
extendControls={extendControls}
placeholder="请输入正文内容"
media={{
uploadFn: handleUploadFn,
validateFn: handleValidateFn,
accepts: {
image: 'image/png, image/jpeg, image/jpg, image/gif, image/webp, image/apng, image/svg',
video: 'video/mp4',
audio: 'audio/mp3, audio/mp4, audio/ogg, audio/mpeg'
}
}}
onChange={this.handleContentChange}
/>
)}
</FormItem>
</Form>
);
};
const modalFooter = done

      ? { footer: null, onCancel: this.handleDone }

      : { okText: '保存', onOk: this.handleSubmit, onCancel: this.handleCancel };

return (

      <PageHeaderWrapper title="产品列表">

        <div className={styles.standardList}>

             //  页面展示的列表 、表格

        </div>

        <Modal

            title={done ? null : `教程${current.id ? '编辑' : '添加'}`}

            className={styles.standardListForm}

            width={1200}

            style={{ top: 0 }}

            bodyStyle={done ? { padding: '56px 0' } : { padding: '28px 0 0' }}

            destroyOnClose

            visible={visible}

            keyboard={false}

            maskClosable={false}

            {...modalFooter}

        >

            {getModalContent()}

        </Modal>

</PageHeaderWrapper> ); } }
二、新页Card表单
1.布局就是简单的Card分栏,Form表单包裹FormItem表单项
2.需要注意的是提交方法handleSubmit,提交成功后router.push跳转返回到列表展示页
import router from 'umi/router';

router.push(`/newmall/goodsList?kw=${keyword}&&cp=${currentPage}`);
三、Card表单与表格Model表单结合
- Card表单部分
 <Card title="基本信息" bordered={false}>

        <Row gutter={24} style={{marginTop: 5}}>

             // Input输入框

            <Col xl={12} lg={12} md={24} sm={24} xs={24}>

              <Form.Item label='分类名称'>

                {getFieldDecorator('categoryName', {

                  rules: [

                    { required: true, message: '请输入1-5字分类名称' },

                    { min: 1, max: 5, message: '请输入1-5字分类名称' }

                  ],

                  initialValue: info && info.categoryName ? info.categoryName : ''

                })(<Input placeholder="请输入分类名称" style={{maxWidth: 300}}  />)}

              </Form.Item>

            </Col>

            // Upload上传图片

            <Col xl={12} lg={12} md={24} sm={24} xs={24}>

              <Form.Item label='分类Logo'>

                {getFieldDecorator('categoryLogo', {

                  rules: [{ required: true, message: '请选择分类Logo' }],

                  initialValue: info && info.categoryLogo ? [{

                    uid: '-1',

                    status: 'done',

                    name: info.categoryLogo,

                    url: `${setFileHost()+info.categoryLogo}`,

                    thumbUrl: `${setFileHost()+info.categoryLogo}`

                  }] : ''

                })(

                  <div>

                    <Upload

                      accept="image/*"

                      action={(file) => handleImageUpload(file, 'img').then(res => {

                        this.handleFileThumb(res)

                      })}

                      listType="picture-card"

                      fileList={imgList}

                      beforeUpload={this.beforeImgUpload}

                      onRemove={this.handleImgRemove}

                      onPreview={this.handleImgPreview}

                      onChange={this.handleImgChange}

                    >

                      {imgList.length >= 1 ? null : ImgUpButton}

                    </Upload>

                    <Modal visible={previewImgVisible} footer={null} onCancel={this.handleImgCancel} style={{textAlign: 'center'}}>

                      <img alt="分类Logo" style={{ width: '100%' }} src={previewImage} />

                    </Modal>

                  </div>

                )}

              </Form.Item>

            </Col>

        </Row>

</Card>
Table结合Modal表单
// 表格展示一 ---- 可添加/编辑
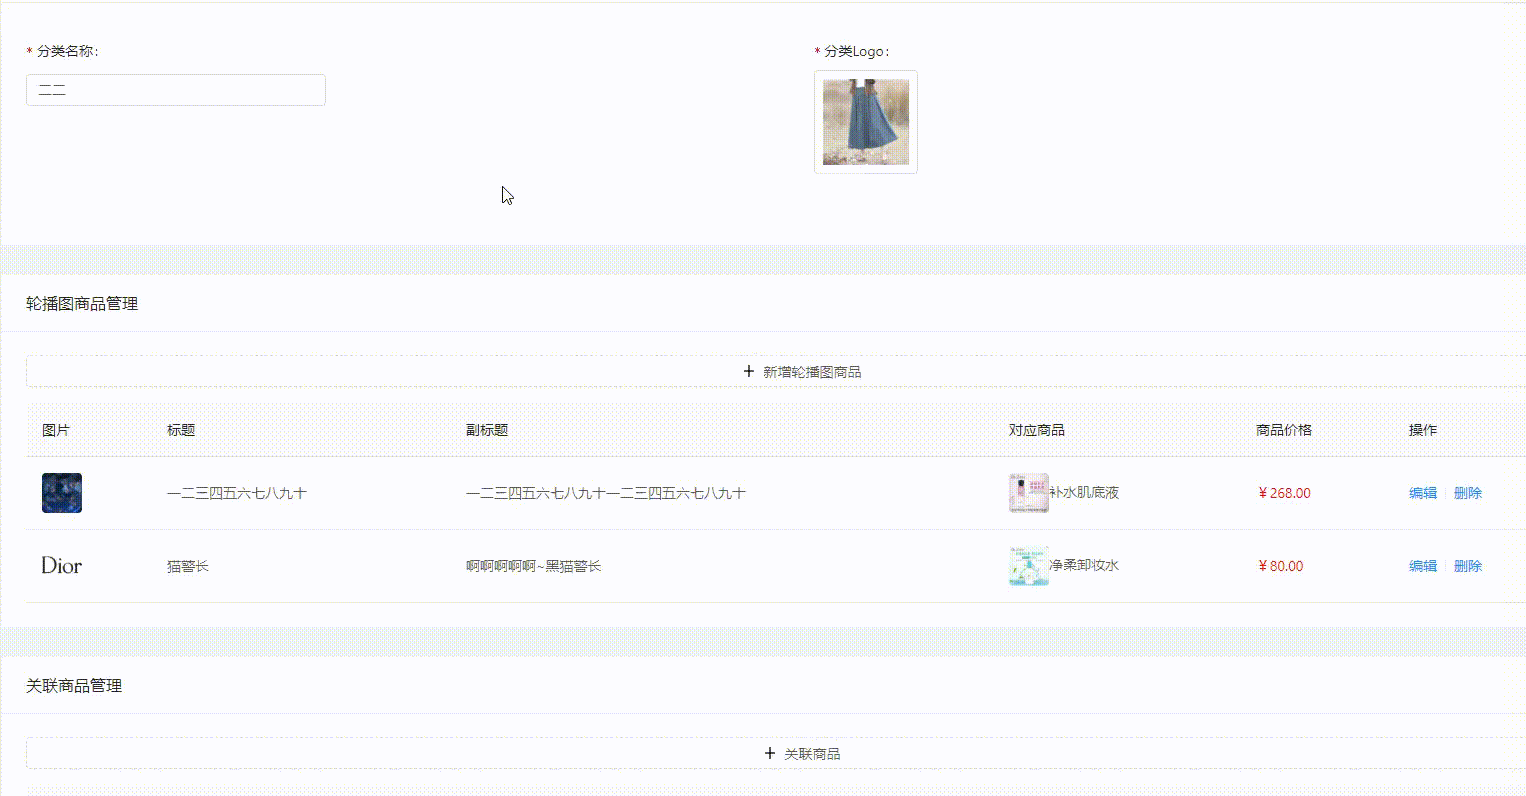
<Card title="轮播图商品管理" bordered={false} style=
{{marginTop: 30}}>
<Button
style={{ width: '100%', marginBottom: 16 }}
type="dashed"
onClick={() => this.addRotation()}
icon="plus"
>
新增轮播图商品
</Button>
<Table
pagination={false} //关闭分页功能
loading={rotationLoading}
rowKey={record => record.id}
dataSource={rotation}
columns={rotationColumns}
onChange={this.handleRotationTableChange}
/>
</Card> <RotationModal {...rotationModalMethods} {...rotationModalProps} /> // Modal表单 // 表格展示二 ---- 可添加/删除
<Card title="关联商品管理" bordered={false} style={{marginTop: 30}}>
<Button
style={{ width: '100%', marginBottom: 16 }}
type="dashed"
onClick={() => this.addProduct()}
icon="plus"
>
关联商品
</Button>
<Table
pagination={productPage} //分页展示
loading={productLoading}
rowKey={record => record.productId}
dataSource={productList}
columns={productColumns}
onChange={this.handleProductTableChange}
/>
</Card> <ProductModal {...productModalMethods} {...productModalProps} /> // Modal表单
转载请注明出处
【后台管理系统】—— Ant Design Pro页面相关(二)的更多相关文章
- 【后台管理系统】—— Ant Design Pro 页面相关(三)
一.卡片Card分类 与普通卡片使用区别:底部按钮及内容样式 <Card hoverable bodyStyle={{ paddingBottom: 20 }} actions={[ // 卡片 ...
- 【后台管理系统】—— Ant Design Pro页面相关(一)
一.List列表形式 import React, { PureComponent } from 'react'; import { findDOMNode } from 'react-dom'; im ...
- ant design pro (十二)advanced UI 测试
一.概述 原文地址:https://pro.ant.design/docs/ui-test-cn UI 测试是项目研发流程中的重要一环,有效的测试用例可以梳理业务需求,保证研发的质量和进度,让工程师可 ...
- 和我一起,重零开始学习Ant Design Pro开发解决方案(二)部署示例项目
- 【后台管理系统】—— Ant Design Pro入门学习&项目实践笔记(三)
前言:前一篇记录了[后台管理系统]目前进展开发中遇到的一些应用点,这一篇会梳理一些自己学习Ant Design Pro源码的功能点.附:Ant Design Pro 在线预览地址. Dashboard ...
- Ant Design Pro (中后台系统)教程
一.概念:https://pro.ant.design/docs/getting-started-cn(官方网站) 1.Ant Design Pro 是什么: https://www.cnblogs ...
- ant design pro(二)布局
一.概述 参看地址:https://pro.ant.design/docs/layout-cn 其实在上述地址ant-design上已经有详细介绍,本文知识简述概要. 页面整体布局是一个产品最外层的框 ...
- Ant Design Pro项目打开页设为登录或者其他页面
Ant Design Pro项目打开页设为登录或者其他页面 一.打开页设为登录页 首先找到utils包中的authority文件,在该文件中找到如下代码: export function getAut ...
- (二)React Ant Design Pro + .Net5 WebApi:前端环境搭建
首先,你需要先装一个Nodejs,这是基础哦.如果没有这方面知识的小伙伴可以在园子里搜索cnpm yarn等关键字,内容繁多,此不赘述,参考链接 一. 简介 1. Ant Design Pro v5 ...
随机推荐
- Yii中实例化类的四种方式
1.最简单的也是最基本的,大家都会的一种 use yii\caching\FileCache; $cache = new FileCache(); $cache->set("name& ...
- homebrew学习(三)之homebrew命令
安装homebrew: /usr/bin/ruby -e "$(curl -fsSL https://raw.githubusercontent.com/Homebrew/install/m ...
- 查看CPU位数的方法
查看电脑cpu的位数 WINDOWS下查看的 方法: 方法一. 在开始→运行 ...
- MySQL安装+Navicat_Premium(安装+破解)+Navicat_Premium中MySQL的localhost不能正常连接+不能连接Docker启动容器中的MySQL
MySQL安装 安装MySQL 我这里安装的是 MySQL 8.0 Command Line Client 下载+安装 详情见 https://www.cnblogs.com/taopanfeng/p ...
- 折半搜索+Hash表+状态压缩 | [Usaco2012 Open]Balanced Cow Subsets | BZOJ 2679 | Luogu SP11469
题面:SP11469 SUBSET - Balanced Cow Subsets 题解: 对于任意一个数,它要么属于集合A,要么属于集合B,要么不选它.对应以上三种情况设置三个系数1.-1.0,于是将 ...
- centos7使用cron任务的相关命令(与centos6有区别)
一.cron任务的自启动相关命令 1.检测cron定时服务是否自启用 systemctl is-enabled crond.service 结果展示如下: enable表示已启用自启动 disable ...
- 分布式远程获取配置文件config属性(修正)
1.采用springcloud 获取github上config配置文件属性需要注意的问题; 2.此时github下面的配置文件,命名要特别注意,否则会获取不到配置里面的属性而报错,报错是因为配置文件命 ...
- 安装RabbitMQ 后配置遇到问题解决方案
http://blog.csdn.net/j_shine/article/details/78833456
- day_14 匿名函数与内置函数连用 作业题
''' 要求: 从文件中取出每一条记录放入列表中,列表的每个元素都是` {'name':'egon','sex':'male','age':18,'salary':3000}`的形式 ''' all_ ...
- day_04 基本数据类型的结构和使用方法
1. 简述Python的五大数据类型的作用.定义方式.使用方法: 1). 数字类型: 整型(int): 表示年龄.号码.级别:变量名=值,变量名=int(值):加减乘除.逻辑判断: 浮点型(float ...