vue 实现分页
1 新建 pager.js 文件
/**

 * [pagination 分页组件]

 * @param  {Number} total         [数据总条数]

 * @param  {Number} display     [每页显示条数 default:10]

 * @param  {Number} current     [当前页码 default:1]

 * @param  {Number} pagegroup     [分页条数(奇数) default:5]

 * @param  {Event} pagechange     [页码改动时 dispatch ]

 * @return {[type]}   [description]

 */

Vue.component('pagination', {

    template: '#template_pagination',

    props: {

        total: {            // 数据总条数

            type: Number,

            default: 0

        },

        display: {            // 每页显示条数

            type: Number,

            default: 10

        },

        current: {            // 当前页码

            type: Number,

            default: 1

        },

        pagegroup: {        // 分页条数 -- 奇数

            type: Number,

            default: 5,

            coerce: function (v) {

                v = v > 0 ? v : 5;

                return v % 2 === 1 ? v : v + 1;

            }

        }

    },

    computed: {

        page: function () { // 总页数

            return Math.ceil(this.total / this.display);

        },

        grouplist: function () { // 获取分页页码

            var len = this.page, temp = [], list = [], count = Math.floor(this.pagegroup / 2), center = this.current;

            if (len <= this.pagegroup) {

                while (len--) { temp.push({ text: this.page - len, val: this.page - len }); };

                return temp;

            }

            while (len--) { temp.push(this.page - len); };

            var idx = temp.indexOf(center);

            (idx < count) && (center = center + count - idx);

            (this.current > this.page - count) && (center = this.page - count);

            temp = temp.splice(center - count - 1, this.pagegroup);

            do {

                var t = temp.shift();

                list.push({

                    text: t,

                    val: t

                });

            } while (temp.length);

            if (this.page > this.pagegroup) {

                (this.current > count + 1) && list.unshift({ text: '...', val: list[0].val - 1 });

                (this.current < this.page - count) && list.push({ text: '...', val: list[list.length - 1].val + 1 });

            }

            return list;

        }

    },

    methods: {

        setCurrent: function (idx) {

            if (this.current != idx && idx > 0 && idx < this.page + 1) {

                this.current = idx;

                this.$emit('pagechange', this.current);

            }

        }

    }

});
2 前端:
@{
ViewBag.Title = "About";
}
<script src="~/Scripts/vue.min.js"></script>
<script src="~/Scripts/pager/Pager.js"></script>
<!-- 模板 -->
<script type="text/template" id="template_pagination">
<nav>
<ul class="pagination">
<li :class="{'disabled': current == 1}"><a href="javascript:;" v-on:click="setCurrent(1)"> 首页 </a></li>
<li :class="{'disabled': current == 1}"><a href="javascript:;" v-on:click="setCurrent(current - 1)"> 上一页 </a></li>
<li v-for="p in grouplist" :class="{'active': current == p.val}"><a href="javascript:;" v-on:click="setCurrent(p.val)"> {{ p.text }} </a></li>
<li :class="{'disabled': current == page}"><a href="javascript:;" v-on:click="setCurrent(current + 1)"> 下一页</a></li>
<li :class="{'disabled': current == page}"><a href="javascript:;" v-on:click="setCurrent(page)"> 尾页 </a></li>
</ul>
<ul class="pagination pull-right">
<li><span> 共 {{ total }} 条数据 </span></li>
<li><span> 每页显示 {{ display }} 条数据 </span></li>
<li><span> 共 {{ page }} 页 </span></li>
<li><span> 当前第 {{ current }} 页 </span></li>
</ul>
</nav>
</script>
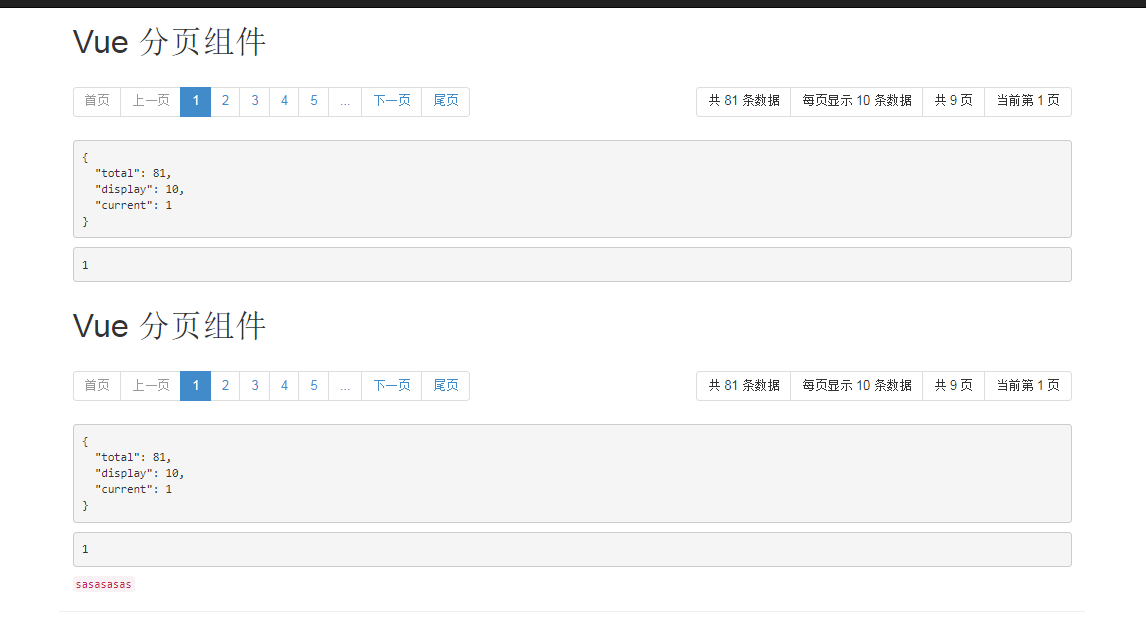
<div>
<div id="app">
<div class="container">
<h1> Vue 分页组件 </h1>
<pagination :total="total" :current.sync="current" v-on:pagechange="pagechange"></pagination>
<pre>{{ $data|json }}</pre>
<pre>{{ current }}</pre>
</div>
</div>
<div id="app01">
<div class="container">
<h1> Vue 分页组件 </h1>
<pagination :total="total" :current.sync="current" v-on:pagechange="pagechange"></pagination>
<pre>{{ $data|json }}</pre>
<pre>{{ current }}</pre>
<code>sasasasas</code>
</div>
</div>
</div>
<script>
new Vue({
el: '#app',
data: {
total: 81, // 记录总条数
display: 10, // 每页显示条数
current: 1 // 当前第n页 , 也可以 watch current 的变化
},
methods: {
pagechange: function (p) {
this.current = p;// 页码改变event , p 为新的 current
console.log('pagechange', p);
}
}
});
new Vue({
el: '#app01',
data: {
total: 81, // 记录总条数
display: 10, // 每页显示条数
current: 1 // 当前第n页 , 也可以 watch current 的变化
},
methods: {
pagechange: function (p) {
this.current = p;// 页码改变event , p 为新的 current
console.log('pagechange', p);
}
}
});
</script>
展示:
vue 实现分页的更多相关文章
- 基于Vue封装分页组件
使用Vue做双向绑定的时候,可能经常会用到分页功能 接下来我们来封装一个分页组件 先定义样式文件 pagination.css ul, li { margin: 0px; padding: 0px;} ...
- JS(vue iview)分页解决方案
JS(vue iview)分页解决方案 一.解决思路 使用分页组件 使用组件API使组件自动生成页面数量 调用组件on-change事件的返回值page 将交互获得的数组存在一个数组list中 通过p ...
- 基于vue的分页插件
相信大家用过很多jquery的分页插件,那这次就用一用基于vue的分页插件. 这里的环境用的是springboot 首先要引入pagehelper的jar文件,版本是1.2.3,配置文件也需要配置一下 ...
- 基于iview 封装一个vue 表格分页组件
iview 是一个支持中大型项目的后台管理系统ui组件库,相对于一个后台管理系统的表格来说分页十分常见的 iview是一个基于vue的ui组件库,其中的iview-admin是一个已经为我们搭好的后天 ...
- vue day5 分页控件 更新 PagedList.mvc 仿
<!DOCTYPE html> <html> <head> <meta http-equiv="Content-Type" content ...
- vue day6 分页显示
@{ ViewBag.Title = "Home Page"; Layout = null; } <!DOCTYPE html> <html> <he ...
- vue day5 分页控件
<!DOCTYPE html> <html> <head> <meta http-equiv="Content-Type" content ...
- Vue element 分页
Vue单页面,有一个带分页的表格,表格内数据关联页码,套路如下: 代码如下: <div class="c-table-list auth-list m-bottom-20"& ...
- 使用Layui和Vue实现分页
原理就是利用Layui的分页组件和Vue组件的模板渲染功能. 我下面直接贴代码,比较直观. index.html <!DOCTYPE html> <html> <head ...
- vue 封装分页组件
分页 一般都是调接口, 接口为这种格式 {code: 0, msg: "success",…} code:0 data:{ content:[{content: "11& ...
随机推荐
- hadoop HA集群的安装
1.hadoop集群规化 ip 主机名 安装软件 角色 运行进程 10.124.147.22 hadoop1 jdk.zookeeper.hadoop namenode/zookeeper/jobhi ...
- sql格式化时间
sql格式化date类型 DATE_FORMAT(nuw(), '%Y-%m-%d') sql格式化long类型时间 FROM_UNIXTIME(time/1000,'%Y-%m-%d')
- boost string algorithm
The Boost.StringAlgorithms library provides many free-standing functions for string manipulation. 1. ...
- linux shell的单行多行注释
1.单行注释,使用符号# echo " echo "test" #echo "comment“ 2. 多行注释 (1)使用 :<<! ! file ...
- 【InnoDB】体系结构
一.概述: innodb的整个体系架构就是由多个内存块组成的缓冲池及多个后台线程构成.缓冲池缓存磁盘数据(解决cpu速度和磁盘速度的严重不匹配问题),后台进程保证缓存池和磁盘数据的一致性(读取.刷新) ...
- Python--模块之re
re模块 就其本质而言,正则表达式(或 RE)是一种小型的.高度专业化的编程语言,(在Python中)它内嵌在Python中,并通过 re 模块实现.正则表达式模式被编译成一系列的字节码,然后由用 C ...
- UNP学习第四章tcp
一.TCP简单流程图 因为对于server我已经写过一篇笔记了:http://www.cnblogs.com/ch122633/p/8315883.html 所以我想再补充一些对于client的部分的 ...
- kubernetes部署metrics-server metrics-server-v0.3.4 pod报错
[root@hadoop02 ~]# kubectl logs metrics-server-v0.3.4-76db4dd54b-s4t2d -c metrics-server -n kube-sys ...
- 关于UI自动化测试的思考
不知不觉,时间过去了二年多,从开始想学习自动化(UI自动化到上手做项目)到上手,到能独立开发一个项目的UI自动化脚本. 一直在学习,边做边学,边看边学.边总结(具体看我的博客,其中大部分都是自己的理解 ...
- java com.db4o 类
<!--juan_zhai--> <dependency> <groupId>com.db4o</groupId> <artifactId> ...