PHP学习8——图像处理
主要内容:
- 加载GD库
- 创建图像
- 绘制点,线,矩形,多边形,椭圆,弧线
- 绘制文字
- 通过GD库生成验证码
其实吧,学习图像方法的最大作用,好像就是为了制作验证码。
所以此专题,不如叫做制作验证码。
1、加载GD库
PHP5不仅可以处理文本数据,还可以处理多种格式的图像,安装了GD库,需要通过php.ini来加载GD库。
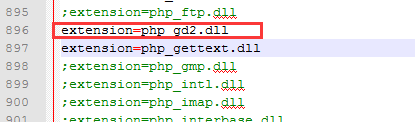
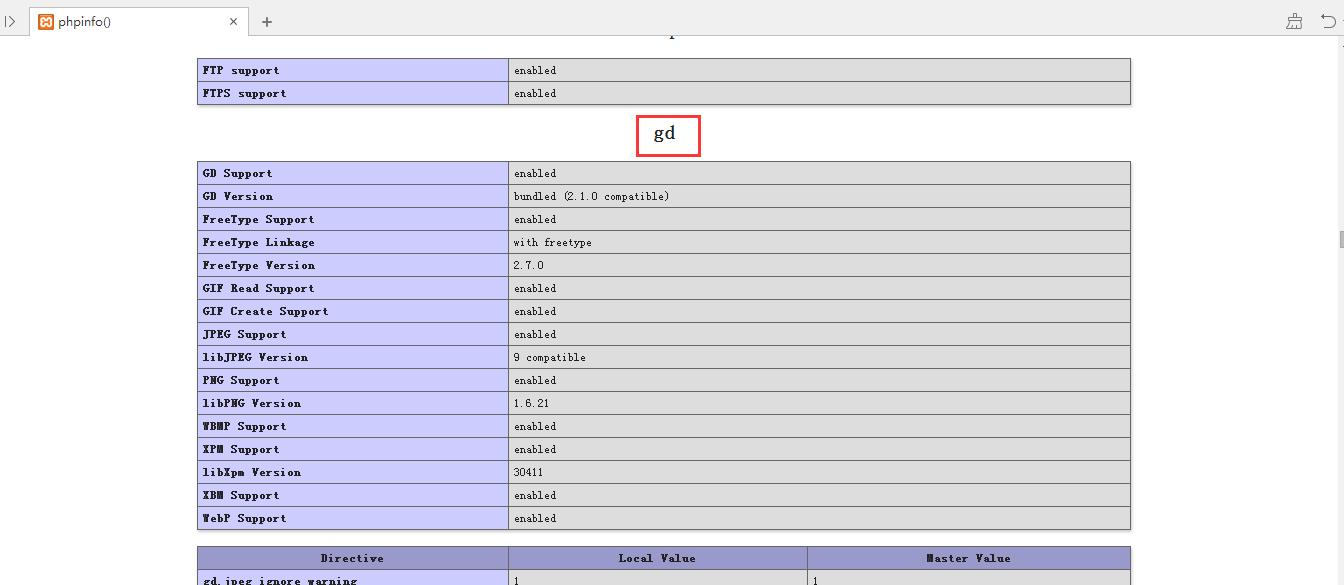
可以通过phpinfo()方法来确认,如果有gd栏目就说明GD库加载成功了。
phpinfo.php
<?php

	phpinfo();

?>
2、创建图像
GD库处理图像的操作都是先在内存处理,操作完成后再以数据流的方式输出到浏览器,有4个步骤:
- 创建画布
- 绘制图像
- 输出图像
- 释放资源
创建画布
创建画布就是在内存区中开辟一块存储区
imagecreate.php
<?php

	//创建普通画布

	$img1=imagecreate(100,100) or die("创建普通画布失败<br/>");

	echo "创建普通画布成功<br/>";

	//创建真彩画布

	$img2=imagecreatetruecolor(200,300) or die("创建真彩画布失败<br/>");

	echo "创建真彩画布成功<br/>";

	//获取图像的大小

	echo "图像1的x:".imagesx($img1)."<br/>";

	echo "图像1的y:".imagesy($img1)."<br/>";

	echo "图像2的x:".imagesx($img2)."<br/>";

	echo "图像2的y:".imagesy($img2)."<br/>";

?>
输出
创建普通画布成功

创建真彩画布成功

图像1的x:100

图像1的y:100

图像2的x:200

图像2的y:300
其他的方法常用:
- imagecreatefromgif()通过gif文件或者url新建一个图像
- imagecreatefromjpeg()通过JPEG文件或者url新建一个图像
- imagecreatefrompng()通过png或者url新建一个图像
- imagecreatefrombmp()通过bmp或者url新建一个图像
输出图像
imagegif($image,$filename)输出一个gif格式图像到浏览器,如果第二个参数指定了,则以文件形式输出
imagejpeg($image,$filename)
imagepng($image,$filename)
imageoutput.php
<?php
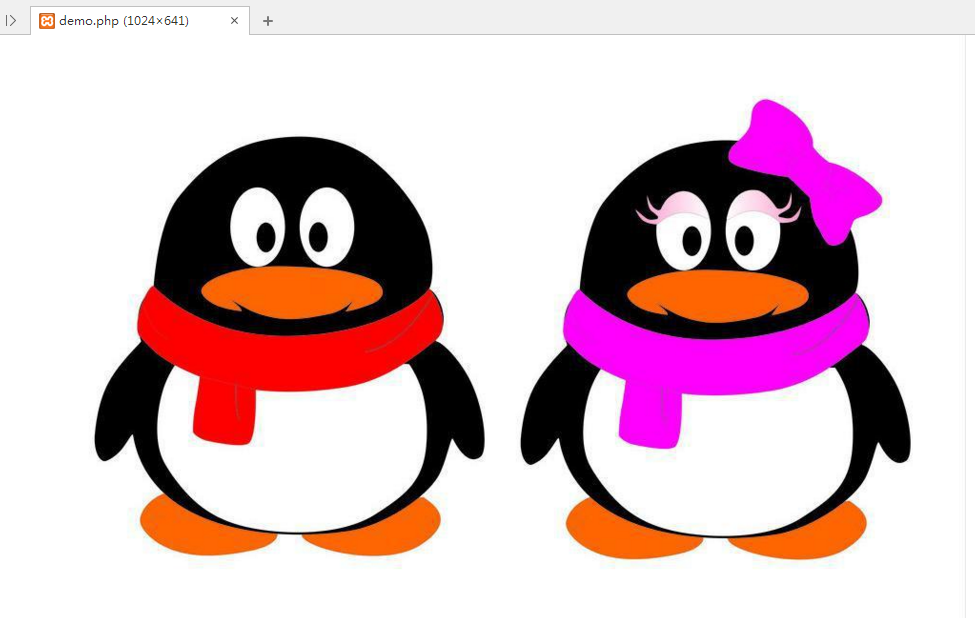
//创建画布
$image1=imagecreatefromjpeg("http://pic.58pic.com/58pic/13/19/83/30J58PICFBZ_1024.jpg");//使用网络资源
$image2=imagecreatefrompng("C:/xampp/htdocs/1.png");//使用本地资源 //在输出图像之前清理输出缓冲,否则缓冲中有其他字符串,图像会乱码
ob_clean(); //指定输出类型为图像,否则乱码,chrome,Firefox,Opera等浏览器不兼容
header("Content-type:image/jpeg"); //输出图像到浏览器
imagejpeg($image1) or die("创建图像失败<br/>");
imagejpeg($image2) or die("创建图像失败<br/>"); //释放资源
imagedestroy($image1,$image2);
?>
输出
一些方法说明:
ob_clean();用于清理输出缓冲,否则缓冲中有其他字符串会使得图片乱码,最后变为2进制数据
header("Content-type:image/jpeg");指定输出类型为图像,是为了解决浏览器的兼容性问题,否则乱码,chrome,Firefox,Opera等浏览器不兼容,只有IE兼容。
imagedestroy($image1);用于释放资源,让出内存。
设置颜色
前面已经学习了如何建立一张画布,但是没有“彩笔”,绘画就还没有开始,下面来创建“彩笔”,设置颜色。
imagecolorallocate($image,$red,$green,$blue),会返回一个标识,代表了给定的RGB成分组成的颜色。
imagecolorallocate.php
<?php
//创建画布
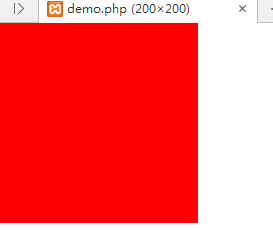
$image=imagecreate(200,200); //第一次设置的通常为背景色
$red=imagecolorallocate($image,255,0,0);
//设置画笔为蓝色
$blue=imagecolorallocate($image,0,0,255); //输出图像前清理输出缓冲
ob_clean();
//解决chrome兼容性问题
header("Content-type:image/jpeg");
//输出图像到浏览器
imagejpeg($image) or die("创建图像失败<br/>"); //释放资源
imagedestroy($image);
?>
输出
区域填充
imagefill($image,$x,$y,$color)它会将(x,y)点出颜色相同并且相邻颜色替换为$color设置的颜色。
这里使用rand(0,255)产生一个大于等于0,小于255的随机数来设置颜色。
imagefill.php
<?php

	//创建画布

	$image=imagecreatefromjpeg("http://pic.58pic.com/58pic/13/19/83/30J58PICFBZ_1024.jpg");//使用网络资源

	//第一次设置的通常为背景色

	$rand=imagecolorallocate($image,rand(0,255),rand(0,255),rand(0,255));//使用随机数设置颜色

	//设置画笔为蓝色

	//$blue=imagecolorallocate($image,0,0,255);

	//区域填充

	imagefill($image,10,10,$rand);

	//输出图像前清理输出缓冲

	ob_clean();

	//解决chrome兼容性问题

	header("Content-type:image/jpeg");

	//输出图像到浏览器

	imagejpeg($image) or die("创建图像失败<br/>");

	//释放资源

	imagedestroy($image);

?>
输出
绘制点,线,矩形,多边形,椭圆,弧线
点和线
imagesetpixel($image,$x,$y,$color)在(x,y)位置使用$color颜色绘制点
imageline($image,$x1,$y1,$x2,$y2,$color)在(x1,y1)到(x2,y2)位置使用$color颜色绘制线
利用下面的这段代码可以在生成验证码的时候生成干扰元素。
imagesetpixel_line.php
<?php

	//创建画布

	//$image=imagecreatefromjpeg("http://pic.58pic.com/58pic/13/19/83/30J58PICFBZ_1024.jpg");//使用网络资源

	$image=imagecreate(200,200);

	//第一次设置的通常为背景色

	$black=imagecolorallocate($image,0,0,0);

	//设置画笔为蓝色

	$white=imagecolorallocate($image,255,255,255);

	//绘制点

	for($i=0;$i<1000;$i++){

		imagesetpixel($image,rand(0,200),rand(0,200),$white);

	}

	//绘制线

	for($i=0;$i<10;$i++){

		imageline($image,rand(0,200),rand(0,200),rand(0,200),rand(0,200),$white);

	}

	//输出图像前清理输出缓冲

	ob_clean();

	//解决chrome兼容性问题

	header("Content-type:image/jpeg");

	//输出图像到浏览器

	imagejpeg($image) or die("创建图像失败<br/>");

	//释放资源

	imagedestroy($image);

?>
输出

矩形
imagerectangle($image,$x1,$y1,$x2,$y2,$color)绘制矩形
imagefilledrectangle($image,$x1,$y1,$x2,$y2,$color)填充矩形
rectangle.php
<?php

	//创建画布

	//$image=imagecreatefromjpeg("http://pic.58pic.com/58pic/13/19/83/30J58PICFBZ_1024.jpg");//使用网络资源

	$image=imagecreate(300,300);

	//第一次设置的通常为背景色

	$black=imagecolorallocate($image,0,0,0);

	//设置画笔为蓝色

	$white=imagecolorallocate($image,255,255,255);

	//绘制矩形

	imagerectangle($image,10,10,100,100,$white);

	//填充矩形

	imagefilledrectangle($image,50,50,100,100,$white);

	//输出图像前清理输出缓冲

	ob_clean();

	//解决chrome兼容性问题

	header("Content-type:image/jpeg");

	//输出图像到浏览器

	imagejpeg($image) or die("创建图像失败<br/>");

	//释放资源

	imagedestroy($image);

?>
输出
多边形
imagepolygon($image,$arr_points,$num_points,$color)绘制多边形,$arr_points多边形顶点数组数必须大于等于$num_points定点总数
imagefilledpolygon($image,$arr_points,$num_points,$color)填充多边形
imagepolygon.php
<?php

	//创建画布

	//$image=imagecreatefromjpeg("http://pic.58pic.com/58pic/13/19/83/30J58PICFBZ_1024.jpg");//使用网络资源

	$image=imagecreate(300,300);

	//第一次设置的通常为背景色

	$black=imagecolorallocate($image,0,0,0);

	//设置画笔为蓝色

	$white=imagecolorallocate($image,255,255,255);

	$arr_points=array(10,10,50,20,40,30,100,120,200,30,30,150);

	//绘制多边形

	imagepolygon($image,$arr_points,6,$white);

	//填充多边形

	imagefilledpolygon($image,$arr_points,5,$white);

	//输出图像前清理输出缓冲

	ob_clean();

	//解决chrome兼容性问题

	header("Content-type:image/jpeg");

	//输出图像到浏览器

	imagejpeg($image) or die("创建图像失败<br/>");

	//释放资源

	imagedestroy($image);

?>
输出
绘制椭圆
imageellipse($image,$cx,$cy,$width,$height,$color)绘制椭圆
imagefilledellipse($image,$cx,$cy,$width,$height,$color)绘制椭圆
imageellipse.php
<?php

	//创建画布

	//$image=imagecreatefromjpeg("http://pic.58pic.com/58pic/13/19/83/30J58PICFBZ_1024.jpg");//使用网络资源

	$image=imagecreate(300,300);

	//第一次设置的通常为背景色

	$black=imagecolorallocate($image,0,0,0);

	//设置画笔为蓝色

	$white=imagecolorallocate($image,255,255,255);

	//绘制椭圆

	imageellipse($image,100,100,200,100,$white);

	//填充椭圆

	imagefilledellipse($image,100,100,200,100,$white);

	//输出图像前清理输出缓冲

	ob_clean();

	//解决chrome兼容性问题

	header("Content-type:image/jpeg");

	//输出图像到浏览器

	imagejpeg($image) or die("创建图像失败<br/>");

	//释放资源

	imagedestroy($image);

?>
输出
绘制弧线
imagearc($image,$cx,$cy,$width,$height,$start,$end,$color)绘制弧线,$start是开始角度,$end是结束角度
imagefilledarc($image,$cx,$cy,$width,$height,$start,$end,$color,$mode)填充弧线,$start是开始角度,$end是结束角度
imagearc.php
<?php

	//创建画布

	//$image=imagecreatefromjpeg("http://pic.58pic.com/58pic/13/19/83/30J58PICFBZ_1024.jpg");//使用网络资源

	$image=imagecreate(300,300);

	//第一次设置的通常为背景色

	$black=imagecolorallocate($image,0,0,0);

	//设置画笔为蓝色

	$white=imagecolorallocate($image,255,255,255);

	//绘制椭圆

	imagearc($image,100,100,200,200,0,90,$white);

	//填充椭圆

	imagefilledarc($image,100,100,200,200,0,45,$white,IMG_ARC_PIE);

	//输出图像前清理输出缓冲

	ob_clean();

	//解决chrome兼容性问题

	header("Content-type:image/jpeg");

	//输出图像到浏览器

	imagejpeg($image) or die("创建图像失败<br/>");

	//释放资源

	imagedestroy($image);

?>
输出

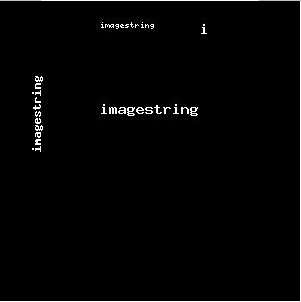
绘制文字
imagestring($image,$font,$x,$y,$data,$color)水平绘制一行字符串,使用$font字体(内置字体为1,2,3,4,5)写$data内容,(x,y)位置为内容左上角。
imagestringup($image,$font,$x,$y,$data,$color)垂直绘制一行字符串
imagechar($image,$font,$x,$y,$data,$color)水平绘制一个字符
imagecharup($image,$font,$x,$y,$data,$color)垂直绘制一个字符
imagettftext($image,$size,$angle,$x,$y,$color,$fontfile,$text)使用truetype字体向图像写入文本
使用$font字体(内置字体为1,2,3,4,5),如果使用其他字体用imageloadfont()
imagestring.php
<?php

	//创建画布

	//$image=imagecreatefromjpeg("http://pic.58pic.com/58pic/13/19/83/30J58PICFBZ_1024.jpg");//使用网络资源

	$image=imagecreate(300,300);

	//第一次设置的通常为背景色

	$black=imagecolorallocate($image,0,0,0);

	//设置画笔为蓝色

	$white=imagecolorallocate($image,255,255,255);

	$data="imagestring";

	//绘制文字

	imagestring($image,1,100,20,$data,$white);

	imagestringup($image,3,30,150,$data,$white);

	imagestring($image,5,100,100,$data,$white);

	//绘制字符

	imagechar($image,5,200,20,$data,$white);

	//输出图像前清理输出缓冲

	ob_clean();

	//解决chrome兼容性问题

	header("Content-type:image/jpeg");

	//输出图像到浏览器

	imagejpeg($image) or die("创建图像失败<br/>");

	//释放资源

	imagedestroy($image);

?>
输出
使用字库,字库文件默认在:C:\Windows\Fonts
imagettftext.php
<?php

	//创建画布

	//$image=imagecreatefromjpeg("http://pic.58pic.com/58pic/13/19/83/30J58PICFBZ_1024.jpg");//使用网络资源

	$image=imagecreate(500,500);

	//第一次设置的通常为背景色

	$black=imagecolorallocate($image,0,0,0);

	//设置画笔为白色

	$white=imagecolorallocate($image,255,255,255);

	$data="hello PHP";

	//绘制truetype文字

	imagettftext($image,55,0,50,250,$white,"C:/Windows/Fonts/Arial.ttf",$data);

	imagettftext($image,55,90,250,400,$white,"C:/Windows/Fonts/Arial.ttf",$data);

	imagettftext($image,55,45,100,370,$white,"C:/Windows/Fonts/Arial.ttf",$data);

	imagettftext($image,55,135,370,330,$white,"C:/Windows/Fonts/Arial.ttf",$data);

	//输出图像前清理输出缓冲

	ob_clean();

	//解决chrome兼容性问题

	header("Content-type:image/jpeg");

	//输出图像到浏览器

	imagejpeg($image) or die("创建图像失败<br/>");

	//释放资源

	imagedestroy($image);

?>
输出
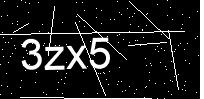
通过GD库生成验证码
在网上注册一些账号,常常遇到注册码输入,生成验证码步骤:
- 创建画布
- 随机绘制字符
- 绘制干扰元素
- 输出图像到浏览器
- 释放资源
check_data.php
<?php

	//创建画布

	//$image=imagecreatefromjpeg("http://pic.58pic.com/58pic/13/19/83/30J58PICFBZ_1024.jpg");//使用网络资源

	$image=imagecreate(200,100);

	//第一次设置的通常为背景色

	$black=imagecolorallocate($image,0,0,0);

	//设置画笔为白色

	$white=imagecolorallocate($image,255,255,255);

	//产生随机干扰线条

	for($i=0;$i<9;$i++){

		imageline($image,rand(0,200),rand(0,100),rand(0,200),rand(0,100),$white);

	}

	//产生随机干扰点

	for($i=0;$i<200;$i++){

		imagesetpixel($image,rand(0,200),rand(0,100),$white);

	}

	//产生4个字符的字符串

	for($i=0,$data='';$i<4;$i++){

		switch(rand(1,3)){

			case '1':$ch=rand(0,9);break;

			case '2':$ch=sprintf('%c',rand(97,122));break;

			case '3':$ch=sprintf('%c',rand(65,90));break;

		}

		$data.=$ch;

	}

	//绘制truetype文字

	imagettftext($image,32,rand(1,15),20,70,$white,"C:/Windows/Fonts/Arial.ttf",$data);

	//输出图像前清理输出缓冲

	ob_clean();

	//解决chrome兼容性问题

	header("Content-type:image/jpeg");

	//输出图像到浏览器

	imagejpeg($image) or die("创建图像失败<br/>");

	//释放资源

	imagedestroy($image);

?>
可能输出

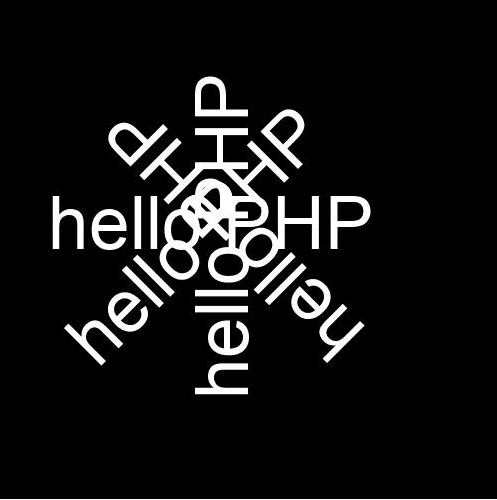
最后来一个好玩的图像

他的实现代码如下
<?php

	//创建画布

	//$image=imagecreatefromjpeg("http://pic.58pic.com/58pic/13/19/83/30J58PICFBZ_1024.jpg");//使用网络资源

	$image=imagecreate(500,500);

	//第一次设置的通常为背景色

	$white=imagecolorallocate($image,255,255,255);

	//设置画笔

	$black=imagecolorallocate($image,0,0,0);

	$data="Hello PHP!";

	//绘制truetype文字

	for($i=0;$i<360;$i+=5){

		imagettftext($image,35,$i,250,250,$black,"C:/Windows/Fonts/Arial.ttf",$data);

	}

	//输出图像前清理输出缓冲

	ob_clean();

	//解决chrome兼容性问题

	header("Content-type:image/jpeg");

	//输出图像到浏览器

	imagejpeg($image) or die("创建图像失败<br/>");

	//释放资源

	imagedestroy($image);

?>
ok,就到这里吧。
PHP学习8——图像处理的更多相关文章
- C#学习笔记-图像处理篇(一)绘制公章
上个月免费帮别人做事,就一直在服务员和程序员中来回切换,所以好多事情都弄得乱糟糟的,家里也是乱七八糟的,所以学习这一块也放了一段时间. 刚刚开始当服务员的时间看到了形形色色的人,觉得很好玩,他们每个人 ...
- 分享用于学习C++图像处理的代码示例
为了便于学习图像处理并研究图像算法, 俺写了一个适合初学者学习的小小框架. 麻雀虽小五脏俱全. 采用的加解码库:stb_image 官方:http://nothings.org/ stb_image. ...
- paper 108:系统学习数字图像处理之图像复原与重建
首先,必须注意这里所限制的处理条件. 关于图像退化/复原模型 退化的图像是由成像系统的退化加上额外的噪声形成的. 1.只考虑噪声引起的退化 噪声模型,包含于空间不相关和相关两种,除了空间周期噪声,这里 ...
- aforge 学习-基本图像处理要用的类库
1.图像灰度化:Grayscale.CommonAlgorithms.BT709(3种) FiltersSequence =new FiltersSequence(数组处理函数): 2.二值化(阈值 ...
- python学习-Pillow图像处理
Pillow中文文档:https://pillow-cn.readthedocs.io/zh_CN/latest/handbook/tutorial.html 安装:pip install pillo ...
- PHP学习之图像处理-水印类
<?php $image = new Image(); $image->water('./upload/up_5cf0caca0565b.png','./upload/up_5cf0cb3 ...
- 数字图像处理(MATLAB版)学习笔记(2)——第2章 灰度变换与空间滤波
0.小叙闲言 1.本章整体结构 2.书中例子 例2.1 主要是使用函数imadjust,来熟悉一下灰度处理,体验一把 >> imread('myimage.jpg'); >> ...
- 使用FSharp 探索Dotnet图像处理功能1--反色变化
坚持写博客是最近的目标.加油. 业余学习fsharp以来一直觉得这才是Dotnet开发,或者说所有开发者应该拥有的语言.配合Visual Studio的代码提示,即时执行窗口.开发程序有着极大的乐趣. ...
- 分享用于学习C++音频处理的代码示例
与<分享用于学习C++图像处理的代码示例>为姊妹篇. 为了便于学习C++音频处理并研究音频算法, 俺写了一个适合初学者学习的小小框架. 麻雀虽小五脏俱全,仅仅考虑单通道处理. 采用Deco ...
随机推荐
- python3.7.0安装
如何安装Python的操作步骤: 1.第一步先去python的官方网站下载python的安装包 地址:https://www.python.org/downloads/ 根据自己的系统选择对应的安装包 ...
- SSO单点登录入门
1,SSO简介 SSO(Single Sign-On,单点登录)是身份管理中的一部分.SSO 的一种较为通俗的定义是:SSO 是指访问同一服务器不同应用中的受保护资源的同一用户,只需要登录一次,即通过 ...
- CentOS加入Windows域
CentOS加入Windows域,为减少操作已经提前关掉了selinux,防火墙.并且更改了主机名 yum install nss-pam-ldapd -y 第一步:更改主机名为linux.itxd ...
- React-Native 工程添加推送功能 (iOS 篇)
推送已经是是手机应用的基本功能,如果自己实现一套推送系统费时费力,所有一般我们会使用第三方的推送服务,这里我使用「极光推送」作为集成推送的例子,因为有现成的 react native 插件 jpush ...
- 手把手教你在Mac中搭建iOS的 React Native环境
准备工作 1.你需要一台Mac电脑..(这不是废话?我所用的是Air~~穷..) 2.我所操作的电脑系统环境是 3.xcode版本:8.0正式版 必需的软件 1.Homebrew Homebrew, ...
- Linux 包管理器
RPM: rpm(Red-Hat Package Manager) 为 Redhat 提出的包管理器, 用于在 Redhat 及其衍生版本中安装 rpm 格式的软件包 rpm 的优点: 1.简化了源码 ...
- 2016级算法第二次上机-F.ModricWang's Number Theory II
891 ModricWang's Number Theory II 思路 使得序列的最大公约数不为1,就是大于等于2,就是找到一个大于等于2的数,它能够整除序列中的所有数. 考虑使得一个数d整除数组中 ...
- (C/C++) 亂數應用
因為公司需要寫了一個亂數產生測試條件的小程式,再此紀錄下來 int _tmain(int argc, _TCHAR* argv[]) { fstream file; file.open("t ...
- python学习,day2:利用列表做购物车实例
一个购物车 # coding=utf-8 # Author: RyAn Bi import sys , os goods = [['iphone',5800],['mate20pro',5000],[ ...
- L2-2 小字辈 (25 分)
本题给定一个庞大家族的家谱,要请你给出最小一辈的名单. 输入格式: 输入在第一行给出家族人口总数 N(不超过 100 000 的正整数) —— 简单起见,我们把家族成员从 1 到 N 编号.随后第二行 ...