061.Python前端Django组件用户认证组件
一 auth认证组件
在使用pymysql,数据库迁移的时候.,默认生成有十张表如下
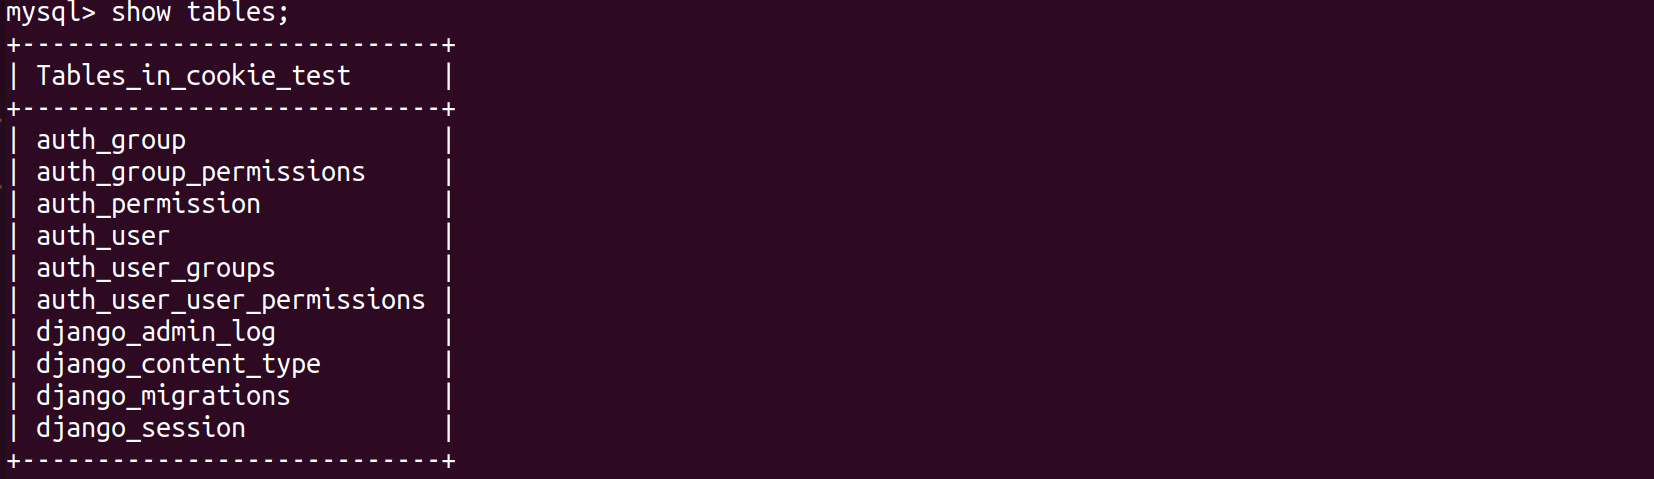
查看author_user表结构
mysql> desc auth_user;
+--------------+--------------+------+-----+---------+----------------+

| Field        | Type         | Null | Key | Default | Extra          |

+--------------+--------------+------+-----+---------+----------------+

| id           | int(11)      | NO   | PRI | NULL    | auto_increment |

| password     | varchar(128) | NO   |     | NULL    |                |

| last_login   | datetime(6)  | YES  |     | NULL    |                |

| is_superuser | tinyint(1)   | NO   |     | NULL    |                |

| username     | varchar(150) | NO   | UNI | NULL    |                |

| first_name   | varchar(30)  | NO   |     | NULL    |                |

| last_name    | varchar(150) | NO   |     | NULL    |                |

| email        | varchar(254) | NO   |     | NULL    |                |

| is_staff     | tinyint(1)   | NO   |     | NULL    |                |

| is_active    | tinyint(1)   | NO   |     | NULL    |                |

| date_joined  | datetime(6)  | NO   |     | NULL    |                |

+--------------+--------------+------+-----+---------+----------------+
在使用用户认证组件,必须使用django自带的author_user表
1.1 创建一个新的auth app
root@darren-virtual-machine:~/PycharmProjects/cookie_seesion# python3 manage.py startapp auth_demo
注册app
INSTALLED_APPS = [

    'django.contrib.admin',

    'django.contrib.auth',

    'django.contrib.contenttypes',

    'django.contrib.sessions',

    'django.contrib.messages',

    'django.contrib.staticfiles',

    'cookie.apps.CookieConfig',

    'session.apps.SessionConfig',

    'auth_demo.apps.AuthConfig',

]
配置路由分发
from django.contrib import admin

from django.urls import path,include

urlpatterns = [

    path('admin/', admin.site.urls),

    path("cookie/",include("cookie.urls")),

    path("session/",include("session.urls")),

    path("auth_demo/",include("auth_demo.urls")),

]
配置路由
root@darren-virtual-machine:~/PycharmProjects/cookie_seesion# vim auth_demo/urls.py
from django.urls import  path,re_path

from auth_demo import  views

urlpatterns = [

    path('index/', views.index),

    path('login/', views.login),

]
1.2 authenticate()用户认证
提供了用户认证,即验证用户名以及密码是否正确,一般需要username password两个关键字参数
如果认证信息有效,会返回一个 User 对象。authenticate()会在User 对象上设置一个属性标识那种认证后端认证了该用户,且该信息在后面的登录过程中是需要的。当我们试图登陆一个从数据库中直接取出来不经过authenticate()的User对象会报错的!!
1.3 login(HttpRequest, user)附加seesion信息
该函数接受一个HttpRequest对象,以及一个认证了的User对象
此函数使用django的session框架给某个已认证的用户附加上session id等信息。
root@darren-virtual-machine:~/PycharmProjects/cookie_seesion# vim auth_demo/views.py
from django.shortcuts import render,redirect,HttpResponse
from django.contrib import auth
# Create your views here.
def index(request):
return render(request,"auth_index.html") def login(request):
if request.method == "GET":
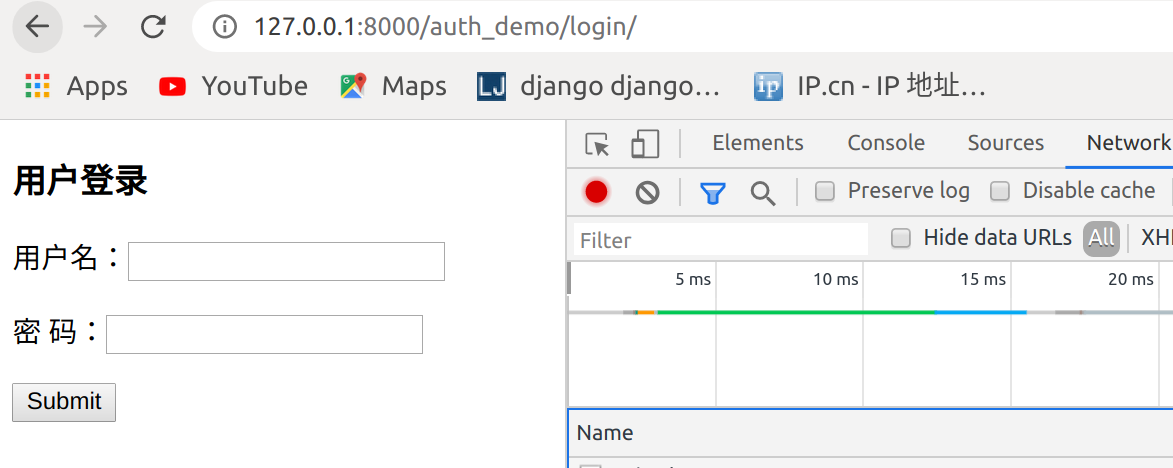
return render(request, "login.html")
else:
username = request.POST.get("username")
password = request.POST.get("password")
user = auth.authenticate(username=username,password=password)
if user:
auth.login(request,user)
request.session["is_login"] = True
return redirect("/auth_demo/index/")
else:
return redirect("/auth_demo/login/")
return render(request,"login.html")
root@darren-virtual-machine:~/PycharmProjects/cookie_seesion# vim templates/auth_index.html
<!DOCTYPE html>
<html lang="en">
<head>
<meta charset="UTF-8">
<title>Title</title>
</head>
<body>
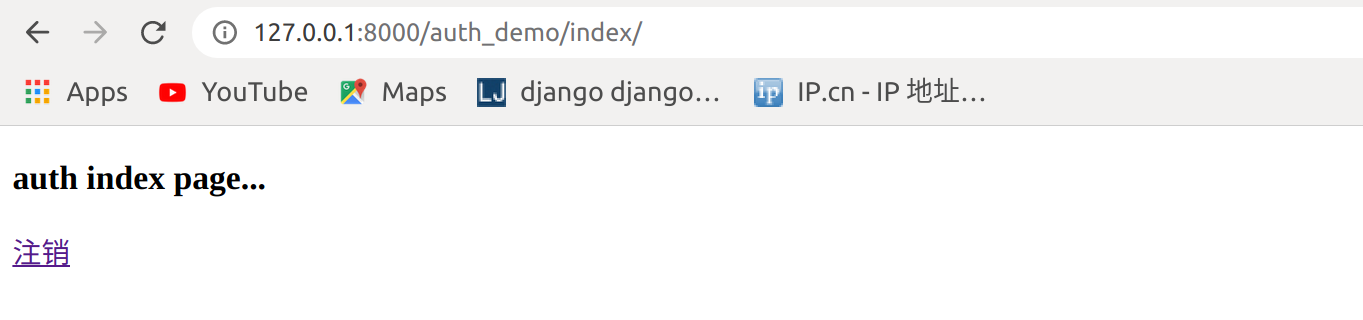
<h3>auth index page...</h3>
</body>
</html>
访问http://127.0.0.1:8000/auth_demo/index/
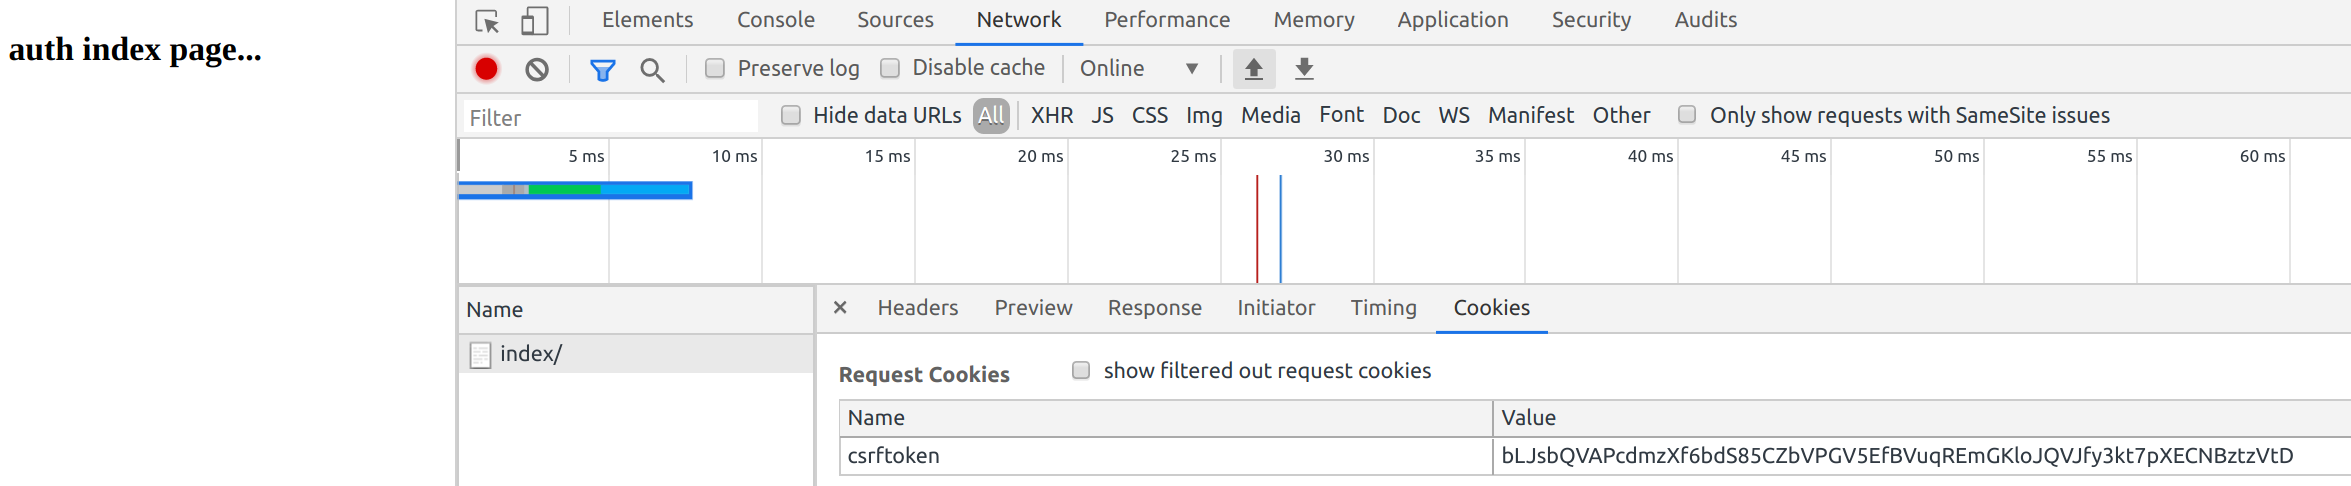
都是干净没有seesion的
添加登陆限制
装饰器views配置
from django.shortcuts import render,redirect,HttpResponse

from django.contrib  import auth

# Create your views here.

def login_required(func):

    def inner(request,*args,**kwargs):

        if not request.user.is_authenticated:

            return redirect("/auth_demo/login/")

        rep = func(request,*args,**kwargs)

        return rep

    return inner

@login_required

def index(request):

    return render(request,"auth_index.html")

def login(request):

    if request.method == "GET":

        return render(request, "login.html")

    else:

        username = request.POST.get("username")

        password = request.POST.get("password")

        user = auth.authenticate(username=username,password=password)

        if user:

            auth.login(request,user)return redirect("/auth_demo/index/")

        else:

            return redirect("/auth_demo/login/")

    return render(request,"login.html")
访问http://127.0.0.1:8000/auth_demo/index/,跳转到登录页面
1.4 创建用户
from django.contrib.auth.models import User

#创建普通用户,密码明文

User.objects.create(username="joy",password="123456")

#创建普通用户,密码密文

User.objects.create_user(username="john",password="123456")

#创建超级管理员用户,密码密文

User.objects.create_superuser(username="darren",password="123456",email="darren@163.com")
查看数据库

使用joy账户不能登录,使用john和darren账户可以登录
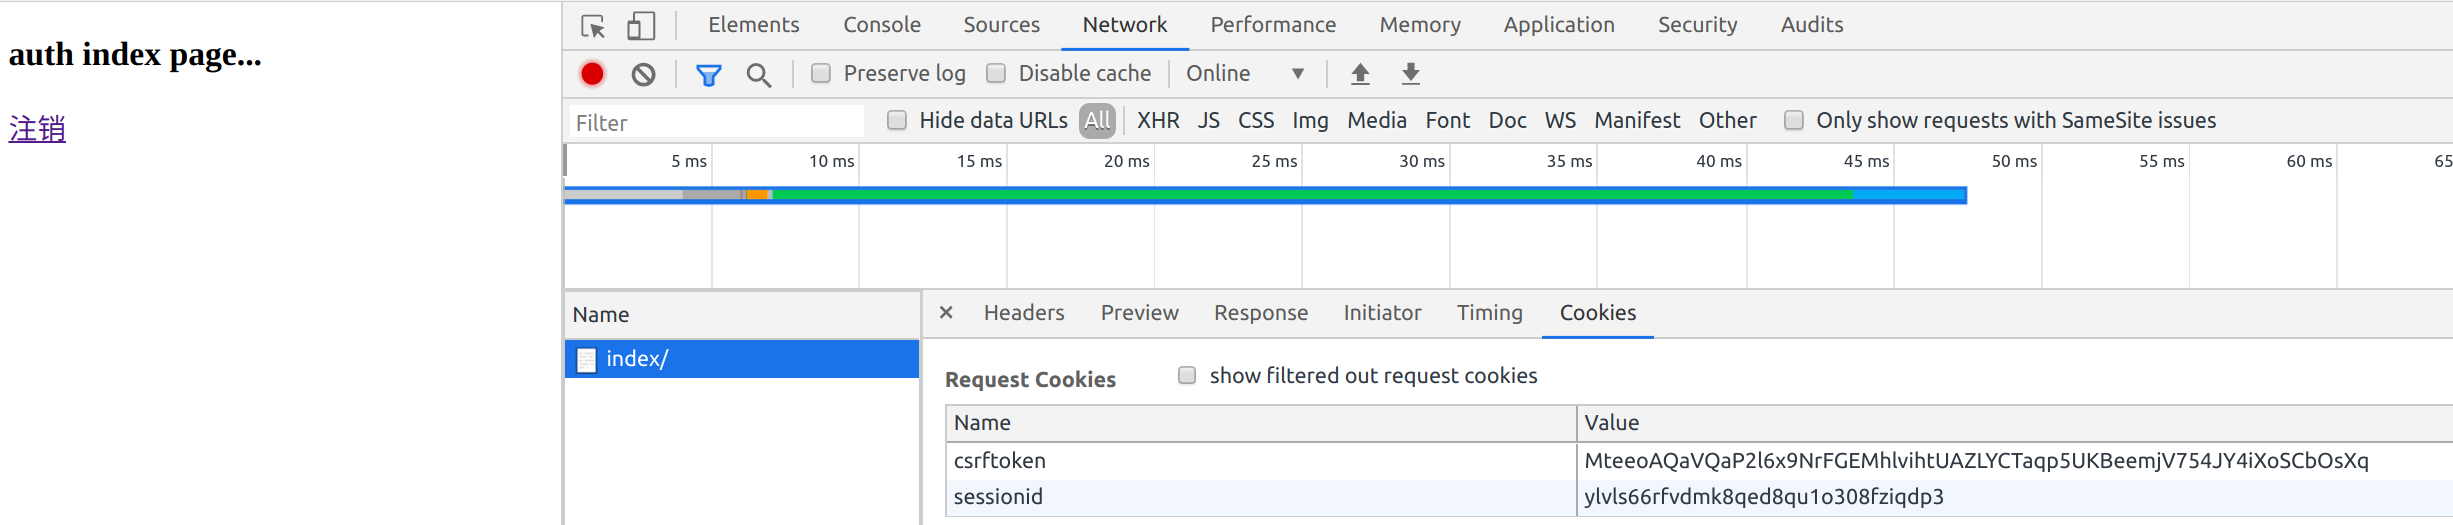
登录后
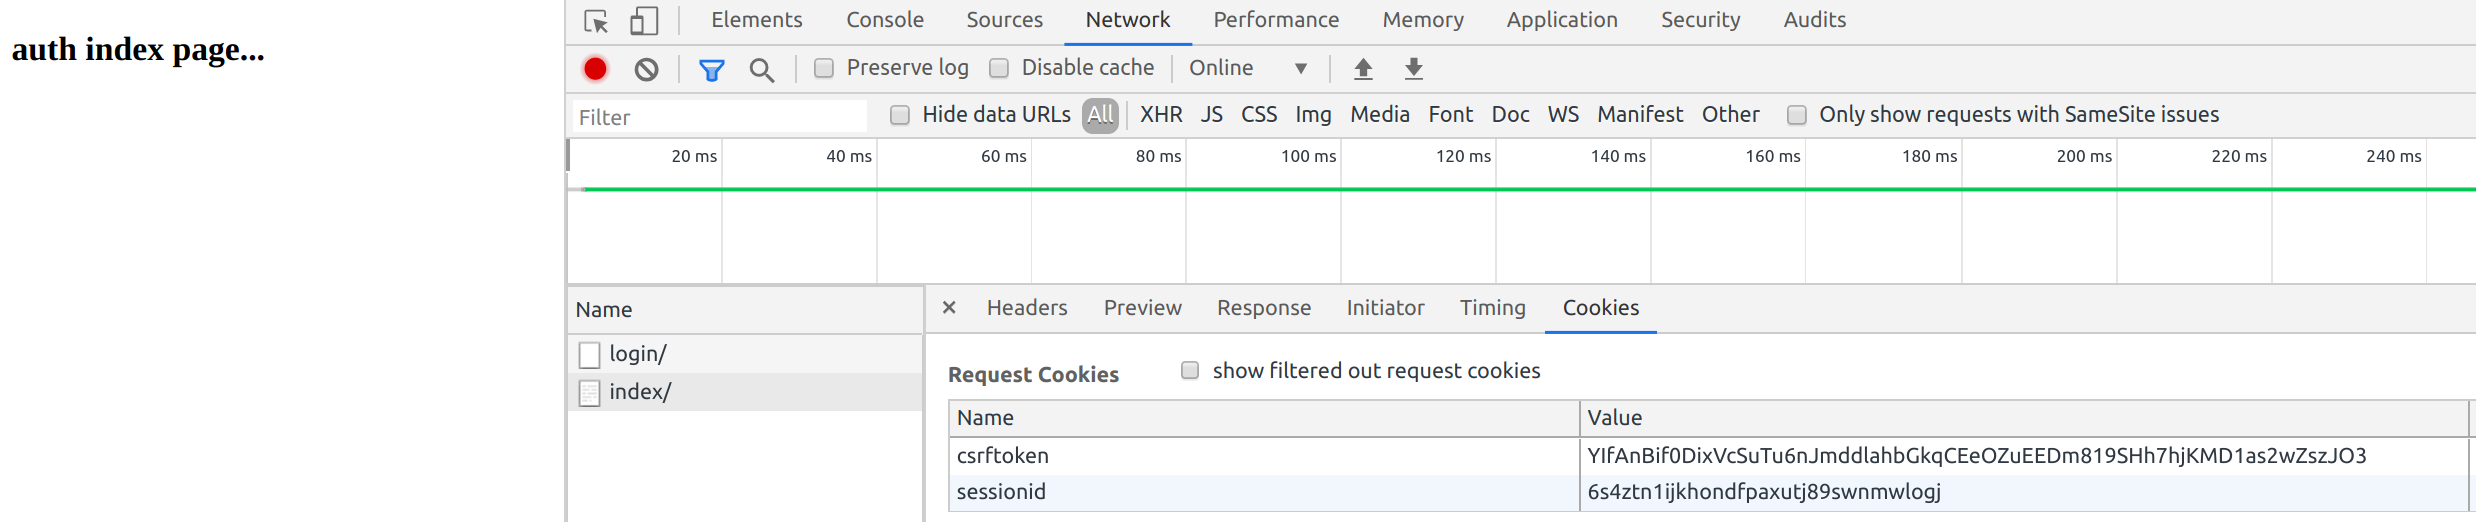
已经有了seesionid
auth.login(request,user)源码
def login(request, user, backend=None):

    """

    Persist a user id and a backend in the request. This way a user doesn't

    have to reauthenticate on every request. Note that data set during

    the anonymous session is retained when the user logs in.

    """

    session_auth_hash = ''

    if user is None:

        user = request.user

    if hasattr(user, 'get_session_auth_hash'):

        session_auth_hash = user.get_session_auth_hash()

    if SESSION_KEY in request.session:

        if _get_user_session_key(request) != user.pk or (

                session_auth_hash and

                not constant_time_compare(request.session.get(HASH_SESSION_KEY, ''), session_auth_hash)):

            # To avoid reusing another user's session, create a new, empty

            # session if the existing session corresponds to a different

            # authenticated user.

            request.session.flush()

    else:

        request.session.cycle_key()

    try:

        backend = backend or user.backend

    except AttributeError:

        backends = _get_backends(return_tuples=True)

        if len(backends) == 1:

            _, backend = backends[0]

        else:

            raise ValueError(

                'You have multiple authentication backends configured and '

                'therefore must provide the `backend` argument or set the '

                '`backend` attribute on the user.'

            )

    else:

        if not isinstance(backend, str):

            raise TypeError('backend must be a dotted import path string (got %r).' % backend)

    request.session[SESSION_KEY] = user._meta.pk.value_to_string(user)

    request.session[BACKEND_SESSION_KEY] = backend

    request.session[HASH_SESSION_KEY] = session_auth_hash

    if hasattr(request, 'user'):

        request.user = user

    rotate_token(request)

    user_logged_in.send(sender=user.__class__, request=request, user=user)
1.5 logout(request) 注销用户
该函数接受一个HttpRequest对象,无返回值。当调用该函数时,当前请求的session信息会全部清除。该用户即使没有登录,使用该函数也不会报错。
添加用户注销
<!DOCTYPE html>

<html lang="en">

<head>

    <meta charset="UTF-8">

    <title>Title</title>

</head>

<body>

<h3>auth index page...</h3>

<a href="/auth_demo/logout">注销</a>

</body>

</html>
路由
from django.urls import  path,re_path

from auth_demo import  views

urlpatterns = [

    path('index/', views.index),

    path('login/', views.login),

    path('logout/',views.logout),

]
视图文件
from django.shortcuts import render,redirect,HttpResponse

from django.contrib  import auth

# Create your views here.

def login_required(func):

    def inner(request,*args,**kwargs):

        if not request.user.is_authenticated:

            return redirect("/auth_demo/login/")

        rep = func(request,*args,**kwargs)

        return rep

    return inner

@login_required

def index(request):

    return render(request,"auth_index.html")

def login(request):

    if request.method == "GET":

        return render(request, "login.html")

    else:

        username = request.POST.get("username")

        password = request.POST.get("password")

        user = auth.authenticate(username=username,password=password)

        if user:

            auth.login(request,user)

            return redirect("/auth_demo/index/")

        else:

            return redirect("/auth_demo/login/")

def logout(request):

    auth.logout(request)

    return redirect("/auth_demo/login/")
访问
点击注销

添加一个order页面
from django.urls import  path,re_path

from auth_demo import  views

urlpatterns = [

    path('index/', views.index),

    path('login/', views.login),

    path('logout',views.logout),

    path('logout',views.logout),

]
views视图文件
from django.shortcuts import render,redirect,HttpResponse

from django.contrib  import auth

# Create your views here.

def login_required(func):

    def inner(request,*args,**kwargs):

        if not request.user.is_authenticated:

            return redirect("/auth_demo/login/")

        rep = func(request,*args,**kwargs)

        return rep

    return inner

@login_required

def index(request):

    return render(request,"auth_index.html")

def login(request):

    if request.method == "GET":

        return render(request, "login.html")

    else:

        username = request.POST.get("username")

        password = request.POST.get("password")

        user = auth.authenticate(username=username,password=password)

        if user:

            auth.login(request,user)

            return redirect("/auth_demo/index/")

        else:

            return redirect("/auth_demo/login/")

def logout(request):

    auth.logout(request)

    return redirect("/auth_demo/login/")

@login_required

def order(request):

    return HttpResponse("order success")
这样访问http://127.0.0.1:8000/auth_demo/order会跳转到http://127.0.0.1:8000/auth_demo/login/
但是登录后

到了index页面,没有到order页面
User对象
User 对象属性:username, password(必填项)password用哈希算法保存到数据库
1.6 user对象的 is_authenticated
如果是真正的 User 对象,返回值恒为 True 。 用于检查用户是否已经通过了认证。
通过认证并不意味着用户拥有任何权限,甚至也不检查该用户是否处于激活状态,这只是表明用户成功的通过了认证。 这个方法很重要, 在后台用request.user.is_authenticated判断用户是否已经登录,如果true则可以向前台展示request.user.username
要求:
1 用户登陆后才能访问某些页面,
2 如果用户没有登录就访问该页面的话直接跳到登录页面
3 用户在跳转的登陆界面中完成登陆后,自动访问跳转到之前访问的地址
view视图设置
from django.shortcuts import render,redirect,HttpResponse

from django.contrib  import auth

# Create your views here.

def login_required(func):

    def inner(request,*args,**kwargs):

        if not request.user.is_authenticated:

            print(request.path)

            return redirect('/auth_demo/login/?next=%s' % request.path)

        rep = func(request,*args,**kwargs)

        return rep

    return inner

@login_required

def index(request):

    return render(request,"auth_index.html")

def login(request):

    if request.method == "GET":

        return render(request, "login.html")

    else:

        username = request.POST.get("username")

        password = request.POST.get("password")

        user = auth.authenticate(username=username,password=password)

        if user:

            auth.login(request,user)

            path = request.GET.get("next")

            return redirect(path)

        else:

            return redirect("/auth_demo/login/")

def logout(request):

    auth.logout(request)

    return redirect("/auth_demo/login/")

@login_required

def order(request):

    return HttpResponse("order success")
访问http://127.0.0.1:8000/auth_demo/order跳转到http://127.0.0.1:8000/auth_demo/login/?next=/auth_demo/order
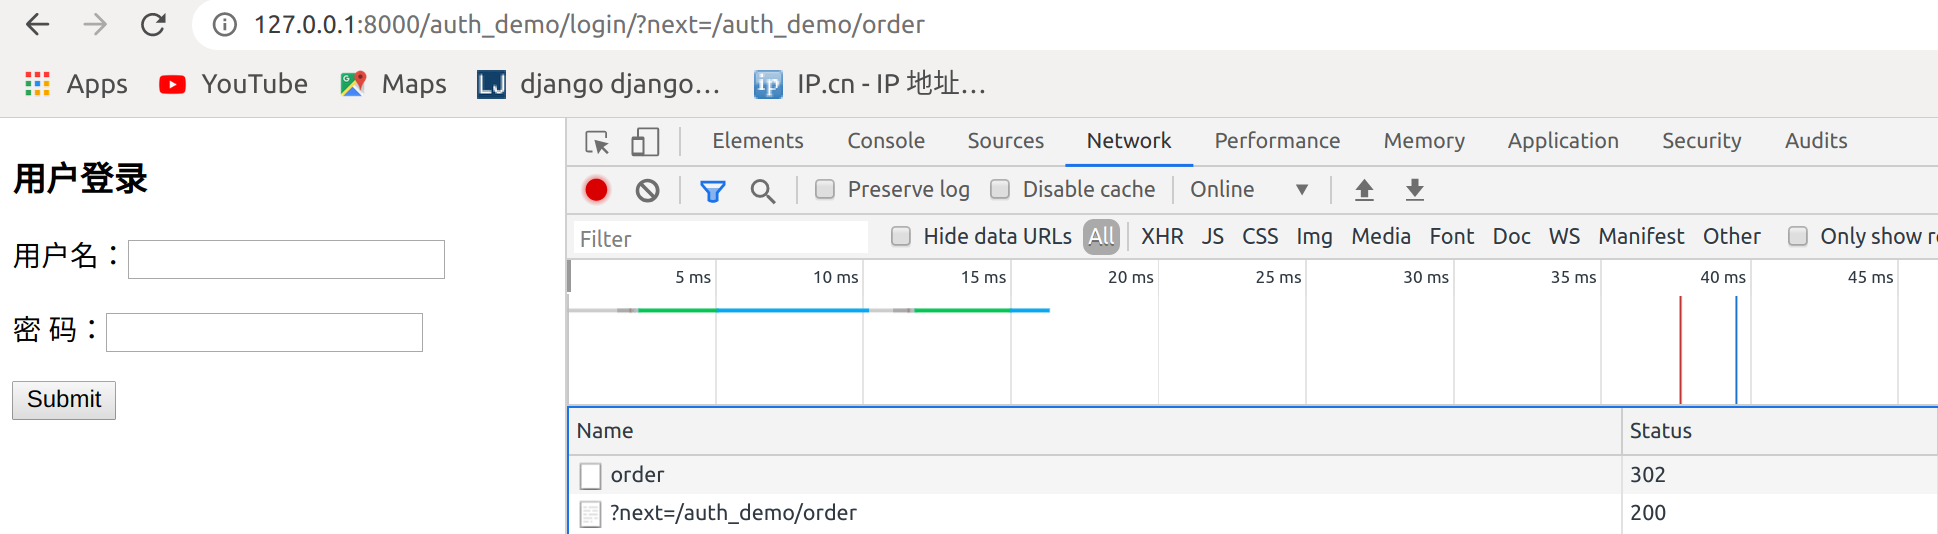
再次登录就到了order页面

点击注销,刷新一下再次登录报错
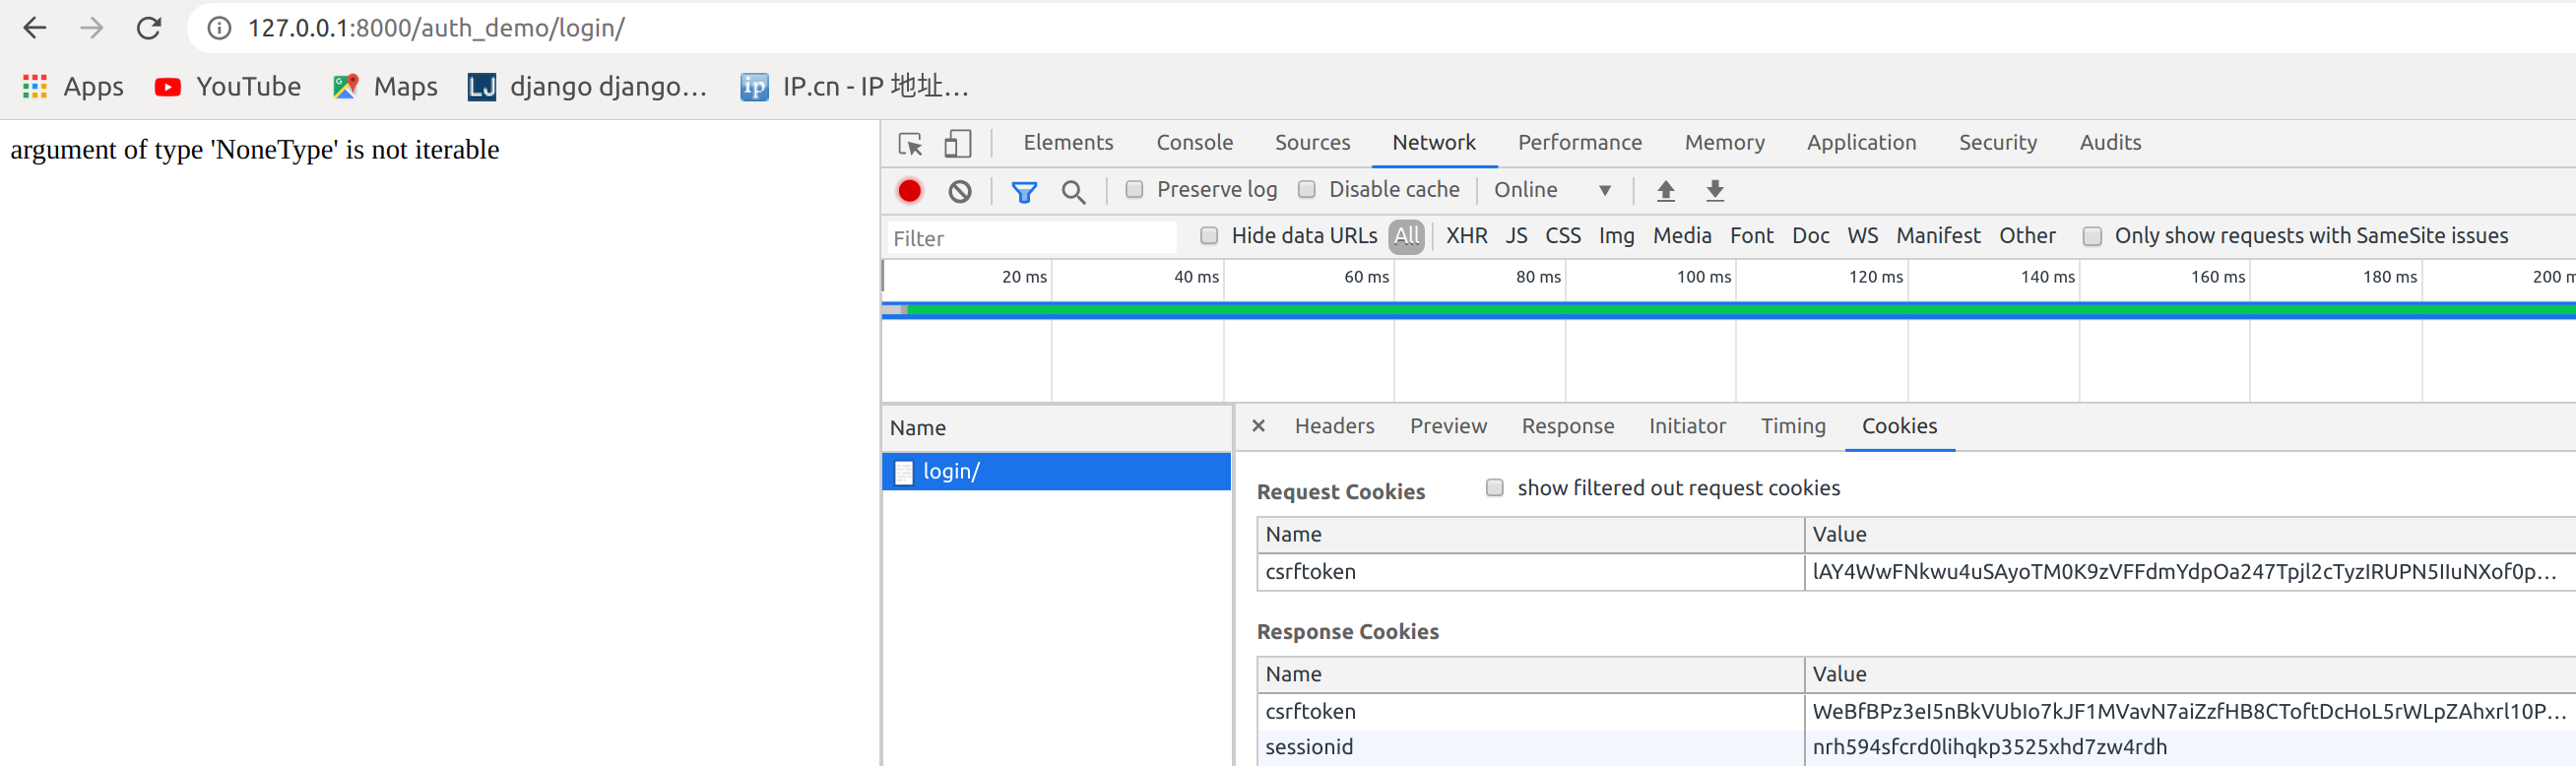
是因为这段代码在跳转会获取一个next参数,但是在直接登录,没有next参数
            path = request.GET.get("next")

            return redirect(path)
处理
from django.shortcuts import render,redirect,HttpResponse

from django.contrib  import auth

# Create your views here.

def login_required(func):

    def inner(request,*args,**kwargs):

        if not request.user.is_authenticated:

            print(request.path)

            return redirect('/auth_demo/login/?next=%s' % request.path)

            return redirect("/auth_demo/login/")

        rep = func(request,*args,**kwargs)

        return rep

    return inner

@login_required

def index(request):

    return render(request,"auth_index.html")

def login(request):

    if request.method == "GET":

        return render(request, "login.html")

    else:

        username = request.POST.get("username")

        password = request.POST.get("password")

        user = auth.authenticate(username=username,password=password)

        if user:

            auth.login(request,user)

            #方法三

            path = request.GET.get("next") or "/auth_demo/index/"

            #方法二

            #path = request.GET.get("next","/auth_demo/index/")

            #方法一

            #if not path:

            #    path = "/auth_demo/index/"

            return redirect(path)

        else:

            return redirect("/auth_demo/login/")

def logout(request):

    auth.logout(request)

    return redirect("/auth_demo/login/")

def logout(request):

    auth.logout(request)

    return redirect("/auth_demo/login/")

@login_required

def order(request):

    return HttpResponse("order success")
登录成功

1.7 内置装饰器
上面的功能可以使用内置的一个装饰器完成
http://127.0.0.1:8000/auth_demo/order/变成http://127.0.0.1:8000/accounts/login/?next=/auth_demo/order/
原因,是因为在源码里面
1从这里进去

进入settings

找到global_seettings
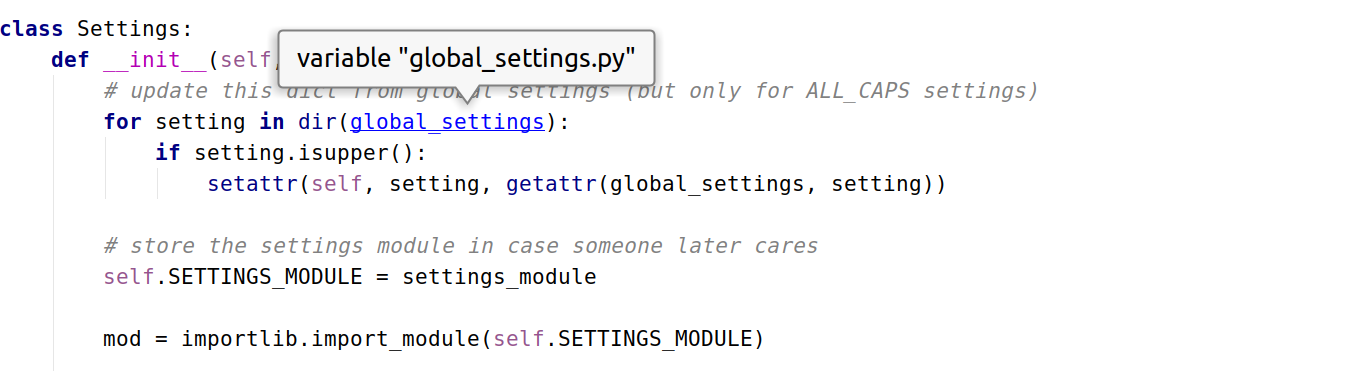
这里设置

在用户的setting配置,这里的优先级高于global_settings
root@darren-virtual-machine:~/PycharmProjects/cookie_seesion# vim cookie_seesion/settings.py
LOGIN_URL = '/auth_demo/login/'
再次访问http://127.0.0.1:8000/auth_demo/order/跳转到http://127.0.0.1:8000/auth_demo/login/?next=/auth_demo/order/已经正常
1.8 添加用户注册页面
from django.urls import  path,re_path

from auth_demo import  views

urlpatterns = [

    path('index/', views.index),

    path('login/', views.login),

    path('logout/',views.logout),

    path('order/',views.order),

    path('register/',views.register),

]
register.html添加注册表单
root@darren-virtual-machine:~/PycharmProjects/cookie_seesion# vim templates/register.html
<!DOCTYPE html>

<html lang="en">

<head>

    <meta charset="UTF-8">

    <title>Title</title>

</head>

<body>

<h3>用户注册</h3>

<form action="" method="post">

    {% csrf_token %}

    <p>用户名: <input type="text" name="username"></p>

    <p>密码: <input type="password" name="password1"></p>

    <p>确认密码: <input type="password" name="password2"></p>

    <input type="submit">

</form>

</body>

</html>
配置views
from django.shortcuts import render,redirect,HttpResponse

from django.contrib  import auth

from django.contrib.auth.decorators import login_required

from  django.contrib.auth.models import User

# Create your views here.

#def login_required(func):

#    def inner(request,*args,**kwargs):

#        if not request.user.is_authenticated:

#            print(request.path)

#            return redirect('/auth_demo/login/?next=%s' % request.path)

#            return redirect("/auth_demo/login/")

#        rep = func(request,*args,**kwargs)

#        return rep

#    return inner

@login_required

def index(request):

    return render(request,"auth_index.html")

def login(request):

    if request.method == "GET":

        return render(request, "login.html")

    else:

        username = request.POST.get("username")

        password = request.POST.get("password")

        user = auth.authenticate(username=username,password=password)

        if user:

            auth.login(request,user)

            #方法三

            path = request.GET.get("next") or "/auth_demo/index/"

            #方法二

            #path = request.GET.get("next","/auth_demo/index/")

            #方法一

            #if not path:

            #    path = "/auth_demo/index/"

            return redirect(path)

        else:

            return redirect("/auth_demo/login/")

def logout(request):

    auth.logout(request)

    return redirect("/auth_demo/login/")

def logout(request):

    auth.logout(request)

    return redirect("/auth_demo/login/")

@login_required

def order(request):

    return HttpResponse("order success")

def register(request):

    if request.method == "GET":

        return render(request,"register.html")

    else:

        username = request.POST.get("username")

        password1 = request.POST.get("password1")

        password2 = request.POST.get("password2")

        if password1 == password2:

            User.objects.create_user(username=username,password=password1)

            return redirect("/auth_demo/login/")

        else:

            return redirect("/auth_demo/register/")
访问http://127.0.0.1:8000/auth_demo/register/
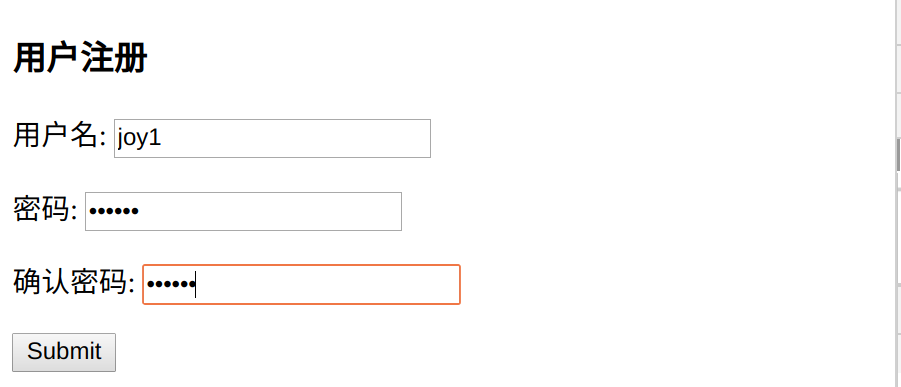
提交检查数据库

已经有joy1用户,登录

登录成功
1.9 修改密码
check_password(passwd)
用户需要修改密码的时候 首先要让他输入原来的密码 ,如果给定的字符串通过了密码检查,返回 True
修改密码
使用 set_password() 来修改密码
user = User.objects.get(username='')

user.set_password(password='')

user.save
urls
from django.urls import  path,re_path

from auth_demo import  views

urlpatterns = [

    path('index/', views.index),

    path('login/', views.login),

    path('logout/',views.logout),

    path('order/',views.order),

    path('register/',views.register),

    path('set_pwd/',views.set_pwd),

]
修改页码html
root@darren-virtual-machine:~/PycharmProjects/cookie_seesion# vim templates/set_password.html
<!DOCTYPE html>

<html lang="en">

<head>

    <meta charset="UTF-8">

    <title>Title</title>

</head>

<body>

<h3>修改密码</h3>

<form action="" method="post">

    <p>旧密码: <input type="password" name="password1"></p>

    <p>新密码: <input type="password" name="password2"></p>

    <p>确认新密码: <input type="password" name="password3"></p>

    <input type="submit">

</form>

</body>

</html>
views
from django.shortcuts import render,redirect,HttpResponse

from django.contrib  import auth

from django.contrib.auth.decorators import login_required

from  django.contrib.auth.models import User

# Create your views here.

#def login_required(func):

#    def inner(request,*args,**kwargs):

#        if not request.user.is_authenticated:

#            print(request.path)

#            return redirect('/auth_demo/login/?next=%s' % request.path)

#            return redirect("/auth_demo/login/")

#        rep = func(request,*args,**kwargs)

#        return rep

#    return inner

@login_required

def index(request):

    return render(request,"auth_index.html")

def login(request):

    if request.method == "GET":

        return render(request, "login.html")

    else:

        username = request.POST.get("username")

        password = request.POST.get("password")

        user = auth.authenticate(username=username,password=password)

        if user:

            auth.login(request,user)

            #方法三

            path = request.GET.get("next") or "/auth_demo/index/"

            #方法二

            #path = request.GET.get("next","/auth_demo/index/")

            #方法一

            #if not path:

            #    path = "/auth_demo/index/"

            return redirect(path)

        else:

            return redirect("/auth_demo/login/")

def logout(request):

    auth.logout(request)

    return redirect("/auth_demo/login/")

def logout(request):

    auth.logout(request)

    return redirect("/auth_demo/login/")

@login_required

def order(request):

    return HttpResponse("order success")

def register(request):

    if request.method == "GET":

        return render(request,"register.html")

    else:

        username = request.POST.get("username")

        password1 = request.POST.get("password1")

        password2 = request.POST.get("password2")

        if password1 == password2:

            User.objects.create_user(username=username,password=password1)

            return redirect("/auth_demo/login/")

        else:

            return redirect("/auth_demo/register/")

@login_required

def set_pwd(request):

    user = request.user

    state = None

    if request.method == "GET":

        return render(request, "set_password.html")

    else:

        old_password = request.POST.get('password1', '')

        new_password = request.POST.get('password2', '')

        repeat_password = request.POST.get('password3', '')

        if user.check_password(old_password):
    #着这里,一定要使用,user.check_password(),或者request.user.check_password()不能使用User.check_password()

            if not new_password:

                state = 'empty'

            elif new_password != repeat_password:

                state = 'repeat_error'

            else:

                user.set_password(new_password)

                user.save()

                return redirect("/auth_demo/")

        else:

            state = 'password_error'

    content = {

        'user': user,

        'state': state,

    }

    return render(request, 'set_password.html', content)
访问http://127.0.0.1:8000/auth_demo/set_pwd,修改密码即可
061.Python前端Django组件用户认证组件的更多相关文章
- python 全栈开发,Day79(Django的用户认证组件,分页器)
一.Django的用户认证组件 用户认证 auth模块 在进行用户登陆验证的时候,如果是自己写代码,就必须要先查询数据库,看用户输入的用户名是否存在于数据库中: 如果用户存在于数据库中,然后再验证用户 ...
- 06 django的用户认证组件
1.用户认证组件 用户认证组件: 功能:用session记录登录验证状态 前提:用户表:django自带的auth_user 创建超级用户: python3 manage.py createsuper ...
- django - 总结 - 用户认证组件
用户认证组件 from django.contrib import auth 从auth_user表中获取对象,没有返回None,其中密码为密文,使用了加密算法 user = auth.authent ...
- django的用户认证组件
DataSource:https://www.cnblogs.com/yuanchenqi/articles/9064397.html 代码总结: 用户认证组件: 功能:用session记录登录验证状 ...
- Django的用户认证组件,自定义分页
一.用户认证组件 1.auth模块 from django.conrtrib import auth django.contrib.auth中提供了许多方法,这里主要介绍其中的三个: 1)authen ...
- Django之用户认证组件
auth模块 之前我们在进行用户登录验证的时候,都是自己写代码,接收用户提交的数据,然后去数据库取数据进行匹配验证,其实Django已经给我们提供了内置的用户认证功能.不信的话你可以打开models. ...
- 14 Django的用户认证组件
用户认证 auth模块 from django.contrib import auth django.contrib.auth中提供了许多方法,这里主要介绍其中的三个: 1.1 .authentica ...
- Django组件:用户认证组件
一丶用户认证 1.auth模块 from django.contrib import auth django.contrib.auth中提供了许多方法,这里主要介绍其中的三个: (1).authent ...
- Django:(7)auth用户认证组件 & 中间件
用户认证组件 用户认证组件: 功能:用session记录登陆验证状态 前提:用户表:django自带的auth_user 创建超级用户的命令: python manage.py createsuper ...
随机推荐
- (二)基于商品属性的相似商品推荐算法——Flink SQL实时计算实现商品的隐式评分
系列随笔: (总览)基于商品属性的相似商品推荐算法 (一)基于商品属性的相似商品推荐算法--整体框架及处理流程 (二)基于商品属性的相似商品推荐算法--Flink SQL实时计算实现商品的隐式评分 ( ...
- python基础(〇):注释
单行注释 Python中单行注释以 # 开头,例如: # 这是一个注释1 print("Hello, World!") # 这是一个注释2 多行注释 单引号(''') ''' 这是 ...
- Unity 背包系统的完整实现(基于MVC框架思想)
前言: 项目源码上传GitHub:Unity-knapsack 背包系统: 背包系统是游戏中非常重要的元素,几乎每一款游戏都有背包系统,我们使用背包系统可以完成装备栏的数据管理,商店物体的数据管理等等 ...
- 【C/C++】memset方法的误区
目录 一.前言 二.函数作用 三.效率对比 四.误区总结 1.按字节设置 2.设置的值只有最低字节有效 3.堆内存不可直接 sizeof 取首地址 4.传参数组不可直接 sizeof 取首地址 一.前 ...
- Spring Boot 2.3 新特配置文件属性跟踪
背景 当我们使用 spring boot 在多环境打包,配置属性在不同环境的值不同,如下: spring: profiles: active: @project.profile@ #根据maven 动 ...
- 安装maven工程报错"Failed to execute goal on project...Could not resolve dependencies for project..."
我在qingcheng_interface中Lifecycle目录下执行install命令后报错"Failed to execute goal on project...Could not ...
- Knight Moves UVA - 439
A friend of you is doing research on the Traveling Knight Problem (TKP) where you are to find the sh ...
- 【网络协议】 TCP三次握手的流程
在TCP/IP协议中,TCP协议通过三次握手,建立可靠的连接服务: 三次握手是由客户端发起 第一步: 客户端向服务端发送请求报文(实际上就是一个具有特定格式的数据包),报文中包含一个标志为Syn,Sy ...
- 反病毒攻防研究第006篇:简单木马分析与防范part2
一.前言 一般来说,木马是既有客户端也有服务器端的.上次讨论的不过是一种特殊情况,毕竟不是人人都懂得DOS命令,因此现在木马的客户端也都是做成非常直观的界面形式,方便操作.本篇文章会从客户端与服务器端 ...
- 手动脱Mole Box V2.6.5壳实战
作者:Fly2015 这个程序是吾爱破解脱壳练习第8期的加壳程序,该程序的壳是MoleBox V2.6.5壳,之前也碰过该种壳但是这个程序似乎要复杂一点. 首先对加壳程序进行侦壳处理. Exeinfo ...