【Android】6.0 添加Menu菜单组件、Intent启动活动、显式Intent、隐式Intent
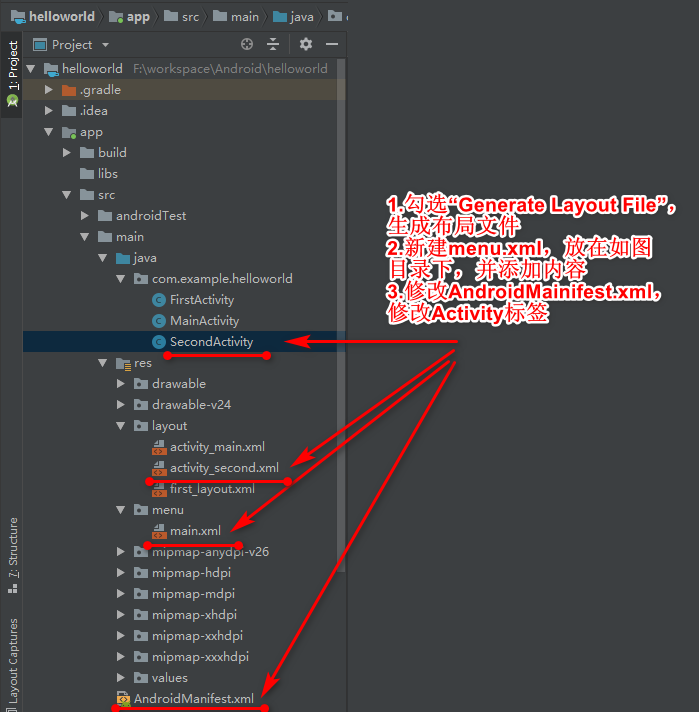
1.0 在helloworld项目基础上创建活动SecondActivity:
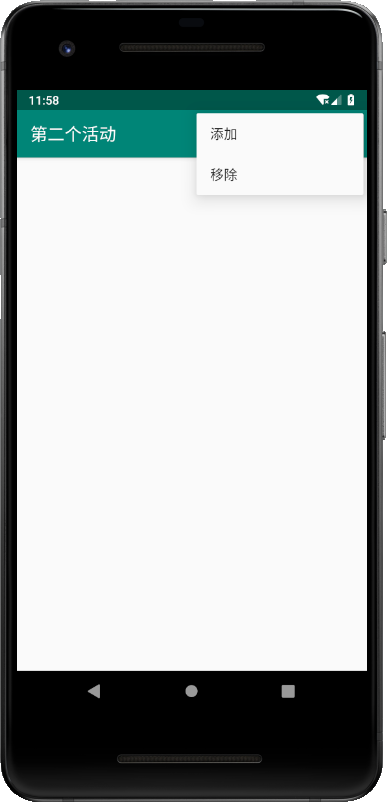
2.0 其中main.xml:
<?xml version="1.0" encoding="utf-8"?>

<menu xmlns:android="http://schemas.android.com/apk/res/android">

<item

    android:id="@+id/add_item"

    android:title="添加"

/>

<item

    android:id="@+id/remove_item"

    android:title="移除"

    />

</menu>
3.0 activity_second.xml不做修改。
4.0 SecondActivity.java:
package com.example.helloworld; import android.support.v7.app.AppCompatActivity;
import android.os.Bundle;
import android.view.Menu;
import android.view.MenuItem;
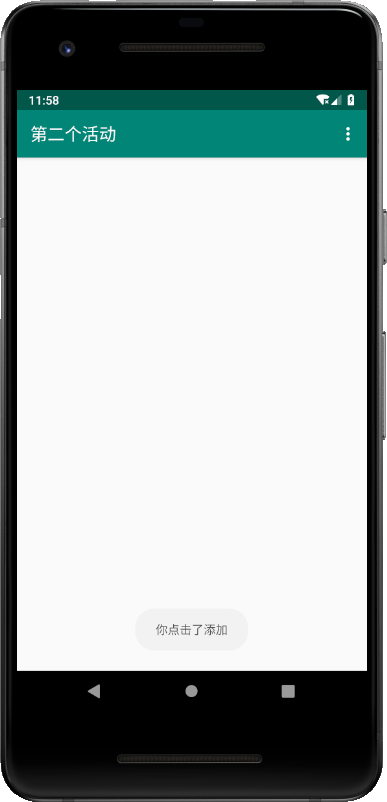
import android.widget.Toast; public class SecondActivity extends AppCompatActivity { @Override
public boolean onCreateOptionsMenu(Menu menu) {
//通过getMenuInflater()方法能够调用MenuInflate对象,
// 在调用它的inflate()方法就可以给当前活动创建菜单。
//inflate()方法第一个参数我们通过哪一个资源文件来创建菜单(R.menu.main)
//第二个参数指定我们的菜单项将添加到哪一个Menu对象中
//使用onCreateOptionsMenu()方法传入menu参数,再用这个方法返回true,表示允许创建的菜单显示出来
//如果返回false,创建的菜单将无法显示。
getMenuInflater().inflate(R.menu.main, menu);
return true;
// return super.onCreateOptionsMenu(menu);
} @Override
public boolean onOptionsItemSelected(MenuItem item) {
switch (item.getItemId()) {
case R.id.add_item:
Toast.makeText(this, "你点击了添加", Toast.LENGTH_SHORT).show();
break;
case R.id.remove_item:
Toast.makeText(this, "你点击了删除", Toast.LENGTH_SHORT).show();
break;
default: }
return true;
// return super.onOptionsItemSelected(item);
} @Override
protected void onCreate(Bundle savedInstanceState) {
super.onCreate(savedInstanceState);
setContentView(R.layout.activity_second); }
}
其中的onCreateOptionsMenu()方法和onOptionsItemSelected()方法可以通过Ctrl+O键(Mac系统是control+O)调用。
5.0 AndroidMainifest.xml:
 <activity android:name=".SecondActivity"

            android:label="第二个活动">

            <intent-filter>

                <action android:name="android.intent.action.MAIN" />

                <category android:name="android.intent.category.LAUNCHER" />

            </intent-filter>

        </activity>
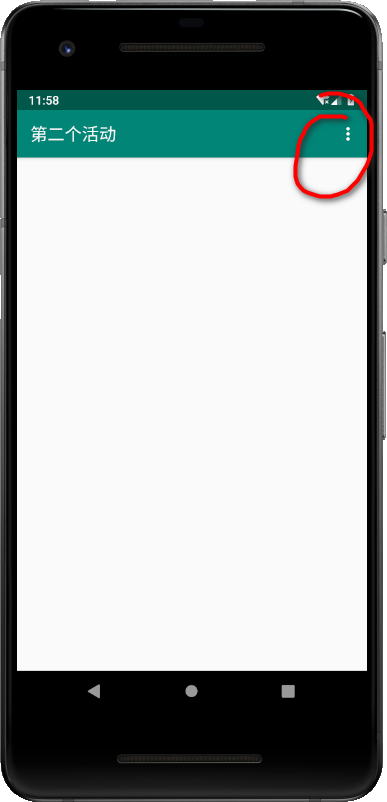
运行:
6.0 Intent一般用于启动活动、启动服务以及发送广播等场景,其中显式Intent,Intent传入两个参数:第一个是上下文,第二个是目标活动:
新建活动ThirdActivity, 勾选“Generate Layout File”和“Launcher Activity”。
ThirdActivity.java:
package com.example.helloworld;

import android.content.Intent;

import android.support.v7.app.AppCompatActivity;

import android.os.Bundle;

import android.view.View;

import android.widget.Button;

public class ThirdActivity extends AppCompatActivity {

    @Override

    protected void onCreate(Bundle savedInstanceState) {

        super.onCreate(savedInstanceState);

        setContentView(R.layout.activity_third);

        Button button3 = (Button) findViewById(R.id.button_3);

        button3.setOnClickListener(new View.OnClickListener() {

            @Override

            public void onClick(View v) {

//                Toast.makeText(FirstActivity.this,"你点击了按钮1",Toast.LENGTH_SHORT).show();

                //Intent一般用于启动活动、启动服务以及发送广播等场景

                //显式Intent,Intent传入两个参数:第一个是上下文,第二个是目标活动

                Intent intent = new Intent(ThirdActivity.this,SecondActivity.class);

                startActivity(intent);

            }

        });

    }

}
activity_third.xml
<?xml version="1.0" encoding="utf-8"?>

<android.support.constraint.ConstraintLayout xmlns:android="http://schemas.android.com/apk/res/android"

    xmlns:app="http://schemas.android.com/apk/res-auto"

    xmlns:tools="http://schemas.android.com/tools"

    android:layout_width="match_parent"

    android:layout_height="match_parent"

    tools:context=".ThirdActivity">

    <Button

        android:id="@+id/button_3"

        android:layout_width="match_parent"

        android:layout_height="wrap_content"

        android:text="按钮 3"

        />

</android.support.constraint.ConstraintLayout>
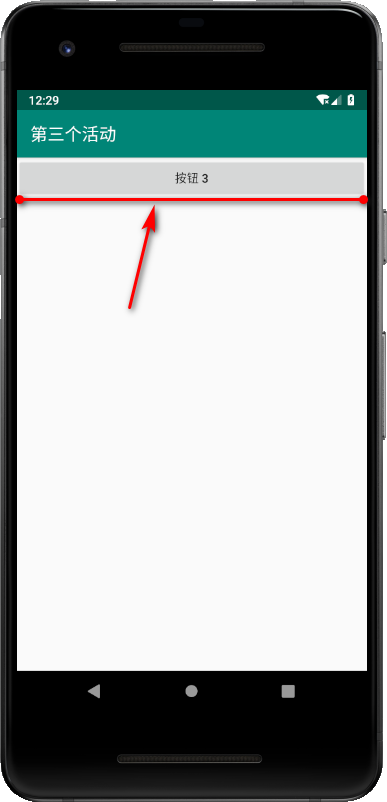
运行(点击“按钮3”,进入第二个活动):

7.0 而隐式Intent,<action>和<category>需要同时匹配上才能响应,一个是"com.example.helloworld.ACTION_START",一个是一个默认的category("android.intent.category.DEFAULT"),调用startActivity时会自动将其添加到Intent。
同样,新建活动FourthActivity,勾选“Generate Layout File”。
修改AndroidMainifest.xml关于活动“FourthActivity”的内容:
 <activity android:name=".FourthActivity"

            android:label="第四个活动">

            <intent-filter>

                <action android:name="com.example.helloworld.ACTION_START" />

                <category android:name="android.intent.category.DEFAULT" />

                <category android:name="com.example.helloworld.MY_CATEGORY" />

            </intent-filter>

        </activity>
第一个action,当前活动可以响应"com.example.helloworld.ACTION_START"这个action,只有当action和category都匹配上才能激活该活动,第一个category是系统默认的配置,在Intent匹配的时候可以不提供category。
举例,我在SecondActivity活动中,设置了Intent,提供了action和category匹配,如果不提供category,发现就会像6.0里面一样,活动FourthActivity可以匹配得到,就会激活(打开)活动FourthActivity,用了第二个category 就会匹配到活动FifthActivity。
进一步修改AndroidMainifest.xml关于活动“FourthActivity”的内容:
 <activity

            android:name=".FourthActivity"

            android:label="第四个活动">

            <intent-filter>

                <action android:name="com.example.helloworld.ACTION_START" />

                <category android:name="android.intent.category.DEFAULT" />

            </intent-filter>

        </activity>
新建活动FifthActivity,勾选“Generate Layout File”。
修改AndroidMainifest.xml关于活动“FifthActivity”的内容:
<activity android:name=".FifthActivity"

            android:label="第五个活动">

            <intent-filter>

                <action android:name="com.example.helloworld.ACTION_START" />

                <category android:name="com.example.helloworld.MY_CATEGORY" />

            </intent-filter>

        </activity>
这里需要修改下活动SecondActivity.java的代码:
package com.example.helloworld;

import android.content.Intent;

import android.support.v7.app.AppCompatActivity;

import android.os.Bundle;

import android.view.Menu;

import android.view.MenuItem;

import android.view.View;

import android.widget.Button;

import android.widget.Toast;

public class SecondActivity extends AppCompatActivity {

    @Override

    public boolean onCreateOptionsMenu(Menu menu) {

        //通过getMenuInflater()方法能够调用MenuInflate对象,

        // 在调用它的inflate()方法就可以给当前活动创建菜单。

        //inflate()方法第一个参数我们通过哪一个资源文件来创建菜单(R.menu.main)

        //第二个参数指定我们的菜单项将添加到哪一个Menu对象中

        //使用onCreateOptionsMenu()方法传入menu参数,再用这个方法返回true,表示允许创建的菜单显示出来

        //如果返回false,创建的菜单将无法显示。

        getMenuInflater().inflate(R.menu.main, menu);

        return true;

//        return super.onCreateOptionsMenu(menu);

    }

    @Override

    public boolean onOptionsItemSelected(MenuItem item) {

        switch (item.getItemId()) {

            case R.id.add_item:

                Toast.makeText(this, "你点击了添加", Toast.LENGTH_SHORT).show();

                break;

            case R.id.remove_item:

                Toast.makeText(this, "你点击了删除", Toast.LENGTH_SHORT).show();

                break;

            default:

        }

        return true;

//        return super.onOptionsItemSelected(item);

    }

    @Override

    protected void onCreate(Bundle savedInstanceState) {

        super.onCreate(savedInstanceState);

        setContentView(R.layout.activity_second);

        Button button2 = (Button) findViewById(R.id.button_2);

        button2.setOnClickListener(new View.OnClickListener() {

            @Override

            public void onClick(View v) {

              //Intent一般用于启动活动、启动服务以及发送广播等场景

                //隐式Intent,<action>和<category>需要同时匹配上才能响应,

                //一个是"com.example.helloworld.ACTION_START",

                //一个是一个默认的category("android.intent.category.DEFAULT"),

                //调用startActivity时会自动将其添加到Intent。

                Intent intent = new Intent("com.example.helloworld.ACTION_START");

                startActivity(intent);

            }

        });

    }

}
修改活动FourthActivity.java的代码:
package com.example.helloworld;

import android.content.Intent;

import android.support.v7.app.AppCompatActivity;

import android.os.Bundle;

import android.view.View;

import android.widget.Button;

public class FourthActivity extends AppCompatActivity {

    @Override

    protected void onCreate(Bundle savedInstanceState) {

        super.onCreate(savedInstanceState);

        setContentView(R.layout.activity_fourth);

        Button button4 = (Button) findViewById(R.id.button_4);

        button4.setOnClickListener(new View.OnClickListener() {

            @Override

            public void onClick(View v) {

                //Intent一般用于启动活动、启动服务以及发送广播等场景

                //隐式Intent,<action>和<category>需要同时匹配上才能响应,

                //一个是"com.example.helloworld.ACTION_START",

                //一个是一个默认的category("android.intent.category.DEFAULT"),

                //调用startActivity时会自动将其添加到Intent。

                Intent intent = new Intent("com.example.helloworld.ACTION_AA");

                intent.addCategory("com.example.helloworld.MY_CATEGORY");

                startActivity(intent);

            }

        });

    }

}
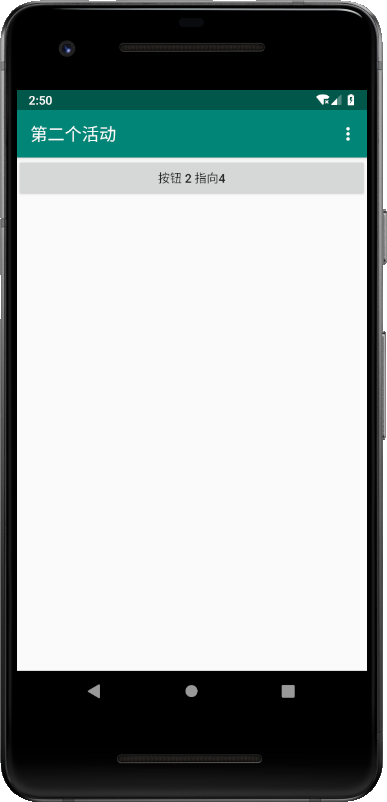
activity_second.xml:
<?xml version="1.0" encoding="utf-8"?>

<android.support.constraint.ConstraintLayout xmlns:android="http://schemas.android.com/apk/res/android"

    xmlns:app="http://schemas.android.com/apk/res-auto"

    xmlns:tools="http://schemas.android.com/tools"

    android:layout_width="match_parent"

    android:layout_height="match_parent"

    tools:context=".SecondActivity">

    <Button

        android:id="@+id/button_2"

        android:layout_width="match_parent"

        android:layout_height="wrap_content"

        android:text="按钮 2 指向4"

        />

</android.support.constraint.ConstraintLayout>
运行测试:
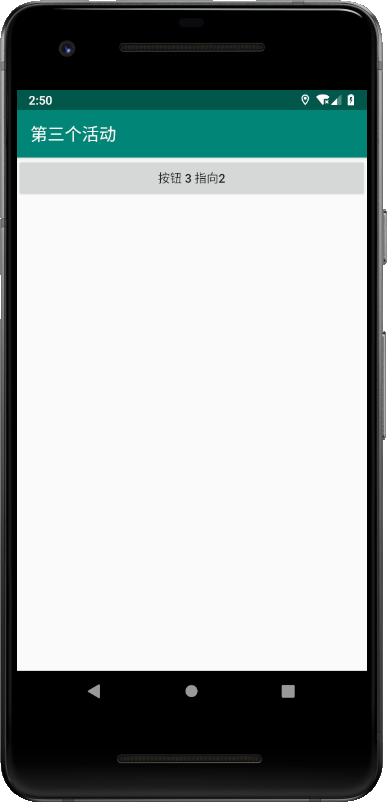
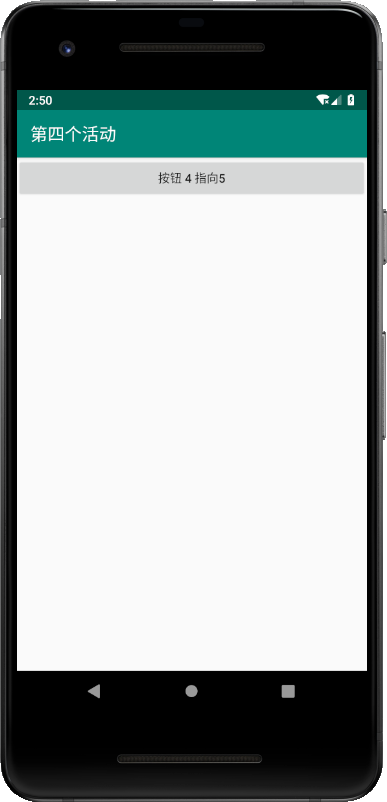
点击“按钮4 指向5”,程序奔溃,目前找不到原因……
8.0 更多Intent运用,可以实现多个应用程序之间实现功能共享。
新建活动SixthActivity.java,勾选“Generate Layout File”和“Launcher Activity”。
修改AndroidMainifest.xml关于活动“SixthActivity”的内容:
<activity android:name=".SixthActivity"

            android:label="第六个活动">

            <intent-filter>

                <action android:name="android.intent.action.MAIN" />

                <category android:name="android.intent.category.LAUNCHER" />

            </intent-filter>

        </activity>
activity_sixth.xml:
<?xml version="1.0" encoding="utf-8"?>

<android.support.constraint.ConstraintLayout xmlns:android="http://schemas.android.com/apk/res/android"

    xmlns:app="http://schemas.android.com/apk/res-auto"

    xmlns:tools="http://schemas.android.com/tools"

    android:layout_width="match_parent"

    android:layout_height="match_parent"

    tools:context=".SixthActivity">

    <Button

        android:id="@+id/button_6"

        android:layout_width="match_parent"

        android:layout_height="wrap_content"

        android:text="按钮 6 指向浏览器支撑网站"

        />

</android.support.constraint.ConstraintLayout>
活动SixthActivity.java:
package com.example.helloworld;

import android.content.Intent;

import android.net.Uri;

import android.support.v7.app.AppCompatActivity;

import android.os.Bundle;

import android.view.View;

import android.widget.Button;

public class SixthActivity extends AppCompatActivity {

    @Override

    protected void onCreate(Bundle savedInstanceState) {

        super.onCreate(savedInstanceState);

        setContentView(R.layout.activity_sixth);

        Button button6 = (Button) findViewById(R.id.button_6);

        button6.setOnClickListener(new View.OnClickListener() {

            @Override

            public void onClick(View v) {

//                指定Intent的action是Intent.ACTION_VIEW

//                这是一个Android系统内置的动作,常量值为android.intent.action.ACTION_VIEW

//                通过Uri.parse()方法,将一个网址字符串解析成uri对象,

//                再调用Intent的setData()方法将URI对象传递进去。

                Intent intent = new Intent(Intent.ACTION_VIEW);

                intent.setData(Uri.parse("https://www.cnblogs.com/xiaofu007/"));

                startActivity(intent);

            }

        });

    }

}
运行:


9.0 setData()方法,这个方法的使用可以结合在<intent-filter>标签中再配置一个<data>标签。
android:scheme:用于指定数据的协议部分,例如http部分
android:host:用于指定数据的主机名部分,例如www.baidu.com
android:port:用于指定数据的端口部分,一般紧随在主机名之后
android:path:用于指定主机名和端口之后的部分,如一段网址中跟在域名之后的内容。
android:mimeType:用于指定可以处理的数据额、类型,允许使用通配符的方式进行指定。
只有<data>标签中指定内容和Intent中携带的Data完全一致时,当前活动才会完全响应Intent。
不过一般<data>标签不好记指定过多内容,比如指定android:scheme为http就可以响应所有Intent了。
新建活动SeventhActivity,勾选“Generate Layout File”和“Launcher Activity”。
修改AndroidMainifest.xml关于活动“SeventhActivity”的内容:
 <activity

            android:name=".SeventhActivity"

            android:label="第七个活动">

            <intent-filter>

                <action android:name="android.intent.action.MAIN" />

                <category android:name="android.intent.category.LAUNCHER" />

                <data android:scheme="http"/>

            </intent-filter>

        </activity>
SeventhActivity.java:
package com.example.helloworld; import android.content.Intent;
import android.net.Uri;
import android.support.v7.app.AppCompatActivity;
import android.os.Bundle;
import android.view.View;
import android.widget.Button; public class SeventhActivity extends AppCompatActivity { @Override
protected void onCreate(Bundle savedInstanceState) {
super.onCreate(savedInstanceState);
setContentView(R.layout.activity_seventh);
Button button7 = (Button) findViewById(R.id.button_7);
button7.setOnClickListener(new View.OnClickListener() {
@Override
public void onClick(View v) {
Intent intent = new Intent(Intent.ACTION_VIEW);
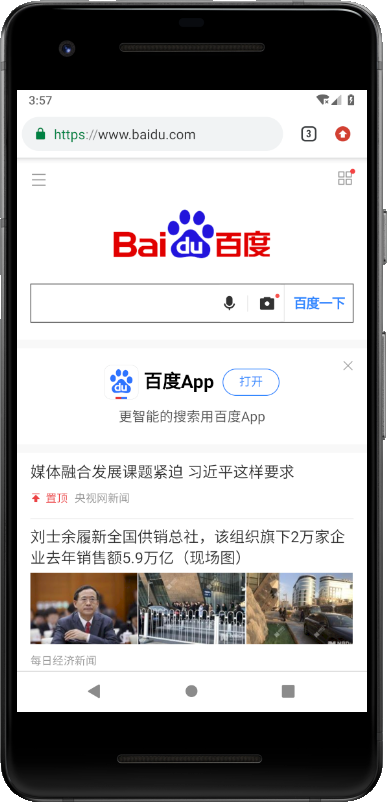
intent.setData(Uri.parse("https://www.baidu.com"));
startActivity(intent);
}
});
}
}
activity_seventh.xml:
<?xml version="1.0" encoding="utf-8"?>

<android.support.constraint.ConstraintLayout xmlns:android="http://schemas.android.com/apk/res/android"

    xmlns:app="http://schemas.android.com/apk/res-auto"

    xmlns:tools="http://schemas.android.com/tools"

    android:layout_width="match_parent"

    android:layout_height="match_parent"

    tools:context=".SeventhActivity">

    <Button

        android:id="@+id/button_7"

        android:layout_width="match_parent"

        android:layout_height="wrap_content"

        android:text="按钮 7 指向浏览器支撑网站"

        />

</android.support.constraint.ConstraintLayout>
运行:

10.0 除了http之外,还可以指定geo,表示显示地理位置,tel表示拨打电话号码:
button7.setOnClickListener(new View.OnClickListener() {
@Override
public void onClick(View v) {
// Intent intent = new Intent(Intent.ACTION_VIEW);
// intent.setData(Uri.parse("https://www.baidu.com"));
// startActivity(intent);
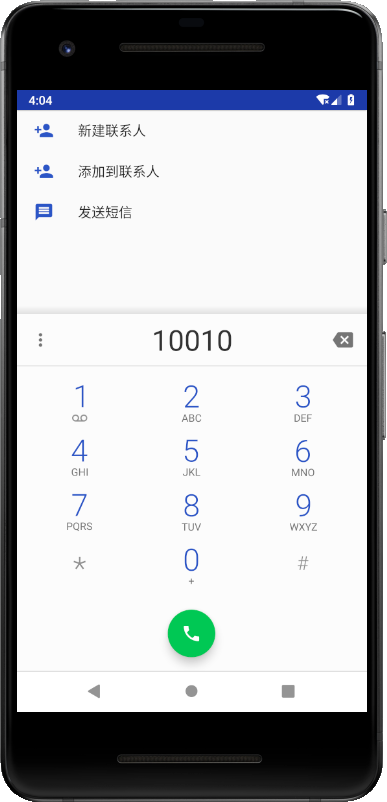
Intent intent = new Intent(Intent.ACTION_DIAL);
intent.setData(Uri.parse("tel:10010"));
startActivity(intent);
}
});
相应的修改AndroidMainifest.xml关于活动“SeventhActivity”<data>标签内容为tel
运行:

【Android】6.0 添加Menu菜单组件、Intent启动活动、显式Intent、隐式Intent的更多相关文章
- Android添加Menu菜单
在安卓中添加Menu菜单十分简单. 步骤: 1.在menu文件夹中的main.xml文件中添加要添加的项目. <menu xmlns:android="http://schemas.a ...
- 第二百零六节,jQuery EasyUI,Menu(菜单)组件
jQuery EasyUI,Menu(菜单)组件 学习要点: 1.加载方式 2.菜单项属性 3.菜单属性 4.菜单事件 5.菜单方法 本节课重点了解 EasyUI 中 Menu(菜单)组件的使用方法, ...
- Android笔记(五)利用Intent启动活动
Intent是意图的意思,分为显式 Intent 和隐式 Intent. 以下我们试图在FirstActivity中通过点击button来启动SecondActivity 1.显式Intent 在应用 ...
- 在活动之间切换(隐式Intent)
实验名称:在活动之间切换 实验现象:在主活动中点击button1可以进入下一个活动 使用技术:隐式Intent 步骤: 1.创建一个项目,加载布局并在布局中添加一个button 部分截图未截,直接Ne ...
- 从零開始学android<Menu菜单组件.三十.>
在Android系统之中.菜单一共同拥有三类:选项菜单(OptionsMenu).上下文菜单(ContextMenu)和子菜单(SubMenu). 今天我们就用几个样例来分别介绍下菜单的使用 acti ...
- 安卓开发笔记——Menu菜单组件(选项菜单,上下文菜单,子菜单)
菜单是用户界面中最常见的元素之一,使用非常频繁,在Android中,菜单被分为如下三种,选项菜单(OptionsMenu).上下文菜单(ContextMenu)和子菜单(SubMenu). 菜单的实现 ...
- MTK Android 设置下添加一级菜单[ZedielPcbTest]
功能描述:Android7.1.2 设置下添加一级菜单[ZedielPcbTest],点击ZedielPcbTest,启动ZedielPcbTest.apk应用. 编译:需要在out目录删除Settt ...
- Android开发中的menu菜单
复写onCreateOptionsMenu方法,当点击menu菜单时,调用该方法. @Override public boolean onCreateOptionsMenu(Menu menu) { ...
- Android 控件 之 Menu 菜单
http://www.cnblogs.com/Mrs-cc/archive/2012/07/21/2603042.html 1.OptionsMenu (选项菜单)用法总结 使用方法: 方法一:添 ...
随机推荐
- Linux 常用命令大全(长期更新)
常见指令 打包压缩相关命令 关机/重启机器 Linux管道 vim使用 用户及用户组管理 文件权限管理 更改文件的用户及用户组 更改权限 常用指令 ls 显示文件或目录 -l 列出文件详细信息l(li ...
- minizip -基于zlib开源代码库
转载:https://www.topomel.com/archives/979.html 一.minizip 是一套用来压缩和解压文件的工具,其基于zlib开源代码库. 开源代码下载链接:http:/ ...
- Mac下安装配置Python2和Python3并相互切换使用 转
版权声明:本文为博主原创文章,未经博主允许不得转载. https://blog.csdn.net/u014259820/article/details/81023224 安装Python2 Mac系统 ...
- python学习之路---day06
一:is 和 == 的区别 01)a b 两个变量 is 是比较变量的内存地址,如果地址相等,则返回True,如果不相等,则返回False == 是比较变量两边内容是否一样,如果一样则返回True,不 ...
- php-fpm 三种运行模式
php-fpm配置 配置文件:php-fpm.conf 开启慢日志功能的: slowlog = /usr/local/var/log/php-fpm.log.slowrequest_slowlog_t ...
- C++_标准模板库STL概念介绍2-泛型编程
有了之前使用STL的经验后,接下来讨论泛型编程及其底层的理念: 首先我们知道STL只是泛型编程的一种: 而面向对象的编程方式关注的是编程的数据方面: 而泛型编程关注的是算法: 但是,他们之间的一个重要 ...
- myeclipse启动后,卡在loading workbench界面
今天在修改svn的配置文件的时候,电脑重启了几次,然后myeclipse启动的时候就一直卡在loading workbeach动不了了. 重启了几次也不行,后来查的百度,找到的解决方法如下: 找到my ...
- Oracle下lag和lead分析函数
[转自] http://blog.csdn.net/thinkscape/article/details/8290894 Lead和Lag分析函数可以在同一次查询中取出同一字段的前N行的数据(Lag) ...
- .net mvc 用jquery ajax成功后页面跳转。
$.ajax({ //url: 'http://192.168.0.102/webApiDemo/api/WebApiTest/PostStudentInforOnePara', //url: &qu ...
- 协程:gevent模块,遇到i/o自动切换任务 038
协程 : gevent模块,遇到io自动切换任务 from gevent import monkey;monkey.patch_all() # 写在最上面 这样后面的所有阻塞就全部能够识别了 impo ...