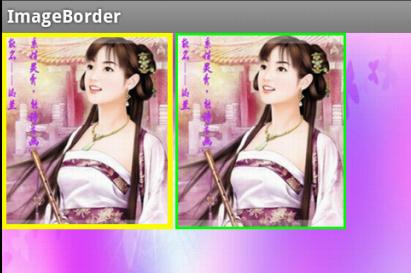
Android学习笔记进阶19 之给图片加边框
- //设置颜色
- public void setColour(int color){
- co = color;
- }
- //设置边框宽度
- public void setBorderWidth(int width){
- borderwidth = width;
- }
具体实现:
- package xiaosi.imageborder;
- import android.app.Activity;
- import android.graphics.Color;
- import android.os.Bundle;
- public class ImageBorderActivity extends Activity {
- /** Called when the activity is first created. */
- private myImageView image = null;
- private myImageView image1 = null;
- @Override
- public void onCreate(Bundle savedInstanceState) {
- super.onCreate(savedInstanceState);
- setContentView(R.layout.main);
- image = (myImageView)findViewById(R.id.iamge);
- image.setColour(Color.YELLOW);
- image.setBorderWidth(10);
- image1 = (myImageView)findViewById(R.id.iamge1);
- image1.setColour(Color.GREEN);
- image1.setBorderWidth(5);
- }
- }
main.xml
- <LinearLayout
- xmlns:android="http://schemas.android.com/apk/res/android"
- android:background="@drawable/playerbackground"
- android:layout_width="fill_parent"
- android:layout_height="fill_parent">
- <xiaosi.imageborder.myImageView
- android:id="@+id/iamge"
- android:layout_width="200px"
- android:layout_height="230px"
- android:layout_alignParentRight="true"
- android:src="@drawable/v"
- android:layout_centerInParent="true"
- android:layout_marginRight="3px"
- />
- <xiaosi.imageborder.myImageView
- android:id="@+id/iamge1"
- android:layout_width="200px"
- android:layout_height="230px"
- android:layout_alignParentRight="true"
- android:src="@drawable/v"
- android:layout_centerInParent="true"
- android:layout_marginRight="3px"
- />
- </LinearLayout>
- package xiaosi.imageborder;
- import android.content.Context;
- import android.graphics.Canvas;
- import android.graphics.Paint;
- import android.graphics.Rect;
- import android.util.AttributeSet;
- import android.widget.ImageView;
- public class myImageView extends ImageView {
- private int co;
- private int borderwidth;
- public myImageView(Context context) {
- super(context);
- }
- public myImageView(Context context, AttributeSet attrs,
- int defStyle) {
- super(context, attrs, defStyle);
- }
- public myImageView(Context context, AttributeSet attrs) {
- super(context, attrs);
- }
- //设置颜色
- public void setColour(int color){
- co = color;
- }
- //设置边框宽度
- public void setBorderWidth(int width){
- borderwidth = width;
- }
- @Override
- protected void onDraw(Canvas canvas) {
- super.onDraw(canvas);
- // 画边框
- Rect rec = canvas.getClipBounds();
- rec.bottom--;
- rec.right--;
- Paint paint = new Paint();
- //设置边框颜色
- paint.setColor(co);
- paint.setStyle(Paint.Style.STROKE);
- //设置边框宽度
- paint.setStrokeWidth(borderwidth);
- canvas.drawRect(rec, paint);
- }
- }
源代码下载:点击打开链接
Android学习笔记进阶19 之给图片加边框的更多相关文章
- Android学习笔记进阶19之给图片加边框
//设置颜色 public void setColour(int color){ co = color; } //设置边框宽度 public void setBorderWidth(int width ...
- Android学习笔记进阶20 之得到图片的缩略图
<1>简介 之前往往是通过Bitmap.Drawable和Canvas配合完成,需要写一系列繁杂的逻辑去缩小原有图片,从而得到缩略图. 现在我给大家介绍一种比较简单的方法:(网上有) 在A ...
- Android学习笔记进阶20之得到图片的缩略图
<1>简介 之前往往是通过Bitmap.Drawable和Canvas配合完成,需要写一系列繁杂的逻辑去缩小原有图片,从而得到缩略图. 现在我给大家介绍一种比较简单的方法:(网上有) 在A ...
- Android学习笔记进阶之在图片上涂鸦(能清屏)
Android学习笔记进阶之在图片上涂鸦(能清屏) 2013-11-19 10:52 117人阅读 评论(0) 收藏 举报 HandWritingActivity.java package xiaos ...
- Android学习笔记进阶16之BitmapShader
<1>简介 具体的看一下博文:Android学习笔记进阶15之Shader渲染 public BitmapShader(Bitmap bitmap,Shader.TileMode ti ...
- Android学习笔记进阶17之LinearGradient
具体的看一下博文:Android学习笔记进阶15之Shader渲染 package xiaosi.BitmapShader; import android.app.Activity; import a ...
- Android学习笔记进阶18 之画图并保存图片到本地
1.首先创建一个Bitmap图片,并指定大小: 2.在该图片上创建一个新的画布Canvas,然后在画布上绘制,并保存即可: 3.需要保存的目录File,注意如果写的目录如“/sdcard/so ...
- Android学习笔记进阶18之画图并保存图片到本地
1.首先创建一个Bitmap图片,并指定大小: 2.在该图片上创建一个新的画布Canvas,然后在画布上绘制,并保存即可: 3.需要保存的目录File,注意如果写的目录如“/sdcard/so ...
- Android学习笔记(二)之异步加载图片
最近在android开发中碰到比较棘手的问题,就是加载图片内存溢出.我开发的是一个新闻应用,应用中用到大量的图片,一个界面中可能会有上百张图片.开发android应用的朋友可能或多或少碰到加载图片内存 ...
随机推荐
- spring boot 集成 mybatis,数据库为mysql
导入mven工程即可运行,方法不描述了,具体见 https://github.com/davidwang456/spring-boot-mybatis-demo
- 运营商 WLAN
运营商 WLAN 运营商 WLAN 是 Android 9 中引入的一项功能,该功能可让设备自动连接到运营商实现的 WLAN 网络.在高度拥塞或信号覆盖范围较小的区域(如体育场或地铁站),运营商 WL ...
- bzoj1270 BeijingWc2008 雷涛的小猫 DP
题目链接:http://www.lydsy.com/JudgeOnline/problem.php?id=1270 比较水的一道dp f1[i]为高度为i的时候的最大值 f2[i]为当前高度在第i棵树 ...
- 为什么使用Nginx & Nginx的使用
Nginx在Windows平台的配置: 什么是Nginx? 根据前面的对比,我们可以了解到Nginx是一个http服务器.是一个使用c语言开发的高性能的http服务器及反向代理服务器.Nginx是一款 ...
- 紫书 习题 10-11 UVa 1646(斐波那契+高精度)
自己用手算一下可以发现是斐波那契数列,然后因为数字很大,用高精度 以后做题的时候记得算几个数据找规律 #include<cstdio> #include<cmath> #inc ...
- intellij idea中快速抽取方法
Intellij Idea使用教程汇总篇 问题:有时候一个方法里面嵌套了很多逻辑,想拆分为多个方法方便调用:或者一个方法复用性很高,这时,这个方法嵌套在局部方法里面肯定是不方便的,如何快速抽取出这个方 ...
- 洛谷—— P1926 小书童——刷题大军
https://www.luogu.org/problem/show?pid=1926#sub 题目背景 数学是火,点亮物理的灯:物理是灯,照亮化学的路:化学是路,通向生物的坑:生物是坑,埋葬学理的人 ...
- [Poi] Customize Babel to Build a React App with Poi
Developing React with Poi is as easy as adding the babel-preset-react-appto a .babelrc and installin ...
- 【iOS开发-34】自己主动释放池@autoreleasepool的使用注意事项以及ARC机制——面试必考内容
自己主动释放池@autorelease面试频率可能会吧release还要高. (1)在自己主动释放池@autoreleasepool{}中alloc一个对象后(如p1).仍然须要用[p1 autore ...
- Zookeeper简单概念介绍
过去,每个应用都是一个CPU.一个主机上的单一系统.然而今天,随着大数据和云计算时代的到来,不论什么相互独立的程序都可以运行在多个计算机上.然而面临的问题是,协调这些集群的系统比在单一主机上要复杂的多 ...