使用cxf开发webservice接口
项目中经常用到开发webservice接口,及调用webService接口。这里讲解如何使用cxf开发webService接口。
一、webservice介绍及理解
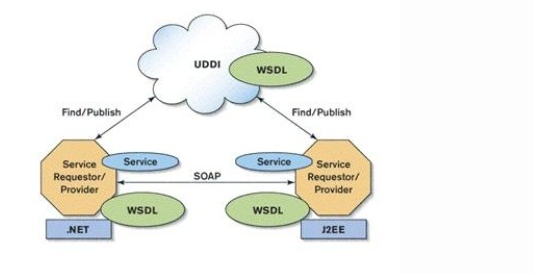
webservice是一种跨平台,跨语言的规范,用于不同平台,不同语言开发的应用之间的交互。
比如,平台平台淘宝、京东想获取其他快递公司数据接口,需快递公司开放数据接口。
那么 webservice就是出于以上类似需求而定义出来的规范;无需关心对方什么平台上开发以及使用何种语言开发。
只关心调用对方发布webservice接口的一些对我们获取有用数据的方法。
开发人员一般就是在具体平台开发webservice接口,以及调用webservice接口;每种开发语言都有自己的webservice实现框架。
比如Java 就有 Apache Axis1、Apache Axis2、Codehaus XFire、Apache CXF、Apache Wink、Jboss RESTEasyd等等...
二、cxf
cxf是java开发webService的一种实现框架技术。目前,cxf是主流的webService实现框架。
使用cxf开发需引入cxf开发相关jar包,maven项目中pom.xml配置如下:

 1 <!--添加cxf支持  -->

 2     <dependency>

 3         <groupId>org.apache.cxf</groupId>

 4         <artifactId>cxf-rt-frontend-jaxws</artifactId>

 5         <version>3.1.9</version>

 6     </dependency>

 7     <dependency>

 8         <groupId>org.apache.cxf</groupId>

 9         <artifactId>cxf-rt-transports-http-jetty</artifactId>

10         <version>3.1.9</version>

11     </dependency>

12     <dependency>

13         <groupId>org.apache.cxf</groupId>

14         <artifactId>cxf-core</artifactId>

15         <version>3.1.9</version>

16     </dependency>
备注:这里要额外加入jetty,作为webservice发布的服务器。jetty是一个内嵌的web服务器;
使用JaxWsServerFactoryBean类创建工厂设置暴露地址、接口类、接口实现类,创建即可发布。
三、下面演示其实现过程
发布webService接口,需一个发布服务的url地址,及对应的接口。Jdk自身有实现WebService。
具体实现代码如下:
根据规范,我们先建一个接口类:HelloWorld
 1 /**

 2  *

 3  */

 4 package com.hik.webservice;

 5

 6 import javax.jws.WebService;

 7

 8 /**

 9  * @ClassName: HelloWorld

10  * @Description: TODO

11  * @author jed

12  * @date 2017年7月30日上午10:20:35

13  *

14  */

15 @WebService

16 public interface HelloWorld {

17

18     public String say(String str);

19 }
再建一个具体的实现类:HelloWorldImpl
 1 /**

 2  *

 3  */

 4 package com.hik.webservice.impl;

 5

 6 import javax.jws.WebService;

 7

 8 import com.hik.webservice.HelloWorld;

 9

10 /**

11  * @ClassName: HelloWorldImpl

12  * @Description: TODO

13  * @author jed

14  * @date 2017年7月30日上午10:24:46

15  *

16  */

17 @WebService

18 public class HelloWorldImpl implements HelloWorld{

19

20     public String say(String str) {

21         return "hello"+str;

22     }

23

24 }
最后建一个发布服务的主类:Server
1 /**
2 *
3 */
4 package com.hik.webservice;
5
6 import javax.xml.ws.Endpoint;
7
8
9 import com.hik.webservice.impl.HelloWorldImpl;
10
11 /**
12 * @ClassName: Server
13 * @Description: TODO
14 * @author jed
15 * @date 2017年7月30日上午10:26:16
16 *
17 */
18 public class Server {
19
20 public static void main(String[] args) {
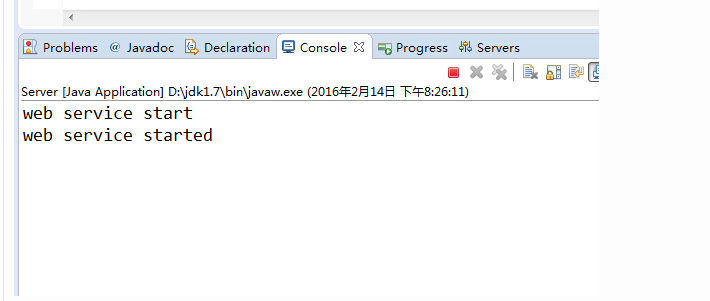
21 System.out.println("web Service start");
22 HelloWorldImpl implementor = new HelloWorldImpl();
23 String address="http://192.168.0.102/helloWorld";
24 Endpoint.publish(address, implementor);//JDK实现
25 System.out.println("web Service started");
26
27 }
28 }
这里的Endpoint是Jdk自身实现的WebService。这里的address,写上自己的本机IP
我们运行下Server类:
运行效果如下:
我们在浏览器里访问:http://192.168.1.102/helloWorld?wsdl
效果:
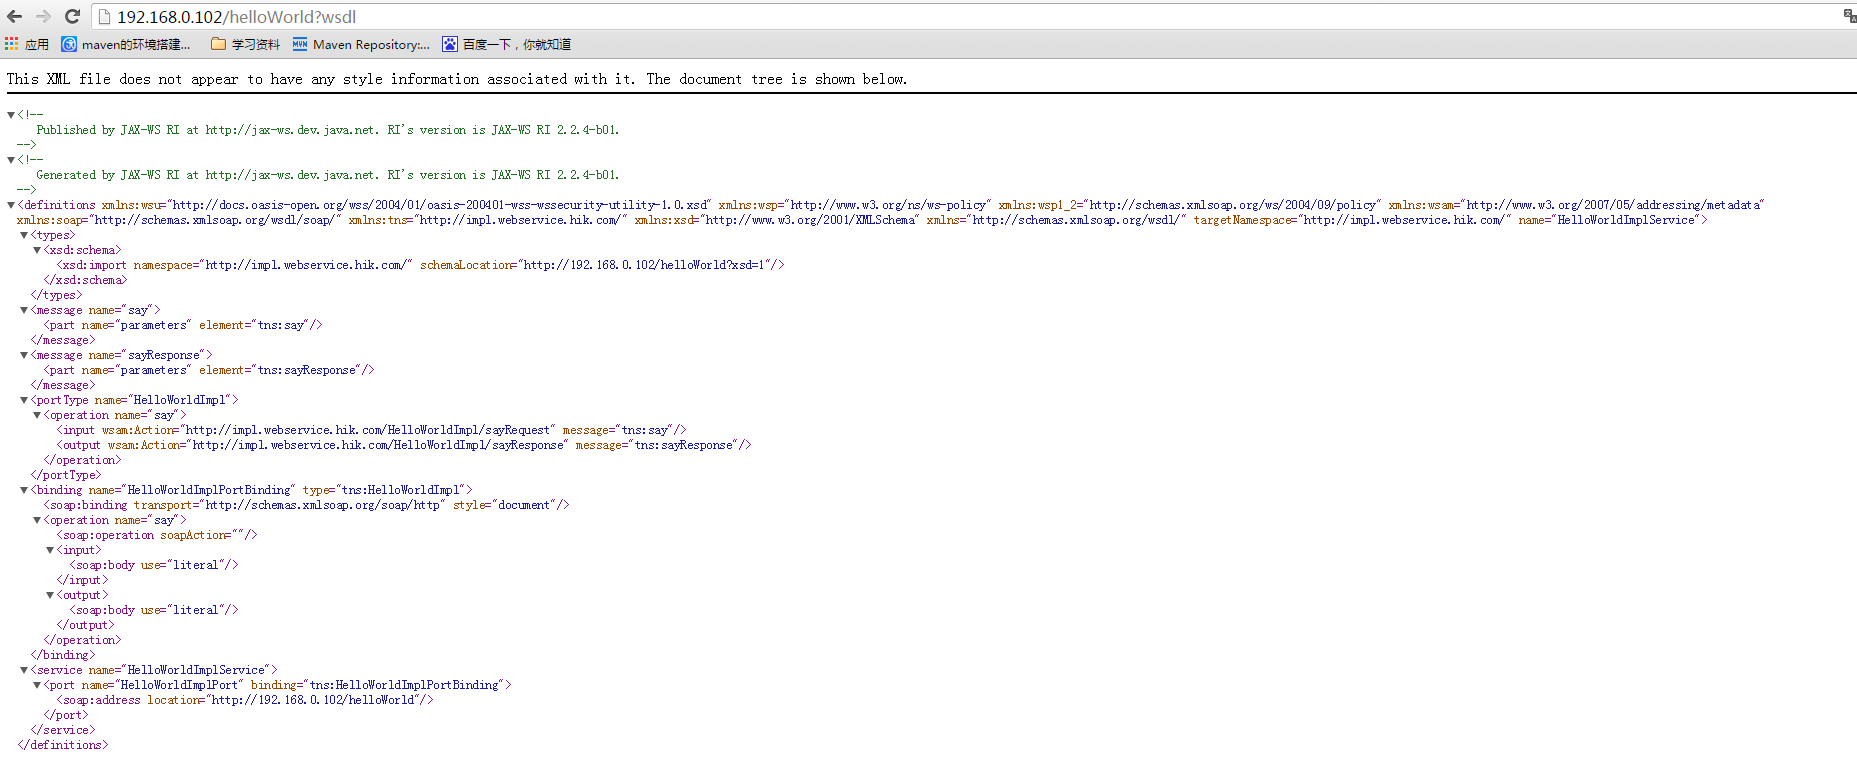
说明已经成功调用了webservice接口;
这里的wsdl 是 Web Services Description Language的缩写,是一个用来描述Web服务和说明如何与Web服务通信的XML语言。WSDL是Web Service的描述语言,用于描述Web Service的服务,接口绑定等,为用户提供详细的接口说明书。
请求后得到的是一个xml规范文档。是一套规范,任何语言平台技术都可以解析。
CXF来实现webservice接口
我们把Server改下。换成CXF实现:
 1 /**

 2  *

 3  */

 4 package com.hik.webservice;

 5

 6 import javax.xml.ws.Endpoint;

 7

 8 import org.apache.cxf.jaxws.JaxWsServerFactoryBean;

 9

10 import com.hik.webservice.impl.HelloWorldImpl;

11

12 /**

13  * @ClassName: Server

14  * @Description: TODO

15  * @author jed

16  * @date 2017年7月30日上午10:26:16

17  *

18  */

19 public class Server {

20

21     public static void main(String[] args) {

22         System.out.println("web Service start");

23         HelloWorldImpl implementor = new HelloWorldImpl();

24         String address="http://192.168.0.102/helloWorld";

25         //Endpoint.publish(address, implementor);//JDK实现

26         JaxWsServerFactoryBean factoryBean = new JaxWsServerFactoryBean();

27         factoryBean.setAddress(address); //设置暴露地址

28         factoryBean.setServiceClass(HelloWorld.class); //接口类

29         factoryBean.setServiceBean(implementor); //设置实现类

30         factoryBean.create();

31         System.out.println("web Service started");

32

33     }

34 }
效果和jdk实现的一样

from: https://www.cnblogs.com/jedjia/p/cxf.html
使用cxf开发webservice接口的更多相关文章
- struts1+spring+myeclipse +cxf 开发webservice以及普通java应用调用webservice的实例
Cxf + Spring+ myeclipse+ cxf 进行 Webservice服务端开发 使用Cxf开发webservice的服务端项目结构 Spring配置文件applicationCont ...
- 【WebService】使用CXF开发WebService(四)
CXF简介 Apache CXF = Celtix + XFire,开始叫 Apache CeltiXfire,后来更名为 Apache CXF 了,以下简称为 CXF.CXF 继承了 Celtix ...
- 使用cxf开发webservice应用时抛出异常
在使用cxf开发webservice应用时,报出了类似下面的错误 JAXB: [javax.xml.bind.UnmarshalException: unexpected element (uri:& ...
- (二)使用CXF开发WebService服务器端接口
CXF作为java领域主流的WebService实现框架,Java程序员有必要掌握它. CXF主页:http://cxf.apache.org/ 简介:百度百科 今天的话,主要是用CXF来开发下Web ...
- 3.使用CXF开发webService
CXF 简介 关于 Apache CXF Apache CXF = Celtix + XFire,Apache CXF 的前身叫 Apache CeltiXfire,现在已经正式更名为 Apache ...
- [转] WebService开发笔记 1 -- 利用cxf开发WebService竟然如此简单
以下文章来自 http://www.blogjava.net/jacally/articles/186655.html 现在的项目中需要用到SOA概念的地方越来越多,最近我接手的一个项目中就提出了 ...
- Spring boot+CXF开发WebService
最近工作中需要用到webservice,而且结合spring boot进行开发,参照了一些网上的资料,配置过程中出现的了一些问题,于是写了这篇博客,记录一下我这次spring boot+cxf开发的w ...
- Spring boot+CXF开发WebService Demo
最近工作中需要用到webservice,而且结合spring boot进行开发,参照了一些网上的资料,配置过程中出现的了一些问题,于是写了这篇博客,记录一下我这次spring boot+cxf开发的w ...
- (三)使用CXF开发WebService客户端
前面一讲开发了webservice服务器端接口,今天的话,我们来开发webservice客户端,让大家来体验下过程: 首先建一个Maven项目,项目名字,WS_Client: 然后我们要用CXF给我们 ...
随机推荐
- 【LOJ】#2056. 「TJOI / HEOI2016」序列
题解 这个我们处理出来每一位能变化到的最大值和最小值,包括自身 然后我们发现 \(f[i] = max(f[i],f[j] + 1) (mx[j] <= a[i] && a[j] ...
- 【LOJ】#2031. 「SDOI2016」数字配对
题解 这个图是个二分图,因为如果有一个奇环的话,我们会发现一个数变成另一个数要乘上个数不同的质数,显然不可能 然后我们发现这个不是求最大流,而是问一定价值的情况下最大流是多少,二分一个流量,加上一条边 ...
- elementUI 学习入门之 Select 选择器
Select 选择器 基础用法 <el-select v-model="val1" placeholder="请输入"> <el-option ...
- git 设置bitbucket 邮箱、用户
1. git config --global user.name "youname" 2 .git config --global user.email "youeami ...
- firewalld启动问题
问题 在查看或启动firewalld服务时,提示"Warning: firewalld.service changed on disk. Run 'systemctl daemon-relo ...
- CSU - 2058 跳一跳
Description 冰弦非常热衷于过气微信小游戏"跳一跳",现在给出了他每次游戏时的一些信息,请你帮他计算一下每局游戏的得分. 跳一跳的游戏规则如下: 玩家操控一个小棋子,在形 ...
- 解读socketserver之Tcpserver
在解析socketserver是如工作之前,我们先看看socektserver类的继承关系图: 请求类继承关系: server类继承关系: 有了上面的继承关系图后,我们解析socketserver就轻 ...
- JavaScript 数据类型 (续)
JavaScript 对象 对象由花括号分隔.在括号内部,对象的属性以名称和值对的形式 (name : value) 来定义.属性由逗号分隔: var person={firstname:" ...
- Linux命令学习<不断更新>
没有系统的学习过Linux命令,遇到了就学习一下,慢慢积累. 1.echo 命令,学习网站『https://linux.cn/article-3948-1.html』. echo单词有回声.共鸣的意思 ...
- jQuery学习总结1
一.下载集CDN引入 1.1.官方下载 地址:http://jQuery.com/download/ jq自2.0版本开始,不再支持IE9一下浏览器:自3.0版本开始,针对移动端做了优化处理: 引入 ...