[SpriteKit] 系统框架中Cocos2d-x制作小游戏ZombieConga
概述
详细
今天我们进入一个全新的系列,先熟悉SpriteKit,然后再看实战的游戏案例。
一、了解SpriteKit
本期的内容就是使用SpriteKit实现一个简单的游戏, 通过一个游戏来进行SpriteKit的入门, 熟练2D游戏的API, 也可以更好的结合在iOS应用中, SpriteKit和Cocos2d 一样都是一个模式, 就是场景, 精灵之类的, 也都是操作Node节点, 我们先来看下基本的API, 以便更好的理解.
SKNode
open class SKNode : UIResponder, NSCopying, NSCoding, UIFocusItem

      open var name: String?

      open var position: CGPoint

      open var zPosition: CGFloat

      open var zRotation: CGFloat

      open func addChild(_ node: SKNode)

      open func removeFromParent()

      open func enumerateChildNodes(withName name: String, using block: @escaping (SKNode, UnsafeMutablePointer<ObjCBool>) -> Swift.Void)

      open func run(_ action: SKAction, completion block: @escaping () -> Swift.Void)

      open func run(_ action: SKAction, withKey key: String)

      open func hasActions() -> Bool

      open func removeAllActions()

      open func intersects(_ node: SKNode) -> Bool
SpriteKit中所有节点的父类, 不直接操作, 类似于CAAnimation
name: 节点的名字, 对节点进行标识
position: 节点的位置, SpriteKit坐标系与UIKit不同
zPosition: Z轴上的位置, 用于显示节点的前后顺序
zRotation: 旋转的弧度
addChild: 添加子节点, 类似于addSubView
removeFromParent: 删除子节点, 类似于removeFromSuperView
enumerateChildNodes: 遍历子节点
run: 执行行动
hasActions: 是否有行动
removeAllActions: 删除所有行动
intersects: 节点之间是否有交集
SKSpriteNode
open class SKSpriteNode : SKNode, SKWarpable

    public convenience init(imageNamed name: String)
Sprite和UIkit中的ImageView非常相似, 游戏中的每一个显示出来的图像都可以使用精灵
SKTexture
open class SKTexture : NSObject, NSCopying, NSCoding
纹理, 目前可知可以实现类似imageView的动画效果, 待深究
SKShapeNode
open class SKShapeNode : SKNode

    open var path: CGPath?

    open var strokeColor: UIColor

    open var fillColor: UIColor

    open var lineWidth: CGFloat
与CAShapeLayer及Quartz2D的部分API极度相似, 和H5中的Canvas也很类似
SKLabelNode
open class SKLabelNode : SKNode

    public convenience init(text: String?)

    public init(fontNamed fontName: String?)

    open var verticalAlignmentMode: SKLabelVerticalAlignmentMode

    open var horizontalAlignmentMode: SKLabelHorizontalAlignmentMode

    open var fontSize: CGFloat

    open var fontColor: UIColor?
类似于UILabel, 与字体颜色和对齐属性等字段, 垂直对齐包括上, 中, 基线, 下, 水平对齐包括,左, 中, 右
SKCameraNode
open class SKCameraNode : SKNode
摄像机节点, 摄像机的position永远在屏幕中
SKAction
open class SKAction : NSObject, NSCopying, NSCoding

    open class func moveBy(x deltaX: CGFloat, y deltaY: CGFloat, duration sec: TimeInterval) -> SKAction

    open class func move(to location: CGPoint, duration sec: TimeInterval) -> SKAction

    open class func rotate(byAngle radians: CGFloat, duration sec: TimeInterval) -> SKAction

    open class func rotate(toAngle radians: CGFloat, duration sec: TimeInterval) -> SKAction

    open class func scale(by scale: CGFloat, duration sec: TimeInterval) -> SKAction

    open class func scale(to scale: CGFloat, duration sec: TimeInterval) -> SKAction

    open class func sequence(_ actions: [SKAction]) -> SKAction

    open class func group(_ actions: [SKAction]) -> SKAction

    open class func `repeat`(_ action: SKAction, count: Int) -> SKAction

    open class func repeatForever(_ action: SKAction) -> SKAction

    open class func wait(forDuration sec: TimeInterval) -> SKAction

    open class func removeFromParent() -> SKAction

    open class func run(_ block: @escaping () -> Swift.Void) -> SKAction
Action和Core Animataion非常相似, 包括了移动, 旋转, 缩放的动画
sequence 行动序列, 逐个执行行动, 串行
group 组, 类似于CAAnimationGroup 将行动包装在组中同时执行, 并行
repeat(:count:) 重复次数
repeatForever: 一直重复执行
wait: 等待执行
removeFromParent: 移除行动
run: 类似于基本动画的animate闭包, 执行闭包中的动作
SKSence
open class SKScene : SKEffectNode

    public init(size: CGSize)

    open var scaleMode: SKSceneScaleMode

@available(iOS 9.0, *)

    weak open var camera: SKCameraNode?

    open var anchorPoint: CGPoint

    open func update(_ currentTime: TimeInterval)

    open func didEvaluateActions()

    open func didMove(to view: SKView)
Sence类似于ViewController, 可以进行场景的切换
size: 场景的尺寸
scaleMode: 缩放模式
camera: 摄像头
anchorPoint: 锚点, 和Layer层相同, 但坐标系不同
update: 刷帧, 每一帧都会调用的方法用于渲染
didEvaluateActions: 生命周期方法, 当行动加载完成后调用
didMove(to view: SKView): 当场景被移到View上调用,类似于viewDidLoad
SKTransition
open class SKTransition : NSObject, NSCopying
转场效果, 类似于基本动画的transition
SKView
open class SKView : UIView

    open var ignoresSiblingOrder: Bool

    open func presentScene(_ scene: SKScene, transition: SKTransition)
UIView的子类, 承载场景的View, 所有游戏的效果都在这个View中实现, 类似于导航控制器的角色
ignoresSiblingOrder: 是否忽略同级元素
presentScene: 切换场景
二、小游戏实战案例
API, 了解一些基本的就够了, 如果要深究可以打开头文件逐个尝试, 我们现在就来实现一个小游戏, 这个游戏中包含了三种角色, 僵尸, 老太和猫, 当僵尸吃到15个猫即为胜利, 僵尸被老太打到5次即为失败, 我们着手进行游戏的开发吧!

Step1 创建游戏后自动生成GameViewController, 将其加载自定义的场景
class GameViewController: UIViewController {

  override func viewDidLoad() {

    super.viewDidLoad()

    let scene =

      MainMenuScene(size:CGSize(width: 2048, height: 1536)) //进行主场景的设置

    let skView = self.view as! SKView

    skView.showsFPS = true //显示帧率

    skView.showsNodeCount = true //显示节点个数

    skView.ignoresSiblingOrder = true // 忽略同级元素优先级

    scene.scaleMode = .aspectFill // 缩放模式设置填充适配

    skView.presentScene(scene) //显示场景

  }

}
Step2 注意点: 由于与UIKit坐标系不同, SpriteKit的坐标系中, 由于锚点默认为(0.5, 0.5), position的位置y轴向上取大.
class MainMenuScene: SKScene {

  override func didMove(to view: SKView) { //到场景被加入时调用

    let background = SKSpriteNode(imageNamed: "MainMenu") //设置背景图片

    background.position = CGPoint(x: size.width/2, y: size.height/2) /将图片设置为居中显示

    addChild(background) //添加到场景中

  }

  func sceneTapped() { //场景点击时调用

    let myScene = GameScene(size: size) //创建游戏场景

    myScene.scaleMode = scaleMode //赋值缩放模式

    let reveal = SKTransition.doorway(withDuration: 1.5) //设置转场模式及时间

    view?.presentScene(myScene, transition: reveal) //切换场景

  }

  override func touchesBegan(_ touches: Set<UITouch>,

                             with event: UIEvent?) {

    sceneTapped() //调用场景被点击方法

  }

}
Step3 设置游戏场景的属性, 注意点, 速度包括方向和增量
class GameScene: SKScene {

    let zombie = SKSpriteNode(imageNamed: "zombie1") //僵尸节点

    var lastUpdateTime: TimeInterval = 0 //最后更新时间

    var dt: TimeInterval = 0 //增量

    let zombieMovePointsPerSec: CGFloat = 480.0 //每秒僵尸移动距离

    var velocity = CGPoint.zero //速度

    let playableRect: CGRect //可执行区域

    var lastTouchLocation: CGPoint? //最后触摸点

    let zombieRotateRadiansPerSec:CGFloat = 4.0 * π //每秒僵尸旋转的弧度

    let zombieAnimation: SKAction //僵尸动画

    let catCollisionSound: SKAction = SKAction.playSoundFileNamed( //猫音效

        "hitCat.wav", waitForCompletion: false)

    let enemyCollisionSound: SKAction = SKAction.playSoundFileNamed( //老太音效

        "hitCatLady.wav", waitForCompletion: false)

    var invincible = false //是否无敌

    let catMovePointsPerSec:CGFloat = 480.0 //猫每秒移动的距离

    var lives = 5 //设置5条命

    var gameOver = false //是否游戏结束

    let cameraNode = SKCameraNode() //摄像机

    let cameraMovePointsPerSec: CGFloat = 200.0 //摄像机每秒移动的距离

    let livesLabel = SKLabelNode(fontNamed: "Glimstick") //生命数量标签

    let catsLabel = SKLabelNode(fontNamed: "Glimstick") //捕获猫数量的标签

    var cameraRect : CGRect { //摄像头区域计算属性

    let x = cameraNode.position.x - size.width/2

        + (size.width - playableRect.width)/2

    let y = cameraNode.position.y - size.height/2

        + (size.height - playableRect.height)/2

    return CGRect(

      x: x,

      y: y,

      width: playableRect.width,

      height: playableRect.height)

  }

    ...

}
Step4 场景的初始化方法的设置
override init(size: CGSize) {

    let maxAspectRatio:CGFloat = 16.0/9.0 //设置屏幕比率为 16比9

    let playableHeight = size.width / maxAspectRatio

    let playableMargin = (size.height-playableHeight)/2.0

    playableRect = CGRect(x: 0, y: playableMargin,

                          width: size.width,

                          height: playableHeight)

    // 1

    var textures:[SKTexture] = [] //纹理数组

    // 2

    for i in 1...4 {

      textures.append(SKTexture(imageNamed: "zombie\(i)")) //类似imageView动画

    }

    // 3

    textures.append(textures[2])

    textures.append(textures[1])

    // 4

    zombieAnimation = SKAction.animate(with: textures,  //僵尸动画执行纹理

      timePerFrame: 0.1)

    super.init(size: size)

  }
Step5 这个没什么好说的, 就是花一条屏幕的线, 来看碰撞检测用的
func debugDrawPlayableArea() { //测试可操作区域

    let shape = SKShapeNode()

    let path = CGMutablePath()

    path.addRect(playableRect)

    shape.path = path

    shape.strokeColor = SKColor.red

    shape.lineWidth = 4.0

    addChild(shape)

  }
Step6 当场景被加载的时候进行一些设置和操作
override func didMove(to view: SKView) {

    playBackgroundMusic(filename: "backgroundMusic.mp3") //播放背景音乐

    for i in 0...1 { //进行场景的设置

      let background = backgroundNode() //合并成一个大场景

      background.anchorPoint = CGPoint.zero

      background.position =

        CGPoint(x: CGFloat(i)*background.size.width, y: 0)

      background.name = "background"

      background.zPosition = -1 //设置为-1, 保持添加新节点永远在背景之上

      addChild(background)

    }

    zombie.position = CGPoint(x: 400, y: 400)

    zombie.zPosition = 100

    addChild(zombie) //将僵尸添加入场景

    // zombie.run(SKAction.repeatForever(zombieAnimation))

    run(SKAction.repeatForever( //场景执行行动

      SKAction.sequence([SKAction.run() { [weak self] in

                      self?.spawnEnemy() //添加老太

                    },

                    SKAction.wait(forDuration: 2.0)]))) //等待2秒

    run(SKAction.repeatForever(

      SKAction.sequence([SKAction.run() { [weak self] in

                          self?.spawnCat() //添加猫

                        },

                        SKAction.wait(forDuration: 1.0)]))) //等待1秒

    // debugDrawPlayableArea()

    addChild(cameraNode) //添加摄像头节点

    camera = cameraNode

    cameraNode.position = CGPoint(x: size.width/2, y: size.height/2)

    livesLabel.text = "Lives: X" //命数显示的设置

    livesLabel.fontColor = SKColor.black

    livesLabel.fontSize = 100

    livesLabel.zPosition = 150

    livesLabel.horizontalAlignmentMode = .left //左下角

    livesLabel.verticalAlignmentMode = .bottom

    livesLabel.position = CGPoint(

      x: -playableRect.size.width/2 + CGFloat(20),

      y: -playableRect.size.height/2 + CGFloat(20))

    cameraNode.addChild(livesLabel)

    catsLabel.text = "Cats: X" //猫数显示的设置

    catsLabel.fontColor = SKColor.black

    catsLabel.fontSize = 100

    catsLabel.zPosition = 150

    catsLabel.horizontalAlignmentMode = .right //右下角

    catsLabel.verticalAlignmentMode = .bottom

    catsLabel.position = CGPoint(x: playableRect.size.width/2 - CGFloat(20),

      y: -playableRect.size.height/2 + CGFloat(20))

    cameraNode.addChild(catsLabel)

  }
Step7 背景音乐的处理
import AVFoundation

var backgroundMusicPlayer: AVAudioPlayer!

func playBackgroundMusic(filename: String) {

  let resourceUrl = Bundle.main.url(forResource: //从沙盒中读取音乐

    filename, withExtension: nil)

  guard let url = resourceUrl else {

    print("Could not find file: \(filename)")

    return

  }

  do {

    try backgroundMusicPlayer = //如果路径错误或文件损坏抛出异常

      AVAudioPlayer(contentsOf: url)

    backgroundMusicPlayer.numberOfLoops = -1

    backgroundMusicPlayer.prepareToPlay()

    backgroundMusicPlayer.play()

  } catch {

    print("Could not create audio player!")

    return

  }

}
Step8 进行背景节点的拼接
func backgroundNode() -> SKSpriteNode {

    // 1

    let backgroundNode = SKSpriteNode()

    backgroundNode.anchorPoint = CGPoint.zero

    backgroundNode.name = "background"

    // 2

    let background1 = SKSpriteNode(imageNamed: "background1")

    background1.anchorPoint = CGPoint.zero

    background1.position = CGPoint(x: 0, y: 0)

    backgroundNode.addChild(background1)

    // 3

    let background2 = SKSpriteNode(imageNamed: "background2") //将第二张图拼接在第一张图的后面

    background2.anchorPoint = CGPoint.zero

    background2.position =

      CGPoint(x: background1.size.width, y: 0)

    backgroundNode.addChild(background2)

    // 4

    backgroundNode.size = CGSize(

      width: background1.size.width + background2.size.width,

      height: background1.size.height)

    return backgroundNode

  }
Step9 设置老太的显示和行动
func spawnEnemy() {

    let enemy = SKSpriteNode(imageNamed: "enemy") //添加老太节点

    enemy.position = CGPoint(

      x: cameraRect.maxX + enemy.size.width/2,

      y: CGFloat.random( //随机高度出现

        min: cameraRect.minY + enemy.size.height/2,

        max: cameraRect.maxY - enemy.size.height/2))

    enemy.zPosition = 50

    enemy.name = "enemy"

    addChild(enemy)

    let actionMove = //进行老太的行动

      SKAction.moveBy(x: -(size.width + enemy.size.width), y: 0, duration: 2.0)

    let actionRemove = SKAction.removeFromParent()

    enemy.run(SKAction.sequence([actionMove, actionRemove])) //当移动完成后删除老太节点

  }
Step10 设置猫的显示和行动
func spawnCat() {

    // 1

    let cat = SKSpriteNode(imageNamed: "cat") //添加猫节点

    cat.name = "cat"

    cat.position = CGPoint(

      x: CGFloat.random(min: cameraRect.minX, //随机位置出现

                        max: cameraRect.maxX),

      y: CGFloat.random(min: cameraRect.minY,

                        max: cameraRect.maxY))

    cat.zPosition = 50

    cat.setScale(0) //初始缩放设为0

    addChild(cat)

    // 2

    let appear = SKAction.scale(to: 1.0, duration: 0.5) //

    cat.zRotation = -π / 16.0 //设置初始旋转

    let leftWiggle = SKAction.rotate(byAngle: π/8.0, duration: 0.5) //左边转

    let rightWiggle = leftWiggle.reversed() //右边转

    let fullWiggle = SKAction.sequence([leftWiggle, rightWiggle]) //左边转后右边转

    let scaleUp = SKAction.scale(by: 1.2, duration: 0.25) //进行放大

    let scaleDown = scaleUp.reversed() //缩小

    let fullScale = SKAction.sequence( //放大后缩小

      [scaleUp, scaleDown, scaleUp, scaleDown])

    let group = SKAction.group([fullScale, fullWiggle]) //同时执行缩放和旋转

    let groupWait = SKAction.repeat(group, count: 10) //重复10次组动画

    let disappear = SKAction.scale(to: 0, duration: 0.5) //缩放消失

    let removeFromParent = SKAction.removeFromParent() //移除节点

    let actions = [appear, groupWait, disappear, removeFromParent] //执行行动

    cat.run(SKAction.sequence(actions)) //节点执行行动

  }
Step11 随机数的设置
extension CGFloat {

  static func random() -> CGFloat {

    return CGFloat(Float(arc4random()) / Float(UInt32.max))

  }

  static func random(min: CGFloat, max: CGFloat) -> CGFloat {

    assert(min < max)

    return CGFloat.random() * (max - min) + min

  }

}
Step12 进行每帧的逻辑
override func update(_ currentTime: TimeInterval) {

    if lastUpdateTime > 0 { //算出每帧的增量

      dt = currentTime - lastUpdateTime

    } else {

      dt = 0

    }

    lastUpdateTime = currentTime

    /*

    if let lastTouchLocation = lastTouchLocation {

      let diff = lastTouchLocation - zombie.position

      if diff.length() <= zombieMovePointsPerSec * CGFloat(dt) {

        zombie.position = lastTouchLocation

        velocity = CGPoint.zero

        stopZombieAnimation()

      } else {

      */

        move(sprite: zombie, velocity: velocity) //移动僵尸 基于算法

        rotate(sprite: zombie, direction: velocity,  //旋转僵尸 基于算法

          rotateRadiansPerSec: zombieRotateRadiansPerSec)

      /*}

    }*/

    boundsCheckZombie() //边界监测

    // checkCollisions()

    moveTrain() //捕获操作

    moveCamera() //移动摄像头

    livesLabel.text = "Lives: \(lives)" //更新命数

    if lives <= 0 && !gameOver { //当命用完的时候

      gameOver = true

      print("You lose!")

      backgroundMusicPlayer.stop() //停止背景音乐

      // 1

      let gameOverScene = GameOverScene(size: size, won: false)

      gameOverScene.scaleMode = scaleMode

      // 2

      let reveal = SKTransition.flipHorizontal(withDuration: 0.5)

      // 3

      view?.presentScene(gameOverScene, transition: reveal) //切换场景

    }

    // cameraNode.position = zombie.position

  }
Step13 僵尸移动和旋转的算法
func move(sprite: SKSpriteNode, velocity: CGPoint) {

    let amountToMove = CGPoint(x: velocity.x * CGFloat(dt),

                               y: velocity.y * CGFloat(dt))

    sprite.position += amountToMove

  }

  func rotate(sprite: SKSpriteNode, direction: CGPoint, rotateRadiansPerSec: CGFloat) {

    let shortest = shortestAngleBetween(angle1: sprite.zRotation, angle2: velocity.angle)

    let amountToRotate = min(rotateRadiansPerSec * CGFloat(dt), abs(shortest))

    sprite.zRotation += shortest.sign() * amountToRotate

  }
Step14 边界检测
func boundsCheckZombie() {

    let bottomLeft = CGPoint(x: cameraRect.minX, y: cameraRect.minY)

    let topRight = CGPoint(x: cameraRect.maxX, y: cameraRect.maxY)

    if zombie.position.x <= bottomLeft.x {

      zombie.position.x = bottomLeft.x

      velocity.x = abs(velocity.x)

    }

    if zombie.position.x >= topRight.x {

      zombie.position.x = topRight.x

      velocity.x = -velocity.x

    }

    if zombie.position.y <= bottomLeft.y {

      zombie.position.y = bottomLeft.y

      velocity.y = -velocity.y

    }

    if zombie.position.y >= topRight.y {

      zombie.position.y = topRight.y

      velocity.y = -velocity.y

    }

  }
Step15 猫的捕获方法
func moveTrain() {

    var trainCount = 0 //设置捕获猫的数量

    var targetPosition = zombie.position //保存僵尸的位置

    enumerateChildNodes(withName: "train") { node, stop in //遍历所有猫的节点

      trainCount += 1 //增加猫的捕获数

      if !node.hasActions() { //当猫失去了行动

        let actionDuration = 0.3 //行动时间

        let offset = targetPosition - node.position //进行猫和僵尸的偏移计算

        let direction = offset.normalized() //转换成速度(方向加距离)

        let amountToMovePerSec = direction * self.catMovePointsPerSec //每秒猫移动的距离

        let amountToMove = amountToMovePerSec * CGFloat(actionDuration) //总共移动的距离

        let moveAction = SKAction.moveBy(x: amountToMove.x, y: amountToMove.y, duration: actionDuration)

        node.run(moveAction) //让猫移动

      }

      targetPosition = node.position //重置目标位置为之前捕获猫的位置

    }

    if trainCount >= 15 && !gameOver { //捕获超过15只

      gameOver = true

      print("You win!")

      backgroundMusicPlayer.stop()

      // 1

      let gameOverScene = GameOverScene(size: size, won: true)

      gameOverScene.scaleMode = scaleMode

      // 2

      let reveal = SKTransition.flipHorizontal(withDuration: 0.5)

      // 3

      view?.presentScene(gameOverScene, transition: reveal) //切换场景

    }

    catsLabel.text = "Cats: \(trainCount)" //更新捕获数

  }
Step16 移动摄像头
func moveCamera() {

    let backgroundVelocity =

      CGPoint(x: cameraMovePointsPerSec, y: 0)

    let amountToMove = backgroundVelocity * CGFloat(dt)

    cameraNode.position += amountToMove //摄像头进行移动

    enumerateChildNodes(withName: "background") { node, _ in //遍历背景节点

      let background = node as! SKSpriteNode

      if background.position.x + background.size.width <

          self.cameraRect.origin.x { //当触碰边界 向后移动背景的位置

        background.position = CGPoint(

          x: background.position.x + background.size.width*2,

          y: background.position.y)

      }

    }

  }
Step17 进行屏幕的点击操作
override func touchesBegan(_ touches: Set<UITouch>,

      with event: UIEvent?) {

    guard let touch = touches.first else {

      return

    }

    let touchLocation = touch.location(in: self)

    sceneTouched(touchLocation: touchLocation)

  }

  override func touchesMoved(_ touches: Set<UITouch>,

      with event: UIEvent?) {

    guard let touch = touches.first else {

      return

    }

    let touchLocation = touch.location(in: self)

    sceneTouched(touchLocation: touchLocation)

  }

  func sceneTouched(touchLocation:CGPoint) {

    lastTouchLocation = touchLocation

    moveZombieToward(location: touchLocation)

  }

func moveZombieToward(location: CGPoint) {

    startZombieAnimation()

    let offset = location - zombie.position

    let direction = offset.normalized()

    velocity = direction * zombieMovePointsPerSec //更新速度, update逐帧渲染

  }
Step18 进行僵尸动画
func startZombieAnimation() {

    if zombie.action(forKey: "animation") == nil {

      zombie.run(

        SKAction.repeatForever(zombieAnimation), //重复播放纹理动画

        withKey: "animation")

    }

  }

  func stopZombieAnimation() {

    zombie.removeAction(forKey: "animation") //删除行动

  }
Step19 碰撞检测
override func didEvaluateActions() { //update后调用

    checkCollisions()

  }

func checkCollisions() {

    var hitCats: [SKSpriteNode] = [] //捕获到猫的数组

    enumerateChildNodes(withName: "cat") { node, _ in //遍历所有的猫

      let cat = node as! SKSpriteNode

      if cat.frame.intersects(self.zombie.frame) {

        hitCats.append(cat) //如果和僵尸有发生碰撞, 添加入捕获数组

      }

    }

    for cat in hitCats {

      zombieHit(cat: cat) //进行捕获操作

    }

    if invincible {

      return //如果僵尸处以无敌状态 不检测碰撞老太

    }

    var hitEnemies: [SKSpriteNode] = [] //被老太击倒数组

    enumerateChildNodes(withName: "enemy") { node, _ in //遍历所有的老太

      let enemy = node as! SKSpriteNode

      if node.frame.insetBy(dx: 20, dy: 20).intersects( //老太向内收缩触碰区域

        self.zombie.frame) {

        hitEnemies.append(enemy) //添加数组

      }

    }

    for enemy in hitEnemies {

      zombieHit(enemy: enemy) //碰撞老太

    }

  }
Step20 碰撞后的操作
func zombieHit(cat: SKSpriteNode) {

    cat.name = "train" //更改猫的标识, 标记为捕获

    cat.removeAllActions() //删除所有行动

    cat.setScale(1.0) //缩放至正常比率

    cat.zRotation = 0 //旋转至正常比率

    let turnGreen = SKAction.colorize(with: SKColor.green, colorBlendFactor: 1.0, duration: 0.2)

    cat.run(turnGreen) //改变颜色

    run(catCollisionSound) //播放音效

  }

  func zombieHit(enemy: SKSpriteNode) {

    invincible = true //设置为无敌状态

    let blinkTimes = 10.0 //闪烁时间

    let duration = 3.0 //无敌时间

    let blinkAction = SKAction.customAction(withDuration: duration) { node, elapsedTime in //

      let slice = duration / blinkTimes

      let remainder = Double(elapsedTime).truncatingRemainder(

        dividingBy: slice)

      node.isHidden = remainder > slice / 2

    }

    let setHidden = SKAction.run() { [weak self] in

      self?.zombie.isHidden = false

      self?.invincible = false

    }

    zombie.run(SKAction.sequence([blinkAction, setHidden])) //进行执行序列

    run(enemyCollisionSound) //播放音效

    loseCats() //丢失猫的操作

    lives -= 1 //失去生命值

  }
Step21 丢失猫的操作
func loseCats() {

    // 1

    var loseCount = 0 // 丢失数量

    enumerateChildNodes(withName: "train") { node, stop in //遍历已捕获的猫的节点

      // 2

      var randomSpot = node.position // 猫进行随机移动

      randomSpot.x += CGFloat.random(min: -100, max: 100)

      randomSpot.y += CGFloat.random(min: -100, max: 100)

      // 3

      node.name = "" //清空标识

      node.run(

        SKAction.sequence([

          SKAction.group([

            SKAction.rotate(byAngle: π*4, duration: 1.0),

            SKAction.move(to: randomSpot, duration: 1.0),

            SKAction.scale(to: 0, duration: 1.0)

            ]),

          SKAction.removeFromParent()

        ]))

      // 4

      loseCount += 1

      if loseCount >= 2 { //设置只丢失2只

        stop[0] = true

      }

    }

  }
Step22 游戏结束的场景
class GameOverScene: SKScene {  let won:Bool //是否胜利

  init(size: CGSize, won: Bool) {    self.won = won    super.init(size: size)

  }  required init(coder aDecoder: NSCoder) {    fatalError("init(coder:) has not been implemented")

  }  override func didMove(to view: SKView) {    var background: SKSpriteNode

    if (won) {

      background = SKSpriteNode(imageNamed: "YouWin") //胜利的图片及音效

      run(SKAction.playSoundFileNamed("win.wav",

          waitForCompletion: false))

    } else {

      background = SKSpriteNode(imageNamed: "YouLose") //失败的图片及音效

      run(SKAction.playSoundFileNamed("lose.wav",

          waitForCompletion: false))

    }

    background.position =

      CGPoint(x: size.width/2, y: size.height/2)    self.addChild(background)    // More here...

    let wait = SKAction.wait(forDuration: 3.0) //等待3秒后重新开始游戏

    let block = SKAction.run {      let myScene = GameScene(size: self.size)

      myScene.scaleMode = self.scaleMode      let reveal = SKTransition.flipHorizontal(withDuration: 0.5)      self.view?.presentScene(myScene, transition: reveal)

    }    self.run(SKAction.sequence([wait, block]))

  }

}
三、运行效果与文件截图
1、运行效果:

2、文件截图:
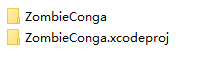
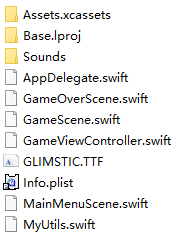
ZombieConga文件夹里面截图:
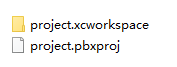
ZombieConga.xcodeproj文件夹里面截图:
注:本文著作权归作者,由demo大师发表,拒绝转载,转载需要作者授权
[SpriteKit] 系统框架中Cocos2d-x制作小游戏ZombieConga的更多相关文章
- Spring框架中一个有用的小组件:Spring Retry
1.概述 Spring Retry 是Spring框架中的一个组件, 它提供了自动重新调用失败操作的能力.这在错误可能是暂时发生的(如瞬时网络故障)的情况下很有帮助. 在本文中,我们将看到使用Spri ...
- c++制作小游戏--雷电
用c++实现了一个小游戏--雷电,貌似执行的还不错.贴图和声效也是Duang!Duang!的.整个项目我也会给出下载链接,有兴趣的能够编译执行一下.用到了C++11的新特性,最好是使用vs2013编译 ...
- Java开发小游戏 用键盘控制精灵在游戏中上下左右跑动 窗体小游戏可打包下载,解压后双击start运行
package com.swift; import java.awt.Point; import java.awt.event.KeyEvent; import com.rupeng.game.Gam ...
- 教你在Yii2.0框架中如何创建自定义小部件
本教程将帮助您创建自己的自定义小部件在 yii framework 2.0.部件是可重用的模块和用于视图. 创建一个小部件,需要继承 yii\base\Widget,覆盖重写 yii\base\Wid ...
- 使用cocos2d-x3.4结合cocos2.1.5制作小游戏《亲亲小熊》
在最新的cocos集成环境中,CocosStudio已经集成到cocos中了,至于界面的制作和编辑器的基本使用在cocos官网有详细教程, 这里就不细说,资源下载和详情请参看官网教程:http://c ...
- 用Canvas制作小游戏——贪吃蛇
今天呢,主要和小伙伴们分享一下一个贪吃蛇游戏从构思到实现的过程~因为我不是很喜欢直接PO代码,所以只copy代码的童鞋们请出门左转不谢. 按理说canvas与其应用是老生常谈了,可我在准备阶段却搜索不 ...
- Canvas进阶——制作小游戏【贪吃蛇】
今天呢,主要和小伙伴们分享一下一个贪吃蛇游戏从构思到实现的过程~因为我不是很喜欢直接PO代码,所以只copy代码的童鞋们请出门左转不谢. 按理说canvas与其应用是老生常谈了,可我在准备阶段却搜索不 ...
- 使用JS制作小游戏贪吃蛇
先看效果图: 过程如下: 1.首先创建一张画布地图<div class="map"> </div>: 2.创建食物的自调用函数 (function (){ ...
- 观摩制作小游戏(js应用)
<!DOCTYPE html PUBLIC "-//W3C//DTD XHTML 1.0 Transitional//EN" "http://www.w3.org/ ...
随机推荐
- 【idea】idea重新打包依赖了父级项目的子级项目,父级项目代码改变,但是子级项目打包依旧是老的代码 问题解决
最简单的方法: 就是单独打包父级项目,然后替换本地maven仓库中的父级项目的jar,然后重新打包子级项目,就可以了.
- 演示Microsoft Advertising SDK for Windows Phone 8.1
演示Microsoft Advertising SDK for Windows Phone 8.1,Only for Windows Phone 8.1 1.在References上点右键,添加引用, ...
- Objective-c:NSFileHandle类,创建流对象,对文件进行写入、读取的操作
NSFileHandle类:它需要配合NSFileManager文件管理类,对文件内容进行操作,写入数据.读取数据. 使用步骤: 1.打开文件获取NSFileHandle类的对象 2. ...
- 基于zabbix的Redis、Sentinel、Slave多实例自动发现监控
约定 保证whereis redis-cli 能够正确返回redis-cli程序的路径 保证 redis的配置文件在模板宏{$REDIS_SERVER_CONFIG_PATH}的路径,并且后缀名 为. ...
- 【PAT Advanced Level】1011. World Cup Betting (20)
简单模拟题,遍历一遍即可.考察输入输出. #include <iostream> #include <string> #include <stdio.h> #inc ...
- [Python爬虫]煎蛋网OOXX妹子图爬虫(1)——解密图片地址
之前在鱼C论坛的时候,看到很多人都在用Python写爬虫爬煎蛋网的妹子图,当时我也写过,爬了很多的妹子图片.后来煎蛋网把妹子图的网页改进了,对图片的地址进行了加密,所以论坛里面的人经常有人问怎么请求的 ...
- iOS开发-UIWebView加载本地和网络数据
UIWebView是内置的浏览器控件,可以用它来浏览网页.打开文档,关于浏览网页榜样可以参考UC,手机必备浏览器,至于文档浏览的手机很多图书阅读软件,UIWebView是一个混合体,具体的功能控件内置 ...
- 【架构】SpringCloud 注册中心、负载均衡、熔断器、调用监控、API网关示例
示例代码: https://github.com/junneyang/springcloud-demo 参考资料: SpringCloud系列 Eureka 一句话概括下spring框架及spring ...
- Jmeter-Maven-Plugin高级应用:Log Levels
Log Levels Pages 12 Home Adding additional libraries to the classpath Advanced Configuration Basic C ...
- 使用grep进行文本查找
命令模式: grep "文本" -rl 路径 例子: grep "w3.the.abc.com" -rl /home/hy/fluent3 有时候需要排除掉一些 ...