使用CNN做数字识别和人脸识别
- 上次写的一层神经网络也都贴这里了。
- 我有点困,我先睡觉,完了我再修改
- 这个代码写法不太符合工业代码的规范,仅仅是用来学习的的。还望各位见谅
import sys,os
sys.path.append(os.pardir)
import numpy as np
from tensorflow.examples.tutorials.mnist import input_data
from PIL import Image
import tensorflow as tf class mmmmser:
id=""
name="" def __int__(self,name,id):
self.name = name
self.id = id
def setself(self,name,id):
self.name = name
self.id = id
def setname(self,name):
self.name = name
def getname(self):
return self.name
def setid(self, id):
self.id = id
def getid(self):
return self.id #交叉熵损失函数
#值越小对应得越是预测的值
#预测的值越大,反而不是正确的预测
#减少了其他结果的影响
def cross_entropy_error(y, t):
delta = 1e-7
return -np.sum(t * np.log(y + delta))
#均方差损失函数
#均方误差,对于的结果相减,平方求和。
#有其他结果的影响。
def mean_squared_error(y,t):
return 0.5*np.sum((y-t)**2)
#图像显示函数
def showImg():
batch_xs, batch_ys = mnist.train.next_batch (100)
x=np.random.choice(batch_xs.shape[0],4)
myx=batch_xs[0]
myx=myx*255
k=myx.reshape(28,28)
print(myx)
img=Image.fromarray(np.uint8(k))
print(img)
img.show()
def showImgTest(one_img):
myx=one_img*255
k=myx.reshape(28,28)
img=Image.fromarray(np.uint8(k))
img.show()
#获取随机的batch
def GetBatch(train_x,train_y):
train_size = len(train_x)
batch_size = 10 #每次训练的batch数量
batch_mask = np.random.choice (train_size, batch_size)
# print (batch_mask)
x_batch=[]
t_batch=[]
for i in range(len(batch_mask)):
x_batch.append(np.array(train_x[batch_mask[i]]).reshape((-1,784)))
t_batch.append(np.array(train_y[batch_mask[i]]).reshape((-1,10)))
return np.array(x_batch).reshape((10,-1)),np.array(t_batch).reshape((10,-1)) #批量交叉熵
def cross_entropy_error_batch(y, t):
batch_size = y.shape[0]
return -np.sum(t * np.log(y + 1e-7)) / batch_size
def eachfile(filepath,arr,trr,k,a):
print("loading face file..")
pathdir=os.listdir(filepath)
for allpath in pathdir:
if(a>10 and k<1):
break
if k>=0:
child=os.path.join('%s\%s'%(filepath,allpath))
if os.path.isfile(child):
readfile(child,arr,trr,a)
else:eachfile(child,arr,trr,a)
def getpeoplename(num):
user1=mmmmser()
user1.setself("tjl","9")
user2=mmmmser()
user2.setself("lw","8")
user3=mmmmser()
user3.setself("lt","0")
user=[]
user.append(user1)
user.append(user2)
user.append(user3)
k=0
for i in range(len(user)):
if user[i].getid()==num:
k=i
break
else:
continue
return user[k].getname() def readfile(child,arr,trr,a):
a+=1
print(child)
img1=Image.open(child)
limg=img1.convert('L')
k=limg.resize((28,28))
if len(arr)==0:
img = Image.fromarray (np.uint8(k))
img.show()
# print(np.array(k).shape)
arr.append(k)
trr.append([0,0,0,0,0,0,0,0,0,1]) # fopen=open(filename,'r')
# fileread=fopen.read()
# fopen.close()
def trainfaceoftian(arr,trr):
print("train face of tianjingle...")
x = tf.placeholder(tf.float32, [None, 784])
y_ = tf.placeholder(tf.float32, [None, 10])
trainImg=tf.reshape(x,[-1,28,28,1])
#第一层网络
w1=tf.Variable(tf.truncated_normal([5,5,1,32], stddev=0.1),name="w1")
b1=tf.Variable(tf.constant(0.1, shape=[32]),name="b1")
h1=tf.nn.relu (tf.nn.conv2d(trainImg, w1, strides=[1, 1, 1, 1], padding='SAME') + b1)
p1=tf.nn.max_pool(h1, ksize=[1, 2, 2, 1],strides=[1, 2, 2, 1], padding='SAME') #第二层网络
w2=tf.Variable(tf.truncated_normal([5,5,32,64], stddev=0.1),name="w2")
b2=tf.Variable(tf.constant(0.1, shape=[64]),name="b2")
h2=tf.nn.relu (tf.nn.conv2d(p1, w2, strides=[1, 1, 1, 1], padding='SAME') + b2)
p2=tf.nn.max_pool(h2, ksize=[1, 2, 2, 1],strides=[1, 2, 2, 1], padding='SAME') #全连接层
w3=tf.Variable(tf.truncated_normal([7*7*64,1024], stddev=0.1),name="w3")
b3=tf.Variable(tf.constant(0.1, shape=[1024]),name="b3") #cnn输出变形
fp2=tf.reshape(p2,[-1,7*7*64])
fp3=tf.nn.relu(tf.matmul(fp2, w3) + b3) #转为【10】
w4 = tf.Variable(tf.truncated_normal([1024, 10], stddev=0.14),name="w4")
b4= tf.Variable(tf.constant(0.1,shape=[10]),name="b4")
y_conv = tf.matmul(fp3, w4) + b4 #定义交叉熵
cross_entropy = tf.reduce_mean(tf.nn.softmax_cross_entropy_with_logits(labels=y_,logits=y_conv))
#定义训练
train_step = tf.train.AdamOptimizer(1e-4).minimize (cross_entropy)
# 使用Dropout,keep_prob是一个占位符,训练时为0.5,测试时为1
keep_prob = tf.placeholder(tf.float32)
# 定义测试的准确率
correct_prediction = tf.equal(tf.argmax(y_conv, 1),tf.argmax(y_, 1))
accuracy = tf.reduce_mean(tf.cast(correct_prediction, tf.float32)) # 创建Session和变量初始化
sess = tf.InteractiveSession()
sess.run (tf.global_variables_initializer()) #准确标志
maxaccuracy=0 #模型存储
saver = tf.train.Saver(max_to_keep=1)
# 训练1000步
for i in range (1000):
# batch = mnist.train.next_batch(50)
batch_xs, batch_ys = GetBatch (arr, trr)
if i % 100 == 0:
train_accuracy = accuracy.eval (feed_dict={x: batch_xs, y_: batch_ys, keep_prob: 1.0})
print ("step %d, training accuracy %g" % (i, train_accuracy))
train_step.run (feed_dict={x: batch_xs, y_: batch_ys, keep_prob: 0.5})
if maxaccuracy<train_accuracy:
maxaccuracy=train_accuracy
saver.save (sess, 'tface/tjlmodel.ckpt')
print("Cnn model training with tjl end..") def trainface():
print("start train face...")
filename="C:\\tianjingletianjingle"
arr=[]
trr=[]
eachfile(filename,arr,trr,1,0)
print("length of arr")
print(len(arr))
trainfaceoftian(arr,trr) def loadface():
filename="C:\\tianjingletianjingle"
arr=[]
trr=[]
eachfile(filename,arr,trr,0,0)
return GetBatch(arr,trr) def predicttjl():
print("start predict tjl...with cnn")
meta_path = 'tface/tjlmodel.ckpt.meta' #模型的结构
model_path ='tface/tjlmodel.ckpt' #模型的数据
sess = tf.InteractiveSession()
saver = tf.train.import_meta_graph (meta_path)
saver.restore (sess, model_path)
x = tf.placeholder (tf.float32, [None, 784])
trainImg=tf.reshape(x,[-1,28,28,1])
graph = tf.get_default_graph ()
w1 = graph.get_tensor_by_name ("w1:0")
b1 = graph.get_tensor_by_name ("b1:0")
w2 = graph.get_tensor_by_name ("w2:0")
b2 = graph.get_tensor_by_name ("b2:0")
w3 = graph.get_tensor_by_name ("w3:0")
b3 = graph.get_tensor_by_name ("b3:0")
w4 = graph.get_tensor_by_name ("w4:0")
b4 = graph.get_tensor_by_name ("b4:0") #第一层网络
# w1=tf.Variable(tf.truncated_normal([5,5,1,32], stddev=0.1),name="w1")
# b1=tf.Variable(tf.constant(0.1, shape=[32]),name="b1")
h1=tf.nn.relu (tf.nn.conv2d(trainImg, w1, strides=[1, 1, 1, 1], padding='SAME') + b1)
p1=tf.nn.max_pool(h1, ksize=[1, 2, 2, 1],strides=[1, 2, 2, 1], padding='SAME')
#第二层网络
# w2=tf.Variable(tf.truncated_normal([5,5,32,64], stddev=0.1),name="w2")
# b2=tf.Variable(tf.constant(0.1, shape=[64]),name="b2")
h2=tf.nn.relu (tf.nn.conv2d(p1, w2, strides=[1, 1, 1, 1], padding='SAME') + b2)
p2=tf.nn.max_pool(h2, ksize=[1, 2, 2, 1],strides=[1, 2, 2, 1], padding='SAME') #全连接层
# w3=tf.Variable(tf.truncated_normal([7*7*64,1024], stddev=0.1),name="w3")
# b3=tf.Variable(tf.constant(0.1, shape=[1024]),name="b3") #cnn输出变形
fp2=tf.reshape(p2,[-1,7*7*64])
fp3=tf.nn.relu(tf.matmul(fp2, w3) + b3) #转为【10】
# w4 = tf.Variable(tf.truncated_normal([1024, 10], stddev=0.14),name="w4")
# b4= tf.Variable(tf.constant(0.1,shape=[10]),name="b4")
y_conv = tf.matmul(fp3, w4) + b4
keep_prob = tf.placeholder (tf.float32) one_img,one_title=loadface()
# img1=tf.reshape(one_img[0],[-1,28,28,1])
# print(img1.shape)
img1=one_img[0].reshape((-1,784))
# print(img1.reshape((0,784)).shape)
temp=sess.run(y_conv,feed_dict={x: img1, keep_prob: 1.0})
a=tf.arg_max(temp,1)
b=tf.arg_max(one_title[0].reshape((-1,10)),1)
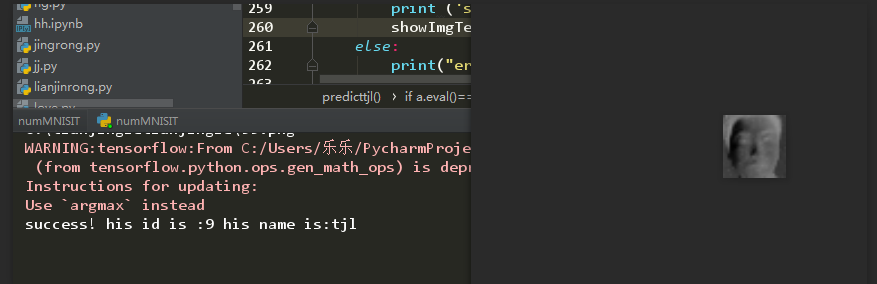
if a.eval()==b.eval():
print ('success! his id is :%d his name is:%s'%(b.eval()[0],getpeoplename(b.eval()[0])))
showImgTest(one_img[0])
else:
print("error..") def predictwithCnn():
print("predict with 3 layer cnn..")
meta_path = 'cnn/model.ckpt.meta' #模型的结构
model_path = 'cnn/model.ckpt' #模型的数据
sess = tf.InteractiveSession ()
saver = tf.train.import_meta_graph (meta_path)
saver.restore (sess, model_path) x = tf.placeholder (tf.float32, [None, 784])
trainImg=tf.reshape(x,[-1,28,28,1])
graph = tf.get_default_graph ()
w1 = graph.get_tensor_by_name ("w1:0")
b1 = graph.get_tensor_by_name ("b1:0")
w2 = graph.get_tensor_by_name ("w2:0")
b2 = graph.get_tensor_by_name ("b2:0")
w3 = graph.get_tensor_by_name ("w3:0")
b3 = graph.get_tensor_by_name ("b3:0")
w4 = graph.get_tensor_by_name ("w4:0")
b4 = graph.get_tensor_by_name ("b4:0") #第一层网络
# w1=tf.Variable(tf.truncated_normal([5,5,1,32], stddev=0.1),name="w1")
# b1=tf.Variable(tf.constant(0.1, shape=[32]),name="b1")
h1=tf.nn.relu (tf.nn.conv2d(trainImg, w1, strides=[1, 1, 1, 1], padding='SAME') + b1)
p1=tf.nn.max_pool(h1, ksize=[1, 2, 2, 1],strides=[1, 2, 2, 1], padding='SAME')
#第二层网络
# w2=tf.Variable(tf.truncated_normal([5,5,32,64], stddev=0.1),name="w2")
# b2=tf.Variable(tf.constant(0.1, shape=[64]),name="b2")
h2=tf.nn.relu (tf.nn.conv2d(p1, w2, strides=[1, 1, 1, 1], padding='SAME') + b2)
p2=tf.nn.max_pool(h2, ksize=[1, 2, 2, 1],strides=[1, 2, 2, 1], padding='SAME') #全连接层
# w3=tf.Variable(tf.truncated_normal([7*7*64,1024], stddev=0.1),name="w3")
# b3=tf.Variable(tf.constant(0.1, shape=[1024]),name="b3") #cnn输出变形
fp2=tf.reshape(p2,[-1,7*7*64])
fp3=tf.nn.relu(tf.matmul(fp2, w3) + b3) #转为【10】
# w4 = tf.Variable(tf.truncated_normal([1024, 10], stddev=0.14),name="w4")
# b4= tf.Variable(tf.constant(0.1,shape=[10]),name="b4")
y_conv = tf.matmul(fp3, w4) + b4
keep_prob = tf.placeholder (tf.float32)
one_img,one_title=mnist.train.next_batch (100)
# img1=tf.reshape(one_img[0],[-1,28,28,1])
# print(img1.shape)
print(one_img.shape)
img1=one_img[0].reshape((-1,784))
print(img1.shape)
temp=sess.run(y_conv,feed_dict={x: img1, keep_prob: 1.0})
a=tf.arg_max(temp,1)
b=tf.arg_max(one_title[0].reshape((-1,10)),1)
print(a.eval())
print(b.eval())
if a.eval()==b.eval():
print ("success! the num is :", (b.eval()[0]))
showImgTest(img1)
else:
print("error..") def CNNmodel():
print("train with 3 layer cnn...")
x = tf.placeholder(tf.float32, [None, 784])
y_ = tf.placeholder(tf.float32, [None, 10])
trainImg=tf.reshape(x,[-1,28,28,1])
#第一层网络
w1=tf.Variable(tf.truncated_normal([5,5,1,32], stddev=0.1),name="w1")
b1=tf.Variable(tf.constant(0.1, shape=[32]),name="b1")
h1=tf.nn.relu (tf.nn.conv2d(trainImg, w1, strides=[1, 1, 1, 1], padding='SAME') + b1)
p1=tf.nn.max_pool(h1, ksize=[1, 2, 2, 1],strides=[1, 2, 2, 1], padding='SAME') #第二层网络
w2=tf.Variable(tf.truncated_normal([5,5,32,64], stddev=0.1),name="w2")
b2=tf.Variable(tf.constant(0.1, shape=[64]),name="b2")
h2=tf.nn.relu (tf.nn.conv2d(p1, w2, strides=[1, 1, 1, 1], padding='SAME') + b2)
p2=tf.nn.max_pool(h2, ksize=[1, 2, 2, 1],strides=[1, 2, 2, 1], padding='SAME') #全连接层
w3=tf.Variable(tf.truncated_normal([7*7*64,1024], stddev=0.1),name="w3")
b3=tf.Variable(tf.constant(0.1, shape=[1024]),name="b3") #cnn输出变形
fp2=tf.reshape(p2,[-1,7*7*64])
fp3=tf.nn.relu(tf.matmul(fp2, w3) + b3) #转为【10】
w4 = tf.Variable(tf.truncated_normal([1024, 10], stddev=0.14),name="w4")
b4= tf.Variable(tf.constant(0.1,shape=[10]),name="b4")
y_conv = tf.matmul(fp3, w4) + b4 #定义交叉熵
cross_entropy = tf.reduce_mean(tf.nn.softmax_cross_entropy_with_logits(labels=y_,logits=y_conv))
#定义训练
train_step = tf.train.AdamOptimizer(1e-4).minimize (cross_entropy)
# 使用Dropout,keep_prob是一个占位符,训练时为0.5,测试时为1
keep_prob = tf.placeholder(tf.float32)
# 定义测试的准确率
correct_prediction = tf.equal(tf.argmax(y_conv, 1),tf.argmax(y_, 1))
accuracy = tf.reduce_mean(tf.cast(correct_prediction, tf.float32)) # 创建Session和变量初始化
sess = tf.InteractiveSession()
sess.run (tf.global_variables_initializer()) #准确标志
maxaccuracy=0 #模型存储
saver = tf.train.Saver(max_to_keep=1)
# 训练1000步
for i in range (400):
batch = mnist.train.next_batch(50)
print(batch[0].shape)
if i % 100 == 0:
train_accuracy = accuracy.eval (feed_dict={x: batch[0], y_: batch[1], keep_prob: 1.0})
print ("step %d, training accuracy %g" % (i, train_accuracy))
train_step.run (feed_dict={x: batch[0], y_: batch[1], keep_prob: 0.5})
if maxaccuracy<train_accuracy:
maxaccuracy=train_accuracy
saver.save (sess, 'cnn/model.ckpt')
print("Cnn model training end..")
# print("test accuracy %g" % accuracy.eval (feed_dict={x: mnist.test.images, y_: mnist.test.labels, keep_prob: 1.0})) def predict():
meta_path = 'ckpt/mnist.ckpt.meta'
model_path = 'ckpt/mnist.ckpt'
sess = tf.InteractiveSession ()
saver = tf.train.import_meta_graph (meta_path)
saver.restore (sess, model_path)
graph = tf.get_default_graph ()
W = graph.get_tensor_by_name ("w:0")
b = graph.get_tensor_by_name ("b:0")
x = tf.placeholder (tf.float32, [None, 784])
y = tf.nn.softmax (tf.matmul (x, W) + b)
keep_prob = tf.placeholder (tf.float32)
batch_xs, batch_ys=mnist.train.next_batch (100)
one_img = batch_xs[0].reshape ((1, 784))
one_num = batch_ys[0].reshape ((1, 10))
temp = sess.run (y, feed_dict={x: one_img, keep_prob: 1.0})
b = sess.run (tf.argmax (temp, 1))
a = sess.run (tf.arg_max (one_num, 1))
print(temp)
print(one_num)
if b == a:
print ("success! the num is :", (b[0]))
showImgTest(one_img)
else:
print ("mistakes predict.") def trainNet():
x = tf.placeholder (tf.float32, [None, 784])
W = tf.Variable (tf.zeros ([784, 10]),name="w")
b = tf.Variable (tf.zeros ([10]),name="b")
y = tf.nn.softmax (tf.matmul (x, W) + b)
y_ = tf.placeholder (tf.float32, [None, 10])
keep_prob = tf.placeholder (tf.float32)
# 定义测试的准确率
correct_prediction = tf.equal (tf.argmax (y, 1), tf.argmax (y_, 1))
accuracy = tf.reduce_mean (tf.cast (correct_prediction, tf.float32))
#模型保存
saver = tf.train.Saver (max_to_keep=1)
#保存最优模型
max_acc=0
train_accuracy=0
#交叉熵
cross_entropy = tf.reduce_mean (-tf.reduce_sum (y_ * tf.log (y)))
# cross_error=cross_entropy_error_batch(y,y_)
train_step = tf.train.GradientDescentOptimizer (0.01).minimize (cross_entropy)
sess = tf.InteractiveSession()
tf.global_variables_initializer().run()
for i in range (1000):
batch_xs, batch_ys = mnist.train.next_batch (100)
sess.run (train_step, feed_dict={x: batch_xs, y_: batch_ys, keep_prob: 1.0})
if i % 100 == 0:
train_accuracy = accuracy.eval (feed_dict={x: batch_xs, y_: batch_ys, keep_prob: 1.0})
print ("step %d, training accuracy %g" % (i, train_accuracy))
if train_accuracy > max_acc:
max_acc = train_accuracy
saver.save (sess, 'ckpt/mnist.ckpt') if __name__ == '__main__':
mnist = input_data.read_data_sets ("MNIST_data/", one_hot=True)
choice="0"
while choice == "0":
print ("------------------------tensorflow--------------------------")
print ("\t\t\t1\ttrain model..")
print("\t\t\t2\tpredict model")
print("\t\t\t3\tshow the first image")
print("\t\t\t4\tCNN model")
print("\t\t\t5\tpredict with cnn model")
print("\t\t\t6\tface recognized train with cnn")
print("\t\t\t7\tpredict tianjingle")
print("-------------------------------------------------------------")
print ("\t\t\t0\texit")
choice = input ("please input your choice!")
if choice == "1":
print("start train...")
trainNet()
if choice=="2":
predict()
if choice=="3":
showImg()
if choice=="4":
CNNmodel()
if choice=="5":
predictwithCnn()
if choice=="6":
trainface()
if choice=="7":
predicttjl() # train_x,train_y=mnist.train.next_batch(60000)
# print(train_x.shape,train_y.shape)
# img=train_x[1]
# k=img.reshape(28,28)
# #showImg(k)
# y=[0.1,0.05,0.6,0.0,0.05,0.1,0.0,0.1,0.0,0.0]
# t=[0,0,1,0,0,0,0,0,0,0]
# print(mean_squared_error(np.array(y),np.array(t))) #取图像的个数
使用CNN做数字识别和人脸识别的更多相关文章
- 百度DMLC分布式深度机器学习开源项目(简称“深盟”)上线了如xgboost(速度快效果好的Boosting模型)、CXXNET(极致的C++深度学习库)、Minerva(高效灵活的并行深度学习引擎)以及Parameter Server(一小时训练600T数据)等产品,在语音识别、OCR识别、人脸识别以及计算效率提升上发布了多个成熟产品。
百度为何开源深度机器学习平台? 有一系列领先优势的百度却选择开源其深度机器学习平台,为何交底自己的核心技术?深思之下,却是在面对业界无奈时的远见之举. 5月20日,百度在github上开源了其 ...
- Home Assistant系列 -- 接入手机摄像头做实时监控和人脸识别
准备一部废旧(土豪忽略,主要是穷)的.摄像头还是好的手机做监控设备,(Android 和iPhone都行)当Home Assistant 获得实时的视频流后,可以接入各种图像处理组件完成人脸识别,动作 ...
- 用opencv做的静态图片人脸识别
这次给大家分享一个图像识别方面的小项目,主要功能是识别图像中的人脸并根据人脸在图片库找出同一个与它最相似的图片,也就是辨别不同的人. 环境:VS2013+opencv2.4.13 主要是算法:open ...
- python使用matplotlib画图,jieba分词、词云、selenuium、图片、音频、视频、文字识别、人脸识别
一.使用matplotlib画图 关注公众号"轻松学编程"了解更多. 使用matplotlib画柱形图 import matplotlib from matplotlib impo ...
- 微信公众平台消息接口开发(24)图片识别之人脸识别API
微信公众平台开发模式 微信 公众平台 消息接口 开发模式 企业微信公众平台 图片识别 人脸识别 API 作者:方倍工作室 原文:http://www.cnblogs.com/txw1958/archi ...
- Python的开源人脸识别库:离线识别率高达99.38%
Python的开源人脸识别库:离线识别率高达99.38% github源码:https://github.com/ageitgey/face_recognition#face-recognitio ...
- Python的开源人脸识别库:离线识别率高达99.38%(附源码)
Python的开源人脸识别库:离线识别率高达99.38%(附源码) 转https://cloud.tencent.com/developer/article/1359073 11.11 智慧上云 ...
- face recognition[翻译][深度人脸识别:综述]
这里翻译下<Deep face recognition: a survey v4>. 1 引言 由于它的非侵入性和自然特征,人脸识别已经成为身份识别中重要的生物认证技术,也已经应用到许多领 ...
- 日常API之C#百度人脸识别
最近看到一只我家徒儿发来的链接,原来是一堆百度AI的SDK,于是一时兴起就做了一只人脸识别,喵喵喵(●'◡'●) 一.准备工作 首先,当然是下载SDK啦:http://ai.baidu.com/sdk ...
随机推荐
- amcharts属性
Amcharts的特点包含: *动画或静态 *价值轴能够扭转 *线性或对数轴的价值尺度 *提前定义或定制的子弹 *定制描写叙述不论什么数据点 *点击栏目/酒吧(可用于钻孔下来图表) *梯度弥漫 *价值 ...
- UVa 11440 - Help Tomisu(欧拉函数 + 问题转换)
链接: https://uva.onlinejudge.org/index.php?option=com_onlinejudge&Itemid=8&page=show_problem& ...
- 【转】iOS:AvPlayer设置播放速度不生效的解决办法
现象: 项目有一个需求是实现视频的慢速播放,使用的是封装的AvPlayer,但是设置时发现比如设置rate为0.5,0.1,0.01都是一样的速度,非常疑惑.后来经过查找资料,发现iOS10对这个AP ...
- sqoop执行job报错(org/json/JSONObject)
NoClassDefFoundError: org/json/JSONObject: [root@hadoop2 ~]# sqoop job --create myjob7 -- import -- ...
- 时分秒倒计时的js实现
示例: 剩余天数:08天02事02分02秒 html代码: <div id="timer" data-timer="20160628140203" sty ...
- IIS提示出现RPC服务器不可用的解决方法
如果你运行IIS时也遇到“RPC服务器不可用”的故障提示,不妨试试我们下面的办法 依次点击“管理工具→服务→Remote Procedure Call→属性”,其默认启动类别是“自动”,但选项是灰色的 ...
- java核心技术-多线程之线程基础
说起线程,无法免俗首先要弄清楚的三个概念就是:进程.线程.协程.OK,那什么是进程,什么是线程,哪协程又是啥东西.进程:进程可以简单的理解为运行在操作系统中的程序,程序时静态代码,进程是动态运行着的代 ...
- 使用Android studio搭建Android环境
最近安装Android studio遇到了很多问题,现在总结一下安装过程 因为我的电脑是AMD的cpu,好像不能使用虚拟机(具体原因不知道),所以我使用 软件+手机 去开发APP 先说一下使用And ...
- 针对于网络安全领域中基于PCAP流量的数据集
网络安全领域中基于PCAP流量的数据集 MAWI Working Group Traffic Archive URL:http://mawi.wide.ad.jp/mawi/ CIC dataset ...
- # 2017-2018-1 20155224 加分项-实现mypwd
2017-2018-1 20155224 加分项-实现mypwd 1. 学习pwd命令 pwd命令以绝对路径的方式显示用户当前工作目录.命令将当前目录的全路径名称(从根目录)写入标准输出.全部目录使用 ...