自动化运维工具Ansible
一、简介
当下有许多的运维自动化工具( 配置管理 ),例如:Ansible、SaltStack、Puppet、Fabric 等。
Ansible 一种集成 IT 系统的配置管理、应用部署、执行特定任务的开源平台,是 AnsibleWorks 公司名下的项目,该公司由 Cobbler 及 Func 的作者于 2012 年创建成立。
Ansible 基于 Python 语言实现,由 Paramiko 和 PyYAML 两个关键模块构建。
二、特性
部署简单,只需在主控端部署 Ansible 环境,被控端无需做任何操作。
支持Linux/UNIX及windows环境
默认使用 SSH(Secure Shell)协议对设备进行管理,用它来配置思科路由也非常方便。
主从集中化管理。
配置简单、功能强大、扩展性强。
支持 API 及自定义模块,可通过 Python 轻松扩展。
通过 Playbooks 来定制强大的配置、状态管理。
对云计算平台、大数据都有很好的支持。
提供一个功能强大、操作性强的 Web 管理界面和 REST
API 接口 ---- AWX 平台。
三、总体架构
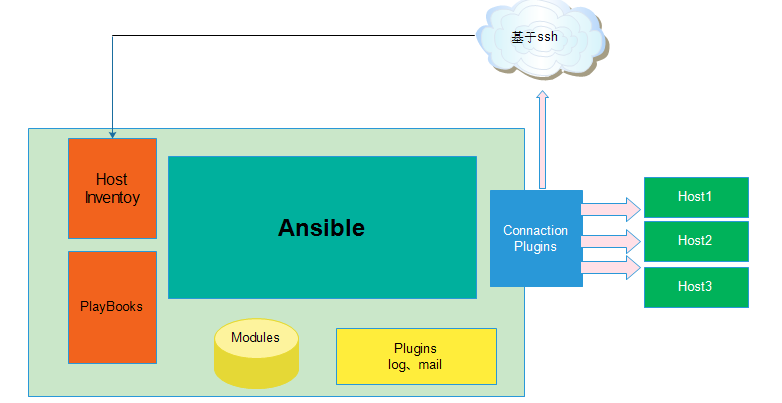
四、执行过程

五、Ansible 与 SaltStack对比
>> 最大的区别是 Ansible 无需在被监控主机部署任何客户端代理,默认通过 SSH 通道进行远程命令执行或下发配置。
>> 相同点是都具备功能强大、灵活的系统管理、状态配置,都使用 YAML 格式来描述配置,两者都提供丰富的模板及 API,对云计算平台、大数据都有很好的支持。
Ansible在github上地址:https://github.com/ansible
Ansible安装部署与配置
角色 主机名 IP 组名
控制端 hd01 192.168.1.11 ——
被控端 hd02 192.168.1.12 webservers
被控端 hd03 192.168.1.13 webservers
Ansible安装
安装可使用源码编译安装,也可以更新yum源后使用yum安装
yum 安装:
配置源(centos6)
yum install
http://download.fedoraproject.org/pub/epel/6/x86_64/epel-release-6-8.noarch.rpm
-y
换163的源
wget
http://mirrors.163.com/.help/CentOS6-Base-163.repo
mv CentOS6-Base-163.repo
/etc/yum.repos.d/
yum clean all
CentOS6-Base-163.repo主要是为了安装:PyYAML
配置源(centos7)
rpm -iUvh http://ftp.jaist.ac.jp/pub/Linux/Fedora/epel//7/x86_64/e/epel-release-7-7.noarch.rpm
下载配置文件(centos7)
wget http://mirrors.163.com/.help/CentOS7-Base-163.repo
CentOS7-Base-163.repo主要是为了安装:PyYAML
mv CentOS7-Base-163.repo /etc/yum.repos.d/
yum clean all
安装ansible
yum -y install ansible
查看ansible 版本
[root@hd01 ~]# ansible --version
ansible 2.5.3
config file = /etc/ansible/ansible.cfg
configured module search path = [u'/usr/share/my_modules']
ansible python module location =
/usr/lib/python2.6/site-packages/ansible
executable location = /usr/bin/ansible
python version = 2.6.6 (r266:84292, Aug 18 2016, 15:13:37) [GCC 4.4.7
20120313 (Red Hat 4.4.7-17)]
注:yum装ansible 随着时间的推移,ansible版本会是最新版的。
Ansible通过定义好的主机与组规则(Inventory)对匹配的目标主机进行远程操作,配置文件默认是/etc/ansible/hosts
定义Host Inventory
添加组名及允许执行命令的主机
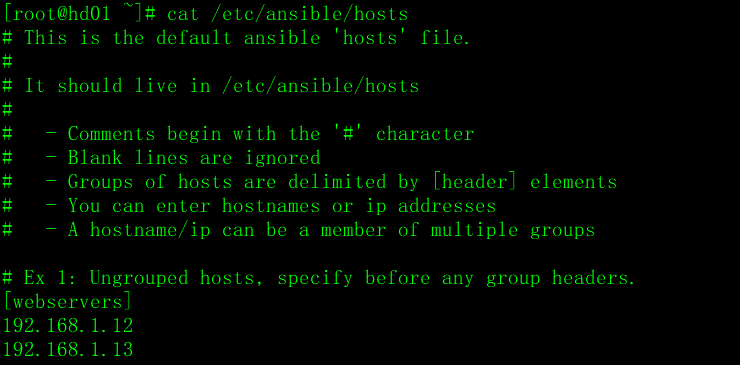
webservers 是组名,下面的是IP也可以使用域名、别名标识。
各主机SSH互信
[root@hd01 ~]# ssh-keygen -t rsa #创建公钥与私钥
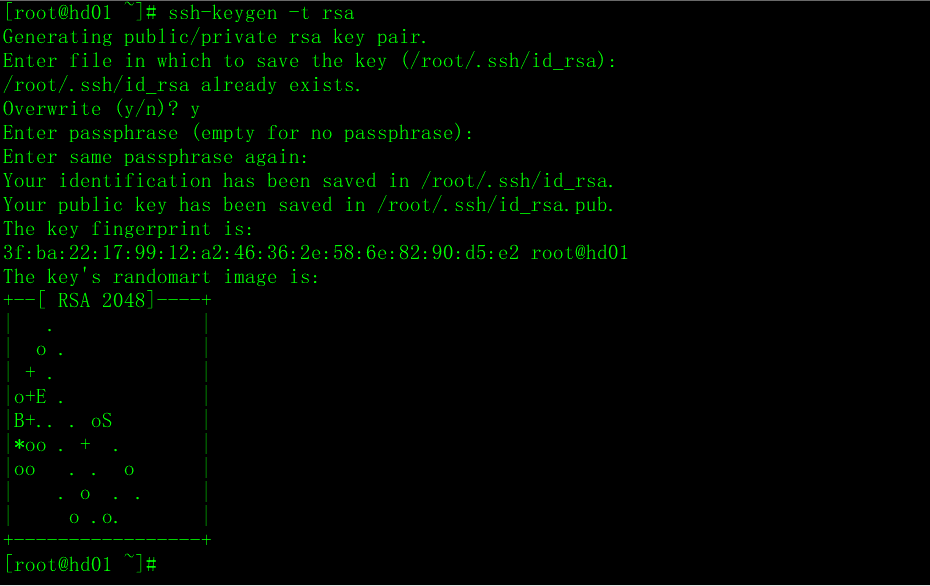
一直回车就OK
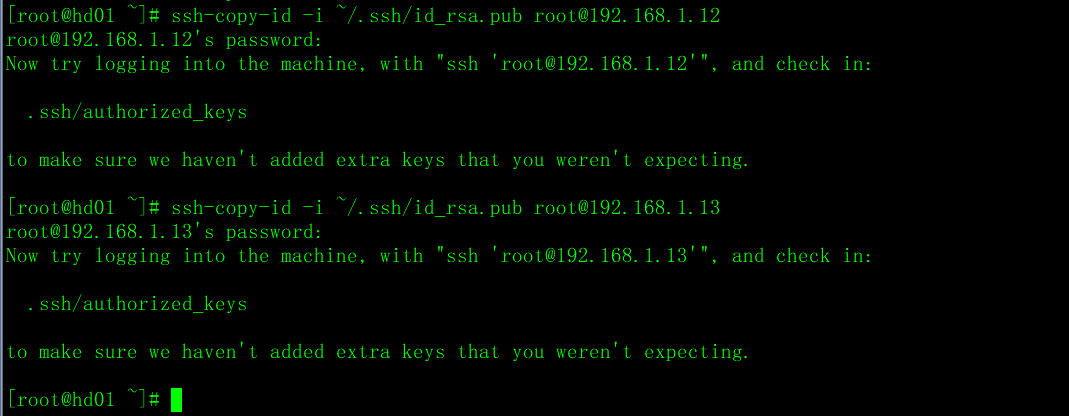
将公钥传给webservers组中的主机
ssh-copy-id -i ~/.ssh/id_rsa.pub root@192.168.1.12
ssh-copy-id -i ~/.ssh/id_rsa.pub root@192.168.1.13
测试主机免密 连通性:
[root@hd01 ~]# ansible webservers -m ping
#-m 使用ping模块 -vvv 可以查看详细的执行过程

OK
提示:
使用Linux普通用户账户进行连接并使用sudo命令实现root权限,格式为:
ansible webservers -m ping -u ansible -sudo
当没有做免密码访问时用 ansible webservers -m ping -k
然后输入密码 操作
关于定义主机与组
在/etc/ansible/hosts中主机可以用域名、IP、别名进行标识。
/etc/ansible/hosts 中组成员主机名称支持正则描述 组成员主机IP支持正则描述
举例说明 格式:
[webservers] #组名
alpha.example.org #域名对应192.168.1.100
beta.example.org #域名对应192.168.1.110
192.168.1.100 #IP
192.168.1.110 #IP
mail.example.com
192.168.1.90:2135 #定义一个SSH服务端口为:2135的主机
组成员主机名称支持正则描述,举例:
[webservers]
www.[01:50].example.com
[databases]
db-[a:f].example.com
定义主机变量
主机可以指定变量,以便后面供Playbook配置使用,比如定义主机host1及host2上apache参数http_port及maxRequestsPerChild,目的是让两台主机产生Apache配置文件httpd.conf差异化,格式:
[atlanta]
host1 http_port=80 maxRequestsPerChild=808
host2 http_port=303 maxRequestsPerChild=909
定义组变量
组变量的作用域是覆盖所有成员,通过定义一个新块,块名由组名+”:vars”组成
格式:
[atlanta]
host1
host2
[atlanta:vars]
ntp_server=ntp. atlanta.example.com
proxy=proxy.atlanta.example.com
匹配目标
格式:ansible <目标主机或组> -m <模块名字> -a <模块参数>
重启webservers组所有Apache服务
[root@hd01 ~]# ansible webservers -m service -a "name=httpd state=restarted"
匹配目标主机规则表
192.168.1.12或者hd02 匹配目标IP地址或主机名,多个IP或主机名使用”:”号分隔
webservers 匹配目标组为webservers多个组使用”:”号分隔
all或者'*' 匹配所有主机
hd.*或者192.168.1.* 支持正则匹配主机或者IP地址
webservers:!192.168.1.11 匹配webservers组且排除192.168.1.11主机IP
agent:&webservers 匹配agent和webservers两个组的交集
webservers:!{{excluded}}:&{{required}} 支持变量匹配方式
Ansible常用模块及API
Ansible提供了非常丰富的功能模块,包括cloud(云计算)、Commands(命令行)、Database(数据库)、Files(文件管理)、Internal(内置功能)、Monitoring(监控管理)等等。
获取webservers组中主机uptime信息
[root@hd01 ~]# ansible webservers -m command -a "uptime"

-m command是默认模块 可省略
[root@hd01 ~]# ansible-doc ping
可获得模块的帮助信息
EXAMPLES:
# Test we can logon to 'webservers' and execute python with json lib.
# ansible webservers -m ping
# Example from an Ansible Playbook
- ping:
# Induce an exception to see what happens
- ping:
data: crash
RETURN VALUES:
ping:
description: value provided with the data parameter
returned: success
type: string
sample: pong
在playbook中运行远程命令格式:
- name: reboot the service
command: /sbin/reboot -t now
Ansible 常用模块学习
shell > ansible-doc -l # 列出 Ansible 支持的模块
ansible-doc <模块名>查看模块帮助信息
>>远程命令模块( command / script / shell )
command 作为 Ansible 的默认模块,可以运行远程权限范围所有的 shell 命令,不支持管道符。
例:
ansible webservers -m command -a "free -m" # 查看 webservers 分组主机内存使用情况
[root@hd01 ~]# ansible webservers -m command -a "free -m"

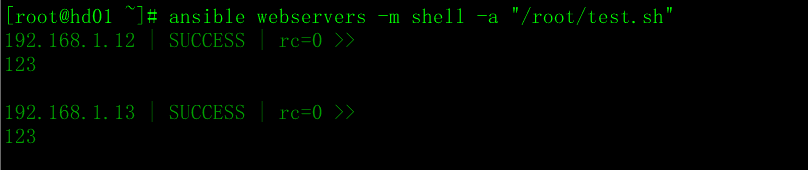
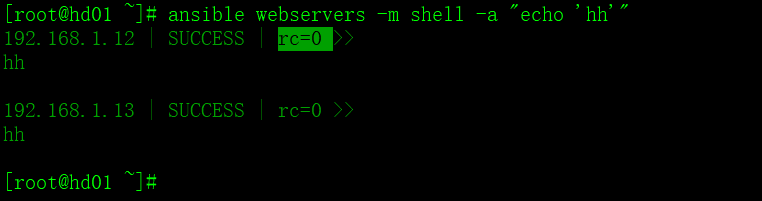
shell 的功能是执行远程主机上的 shell 脚本文件,支持管道符。
例:
[root@hd01 ~]# ansible webservers -m shell -a "/root/test.sh" # 执行远程脚本
ansible的command和shell模块的区别:
比如我要批量删除一些文件,
[root@hd01 ~]# ansible webservers -m command -a "rm -f /root/test*.sh"
因为你的命令行中包含了通配符*号,通配符必须要有在shell环境中才能被识别出,不然,它只能删除test*.sh这一个文件。
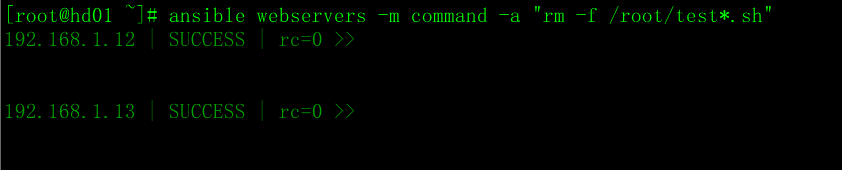
虽显示成功,但目标文件未被删除

所以你需要执行以下命令才能成功
[root@hd01 ~]# ansible webservers -m shell -a "rm -f /root/test*.sh"
执行之后

关于command模块运行的命令中无法使用管道符的说明。

script 的功能是在远程主机执行主控端存储的 shell 脚本文件,相当于 scp + shell 组合。
例:
[root@hd01 ~]# ansible webservers -m script -a "/root/test.sh" # 远程执行本地脚本
192.168.1.12 | SUCCESS => {
"changed": true,
"rc": 0,
"stderr": "Shared connection to 192.168.1.12 closed.\r\n",
"stdout": "123\r\n",
"stdout_lines": [
"123"
]
}
192.168.1.13 | SUCCESS => {
"changed": true,
"rc": 0,
"stderr": "Shared connection to 192.168.1.13 closed.\r\n",
"stdout": "123\r\n",
"stdout_lines": [
"123"
]
>>copy 模块(实现主控端向目标主机拷贝文件,类似于 scp 功能)
例:
[root@hd01 ~]# ansible webservers -m copy -a "src=/root/test.sh dest=/tmp/ owner=root group=root mode=0755 backup=yes"
# 向 webservers 组中主机拷贝 test.sh 到 /tmp 下,owner:指定属主为 root,group:指定属组为:root ,mode:权限为 0755 , backup:在覆盖之前将原文件备份,备份文件包含时间信息。有两个选项:yes|no

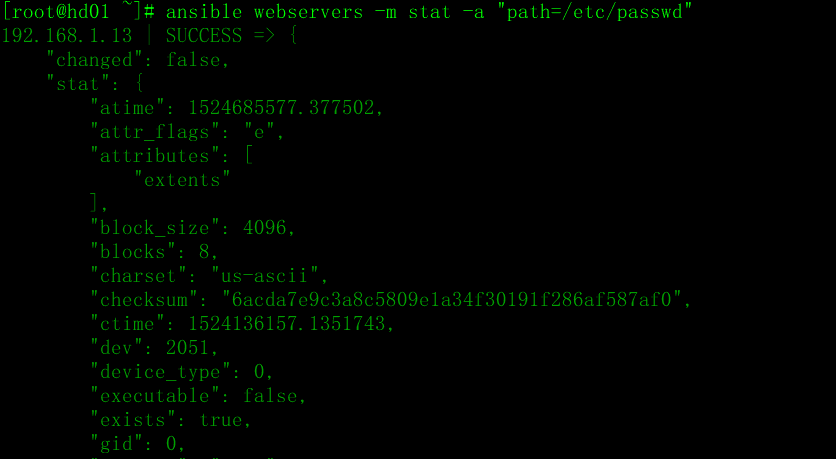
>>stat 模块(获取远程文件状态信息,atime/ctime/mtime/md5/uid/gid 等信息)
例:
[root@hd01 ~]# ansible webservers -m stat -a "path=/etc/passwd" #path指定具体路径
>>get_url 模块(实现在远程主机下载指定 URL 到本地,支持 sha256sum 文件校验)
例:
[root@hd01 ~]# ansible webservers -m get_url -a "url=http://www.baidu.com dest=/tmp/index.html mode=0440 force=yes"
#下载百度首页index.html文件
# force:
yes:默认项,如果目标主机包含该文件,但内容不同,则强制覆盖
no:则只有当目标主机的目标位置不存在该文件时,才复制
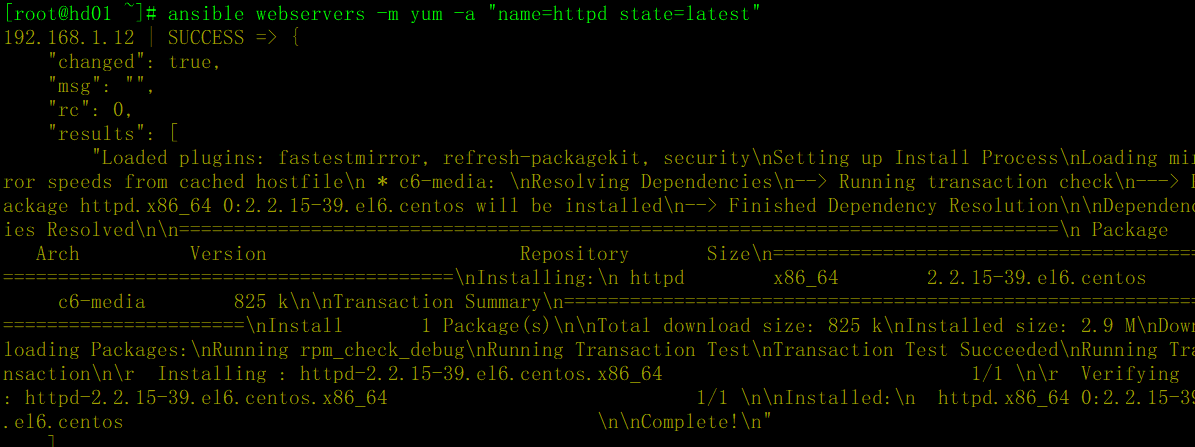
>>yum 模块(软件包管理)
#name:要进行操作的软件包的名字,也可以传递一个url或者一个本地的rpm包的路径
#state:目标状态(present,absent,latest)
- present是指安装套件,而 latest 則是指安装最新的套件,也就是会使用 yum mirror 上最新的版本。
- absent 卸载
例:yum 装httpd
[root@hd01 ~]#ansible webservers -m yum -a "name=httpd state=latest"
安装
卸载
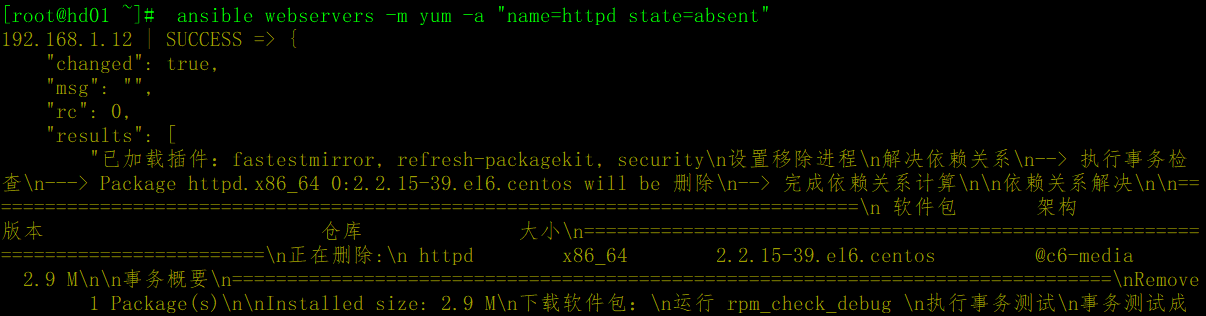
[root@hd01 ~]#ansible webservers -m yum -a "name=httpd state=absent"
>>cron 模块(远程主机 crontab 配置)
例:
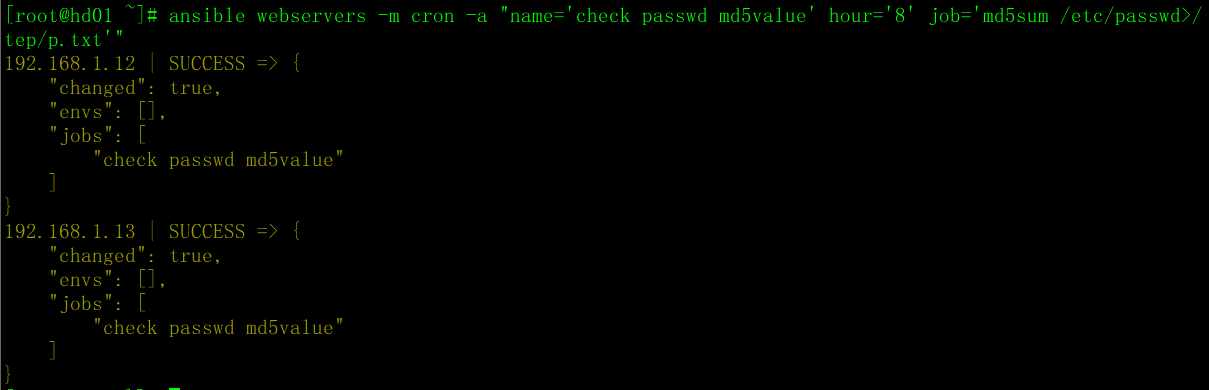
[root@hd01 ~]# ansible webservers -m cron -a "name='check passwd md5value' hour='8' job='md5sum /etc/passwd>/tep/p.txt'"
任务名字叫check passwd md5value hour=’8’ 每天的8时执行任务
效果:
[root@hd02 ~]# crontab -l
#Ansible: check passwd md5value
* 8 * * * md5sum /etc/passwd>/tep/p.txt
[root@hd02 ~]#
>>mount 模块(远程主机分区挂载)
例:
[root@hd01 ~]# ansible webservers -m mount -a 'name=/test src=/dev/sdb1 fstype=ext3 opts=ro state=present'
# fstype 指定文件系统类型为ext4
# opts 设定挂载的参数选项信息;-o ro == opts=ro
# src 要被挂载的目录设备信息 src=/dev/sdb1
>>service 模块(远程主机系统服务管理)
例:
#state的4种目标状态
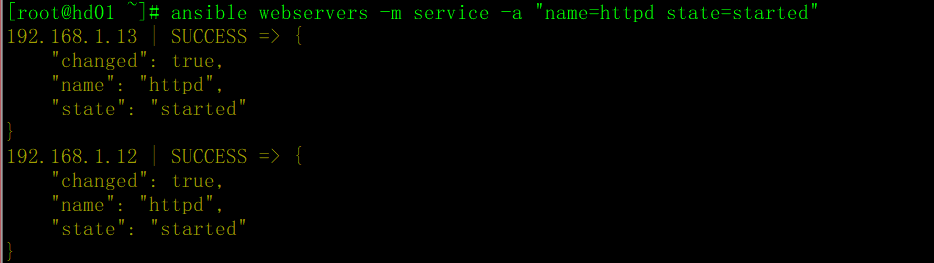
[root@hd01 ~]# ansible webservers -m service -a "name=httpd state=started" #启动httpd
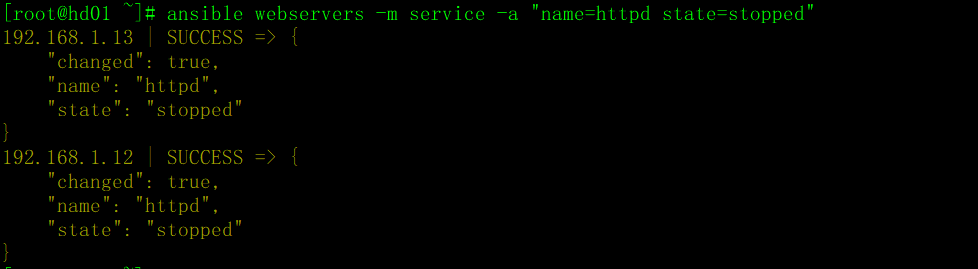
[root@hd01 ~]# ansible webservers -m service -a "name=httpd state=stopped" #关闭httpd
[root@hd01 ~]# ansible webservers -m service -a "name=httpd state=restarted" #重启httpd
[root@hd01 ~]# ansible webservers -m service -a "name=httpd state=reloaded" #重新加载httpd
>>sysctl 包管理模块
功能
远程Linux主机sysctl配置。
实例
sysctl: name=kernel.panic value=3 sysctl_file=/etc/sysctl.conf checks=before reload=yessalt '*' pkg.upgrade
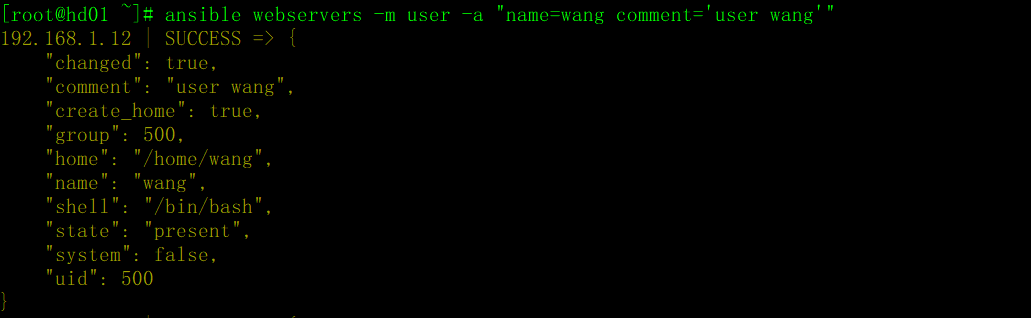
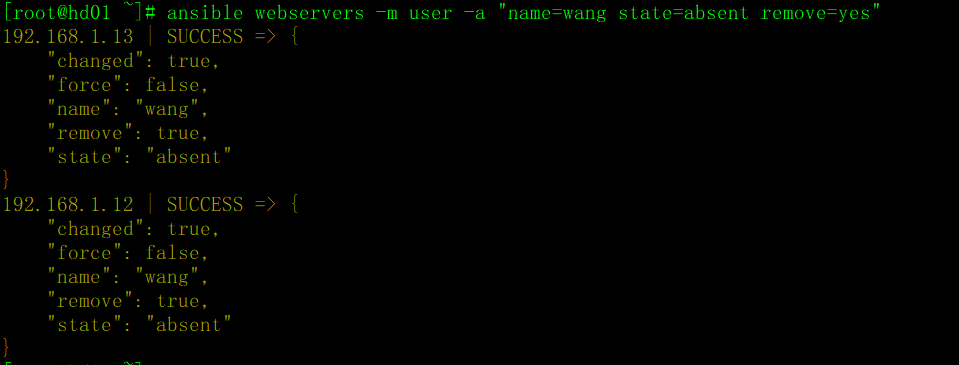
>>user 服务模块(远程主机用户管理)
例:
[root@hd01 ~]# ansible webservers -m user -a "name=wang comment='user wang'"
[root@hd01 ~]# ansible webservers -m user -a "name=wang state=absent remove=yes" #state 目标状态 删除
实现一些监控功能
查看全部主机在线情况
[root@ansible ~]# ansible all -m ping //内建的ping模块 #all表示/etc/ansible/hosts中全部主机

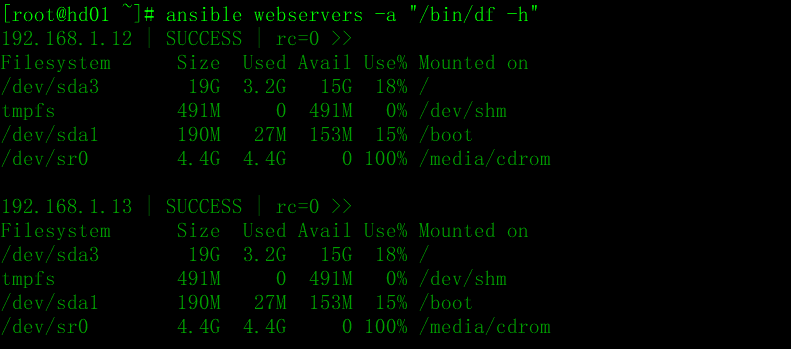
[root@hd01 ~]# ansible webservers -a "/bin/df -h" #输出挂载信息
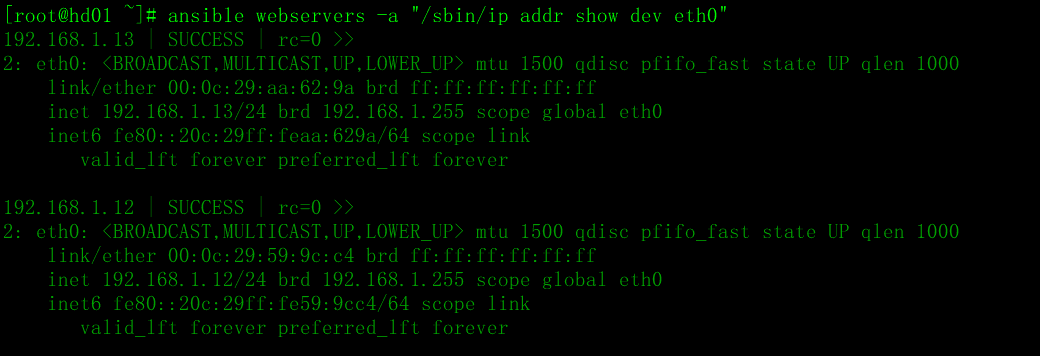
[root@hd01 ~]# ansible webservers -a "/sbin/ip addr show dev eth0" #查看webservers组中主机网卡信息
YAML语言
yaml语言是一种基于Unicode容易阅读,容易和脚本语言交互的,用来表达数据序列的编程语言。Ansible与Saltstack环境中配置文件都以YAML格式存在,YAML文件扩展名通常为.yaml或者.yml
重要组成结构:list和directory
以下通过描述YAML与Python的对应关系,了解YAML的层次及结构
块序列描述
块序列就是将描述的元素序列到python的列表中
Python:
import yaml
obj = yaml.load(
"""
- apple
- banana
- orange
"""
)
print(obj)
结果:
['apple', 'banana', 'orange']
YAML与Python块概念类似,例如:
-
- apple
- banana
- orange
-
- chuanzhi
- oldboy
- mage
对应Python结果:
[['apple', 'banana', 'orange'],[ 'chuanzhi', 'oldboy', 'mage']]
块映射描述:
块映射就是将描述的元素序列到字典的中,格式为”key: value”,以下为YAML例子:
hero:
hp: 34
sp: 8
level: 4
orc:
hp: 12
sp: 0
level: 2
对应python结果为:
{'hero': '{'hp': 34, 'sp': 8, 'level': 4}, 'orc': {'hp': 12, 'sp': 0, 'level': 2}}
YAML块序列与块映射是可以自由组合在一起的,他们之间可以相互嵌套,通过灵活的组合实现复杂的对象属性。例如:
- hero:
hp: 34
sp: 8
level: 4
- orc:
hp:
- 12
- 30
sp: 0
level: 2
对应Python结果为:
[{'hero': '{'hp': 34, 'sp': 8, 'level': 4}, {'orc': {'hp': [12,30] ,'sp': 0, 'level': 2}}]
Ansible-playbook介绍
# 使用 Ansible-playbook 可以完成一组复杂的动作,例如部署环境、搭建服务、修改配置等。playbook可以定制配置,可以按指定的操作步骤有序执行,支持同步及异步方式。官方提供很多例子,可在https://github.com/ansible/ansible-examples 找到。playbook通过YAML格式来进行描述定义,可以实现多台主机应用部署。
先创建一个存放playbook剧本的目录
[root@hd01 ~]# mkdir -p /root/ansible/playbooks
在webservers组中简单部署nginx,ntp服务,利用其批量部署过程介绍playbook。
playbook案例一 yum安装nginx,ntp
创建nginx的目录
[root@hd01 ~]# cd /root/ansible/
[root@hd01 ansible]# mkdir nginx
【/root/ansible/playbooks/nginx.yml】

---

- hosts: webservers

  vars:

    worker_processes:

    num_cpus:

    max_open_file:

    root: /application

  remote_user: root

  tasks:

  - name: ensure nginx is at the latest version

    yum: name=nginx state=latest

  - name: write the nginx config file

    template: src=/root/ansible/nginx/nginx2.conf dest=/etc/nginx/nginx.conf

    notify:

    - restart nginx

  - name: ensure nginx is running

    service: name=nginx state=started

  handlers:

    - name: restart nginx

      service: name=nginx state=restarted
以上playbook定制了一个简单的Nginx软件包管理,内容包括安装、配置模板、状态管理等。下文将上面代码拆分进行说明。
1、定义主机与用户
- hosts: webservers
vars:
worker_processes: 4
num_cpus: 4
max_open_file: 65506
root: /application
remote_user: root
#hosts 定义操作的对象是webservers组,对象可以是主机或组
#vars 定义了4个变量(配置模板用到)
#remote_user 指定远程操作主机为root,支持sudo方式运行,通过添加sudo:yes即可。
2、任务列表
tasks: #任务集
- name: ensure nginx is at the latest version #确保nginx是最新的版本
yum: name=nginx state=latest # state=latest 目标状态=最新版
- name: ensure nginx is running #name标签增强可读性,对下面的service模块(动作)描述
service: name=nginx state=started #serivce模块使nginx处于启动状态
#软件名字 #状态 参数使用key=value格式
功能是检测Nginx服务是否为启动状态,如没有则启动。
在playbook可通过template模块对本地配置模板文件进行渲染并同步到目标主机。
- name: write the nginx config file
template: src=/root/ansible/nginx/nginx2.conf dest=/etc/nginx/nginx.conf
notify:
- restart nginx
#src指定文件源地址 dest指定文件的目标地址
notify: #通知handlers重启nginx
- restart nginx
- name: ensure nginx is running #确保nginx在运行中
service: name=nginx state=started
handlers: # handlers(处理程序)做通知的动作
- name: restart nginx
service: name=nginx state=restarted
执行playbook
执行playbook,可以通过ansible-playbook命令实现,格式:
ansible-playbook playbookfile(.yml或.yaml) [参数],如启用10个并行进程执行playbook:
[root@hd01 ~]# ansible-playbook /root/ansible/playbooks/nginx.yml -f 10
其他常用参数说明:
-u remote_user: 自己指定远程指定执行playbook的系统用户
--syntax-check: 检查playbook语法
--list-hosts playbooks: 匹配到的主机列表
-T timeout:定义执行playbook的超时时间
--step: 以单任务分步骤运行,方便做每一步的确认工作
playbook角色与包含声明
当我们写一个非常大的playbook时,想要复用些功能显得有些吃力,还好ansible支持写playbook时拆分成多个文件,通过包含(include)的形式进行引用,我们可以根据多重维度进行“封装”,比如定义变量、任务、处理程序等等。
角色建立在包含文件之上,抽象之后更清晰,可复用,
ansible官方在https://github.com/ansible/ansible-examples/上提供大量资料供参考
包含文件,鼓励复用
当多个playbook涉及服用的任务列表时,可以将复用的内容剥离出,写到独立的文件当中,最后在需要的地方include进来即可,示例如下:
将处理程序(handlers)放到包含文件中是一个好的办法,比如重启apache的任务:
【handlers/handlers.yml】
---
#this might be in a file like handlers/handlers.yml #注释说明在处理这类文件
- name: restart apache
service: name=apache state=restarted
需要用时如下引用:
handlers:
- include: handlers/handlers.yml #注意路径
角色
角色可以更好地进行组织或抽象,让剧本复用性更强、功能更具模块化。
角色是Ansible定制的一种标准规范,以不同级别目录层次及文件对角色、变量、任务、处理程序等进行拆分,为后续功能扩展、可维护性打下基础。一个典型角色目录结构的示例如下:
site.yml
webservers.yml
roles/
common/ #公共类角色
files/ ## files目录:用于存放将要拷贝到远程主机的安装包等
templates/
tasks/ #tasks目录: 将要执行的所有任务,如果比较复杂,可以单独定义不同任务,
handlers/
vars/
defaults/
meta/
webservers/
files/
templates/
tasks/
handlers/
vars/
defaults/
meta/
在playbook是这样引用的:
【site.yml】
---
- hosts: webservers
roles:
- common
- webservers
角色定制以下规范,其中x为角色名。
-如roles/x/tasks/main.yml文件存在,其中列出的任务将被添加到执行队列;
-如roles/x/handlers/main.yml文件存在,其中所列的处理程序将被添加到执行队列
-如roles/x/vars/main.yml 文件存在,其中所列出的变量将被添加到执行队列
-如roles/x/meta/main.yml 文件存在,所列任何变量的依赖关系将被添加到角色的列表
-任何副本任务可以引用roles/x/files/ 无需写路径,默认相对或绝对引用
-任何脚本任务可以引用roles/x/files/ 无需写路径,默认相对或绝对引用
-任何模板任务可以引用文件中的roles/x/templates/ 无需写路径,默认相对或绝对引用
对上面nginx软件包管理的playbook(独立文件)修改成角色的形式,添加一个公共类角色common,从角色全局作用域中抽取出公共的部分,一般为系统的基础服务,比如ntp、iptables、selinux、sysctl等。本实例针对ntp服务管理。
- playbook目录结构
playbook目录包括变量定义目录group_vars、主机组定义文件hosts、全局配置文件site.yml、角色功能目录。
【/root/ansible/playbooks/nginx/】
[root@hd01 ~]# cd /root/ansible/playbooks/
[root@hd01 playbooks]# mkdir nginx
playbook目录树结构
[root@hd01 playbooks]# tree nginx/

nginx/

├── group_vars

│   ├── all

│   └── webservers

├── hosts

├── roles

│   ├── common

│   │   ├── handlers

│   │   │   └── main.yml

│   │   ├── tasks

│   │   │   └── main.yml

│   │   ├── templates

│   │   │   └── ntp.conf.j2

│   │   └── vars

│   │       └── main.yml

│   └── web

│       ├── handlers

│       │   └── main.yml

│       ├── tasks

│       │   └── main.yml

│       └── templates

│           └── nginx2.conf

└── site.yml
- 定义主机组
定义一个业务组webservers,成员为两台主机。
【nginx/hosts】
[root@hd01 nginx]# cat hosts

[webservers]

192.168.1.12

192.168.1.13
非必选配置,默认引用/etc/ansible/hosts的参数,角色中定义组与主机的文件将通过”-i file”参数调用,格式:
[root@hd01 nginx]# ansible-playbook -i hosts 剧本文件
- 定义主机或组变量
group_vars为定义组变量目录,目录当中的文件名要与组名保持一致,组变量文件定义的变量作为域只受限于该组,all代表所有主机。
[root@hd01 group_vars]# cat all

---

# Variables listed here sre applicable to all host groups

ntpserver: ntp.sjtu.edu.cn

[root@hd01 group_vars]# cat webservers

---

worker_processes:

num_cpus:

max_open_file:

root: /application
- 全局配置文件site.yml
site.yml引用了两个角色块,角色的应用范围及实现功能都不太一样
【nginx/site.yml】
[root@hd01 nginx]# cat site.yml

---

- name: apply common configuration to all nodes

  hosts: all

  roles:

    - common

- name: configure add deploy the webservers and application code

  hosts: webservers

  roles:

    - web
site.yml引用了两个角色,一个为公共类的common,另一个为web类,分别对应nginx/roles/common、nginx/roles/web目录。以此类推,可以引用更多的角色如db、hadoop等等,前提是得先定义,通常一个角色对应着一个服务。通过hosts参数来绑定角色对应的主机或组。
- 角色common的定义
角色common定义了handlers、tasks、templates、vars 4个功能类,分别存放处理程序、任务集、模板、变量的配置文件main.yml,需要注意的是,vars/main.yml中定义的变量优先级高于/nginx/group_vars/all,可从ansible-playbook的执行结果中得到验证。各功能块定义文件如下:
[root@hd01 roles]# pwd
/root/ansible/playbooks/nginx/roles
[root@hd01 roles]# mkdir common
[root@hd01 roles]# cd common/
[root@hd01 common]# mkdir {handlers,tasks,templates,vars}
【handlers/main.yml】
[root@hd01 handlers]# cat main.yml

- name: restart ntp

  service: name=ntpd state=restarted
【tasks/main.yml】
[root@hd01 tasks]# cat main.yml

- name: install ntp

  yum: name=ntp state=present

- name: configure ntp file

  template: src=ntp.conf.j2 dest=/etc/ntp.conf  #src引用模板是无需写路径,默认在上级的

  notify: restart ntp                                             templates目录查找

- name start the ntp service

  service: name=ntpd state=started

- name: test to see if selinux is running

  command: getenforce

  register: sestatus

  changed_when:false
【templates/ ntp.conf.j2】
[root@hd01 templates]# cat ntp.conf.j2

driftfile /var/lib/ntp/drift

restrict 127.0.0.1

restrict - ::

server {{ ntpserver }}        #{{ ntpserver }}将引用vars/main.yml定义的ntpserver变量

includefile /etc/ntp/crypto/pw

keys /etc/ntp/keys
【vars/main.yml】
[root@hd01 vars]# cat main.yml

---

# Variables listed here are applicable to all groups

ntpserver: 210.72.145.44
- 角色web的定义
角色web定义了handlers、tasks、templates三个功能类,基本上是前面nginx管理playbook对应定义功能段打散了之后的内容。
[root@hd01 roles]# mkdir web
[root@hd01 roles]# cd web/
[root@hd01 web]# mkdir {handlers,tasks,templates}
【handlers/main.yml】
[root@hd01 handlers]# cat main.yml

- name: restart nginx

  service: name=nginx state=restarted
【tasks/main.yml】
[root@hd01 tasks]# cat main.yml

- name: ensure nginx is at latest version

  yum: pkg=nginx state=latest

- name: write the nginx config file

  template: src=nginx2.conf dest=/etc/nginx/nginx.conf

  notify:

  - restart nginx

- name: ensure nginx is running

  service: name=nginx state=started
需要去替换的nginx配置文件
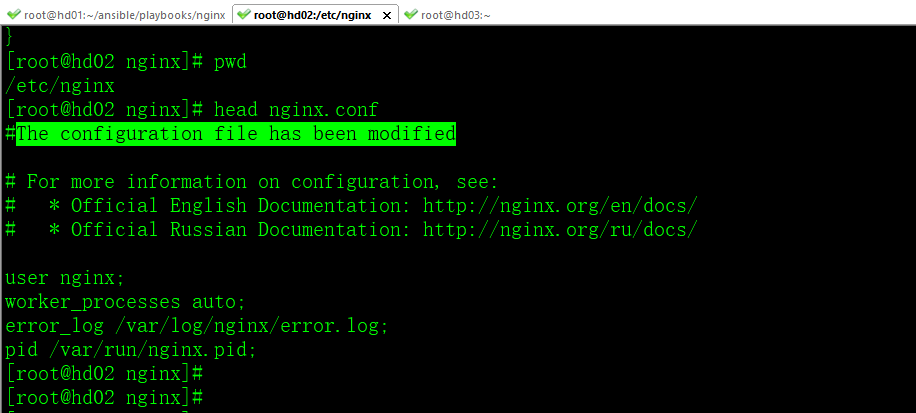
【templates/nginx2.conf】
[root@hd01 templates]# cat nginx2.conf

#The configuration file has been modified

# For more information on configuration, see:

#   * Official English Documentation: http://nginx.org/en/docs/

#   * Official Russian Documentation: http://nginx.org/ru/docs/

user nginx;

worker_processes auto;

error_log /var/log/nginx/error.log;

pid /var/run/nginx.pid;

# Load dynamic modules. See /usr/share/nginx/README.dynamic.

include /usr/share/nginx/modules/*.conf;

events {

    worker_connections  1024;

}

http {

    log_format  main  '$remote_addr - $remote_user [$time_local] "$request" '

                      '$status $body_bytes_sent "$http_referer" '

                      '"$http_user_agent" "$http_x_forwarded_for"';

    access_log  /var/log/nginx/access.log  main;

    sendfile            on;

    tcp_nopush          on;

    tcp_nodelay         on;

    keepalive_timeout   65;

    types_hash_max_size 2048;

    include             /etc/nginx/mime.types;

    default_type        application/octet-stream;

    # Load modular configuration files from the /etc/nginx/conf.d directory.

    # See http://nginx.org/en/docs/ngx_core_module.html#include

    # for more information.

    include /etc/nginx/conf.d/*.conf;

}
- 运行角色
先在webservers组上换163的源 安装扩展源
wget http://mirrors.163.com/.help/CentOS6-Base-163.repo
cp /root/CentOS6-Base-163.repo /etc/yum.repos.d/CentOS-Base.repo
yum clean all
yum -y install epel-release
yum clean all
运行之前先介绍下ntp
在Linux系统中,为了避免主机时间因为在长时间运行下所导致的时间偏差,进行时间同步(synchronize)的工作是非常必要的。Linux系统下,一般使用ntp服务来同步不同机器的时间。NTP 是网络时间协议(Network Time Protocol)的简称,干嘛用的呢?就是通过网络协议使计算机之间的时间同步化。
ntpd与ntpdate在更新时间时有什么区别。ntpd不仅仅是时间同步服务器,它还可以做客户端与标准时间服务器进行同步时间,而且是平滑同步,并非ntpdate立即同步,在生产环境中慎用ntpdate,也正如此两者不可同时运行。
[root@hd01 playbooks]# tree nginx/
nginx/
├── group_vars
│ ├── all
│ └── webservers
├── hosts
├── roles
│ ├── common
│ │ ├── handlers
│ │ │ └── main.yml
│ │ ├── tasks
│ │ │ └── main.yml
│ │ ├── templates
│ │ │ └── ntp.conf.j2
│ │ └── vars
│ │ └── main.yml
│ └── web
│ ├── handlers
│ │ └── main.yml
│ ├── tasks
│ │ └── main.yml
│ └── templates
│ └── nginx2.conf
└── site.yml
[root@hd01 nginx]# pwd
/root/ansible/playbooks/nginx
[root@hd01 nginx]# ansible-playbook -i hosts site.yml
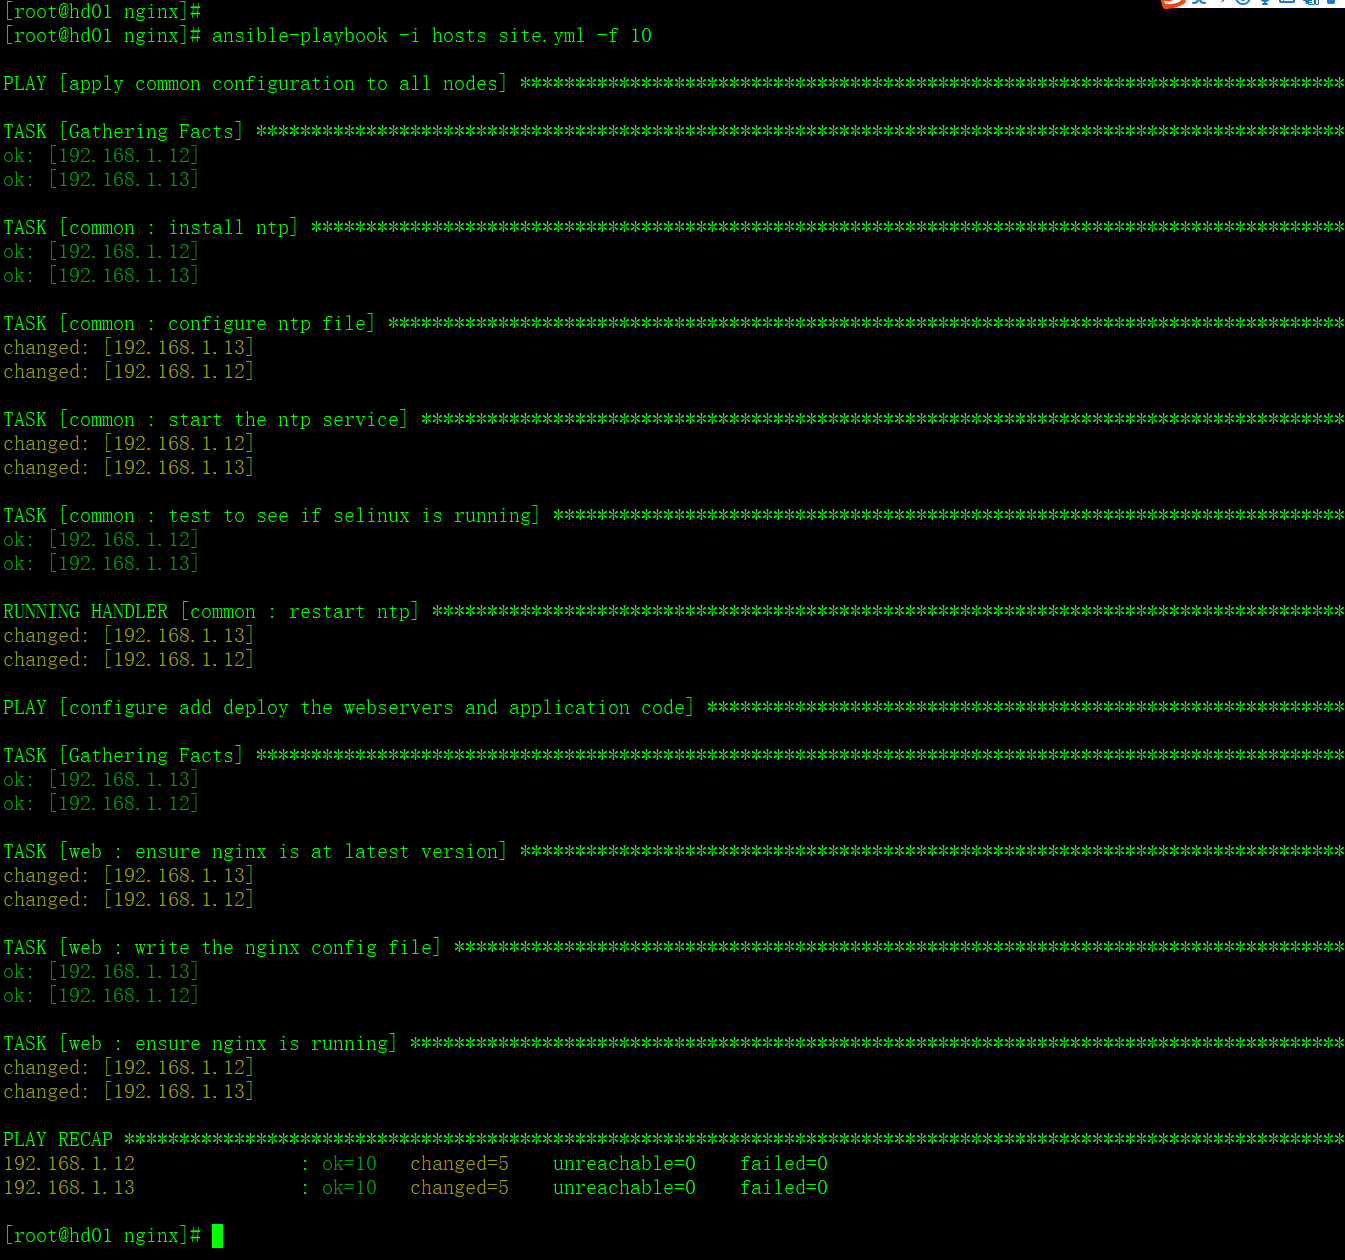
验证:
[root@hd02 ~]# rpm -qa|grep nginx
nginx-mod-http-image-filter-1.10.2-1.el6.x86_64
nginx-mod-http-geoip-1.10.2-1.el6.x86_64
nginx-filesystem-1.10.2-1.el6.noarch
nginx-mod-stream-1.10.2-1.el6.x86_64
nginx-1.10.2-1.el6.x86_64
nginx-mod-http-perl-1.10.2-1.el6.x86_64
nginx-mod-mail-1.10.2-1.el6.x86_64
nginx-all-modules-1.10.2-1.el6.noarch
nginx-mod-http-xslt-filter-1.10.2-1.el6.x86_64
[root@hd02 ~]# rpm -qa | grep ntp
fontpackages-filesystem-1.41-1.1.el6.noarch
ntpdate-4.2.6p5-12.el6.centos.2.x86_64
ntp-4.2.6p5-12.el6.centos.2.x86_64

OK
获取远程主机系统信息: Facts
Facts是一个非常有用的组件,类似于Saltstack的Grains功能,实现获取远程主机的系统信息,包括主机名、IP地址、操作系统、分区信息、硬件信息等,可以配合playbook实现更多功能需求。比如在httpd.conf模板中引用Facts的主机名信息作为ServerName参数的值。运行ansible 192.168.1.12 -m setup,返回192.168.1.12的Facts信息:
192.168.1.12 | SUCCESS => {
"ansible_facts": {
"ansible_all_ipv4_addresses": [
"192.168.1.12"
],
"ansible_all_ipv6_addresses": [
"fe80::20c:29ff:fe59:9cc4"
],
"ansible_apparmor": {
"status": "disabled"
},
"ansible_architecture": "x86_64",
"ansible_bios_date": "07/02/2015",
"ansible_bios_version": "6.00",
"ansible_cmdline": {
"KEYBOARDTYPE": "pc",
"KEYTABLE": "us",
"LANG": "zh_CN.UTF-8",
"quiet": true,
"rd_NO_DM": true,
"rd_NO_LUKS": true,
"rd_NO_LVM": true,
"rd_NO_MD": true,
"rhgb": true,
"ro": true,
"root": "UUID=17ff3012-e425-439a-9cd4-0f8da54aa4ae"
},
系统 版本 dns地址等等
"ansible_distribution": "CentOS",
"ansible_distribution_file_parsed": true,
"ansible_distribution_file_path": "/etc/redhat-release",
"ansible_distribution_file_variety": "RedHat",
"ansible_distribution_major_version": "6",
"ansible_distribution_release": "Final",
"ansible_distribution_version": "6.6",
"ansible_dns": {
"nameservers": [
"114.114.114.114"
]
},
主机名 CPU VMware虚拟平台 等等
"ansible_nodename": "hd02",
"ansible_os_family": "RedHat",
"ansible_pkg_mgr": "yum",
"ansible_processor": [
"0",
"GenuineIntel",
"Intel(R) Core(TM) i7-5500U CPU @ 2.40GHz"
],
"ansible_processor_cores": 1,
"ansible_processor_count": 1,
"ansible_processor_threads_per_core": 1,
"ansible_processor_vcpus": 1,
"ansible_product_name": "VMware Virtual Platform",
"ansible_product_serial": "VMware-56 4d d9 aa 53 2d 1d 9c-c8 1d ac 6d 1c 59 9c c4",
"ansible_product_uuid": "564DD9AA-532D-1D9C-C81D-AC6D1C599CC4",
"ansible_product_version": "None",
……
在模板文件中这样引用Facts信息
{{ ansible_devices.sda.model }}
{{ ansible_hostname }}
变量
在实际应用环境中,机器之间可能存在不同差异,比如CPU核心数等等,在ansible中定义变量可处理这些差异。
变量定义规则:由字母、数字、下划线组成,必须以字母开头。
关于前文Nginx软件包管理的剧本的变量的解释
vars:
worker_processes: 4 #4个工作进程
num_cpus: 4 #CPU数量为4
max_open_file: 65506 #最大打开文件数
root: /application #Nginx根目录
Jinja2过滤器
Jinja2是Python下一个广泛应用的模板引擎,它的设计思想类似于Django的模板引擎,并扩展了其语法和一系列强大的功能,官网地址: http://jinja.pocoo.org/
下面介绍Ansible使用Jinja2强大的过滤器(Filters)功能。
使用格式:{{ 变量名|过滤方法 }}
实现获取一个文件路径变量过滤出文件名的一个示例:
{{ path | basename }}
获取文件所处的目录名:
{{ path | dirname }}
下面为一个完整的示例,实现从” /etc/profile”中过滤出文件名”profile”并输出重定向到
/tmp/testshell文件中
[root@hd01 ~]# cat 1.yml
---
- hosts: 192.168.1.12
vars:
filename: /etc/profile
tasks:
- name: "shelll"
shell: echo {{ filename | basename }}>tmp/testshell
[root@hd02 ~]# cat /tmp/testshell
profile
更多过滤方法参考:
http://jinja.pocoo.org/docs/2.10/templates/#builtin-filters
本地Facts
通过Facts可以来获取目标主机的系统信息,当这些信息还不能满足功能需求时,可通过编写自定义的Facts模板来实现。还有一个更简单的实现办法,就是通过本地Facts实现。只需在目标设备/etc/ansible/facts.d 目录定义JSON、INI或可执行文件的JSON(数据)输出,文件扩展名要求使用 “.fact”,这些文件都可以作为Ansible本地的Facts,例如,在目标设备192.168.1.12定义三个变量,供以后playbook进行引用。
【/etc/ansible/facts.d/preferences.fact】
[root@hd02 ~]# cat /etc/ansible/facts.d/preferences.fact
[general] #常规
max_memory_size=32
max_user_processes=3730
open_files=65535
[root@hd01 ~]# ansible 192.168.1.12 -m setup -a "filter=ansible_local"
192.168.1.12 | SUCCESS => {
"ansible_facts": {
"ansible_local": {
"preferences": {
"general": {
"max_memory_size": "32",
"max_user_processes": "3730",
"open_files": "65535"
}
}
}
},
"changed": false
}
注意返回JSON(数据)的层次结构,perferences(facts文件名前缀)→general(INI的节名)→key:value(INI的键与值),最后就可以在我们的模板或playbook中通过以下方式调用:
{{ ansible_local.preferences.general.openfiles }}
注册变量
变量的另一个用途是将一条命令的运行结果保存到变量中去,供后面的playbook使用。
示例:
- hosts: webservers
tasks:
- shell: /usr/bin/foo
register: foo_result #注册foo_result变量 变量值为shell: /usr/bin/foo的运行结果;
ignore_errors: True #忽略错误
- shell: /usr/bin/bar
when: foo_result.rc == 5
#当条件语句when: foo_result.rc == 5成立时,shell: /usr/bin/bar命令才会执行
其中foo_result.rc为返回/usr/bin/foo 的resultcode(返回码)。
条件语句
有时候一个playbook的结果取决于一个变量,或者取决于上一个任务(task)的执行结果,某些情况下,一个变量的值可以依赖于其他变量的值,当然也会影响Ansible的执行过程。
有时候我们想跳过某些主机的执行步骤,比如符合特定版本的操作系统将不安装某个软件,或者磁盘爆满了将进行清理的步骤。在Ansible中很容易做到这一点,通过When子句实现,其中引用Jinja2表达式。
简单示例1:
[root@hd01 ~]# cat 1.yml
- hosts: webservers
remote_user: root
tasks:
- name: "shutdown Debian flavored systems"
command: /sbin/shutdown -t now #下面when语句执行结果为True时 关机
when: ansible_os_family == "Debian" #Jinja2表达式
#通过定义任务的Facts本地变量ansible_os_family(操作系统版本名称)是否为Debian,
结果返回BOOL(布尔型)类型,为True是将执行上一条语句,为False是该条语句不触发

skipping跳过
绿色 没执行shutdown命令
示例2:
通过判断一条命令执行结果做不同分支的二级处理
[root@hd01 ~]# cat 1.yml
……
- command: /bin/false
register: result #注册变量
ignore_errors: True #忽略错误
- command: /bin/something
when: result|failed #当变量result执行结果为失败状态时执行/bin/something
- command: /bin/something_else
when: result|success #当变量result执行结果为成功状态时执行/bin/something_else
- command: /bin/still/something_else
when: result|skipped #当变量result执行结果跳过时执行/bin/something_else
……
循环
通常一个任务会做很多事情,如创建大量用户、安装很多包、重复轮询特定的步骤,直到某种结果条件为止,Ansible提供良好支持。
例如在被控端添加 2 个用户
方式1一般做法
- name: add user testuser1
user: name=testuser1 state=present groups=wheel
- name: add user testuser2
user: name=testuser2 state=present groups=wheel
解释:
user: name=testuser1 state=present groups=wheel #用户名testuser1 目标状态为安装 加入wheel组
在重复执行执行任务量大的时候 推荐使用 迭代机制 方式2
方式2使用迭代方式
- name: add several users
user: name={{ item }} state=present groups=wheel #{{ item }} 在引用下面的变量
with_items: #通过with_items语句来指明迭代的元素列表
- testuser1
- testuser2
with_items会自动循环执行上面的语句” user: name={{ item }} state=present groups=wheel” 次数为with_items的元素个数。
还支持字典、列表形式在这里只叙述简单 常用的
批量用yum安装软件包
……
- name: yum many install package
yum: name={{ item }} state=installed
with_items:
- httpd
- nginx
……
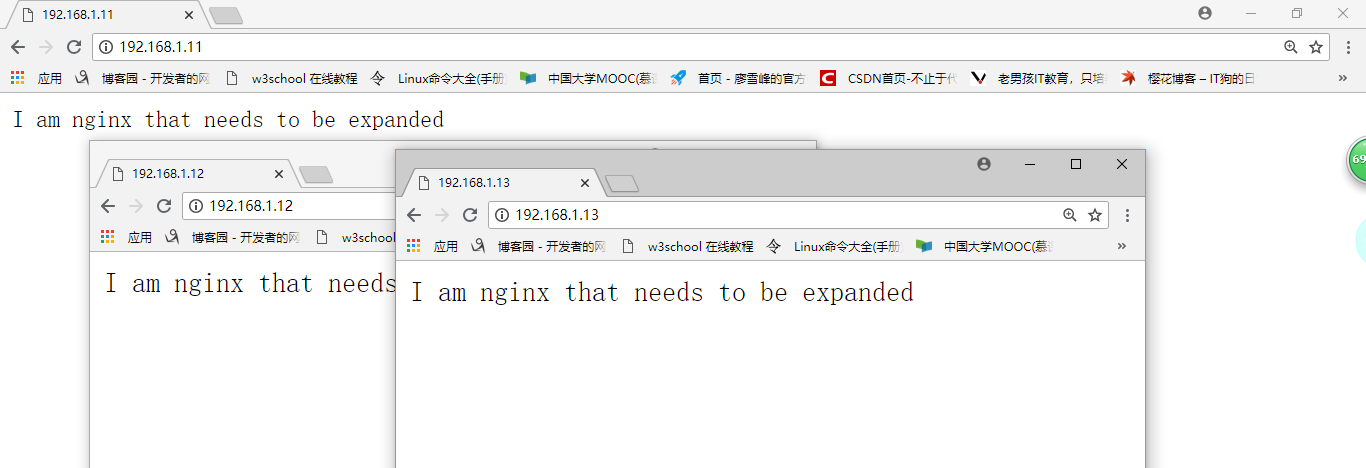
playbook案例二 源码安装nginx,定制服务,针对自定制的nginx服务
需求:假如说业务需要扩容,我需要部署新的环境,新增加了机器,我需要把我原来标准的环境搬过去,那么就可以使用ansible的playbook,把你已经存在的模板,已经编译好的nginx,包括配置文件 包括启动脚本。
思路:先在一台机器上编译安装好nginx、打包,然后再用ansible去下发。
过程:
目录树结构
[root@hd01 playbooks]# pwd
/root/ansible/playbooks
[root@hd01 playbooks]# tree nginx_install/

nginx_install/

├── install.yml

└── roles

    ├── common

    │   ├── files

    │   ├── handlers

    │   ├── meta

    │   ├── tasks

    │   │   └── main.yml

    │   ├── templates

    │   └── vars

    └── install

        ├── files

        │   └── nginx.tar.gz

        ├── handlers

        ├── meta

        ├── tasks

        │   ├── copy.yml

        │   ├── install.yml

        │   └── main.yml

        ├── templates

        │   ├── nginx

        │   └── nginx.conf

        └── vars

            └── main.yml
[root@hd01 playbooks]# mkdir nginx_install
[root@hd01 ~]# mkdir -p roles/{common,install}/{handlers,files,meta,tasks,templates,vars}
说明:roles目录下有两个角色,common为一些准备操作,install为安装nginx的操作。每个角色下面又有几个目录,handlers下面是当发生改变时要执行的操作,通常用在配置文件发生改变,重启服务。Files为安装时用到的一些文件,meta为说明信息,说明角色依赖等信息,tasks里面是核心的配置文件,templates通常存一些配置文件,启动脚本等模板文件,vars下为定义的变量。
需要事先准备好安装用到的文件,具体如下:
- 在一台机器上事先编译安装好nginx,配置好启动脚本,配置好配置文件
-安装好后我们需要把nginx目录打包,并放到/root/ansible/playbooks/nginx_install/roles/install/files下面,名字为nginx.tar.gz
- 启动脚本、配置文件都要放到/root/ansible/playbooks/nginx_install/roles/install/templates下面
- cd /root/ansible/playbooks/nginx_install/roles
- 定义common的tasks,nginx是需要一些依赖包的,如下:
[root@hd01 tasks]# pwd
/root/ansible/playbooks/nginx_install/roles/common/tasks
[root@hd01 tasks]# cat main.yml

- name: Install initializtion require software

  yum: name={{ item }} state=installed

  with_items:

    - pcre

    - zlib-devel

    - pcre-devel
先看下准备好的nginx
[root@hd01 ~]# ls /usr/local/nginx/
client_body_temp conf fastcgi_temp html logs proxy_temp sbin scgi_temp uwsgi_temp
[root@hd01 ~]# ls /etc/init.d/nginx
/etc/init.d/nginx
[root@hd01 ~]# ls /usr/local/nginx/conf/nginx.conf
/usr/local/nginx/conf/nginx.conf
[root@hd01 ~]#
[root@hd01 sbin]# ./nginx -V
nginx version: nginx/1.12.1
built by gcc 4.4.7 20120313 (Red Hat 4.4.7-18) (GCC)
configure arguments:
启动脚本内容:
如果想添加脚本用service启动,加入开机启动,必须要脚本里面包含标红的这2行
[root@hd01 ~]# cat /etc/init.d/nginx

#! /bin/bash

#chkconfig:

# description: nginx is a World Wide Web server. It is used to serve

. /etc/rc.d/init.d/functions

pidfile="/usr/local/nginx/logs/nginx.pid"

start(){

         if [ -f $pidfile ]

         then

                echo "nginx is running..."

         else

                /usr/local/nginx/sbin/nginx

                sleep

                if [ -f $pidfile ]

                then

                        action "nginx start"  /bin/true

                else

                        action "nginx start" /bin/false

                fi

         fi

}

stop(){

         if [ -f $pidfile ]

         then

             kill  `cat $pidfile`

             #rm -rf $pidfile

             action "nginx stop"  /bin/true

         else

             action "nginx have been stopped"    /bin/false

         fi

}

status(){

         if [ -f $pidfile ]

         then

            action "nginx is running"  /bin/true

         else

            action "nginx  have been stopped"         /bin/true

         fi

}

restart(){

        stop

        start

}

case "$1" in

start)

      start

      ;;

stop)

      stop

      ;;

restart)

      restart

      ;;

status)

      status

      ;;

*)

   echo "USAGE:{start|stop|restart|status}"

   exit

      ;;

esac

exit
打包nginx之前 控制端hd01关闭nginx,被控端确保环境中不存在nginx以及启动脚本。
把启动脚本,配置文件复制到对应的templates/下。
[root@hd01 ~]# cd /usr/local/
[root@hd01 local]# tar zcvf nginx.tar.gz --exclude "nginx.conf" --exclude "vhost" nginx/
[root@hd01 local]# mv nginx.tar.gz /root/ansible/playbooks/nginx_install/roles/install/files/
[root@hd01 local]#
cp nginx/conf/nginx.conf /root/ansible/playbooks/nginx_install/roles/install/templates/
[root@hd01 local]#
cp /etc/init.d/nginx /root/ansible/playbooks/nginx_install/roles/install/templates/
查看公共类角色
[root@hd01 common]# pwd
/root/ansible/playbooks/nginx_install/roles/common
[root@hd01 common]# ls
files handlers meta tasks templates vars
[root@hd01 common]# cat tasks/main.yml

- name: Install initializtion require software

  yum: name={{ item }} state=installed

  with_items:

    - pcre

    - zlib-devel

    - pcre-devel
定义变量
[root@hd01 vars]# pwd
/root/ansible/playbooks/nginx_install/roles/install/vars
[root@hd01 vars]# cat main.yml

nginx_user: www

nginx_port:

nginx_basedir: /usr/local/nginx
可以根据这个去修改 被控端的一些参数
把所有需要的文件拷贝到目标机器
[root@hd01 tasks]# pwd
/root/ansible/playbooks/nginx_install/roles/install/tasks
[root@hd01 tasks]# cat copy.yml

- name: copy nginx software

  copy: src=nginx.tar.gz dest=/tmp/nginx.tar.gz owner=root group=root

- name: uncompression nginx software

  shell: tar zxf /tmp/nginx.tar.gz -C /usr/local/

- name: copy nginx start script

  template: src=nginx dest=/etc/init.d/nginx owner=root group=root mode=

- name: copy nginx config

  template: src=nginx.conf dest={{ nginx_basedir }}/conf/ owner=root group=root mode=
为什么上面的src后没跟绝对路径呢,因为他默认就去上一级files、templates里面找了。
接下来建立用户,启动服务,删除压缩包。
[root@hd01 tasks]# pwd
/root/ansible/playbooks/nginx_install/roles/install/tasks
[root@hd01 tasks]# cat install.yml

- name: creat nginx user

  user: name={{ nginx_user }} state=present createhome=no shell=/sbin/nologin

- name: To solve the error

  shell: ln -s /lib64/libpcre.so.0.0.1 /lib64/libpcre.so.1

- name: start nginx service

  shell: /etc/init.d/nginx start

- name: add boot start nginx service

  shell: chkconfig --level  nginx on

- name: delete nginx compreeion files

  shell: rm -rf /tmp/nginx.tar.gz
上述标红的两行 根据被控端 实际情况考虑
再创建一个新的文件main.yml去调用copy.yml 和install.yml
[root@hd01 tasks]# pwd
/root/ansible/playbooks/nginx_install/roles/install/tasks
[root@hd01 tasks]# cat main.yml

- include: copy.yml

- include: install.yml
到此两个roles: common和install就定义完成了,接下来定义一个入口配置文件
[root@hd01 nginx_install]# pwd
/root/ansible/playbooks/nginx_install
[root@hd01 nginx_install]# cat install.yml

---

- hosts: webservers

  remote_user: root

  gather_facts: True

  roles:

    - common

    - install
[root@hd01 nginx_install]# pwd
/root/ansible/playbooks/nginx_install
[root@hd01 nginx_install]# ansible-playbook install.yml
控制端
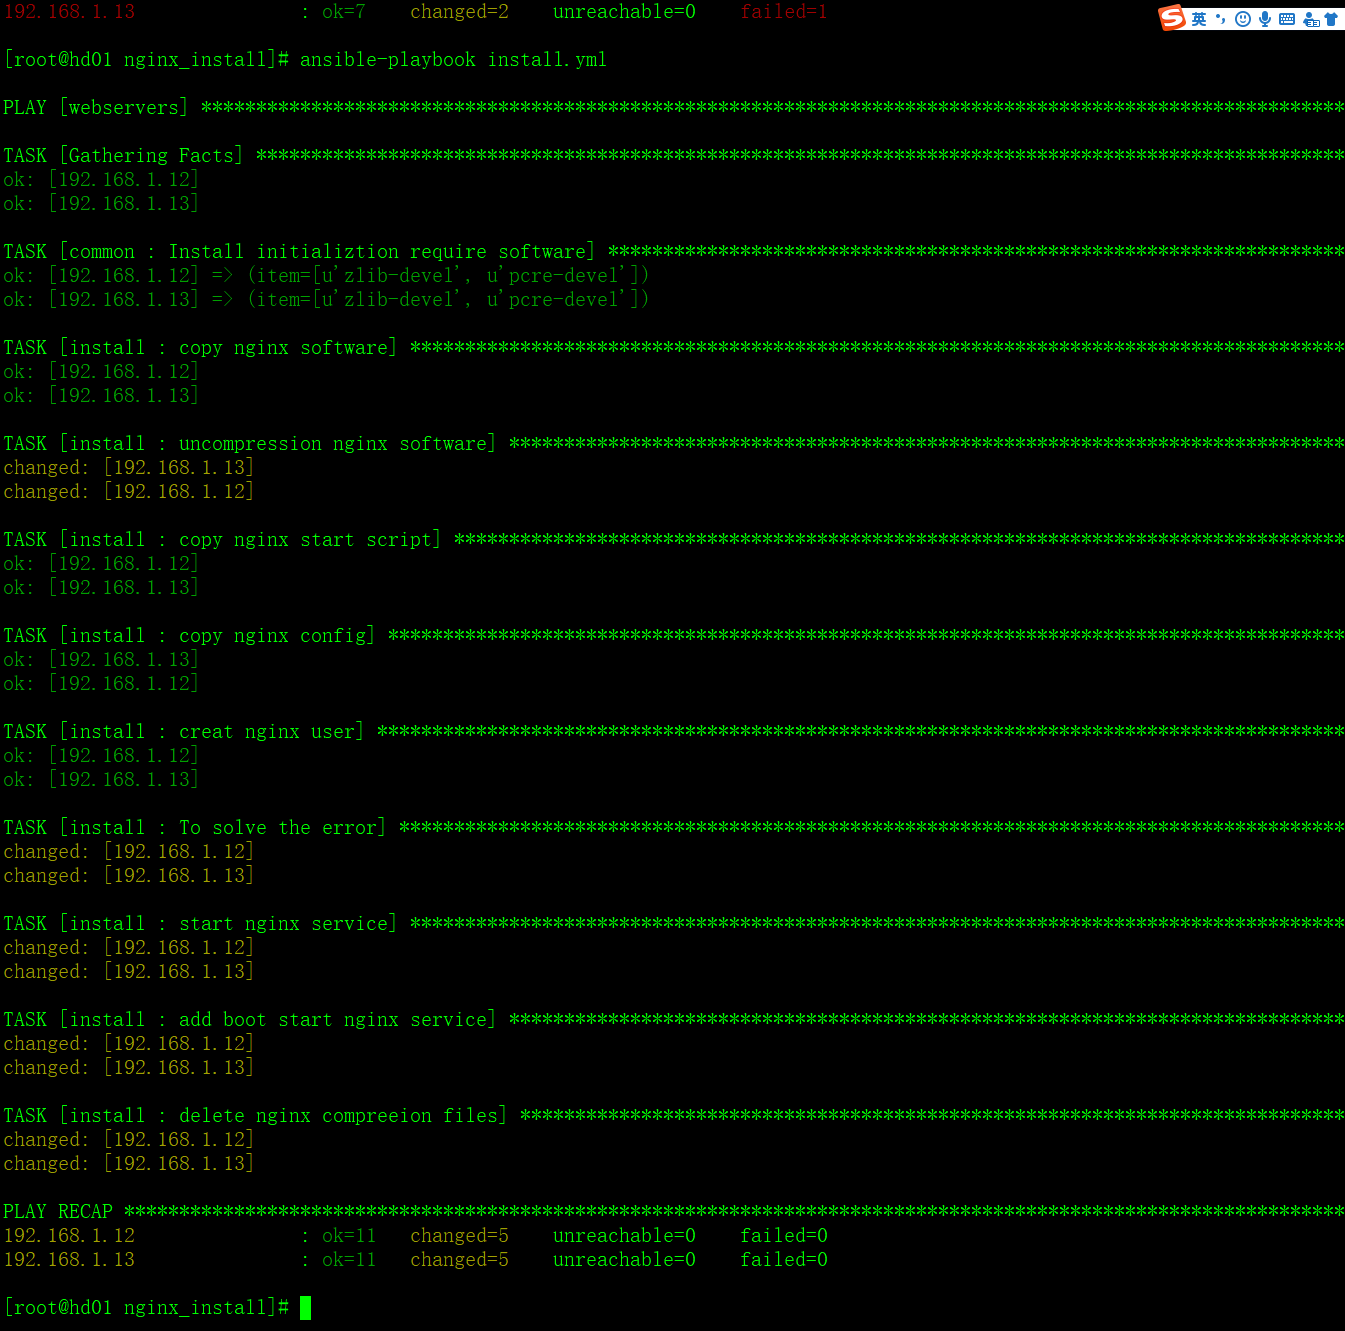
webservers端


环境不同 或一些小细节问题,或者机器有bug
ansible-playbook很可能会报错,需要耐心调试。
playbook案例3:
在agent组上yum安装并启动mysql然后检查启动情况返回结果
[root@hd01 ~]# cat install_mysql.yaml

---

- hosts: agent

  remote_user: root

  tasks:

  - name: install mysql-server

    yum: name=mysql-server state=present

  - name: start mysql-server

    service: name=mysqld state=started

  - name: check mysql service

shell: ps -ef |grep mysqld
选项解析:

hosts:agent         #指定要执行指定任务的主机,其可以是一个或多个由冒号分隔主机组

remote_user:root         #用于指定远程主机上的执行任务的用户

tasks:                       #  任务集

-name:mysql-server installing    # 给这个任务起的名字

yum:name= mysql-server          #利用yum模块,安装软件的包名为mysql-server

service: name=mysqld state=started #启动mysql

state=present                 #状态为安装

state=absent                  #状态为卸载

检查agent是否已经安装mysql-server
执行命令
[root@hd01 ~]# ansible-playbook install_mysql.yaml
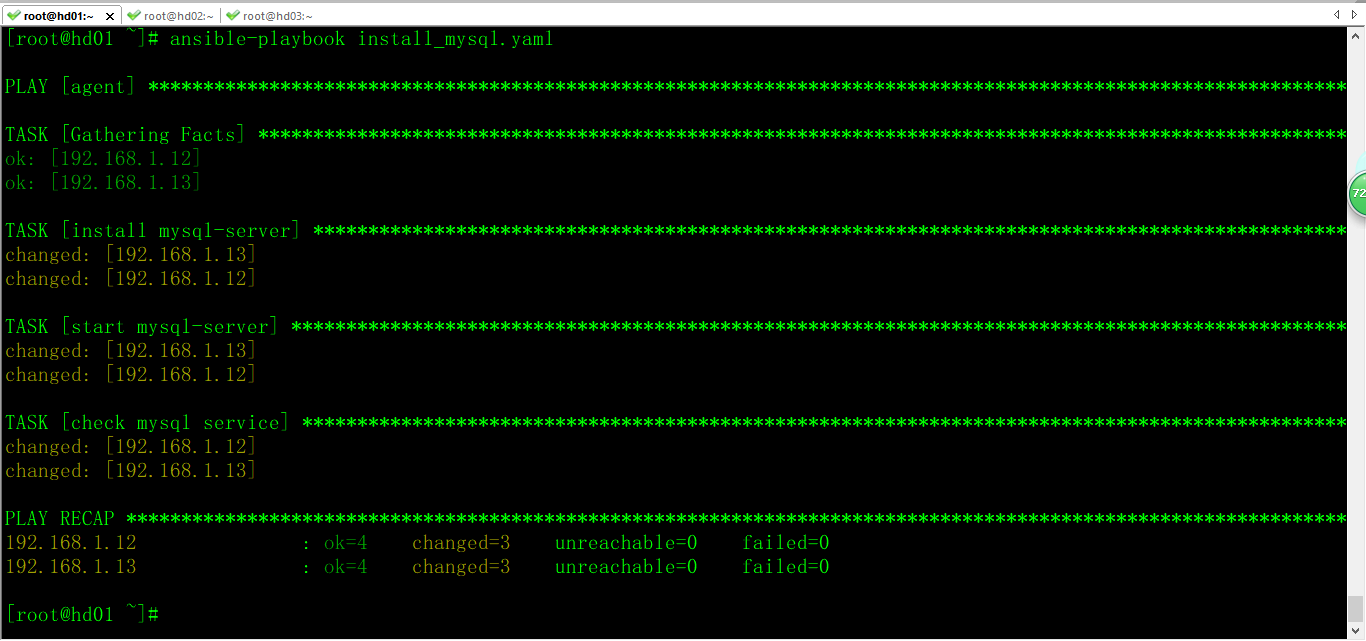

对比两张图
当返回信息为绿色时,表示ansible没有进行任何操作。
当返回信息为黄色时,表示ansible执行了操作,“当前状态”已经变成了“目标状态”。
playbook案例4:
创建crontab计划
建立cron.yaml,让agent组 每天1点来运行/root/backup.sh脚本 做重要资料的备份
[root@hd01 ~]# cat crond.yaml

---

- hosts: agent

  remote_user: root

  tasks:

  - name: cron

     cron: name='test job' hour='' job="/root/backup.sh"

看到结果,ok=2 changed=1 说明客户机上的crontab计划创建成功了!

上述基本操作案例熟悉后开始优化ansible运行
让你的ansible飞起来
一、SSH Multiplexing #SSH 多路复用
说明:
注意:OpenSSH需要5.6以上版本,低版本需要升级才能使用。
Centos7系统上安装的OpenSSH版本是较新的,可以直接支持;对于Centos6的系统,自带的OpenSSH版本较低,可以用下面这个yum源进行升级yum update openssh-clients:
加入新yum源
cat  /etc/yum.repos.d/openssh.repo

[CentALT]

name=CentALT Packages for Enterprise Linux

baseurl=http://mirror.neu.edu.cn/CentALT/6/$basearch/

enabled=

gpgcheck=
输入 yum update openssh-clients 升级OpenSSH 版本到5.6以上
1.配置
[root@hd01 ~]# tail - /etc/ssh/ssh_config   #最后三行添加

        ControlMaster   yes

        ControlPath     /tmp/%r@%h:%p

        ControlPersist  10m
解释:
ControlMaster yes #Session Multiplexing 开关
ControlPath ~/.ssh/master-%r@%h:%p #供 Session Multiplexing 使用的 Control Socket (Unix Socket) 路径
ControlPersist yes #是否开启后台 Control master 模式保持
成功开启后,无论从该客户端节点用同一用户向同一 SSH Server 节点发起多少次连接,都有且仅有一条TCP连接被建立,负责该节点到该 Server 之间的所有 SSH 包文。
[root@hd01 ~]# ssh -O check 192.168.1.12
[root@hd01 ~]# ssh -O check 192.168.1.13
成功开启后如下所示

测试:

1 开启SSH长连接
ansible是通过使用ssh和远程主机进行通信,所以对ssh有这很强的依赖。在OpenSSH 5.6以后支持Multiplexing这个特性,可以通过在ansible配置中设置以支持该特性。
如下是配置参数,设置长连接保持时间为5天;control_path指定socket文件所保存的位置。
ssh_args = -C -o ControlMaster=auto -o ControlPersist=5d
control_path = /etc/ansible/ssh-socket/%%h-%%p-%%r

通过上面配置后,ansible中控机上执行一次与远程主机的连接之后,这个连接会持久保持设定时间之久。可以通过netstat命令查看到ESTABLISHED状态的连接信息。
注意:control_path指定的目录不存在,或执行ansible命令的用户没有写权限的话是会报错的。
2 开启pipelining
默认情况下,ansible的执行流程是把生成好的本地python脚本PUT到远程服务器然后运行。如果开启了pipelining,整个流程少了一个PUT脚本到远程服务器的步骤,直接在SSH的会话中进行,可以提高整个执行效率。
# 在ansible.cfg配置文件中设置pipelining为True
pipelining = True
需要注意的是:如果开启pipelining,需要被控的远程服务器将/etc/sudoers中的”Defaults requiretty”注释掉,否则会出现类似如:you must have a tty to run sudo 的报错。
用sed做替换
[root@hd01 ~]# ansible agent -m shell -a"sed -i 's/Defaults requiretty/#Defaults requiretty/' /etc/sudoers"
如下警告解决办法

在/etc/ansible/ansible.cfg的[defaults]
添加一行
command_warnings = False
即可解决

Ansible 先介绍这么多实际上它的用法挺深奥的,需要你不断的去实践,才能够掌握,你入门之后再去深入研究包括他的理论也好 具体实践也好就会很容易了。
参考书籍 《python自动化运维》
出处:https://www.cnblogs.com/xh-blog/p/9539379.html
注:本文版权归作者和博客园共有,转载请注明出处!
自动化运维工具Ansible的更多相关文章
- 自动化运维工具Ansible详细部署 (转载)
自动化运维工具Ansible详细部署 标签:ansible 原创作品,允许转载,转载时请务必以超链接形式标明文章 原始出处 .作者信息和本声明.否则将追究法律责任.http://sofar.blog. ...
- 自动化运维工具Ansible详细部署 - 人生理想在于坚持不懈 - 51CTO技术博客
自动化运维工具Ansible详细部署 - 人生理想在于坚持不懈 - 51CTO技术博客 自动化运维工具Ansible详细部署
- CentOS7Linux中自动化运维工具Ansible的安装,以及通过模块批量管理多台主机
使用自动化运维工具Ansible集中化管理服务器 Ansible概述 Ansible是一款为类Unix系统开发的自由开源的配置和自动化工具.它用Python写成,类似于saltstack和Puppet ...
- 自动化运维工具Ansible介绍
一个由 Python 编写的强大的配置管理解决方案.尽管市面上已经有很多可供选择的配置管理解决方案,但他们各有优劣,而 ansible 的特点就在于它的简洁. 让 ansible 在主流的配置管理系统 ...
- 在CentOS7.6上安装自动化运维工具Ansible以及playbook案例实操
前言 Ansible是一款优秀的自动化IT运维工具,具有远程安装.远程部署应用.远程管理能力,支持Windows.Linux.Unix.macOS和大型机等多种操作系统. 下面就以CentOS 7.6 ...
- 自动化运维工具-Ansible基础
目录 自动化运维工具-Ansible基础 什么是Ansible 同类型软件对比 Ansible的功能及优点 Ansible的架构 Ansible的执行流程 安装Ansible ansible配置文件 ...
- 自动化运维工具-Ansible之7-roles
自动化运维工具-Ansible之7-roles 目录 自动化运维工具-Ansible之7-roles Ansible Roles基本概述 Ansible Roles目录结构 Ansible Roles ...
- 自动化运维工具-Ansible之6-Jinja2模板
自动化运维工具-Ansible之6-Jinja2模板 目录 自动化运维工具-Ansible之6-Jinja2模板 Ansible Jinja2模板概述 Ansible Jinja2模板使用 Ansib ...
- 自动化运维工具-Ansible之5-流程控制
自动化运维工具-Ansible之5-流程控制 目录 自动化运维工具-Ansible之5-流程控制 playbook条件语句 单条件 多条件 多条件运算 示例 playbook循环语句 with_ite ...
- 自动化运维工具-Ansible之3-playbook
自动化运维工具-Ansible之3-playbook 目录 自动化运维工具-Ansible之3-playbook PlayBook初识 YAML语法 PlayBook部署httpd PlayBook实 ...
随机推荐
- Pycharm2019.1.2永久激活
五月八日Pycharm更新至2019.1.2,小伙们是否也及时更新了呢?值得注意的是以前的激活方式已不适用于本次更新,这里分享最新的激活方法,有需要的同学请扫码关注我的公众号获取 重申:如果经济条件允 ...
- 关于log
如果项目上过线的话,那你一定知道Log是多么重要. 为什么说Log重要呢?因为上线项目不允许你调试,你只能通过Log来分析问题.这时打一手好Log的重要性绝不亚于写一手好代码.项目出问题时,你要能拿出 ...
- DRF教程3-类视图
Rewriting our API using class-based views 使用类视图重写root views,只需要一点点重构. from django.http import Http40 ...
- TensorFlow 模型保存/载入
我们在上线使用一个算法模型的时候,首先必须将已经训练好的模型保存下来.tensorflow保存模型的方式与sklearn不太一样,sklearn很直接,一个sklearn.externals.jobl ...
- Codeforces Round #533(Div. 2) A.Salem and Sticks
链接:https://codeforces.com/contest/1105/problem/A 题意: 给n个数,找到一个数t使i(1-n)∑|ai-t| 最小. ai-t 差距1 以内都满足 思路 ...
- python学习之调试:
编写的代码不会都能完好运行,所以需要调试,解决错误和异常,常有几种方法: 1 通过printf()来打印信息.但在发布时无法删除: 2 通过assert 条件表达式,‘提示信息’:启动解释器时通过 - ...
- Python基础之collection
collection-系列 cellection是作为字典.元组(列表与元组可互相转换)的扩充,在此需要导入cellection 一.计数器(counter) counter是对字典类型的补充,用户获 ...
- Spring Security LDAP简介
1.概述 在本快速教程中,我们将学习如何设置Spring Security LDAP. 在我们开始之前,了解一下LDAP是什么? - 它代表轻量级目录访问协议.它是一种开放的,与供应商无关的协议,用于 ...
- autofac 遇到构造函数问题
None of the constructors found with 'aaaaa' on type ' aaa' can be invoked with the available service ...
- CSS3基础知识学习
CSS3动画例子展示 http://www.17sucai.com/pins/demoshow/13948 HTML5和CSS3特效展示 http://www.html5tricks.com/30-m ...