原生js实现ajax的文件异步提交功能、图片预览功能.实例
采用html5使得选择图片改变时,预览框中图片随之改变。input文件选择框美化。原生js完成文件异步提交
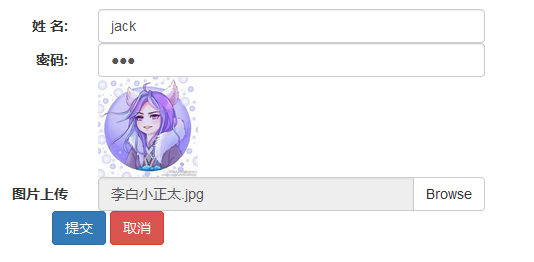
效果图:
代码如下,可直接复制并保存为html文件打开查看效果
<html>

<head>

    <title>Title</title>

    <link rel="stylesheet" href="https://maxcdn.bootstrapcdn.com/bootstrap/3.3.4/css/bootstrap.min.css">

    <script src="http://apps.bdimg.com/libs/jquery/2.1.4/jquery.min.js"></script>

    <script src="https://maxcdn.bootstrapcdn.com/bootstrap/3.3.4/js/bootstrap.min.js"></script>

    <script>

//        html5实现图片预览功能

        $(function(){

            $("#file").change(function(e){

                var file = e.target.files[0]||e.dataTransfer.files[0];

                $('#photoCover').val(document.getElementById("file").files[0].name);

                if(file){

                    var reader = new FileReader();

                    reader.onload=function(){

                        $("img").attr("src", this.result);

                    }

                    reader.readAsDataURL(file);

                }

            });

        })

        function saveUser(){

            var id = $("#id").val().trim();

            var uname = $("#uname").val().trim();

            var pwd = $("#pwd").val().trim();

            var file = document.getElementById("file").files[0];

//            原生ajax实现文件上传

            var form = new FormData();

            form.append("uname", uname); // 可以增加表单数据

            form.append("id", id);

            form.append("pwd", pwd);

            if(file){

                form.append("file", file);

            }

            var xhr = null; //得到xhr对象

            if(XMLHttpRequest){

                xhr = new XMLHttpRequest();

            }else{

                xhr = new ActiveXObject("Microsoft.XMLHTTP");

            }

            xhr.open("post", "${ctx}/user/save", true);//设置提交方式,url,异步提交

            xhr.onload = function ()

            {

                var data = xhr.responseText;    //得到返回值

               // alert(data);

                var errorMsg = JSON.parse(data);

                alert(errorMsg.msg);

                if(errorMsg.code == "0"){

                    alert("success"); //成功

                }

            }

            xhr.send(form);

        }

    </script>

</head>

<body style="overflow:scroll;overflow-y:hidden;overflow-x:hidden">

<div style="height: 20px"></div>

<div class="container">

    <div class="row">

        <div class="col-md-6 col-md-offset-3">

            <form class="form-horizontal" enctype="multipart/form-data" role="form">

                <input type="hidden" value="${user.id}" id="id"/>

                <div class="control-group">

                    <label for="uname" class="col-md-3 control-label span3">姓 名:</label>

                    <div class="col-md-9">

                        <input type="text" class="form-control span3" value="" id="uname"

                               placeholder="请输入姓名">

                    </div>

                </div>

                <div class="control-group">

                    <label for="pwd" class="col-md-3 control-label span3">密码:</label>

                    <div class="col-md-9">

                        <input type="password" class="form-control span3" value="" id="pwd"

                               placeholder="请输入密码">

                    </div>

                </div>

                <div class="control-group">

                    <label  class="col-md-3 control-label span3"></label>

                    <div class="col-md-9">

                        <img src="" width="100px" height="100px">

                    </div>

                </div>

                <div class="control-group">

                    <label for="requirement" class="col-md-3 control-label span3">图片上传</label>

                    <div class="col-md-9">

                        <div class="input-group">

                            <input id="photoCover" class="form-control" readonly type="text">

                            <label class="input-group-btn">

                            <input id="file" type="file" style="left:-9999px;position:absolute;">

                            <span class="btn btn-default">Browse</span>

                            </label>

                        </div>

                    </div>

                 </div>

                <div class="control-group">

                    <label class="col-md-2 control-label span2"></label>

                    <div class="col-md-10">

                        <button type="button" class="btn btn-small btn-primary" onclick="saveUser()">提交</button>

                        <a type="button" class="btn btn-small btn-danger">取消</a>

                    </div>

                </div>

            </form>

        </div>

    </div>

</div>

</body>

</html>
原生js实现ajax的文件异步提交功能、图片预览功能.实例的更多相关文章
- js实现form表单提交,图片预览功能
代码如下 <html> <head> <meta http-equiv="Content-Type" content="text/html; ...
- 原生JS实现图片预览功能
html代码: <div class="album-new fr"> <div class="upload-btn btn-new container& ...
- 如何通过js实现图片预览功能
一.效果预览 效果图: 二.实现代码: <!DOCTYPE html PUBLIC "-//W3C//DTD XHTML 1.0 Transitional//EN" &quo ...
- 34)django-上传文件,图片预览功能实现
目录 文件上传 1)form表单提交上传(会刷新) 2)ajax上传 3)iframe 4)图片上传预览(思路保存文件的时候,把文件保存文件的路径反馈回,客户端 ...
- dwz+jquery+fileupload+springmvc实现文件上传 及图片预览
1 前台jsp:文件的上传利用了iframe实现局部刷新功能.使用了apache的fileupload组件,用到的jar: commons-fileupload.jar,commons-io.jarD ...
- 通过file文件选择图片预览功能
<!DOCTYPE html PUBLIC "-//W3C//DTD XHTML 1.0 Transitional//EN" "http://www.w3.org/ ...
- JS实现的图片预览功能
之前的博文有实现过图片上传预览,但那种方法是预览时就将图片上传,会产生很大的浪费空间.找到了之前有人写的用JS实现的图片预览,就说用js将上传的图片显示,上传代码在之前的博文中有写到. 以下是实现的代 ...
- javascript实现文件上传之前的预览功能
1.首先要给上传文件表单控件和图片控件设置name属性 <div class="form-group"> <label fo ...
- 利用js加载本地图片预览功能
直接上代码: 经测试,除safari6包括6以下不支持,其他均可正常显示. 原因:safari6不支持filereader,同时不能使用IE滤镜导致失效. fix: 可以利用canvas,解决safa ...
随机推荐
- 微信开发(3):微信公众号发现金红包功能开发,利用第三方SDK实现(转)
最近需求是 用户兑换微信红包,需要一些验证,加密,以及证书: 工欲善其事必先利其器 感谢前辈的微信SDK 已经维护三年了,还在维护中! 官方文档走一波 文档还是一如既往的 坑人啊,写的很简单,对简单明 ...
- SpringMVC Controller介绍及常用注解
一.简介 在SpringMVC 中,控制器Controller 负责处理由DispatcherServlet 分发的请求,它把用户请求的数据经过业务处理层处理之后封装成一个Model ,然后再把该Mo ...
- Groovy中的面向对象
Groovy中的面向对象 前面说到groovy支持脚本和类,前面一节已将简单说了脚本和类之间的关系,这一节主要介绍一下groovy中类的相关知识,即面向对象相关知识. 1.类型 1.1 原始类型 gr ...
- jenkins之配置git认证方式
在使用jenkins构建时候需要从git下拉代码,需要配置认证方式 http拉取代码 配置用户名和密码认证 添加认证 设置用户名和密码 git认证 设置私钥认证
- Oracle安装部署之 6节点11g cluster环境搭建
**********************集群规划*************************************** --配置主机,共需要8台主机,其中6台做grid集群,1台作为存储服 ...
- .NET、NET Framewor以及.NET Core的关系(一)
什么是.NET?什么是.NET Framework?本文将从上往下,循序渐进的介绍一系列相关.NET的概念,先从类型系统开始讲起,我将通过跨语言操作这个例子来逐渐引入一系列.NET的相关概念,这主要包 ...
- Openstack(三)Haproxy+Keepalived双机
3.1部署keepalived 3.1.1下载keepalived源码包,并解压 # wget http://www.keepalived.org/software/keepalived-1.4.2. ...
- Java系列介绍
Java系列目录 重新编写equals()方法,hashCode()方法,以及toString(),提供自定义的相等标准,以及自描述函数 Java 7新增功能 Java应用程序中System.out. ...
- Sparsity稀疏编码(一)
稀疏编码来源于神经科学,计算机科学和机器学习领域一般一开始就从稀疏编码算法讲起,上来就是找基向量(超完备基),但是我觉得其源头也比较有意思,知道根基的情况下,拓展其应用也比较有底气.哲学.神经科学.计 ...
- (9)SpriteFrameCache和TextureCache
简介 SpriteFrameCache 主要服务于多张碎图合并出来的纹理图片.这种纹理在一张大图中包含了多张小图,直接通过TextureCache引用会有诸多不便,因而衍生出来精灵框帧的处理方式,即把 ...