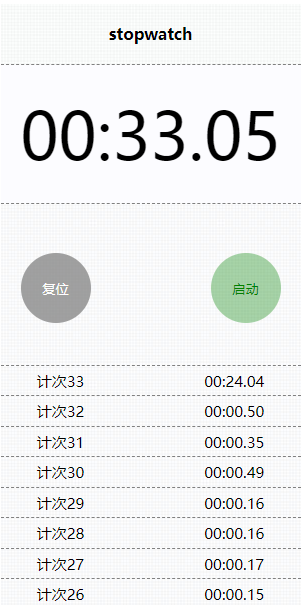
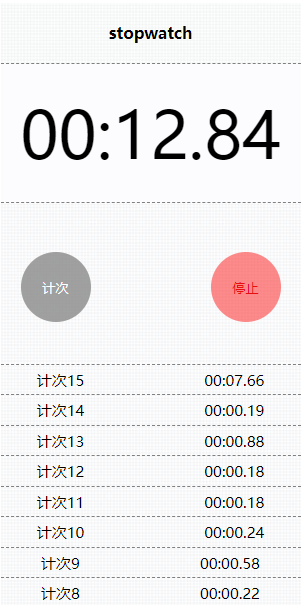
IOS系统定时APP
将页面分为时间显示部分,控制部分,显示计次共三个部分。实现的功能有:启动定时器,计次,停止,复位。
计算:当前显示的时间 = 当前计次的累积时间 + 已经结束的所有计次的累积时间和;
关于 new Date().getTime() 实现,google准确,Firefox 误差很大;
涉及到的时间计算,都是用 setInterval实现,没有用 new Date();
尝试过setInterval 与 new Date两者混用,一是误差很大,二是逻辑不够强;
经测试在google浏览器和IOS原组件的误差很小(毫秒级别),准确度可靠;Firefox 误差很大;
  1class Stopwatch {
  2    constructor(id) {
  3        this.container = document.getElementById(id);
  4        this.display = this.container.querySelector('.display');   // 时间显示
  5        this.lap = this.container.querySelector('.lap');           // 计次显示
  6
  7        // 计数相关变量
  8        this._stopwathchTimer = null;                              // 计时器
  9        this._count = 0;                                           // 计次的次数
 10        this._timeAccumulation = 0;                                // 累积时长
 11        this._timeAccumulationContainer = [];                      // 存放已经结束的计次的容器
 12        this._s = 0;                                               // 已经结束的所有计次累积时间
 13        this._stopwatchHandlers = [];                              // 用于tartTimer里回调的函数
 14
 15        // 控制流
 16        this.ctrl = this.container.querySelector('.ctrl');         // 控制部分
 17        if(this.ctrl) {
 18            let btns = this.ctrl.querySelectorAll('button');
 19            let startStopBtn = btns[1];                            // 开始和暂停按钮
 20            let lapResetBtn = btns[0];                             // 计次和复位按钮
 21
 22            // 样式更改
 23            let changeStyle = {
 24                clickStart : function(){
 25                    lapResetBtn.disabled = '';                     // 计次按钮生效
 26                    startStopBtn.innerHTML = '停止';
 27                    startStopBtn.className = 'stop';
 28                    lapResetBtn.innerHTML = '计次';
 29                    lapResetBtn.className = 'active';
 30                },
 31                clickStop : function() {
 32                    startStopBtn.innerHTML = '启动';
 33                    startStopBtn.className = 'start';
 34                    lapResetBtn.innerHTML = '复位';
 35                },
 36                clickReset : function() {
 37                    lapResetBtn.disabled = 'disabled';             // 计次按钮失效
 38                    lapResetBtn.innerHTML = '计次';
 39                    lapResetBtn.className = '';
 40                    this.display.innerHTML = '00:00.00';
 41                    this.lap.innerHTML = '';
 42                }
 43            };
 44
 45            // 事件处理函数
 46            let eventHandler = {
 47                start: function() {
 48                    lapResetBtn.removeEventListener('click', resetBind);            // 移除复位事件;选择启动,就移除复位
 49                    console.log('启动');
 50                    changeStyle.clickStart.call(this);                              // 改变按钮显示样式
 51                    if(this._count === 0) {                                         // 如果首次启动计时器,增加一条计次
 52                        this._count = 1;
 53                        // console.log('开始事件中的计数次', this._count)
 54                        this.insertLap();                                           // 插入计次
 55                    }
 56                    this.startTimer();
 57                    startStopBtn.removeEventListener ('click', startBind);          // 移除启动计时事件
 58                    lapResetBtn.addEventListener('click', lapfBind)                 // 添加计次事件
 59                    startStopBtn.addEventListener('click', stopBind)                // 添加停止计时事件
 60                },
 61
 62                stop: function() {
 63                    console.log('停止');
 64                    changeStyle.clickStop.call(this);                               // 改变按钮显示样式
 65                    this.stopTimer();                                               // 停止计时;
 66                    startStopBtn.removeEventListener('click', stopBind)             // 移除停止计时事件
 67                    startStopBtn.addEventListener('click', startBind);              // 重新添加启动计时事件
 68                    lapResetBtn.removeEventListener('click', lapfBind);             // 移除计次事件;
 69                    lapResetBtn.addEventListener('click', resetBind);               // 添加复位事件
 70                },
 71
 72                lapf: function() {
 73                    this.insertLap();                                               // 插入新计次
 74                    this._timeAccumulationContainer.push(this._timeAccumulation);   // 将当前结束的计次推入容器,保存起来
 75                    this._s += this._timeAccumulationContainer[this._count - 1];    // 累加已经结束的所有计次
 76                    console.log('计次', '当前累积的计次时间', this._s);
 77                    this._timeAccumulation = 0;                                     // 计时器清零,这条放在求和后面!
 78                    this._count++;
 79                },
 80
 81                reset: function() {                                                 // 复位事件
 82                    console.log('复位');
 83                    changeStyle.clickReset.call(this);                              // 改变按钮显示
 84                    // 重置
 85                    this._stopwathchTimer = null;
 86                    this._count = 0;
 87                    this._timeAccumulation = 0;
 88                    this._timeAccumulationContainer = [];
 89                    this._s = 0;
 90                    lapResetBtn.removeEventListener('click', resetBind);            // 复位是所有事件中最后绑定的用完应该删除
 91                }
 92            }
 93
 94            // 事件绑定
 95            // 事件函数副本
 96            let startBind = eventHandler.start.bind(this),                          // bind 每次会弄出新函数...
 97                stopBind = eventHandler.stop.bind(this),
 98                lapfBind = eventHandler.lapf.bind(this),
 99                resetBind = eventHandler.reset.bind(this);
100            startStopBtn.addEventListener('click', startBind);
101        }
102
103        // 用于监听startTimer
104        this.addStopwatchListener(_timeAccumulation => {
105            this.displayTotalTime(_timeAccumulation);
106        })
107        this.addStopwatchListener(_timeAccumulation => {
108            this.displayLapTime(_timeAccumulation);
109        })
110    }
111
112    // API
113    // 计时器
114    startTimer() {
115        this.stopTimer();
116        this._stopwathchTimer = setInterval(() => {
117            this._timeAccumulation++;                          // 注意时间累积量 _timeAccumulation 是厘秒级别的(因为界面显示的是两位)
118            this._stopwatchHandlers.forEach(handler => {       // 处理回调函数
119                handler(this._timeAccumulation);
120            })
121        }, 1000 / 100)
122    }
123
124    stopTimer() {
125        clearInterval(this._stopwathchTimer );
126    }
127
128    // 总时间显示(从启动到当前时刻的累积时间)
129    displayTotalTime(_timeAccumulation) {
130        let totaltimeAccumulation = this._timeAccumulation * 10  + this._s * 10;     // _s为_timeAccumulation累积时间队列之和;
131        this.display.innerHTML = `${this.milSecond_to_time(totaltimeAccumulation)}`;
132    }
133    // 计次条目显示
134    displayLapTime(_timeAccumulation) {
135        let li = this.lap.querySelector('li'),
136            spans = li.querySelectorAll('span'),
137            task = spans[0], time = spans[1];
138
139        task.innerHTML = `计次${this._count}`;
140        time.innerHTML = `${this.milSecond_to_time(this._timeAccumulation * 10)}`;
141    }
142
143    // 插入一个计次
144    insertLap() {
145        let t = this.templateLap(); // 显示计次
146        this.lap.insertAdjacentHTML('afterBegin', t);
147    }
148    // 计次内容模板
149    templateLap() {
150        let t = `
151        <li><span></span><span></span></li>
152        `
153        return t;
154    }
155
156    // 将时间累积量转化成时间
157    milSecond_to_time(t) {                                         // t 时间间隔,单位 ms
158        let time,
159            minute = this.addZero(Math.floor(t / 60000) % 60),     // 分
160            second = this.addZero(Math.floor(t / 1000) % 60),      // 秒
161            centisecond = this.addZero(Math.floor(t / 10) % 100) ; // 厘秒(百分之一秒)
162        time = `${minute}:${second}.${centisecond}`;
163        return time;
164    }
165    // 修饰器;加零
166    addZero(t) {
167        t = t < 10 ? '0' + t : t;
168        return t;
169    }
170    // 添加监听startTimer的事件函数
171    addStopwatchListener(handler) {
172        this._stopwatchHandlers.push(handler);
173    }
174}
175
176// 调用
177const stopwatch = new Stopwatch('stopwatch');
一个200行的小demo,收获不少
从基于实现组件功能开始,到使用class封装组件;
最小化访问DOM元素;
相关变量放在一起,将样式更改函数放在一块,将事件处理函数放在一块;
绑定this(非箭头函数this丢失),bind的时候每次都会重新生成新函数(将函数bind后统一赋给一个变量,这样增加事件和删除事件所用的函数就是同一个了);
增加事件监听器,统一管理需要调用函数变量的系列相关事件;
将函数抽象到最纯(函数就是函数不与组件的元素相互耦合),使用Decorate(装饰器);
由于在同一个按钮上绑定了不同的事件,因此事件绑定与移除的顺序很重要;
https://rencoo.github.io/appDemo/iosStopwatch/index.html另外一篇文章, 用状态模式重构了这个小demo https://www.cnblogs.com/rencoo/p/10115341.html
IOS系统定时APP的更多相关文章
- 超强教程:如何搭建一个 iOS 系统的视频直播 App?
现今,直播市场热火朝天,不少人喜欢在手机端安装各类直播 App,便于随时随地观看直播或者自己当主播.作为开发者来说,搭建一个稳定性强.延迟率低.可用性强的直播平台,需要考虑到部署视频源.搭建聊天室.优 ...
- iOS系统app崩溃日志手动符号化
iOS系统app崩溃日志手动符号化步骤: 1.在桌面建立一个crash文件夹,将symbolicatecrash工具..crash文件..dSYM文件放到该文件夹中 a.如何查询symbolicate ...
- 苹果iOS系统下检查第三方APP是否安装及跳转启动
在iOS系统,使用Url Scheme框架在APP间互相跳转和传递数据,本文只介绍如果检测和跳转. Url Scheme框架 如果你想知道ios设备中是否安装QQ这个软件,我们可以通过一个简单方法判断 ...
- iOS开发之App间账号共享与SDK封装
上篇博客<iOS逆向工程之KeyChain与Snoop-it>中已经提到了,App间的数据共享可以使用KeyChian来实现.本篇博客就实战一下呢.开门见山,本篇博客会封装一个登录用的SD ...
- 有关iOS系统中调用相机设备实现二维码扫描功能的注意点(3/3)
今天我们接着聊聊iOS系统实现二维码扫描的其他注意点. 大家还记得前面我们用到的输出数据的类对象吗?AVCaptureMetadataOutput,就是它!如果我们需要实现目前主流APP扫描二维码的功 ...
- iOS 系统架构
https://developer.apple.com/library/ios/documentation/Miscellaneous/Conceptual/iPhoneOSTechOverview/ ...
- 在MacOS和iOS系统中使用OpenCV
在MacOS和iOS系统中使用OpenCV 前言 OpenCV 是一个开源的跨平台计算机视觉库,实现了图像处理和计算机视觉方面的很多通用算法. 最近试着在 MacOS 和 iOS 上使用 OpenCV ...
- 深入了解ios系统机制
1.什么叫ios? ios一般指ios(Apple公司的移动操作系统) . 苹果iOS是由苹果公司开发的移动操作系统.苹果公司最早于2007年1月9日的Macworld大会 ...
- iOS系统提供开发环境下命令行编译工具:xcodebuild
iOS系统提供开发环境下命令行编译工具:xcodebuild[3] xcodebuild 在介绍xcodebuild之前,需要先弄清楚一些在XCode环境下的一些概念[4]: Workspace:简单 ...
随机推荐
- PHP Swoole-Demo TCP服务端简单实现
tcp 服务端简单demo与client . <?php /** * author : rookiejin <mrjnamei@gmail.com> * createTime : 2 ...
- 50行Python代码实现视频中物体颜色识别和跟踪(必须以红色为例)
目前计算机视觉(CV)与自然语言处理(NLP)及语音识别并列为人工智能三大热点方向,而计算机视觉中的对象检测(objectdetection)应用非常广泛,比如自动驾驶.视频监控.工业质检.医疗诊断等 ...
- Linq三表连接查询加分组
1.Linq查询 2.数据库事例: 3.效果图:
- 结合Spring Security进行web应用会话安全管理
在本文中,将为大家说明如何结合Spring Security 和Spring Session管理web应用的会话. 一.Spring Security创建使用session的方法 Spring Sec ...
- 领扣(LeetCode)二维区域和检索 个人题解
给定一个二维矩阵,计算其子矩形范围内元素的总和,该子矩阵的左上角为 (row1, col1) ,右下角为 (row2, col2). 上图子矩阵左上角 (row1, col1) = (2, 1) ,右 ...
- ubuntukylin16.04LTS(乌班图麒麟版长期支持版,并非银河麒麟)安装体验
最近,国产银河麒麟版在政府部门推广使用.我有幸接触了,感觉还是不错的.这次政府软件正版化整改中,也列入了windows和银河麒麟的选项.我想试安装一下,可是没找到.就近找了它的类似系统ubuntuky ...
- Reverse proxy
Nginx 反向代理配置: upstream dynamic { zone upstream_dynamic 64k; least_conn; ##适用于long connect,即请求处理时间长 # ...
- Redis面试题详解:哨兵+复制+事务+集群+持久化等
Redis主要有哪些功能? 1.哨兵(Sentinel)和复制(Replication) Redis服务器毫无征兆的罢工是个麻烦事,如何保证备份的机器是原始服务器的完整备份呢?这时候就需要哨兵和复制. ...
- 微信公众号配置及微信jsAPI支付
公众号配置 一.基本配置 首先登陆微信公众平台,在开发--->配置--->公众号开发信息,获取到AppId,开发者秘钥是后台需要的,给到后台,IP白名单配置就是你服务器的IP地址写到里面就 ...
- 【论文阅读】Where Is My Mirror?
Where Is My Mirror?(ICCV2019收录) 作者: 论文链接: https://arxiv.org/pdf/1908.09101.pdf 1. 研究背景 目前存在的计算机视觉任务 ...