SpringMVC的简单示例
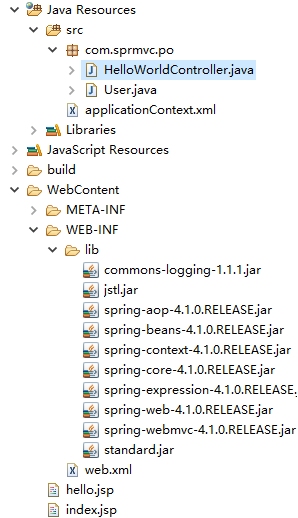
首先导入所需的jar包,项目目录结构如下:
之后需要配置一下web.xml文件,内容如下:
 <?xml version="1.0" encoding="UTF-8"?>

 <web-app xmlns:xsi="http://www.w3.org/2001/XMLSchema-instance" xmlns="http://java.sun.com/xml/ns/javaee" xsi:schemaLocation="http://java.sun.com/xml/ns/javaee http://java.sun.com/xml/ns/javaee/web-app_2_5.xsd" version="2.5">

   <servlet>

     <servlet-name>springDispatcherServlet</servlet-name>

     <servlet-class>org.springframework.web.servlet.DispatcherServlet</servlet-class>

     <init-param>

       <param-name>contextConfigLocation</param-name>

       <param-value>classpath:applicationContext.xml</param-value>

     </init-param>

     <load-on-startup>1</load-on-startup>

   </servlet>

   <servlet-mapping>

     <servlet-name>springDispatcherServlet</servlet-name>

     <url-pattern>/</url-pattern>

   </servlet-mapping>

 </web-app>
然后配置applicationContext.xml:
 <beans xmlns="http://www.springframework.org/schema/beans"

     xmlns:context="http://www.springframework.org/schema/context"

     xmlns:xsi="http://www.w3.org/2001/XMLSchema-instance"

     xsi:schemaLocation="

         http://www.springframework.org/schema/beans

         http://www.springframework.org/schema/beans/spring-beans-3.0.xsd

         http://www.springframework.org/schema/context

         http://www.springframework.org/schema/context/spring-context-3.0.xsd">

     <!-- 配置自动扫描的包 -->

     <context:component-scan base-package="com.sprmvc.po"></context:component-scan>

     <!-- 配置视图解析器 将HelloWorldController中的返回值解析为实际的物理视图 -->

     <bean

         class="org.springframework.web.servlet.view.InternalResourceViewResolver">

         <!-- prefix为前缀,suffix为后缀 -->

         <property name="prefix" value="/"></property>

         <property name="suffix" value=".jsp"></property>

     </bean>

 </beans>
下面开始建立实体类User.java:
 package com.sprmvc.po;

 public class User {

     private String userName;

     private String password;

     public String getUserName() {

         return userName;

     }

     public void setUserName(String userName) {

         this.userName = userName;

     }

     public String getPassword() {

         return password;

     }

     public void setPassword(String password) {

         this.password = password;

     }

 }
然后是控制层代码:
 package com.sprmvc.po;

 import javax.servlet.http.HttpServletRequest;

 import org.springframework.stereotype.Controller;

 import org.springframework.web.bind.annotation.RequestMapping;

 import org.springframework.web.bind.annotation.RequestMethod;

 @Controller

 public class HelloWorldController {

     @RequestMapping(value="/hello",method = RequestMethod.GET)

     public String printHelloWorld(HttpServletRequest request,User user) {

         request.setAttribute("userName", user.getUserName());

         request.setAttribute("password", user.getPassword());

         return "hello";

     }

 }
这里的value即访问路径,而return的"hello"通过applicationContext.xml中配置的视图解析器会返回到hello.jsp中
接下来我们建立两个.jsp页面,首先是index.jsp:
 <body>

     <form method="get" action="hello">

     用户名:<input type="text" name="userName">

     密码:<input type="password" name="password"><br>

         <input type="submit" value="提交">

     </form>

   </body>
这里的method和action分别与控制层中的method和value的值相对应,即HelloWorldController.java中的第11行。
然后是hello.jsp:
 <body>

 <h1>操作成功了</h1>

 您的用户名为:${userName}<br>

 您的密码为:${password }

 </body>
这样只需要将项目加载到tomcat下就可以进行访问了,赶快试试把。
SpringMVC的简单示例的更多相关文章
- SpringMVC + MyBatis简单示例
该项目基于Maven开发,该项目中包含了MyBatis自动创建表的功能,具体实现查阅MyBatis---自动创建表 源码下载 配置 maven支持pom.xml <project xmlns=& ...
- SpringMVC之简单的增删改查示例(SSM整合)
本篇文章主要介绍了SpringMVC之简单的增删改查示例(SSM整合),这个例子是基于SpringMVC+Spring+Mybatis实现的.有兴趣的可以了解一下. 虽然已经在做关于SpringMVC ...
- springMVC源码分析--异常处理机制HandlerExceptionResolver简单示例(一)
springMVC对Controller执行过程中出现的异常提供了统一的处理机制,其实这种处理机制也简单,只要抛出的异常在DispatcherServlet中都会进行捕获,这样就可以统一的对异常进行处 ...
- springmvc 项目完整示例01 需求与数据库表设计 简单的springmvc应用实例 web项目
一个简单的用户登录系统 用户有账号密码,登录ip,登录时间 打开登录页面,输入用户名密码 登录日志,可以记录登陆的时间,登陆的ip 成功登陆了的话,就更新用户的最后登入时间和ip,同时记录一条登录记录 ...
- spring-servlet.xml简单示例
spring-servlet.xml简单示例 某个项目中的spring-servlet.xml 记下来以后研究用 <!-- springMVC简单配置 --> <?xml versi ...
- springmvc 项目完整示例06 日志–log4j 参数详细解析 log4j如何配置
Log4j由三个重要的组件构成: 日志信息的优先级 日志信息的输出目的地 日志信息的输出格式 日志信息的优先级从高到低有ERROR.WARN. INFO.DEBUG,分别用来指定这条日志信息的重要程度 ...
- springmvc 项目完整示例02 项目创建-eclipse创建动态web项目 配置文件 junit单元测试
包结构 所需要的jar包直接拷贝到lib目录下 然后选定 build path 之后开始写项目代码 配置文件 ApplicationContext.xml <?xml version=" ...
- springmvc 项目完整示例03 小结
利用spring 创建一个web项目 大致原理 利用spring的ioc 原理,例子中也就是体现在了配置文件中 设置了自动扫描注解 配置了数据库信息等 一般一个项目,主要有domain,dao,ser ...
- springmvc 项目完整示例04 整合mybatis mybatis所需要的jar包 mybatis配置文件 sql语句 mybatis应用
百度百科: MyBatis 本是apache的一个开源项目iBatis, 2010年这个项目由apache software foundation 迁移到了google code,并且改名为MyBat ...
随机推荐
- Tkinter教程之Event篇(1)'
本文转载自:http://blog.csdn.net/jcodeer/article/details/1823544 ''Tkinter教程之Event篇(1)'''# 事件的使用方法'''1.测试鼠 ...
- 第二百三十八天 how can I 坚持
最近睡觉,老是梦到死亡,多么可怕啊.感觉好虚幻. spring事务管理,框架搭建. 看着没多少事,最起来感觉好多啊. 梳理下最近爬过的山,时间久了会忘,反正上周没爬,下雪了. 10月18号-香山,11 ...
- [iOS 多线程 & 网络 - 2.10] - ASI框架下载文件
A.ASI框架中的下载 1.实现步骤 在实际的开发中如果要使用asi框架来下载服务器上的文件,只需要执行下面简单的几个步骤即可. (1)创建请求对象:(2)设置下载文件保存的路径:(3)发送下载文件的 ...
- Timus OJ 1997 Those are not the droids you're looking for (二分匹配)
题目链接:http://acm.timus.ru/problem.aspx?space=1&num=1997 这个星球上有两种人,一种进酒吧至少玩a小时,另一种进酒吧最多玩b小时. 下面n行是 ...
- 认识JavaScript的原型
本来打算也写一个JavaScript学习笔记的系列,不过由于笔者不太想买大部头的js数据,和网上的资料也不少,所以js系列就打算写到了算了了. 要理解JavaScript就要理解其原型,首先我们先区分 ...
- MVC4学习过程记录
终于决定开始尝试Web开发,即是为了工作也是为了自己的兴趣,决定还是从MS的MVC4开始. 首先从Asp.Net MVC4入门指南这个系列开始学习(http://www.cnblogs.com/pow ...
- Oracle-11g-R2 于 Linux 上的 RAC 卸载
安装环境: SuSE Linux Enterprise Server 11 SP3 Oracle 11g 11.2.0.3 卸载步骤: 1.卸载 Database 软件(oracle,第一节点) ...
- 【转】Android真机抓屏- Android Screen Monitor
http://www.cnblogs.com/xiaofeixiang/p/4086092.html 一般运行Android应用程序有两种方式一种是设置Android虚拟设备模拟器,通过Android ...
- 【转】python的小知识
1. 如何反序访问一个序列(how do I iterate over a sequence in reverse order) 如果序列是list,则使用list.reverse()即可将序列反序. ...
- Codeforces Round #280 (Div. 2) C. Vanya and Exams 贪心
C. Vanya and Exams Time Limit: 20 Sec Memory Limit: 256 MB 题目连接 http://codeforces.com/contest/492/pr ...