centos 7下部署grpc
gRPC 是一个高性能、开源和通用的 RPC 框架,面向移动和 HTTP/2 设计。目前提供 C、Java 和 Go 语言版本,分别是:grpc, grpc-java, grpc-go. 其中 C 版本支持 C, C++, Node.js, Python, Ruby, Objective-C, PHP 和 C#。
gRPC 基于 HTTP/2 标准设计,带来诸如双向流、流控、头部压缩、单 TCP 连接上的多复用请求等特。这些特性使得其在移动设备上表现更好,更省电和节省空间占用。
环境部署:
1、查看centos版本:

2、安装grpc的提前准备(g++, autoconf等)
yum install -y gcc-c++ autoconf libtool

yum groupinstall -y "Development Tools"
3、下载grpc源码和相关子模块
git clone https://github.com/grpc/grpc.git

cd grpc

git submodule update --init
4、编译安装protobuf(grpc需要用到的组件)
网上有很多方法是使用curl的方式直接从github上使用脚本下载,但是新版(libprotoc 3.6.1)好像不支持修改文件autogen.sh,当然这一步完全可以借助third_party/protobuf/README.txt来部署protobuf,这里我采用直接从github上下载的方式部署:
https://github.com/protocolbuffers/protobuf/releases/

直接终端命令:(在目录third_party下)
wget https://github.com/protocolbuffers/protobuf/releases/download/v3.6.1/protobuf-all-3.6.1.tar.gz
解压后:
mv protobuf-all-3.6.1 protobuf
cd protobuf
./autogen.sh
./configure
make
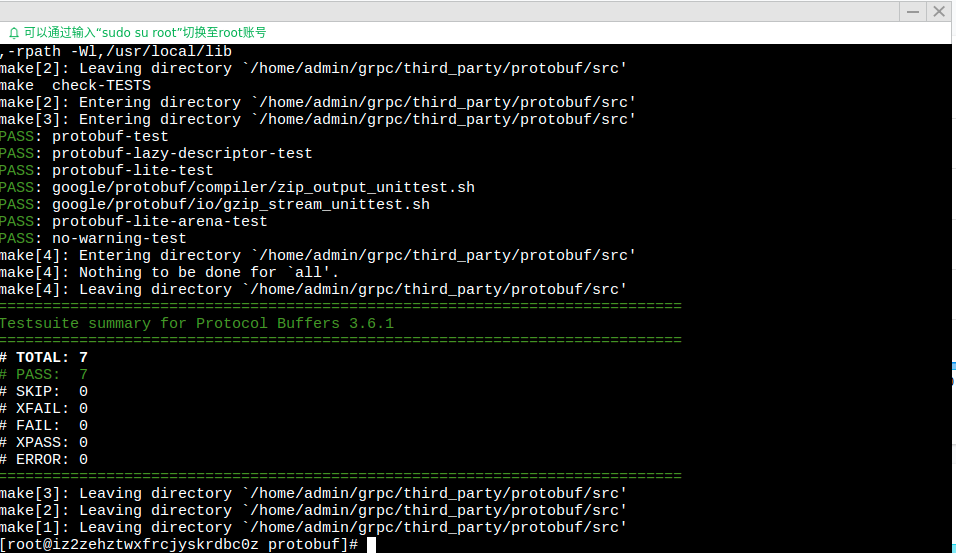
make check
make install
如果make check成功,则显示:
上述操作如果出现了错误,可以查看同级目录下的config.log里面的日志。比如gcc的版本过低等问题。
之后我们可以使用命令:
protoc --version

来验证protobuf是否安装成功,如果出现:
command not found
则需要添加环境变量或者将生成的protoc二进制拷贝到/usr/bin/目录下。
5、编译安装grpc
首先在进到如下的目录下:

然后分别执行命令:
 make

 make install
6、demo测试
官方自带有个HelloWorld的Demo,可以编译这个Demo看是否我们已经安装成功了。

执行:
make
如果报错:

则需要如下两条语句:
export PKG_CONFIG_PATH=$PKG_CONFIG_PATH:/usr/local/lib/pkgconfig

pkg-config --libs protobuf grpc++ grpc
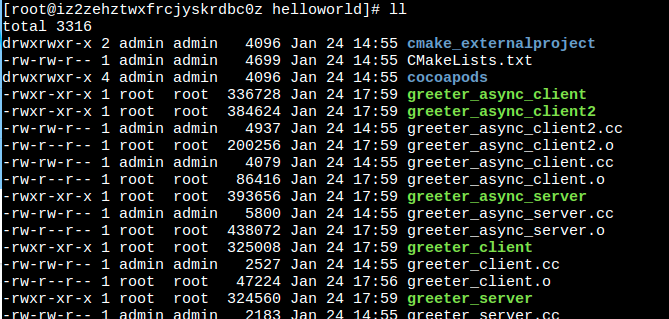
此时再次make发现:
然后分别启动服务器和客户端
./greeter_server
./greeter_clien
效果:(说明部署成功)

补充:
gcc升级到5.3.1:(centos7.3下)
yum install centos-release-scl

yum install devtoolset-4-toolchain

scl enable devtoolset-4 bash

gcc --version
上述内容参考:
http://blog.dreamlikes.cn/archives/555
https://www.jianshu.com/p/efc9167e7044
【grpc配置问题汇总】
1、grpc默认是使用动态库,如果使用静态库编译的话,编译能通过,但是运行时,会报错:
[admin@iz2zehztwxfrcdbc0z worker]$ ./worker_server 127.0.0.1: 127.0.0.1:

E0304 ::33.725495889     uri_parser.cc:]           bad uri.scheme: '127.0.0.1:21111'

E0304 ::33.725607759     uri_parser.cc:]                            ^ here

E0304 ::33.725615018     resolver_registry.cc:]    don't know how to resolve '127.0.0.1:' or 'dns:///127.0.0.1:21111'

E0304 ::33.725665096     resolver_registry.cc:]    don't know how to resolve 'dns:///127.0.0.1:21111' or 'dns:///dns:///127.0.0.1:21111'

E0304 ::33.725687178     channel.cc:]              channel stack builder failed: {"created":"@1551679173.725672811","description":"resolver creation failed","file":"src/core/ext/filters/client_channel/resolving_lb_policy.cc","file_line":}

Register fail, error_code: , error_message: lame client channel
参考github上的相似问题:https://github.com/grpc/grpc/issues/11366
即需要自己初始化grpc,直接调用grpc_init()
就我们的helloworld例子来说,代码应该变成:
server端:greeter_server.cc
 #include <iostream>

 #include <memory>

 #include <string>

 #include <grpc/grpc.h>

 #include <grpc++/server.h>

 #include <grpc++/server_builder.h>

 #include <grpc++/server_context.h>

 #include <grpc++/server_credentials.h>

 #include <grpc++/status.h>

 #include "helloworld.pb.h"

 using grpc::Server;

 using grpc::ServerBuilder;

 using grpc::ServerContext;

 using grpc::Status;

 using helloworld::HelloRequest;

 using helloworld::HelloReply;

 using helloworld::Greeter;

 class GreeterServiceImpl final : public Greeter::Service {

     Status SayHello(ServerContext* context, const HelloRequest* request, HelloReply* reply) override {

         std::string prefix("Hello ");

         reply->set_message(prefix + request->name());

         return Status::OK;

     }

 };

 void RunServer() {

     std::string server_address("0.0.0.0:50051");

     GreeterServiceImpl service;

     ServerBuilder builder;

     builder.AddListeningPort(server_address,

     grpc::InsecureServerCredentials());

     builder.RegisterService(&service);

     std::unique_ptr<Server> server(builder.BuildAndStart());

     std::cout << "Server listening on " << server_address << std::endl;

     server->Wait();

 }

 int main(int argc, char** argv) {

     grpc_init();

     RunServer();

     grpc_shutdown();

     return ;

 }
client端:greeter_client.cc
 #include <iostream>

 #include <memory>

 #include <string>

 #include <grpc/grpc.h>

 #include <grpc++/channel_arguments.h>

 #include <grpc++/channel_interface.h>

 #include <grpc++/client_context.h>

 #include <grpc++/create_channel.h>

 #include <grpc++/credentials.h>

 #include <grpc++/status.h>

 #include "helloworld.pb.h"

 using grpc::ChannelArguments;

 using grpc::ChannelInterface;

 using grpc::ClientContext;

 using grpc::Status;

 using helloworld::HelloRequest;

 using helloworld::HelloReply;

 using helloworld::Greeter;

 class GreeterClient {

   public:

     GreeterClient(std::shared_ptr<ChannelInterface> channel) : stub_(Greeter::NewStub(channel)) {}

     std::string SayHello(const std::string& user) {

         HelloRequest request;

         request.set_name(user);

         HelloReply reply;

         ClientContext context;

         Status status = stub_->SayHello(&context, request, &reply);

         if (status.IsOk()) {

             return reply.message();

         } else {

             return "Rpc failed";

         }

     }

     void Shutdown() { stub_.reset(); }

   private:

     std::unique_ptr<Greeter::Stub> stub_;

 };

 int main(int argc, char** argv) {

     grpc_init();

     GreeterClient greeter(

     grpc::CreateChannel("localhost:50051", grpc::InsecureCredentials(),

         ChannelArguments()));

     std::string user("world");

     std::string reply = greeter.SayHello(user);

     std::cout << "Greeter received: " << reply << std::endl;

     greeter.Shutdown();

     grpc_shutdown();

 }
centos 7下部署grpc的更多相关文章
- Centos环境下部署游戏服务器-软件安装
这篇文章主要介绍一下游戏服务器需要安装的软件和需要修改的配置.现介绍下项目,本项目服务器端是c++ + mysql组合,客户端是as写的,需要安装的服务为Mysql,Php,Apache, 以及一个n ...
- Centos环境下部署游戏服务器-自动化
计算机是没有智力的,只会接受指令,运行指令,得出结果.因此就算你让它重复做一件事多少次,它也学不会自动去做这件事.对于重复繁琐的事情,做为一个懒惰的程序员,必须告诉机器去做这件事情,然后就行了,而不是 ...
- Centos 7 下部署集群式阿波罗
apollo工作原理 用户通过浏览器登录Portal管理界面 >> 通过Admin server对配置进行修改 >> 应用程序主动向config server配置注意:Port ...
- Centos环境下部署游戏服务器-常用命令
图1 在Linux的世界,如果你不玩命令,那你见了同行都不好意思和人家打招呼.同时服务器正常状况下放在远端,一般都是开ssh登录服务器,相信远程桌面的人很少见吧.这篇文章说说Linu ...
- Centos环境下部署游戏服务器-iptables
简介: 图1 Centos做为服务器级操作系统,防火墙是不可缺少的.防火墙的主要功能为控制进出网络包,防火墙就如小区门卫的工作职责,检查出入小区居民的身份,如果不符合小区门卫管理条例 ...
- Centos环境下部署游戏服务器-SVN
版本控制工具的文章已经被写滥了,所以本篇文章不想介绍如何安装Svn如何可视化操作这些东西.本篇文章讲述我自己对Svn的理解,以及在命令行下操作.为啥不应可视化界面?有两方面的原因,远程登录到服务器都是 ...
- Centos环境下部署游戏服务器-权限
部署Web服务器的时候,在"DocumentRoot"指向的根目录新建一个文件夹,然后将网页和资源放在这个文件夹里,通过地址http://192.168.0.100/Res/ind ...
- Centos环境下部署游戏服务器-编译
游戏服务器是在windows环境开发的,相关跨平台的东西在这里不谈了,只谈如何将Visual Studio 工程转换到Linux下编译.这里涉及到的软件分别为:Centos版本为6.4,Visual ...
- Centos环境下部署游戏服务器-简介
一.前言 在接触这个操作系统之前我一直使用的是ubuntu和mac os,这次由于游戏是测试版本,没有专业的运维人员去做这件事情,只能我这个稍微懂一点linux的人来做这件事情了.由于涉及到 ...
随机推荐
- linux下通过sed命令直接修改文件内容
sed是实现对流的编辑.通常,我们使用sed可以实现内容的编辑后然后保存成另外的一个文件,如果正确的话,才写入到源文件.但是某些时候,我们需要直接修改文件,因为,保存文件到一个文件,然后再覆盖原文件的 ...
- 17_react脚手架应用分析
|-- index.html // 启动页(主页) |-- build //构建目录,遵循发布系统规范 | |-- index.html //静态页面 | |-- static //资源文件发布到cd ...
- 深入Spring Boot:怎样排查expected single matching bean but found 2的异常
写在前面 这个demo来说明怎么排查一个常见的spring expected single matching bean but found 2的异常. https://github.com/hengy ...
- Python 数据结构基本操作
数据结构是用来存储数据的逻辑结构,合理使用数据结构才能编写出优秀的代码.本文主要介绍Python提供的几种内置数据结构,包括元组.列表.字典的定义和基本操作方法以及介绍典型函数的使用方法. 元组结构 ...
- [ 转载 ] ssh连接远程主机执行脚本的环境变量问题
近日在使用ssh命令ssh user@remote ~/myscript.sh登陆到远程机器remote上执行脚本时,遇到一个奇怪的问题: ~/myscript.sh: line n: app: co ...
- [leetcode]股票题型123
122. Best Time to Buy and Sell Stock II Say you have an array for which the ith element is the price ...
- Delphi判断是否有全屏程序
unit Unit1; interface uses Windows, Messages, SysUtils, Variants, Classes, Graphics, Controls, Forms ...
- tap news:week5 0.0 create react app
参考https://blog.csdn.net/qtfying/article/details/78665664 先创建文件夹 安装create react app 这个脚手架(facebook官方提 ...
- swift 头尾式动画
1.0 头尾式动画 UIView.beginAnimations(nil, context: nil) UIView.setAnimationDuration(1.0) // 设置执行动画所需要的时间 ...
- 吴裕雄 python 机器学习-NBYS(2)
import matplotlib import numpy as np import matplotlib.pyplot as plt n = 1000 xcord0 = [] ycord0 = [ ...