vue_drf之实现短信验证码
一、需求
1,需求
我们在做网站开发时,登录页面很多情况下是可以用手机号接收短信验证码,然后实现登录的,那我们今天就来做一做这一功能。
伪代码:
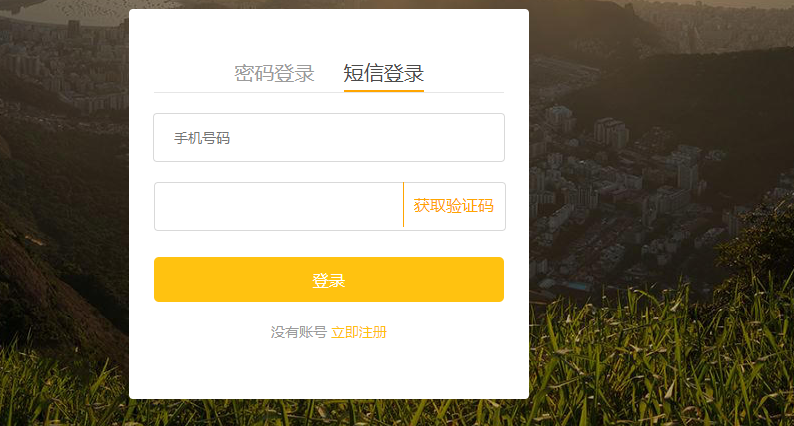
进入登录页面,点击短信登录

输入手机号码,点击获取验证码,后端在redis里保存验证码

用户把手机收到的验证码输入,点击登录,会把手机号和验证码发往后端,然后进行验证
2,依赖
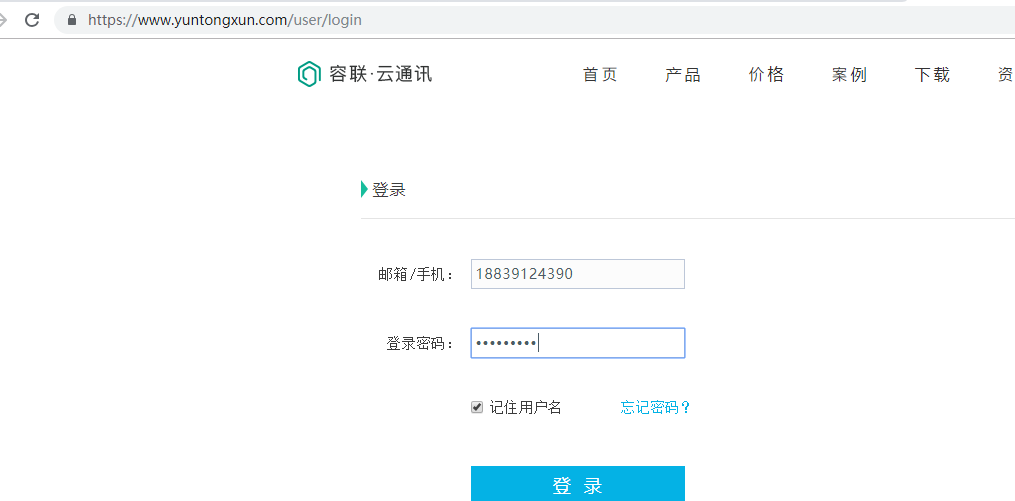
要想发送短信,让用户收到短信,我们的借助一个容联云的接口,注册一个账号。
使用时需要的一些参数:

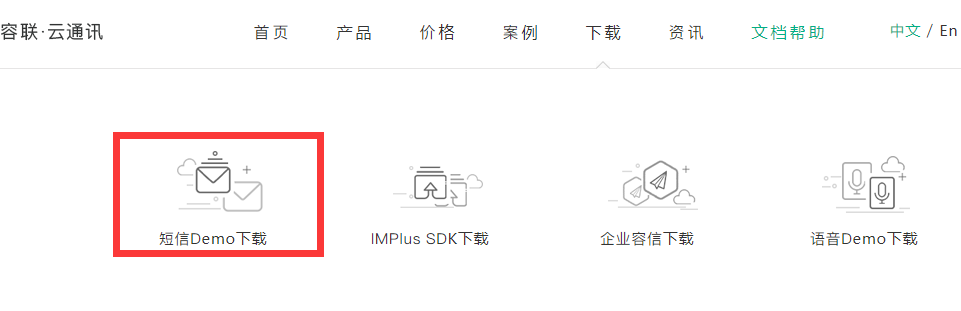
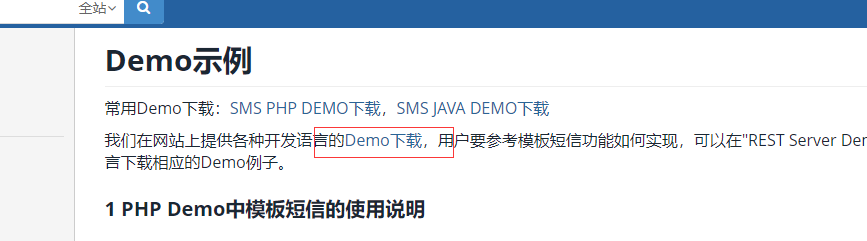
下载sdk
1.。。。。。。。
2.。。。。。。
3.。。。。。。。

下载完成后,解压。放入我们drf项目的apps里的libs里
二、sdk参数配置
1,目录结构
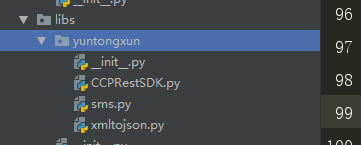
2,配置sms.py文件
# -*- coding:utf-8 -*-

from .CCPRestSDK import REST

# 说明:主账号,登陆云通讯网站后,可在"控制台-应用"中看到开发者主账号ACCOUNT SID

_accountSid = 'xxxxxxxxxxxxx'

# 8a216da863f8e6c20164139687e80c1b

# 说明:主账号Token,登陆云通讯网站后,可在控制台-应用中看到开发者主账号AUTH TOKEN

_accountToken = 'xxxxxxxxxxxxx'

# 6dd01b2b60104b3dbc88b2b74158bac6

# 请使用管理控制台首页的APPID或自己创建应用的APPID

_appId = '8aaf0708697b6beb01699f3c645f1766'

# 8a216da863f8e6c20164139688400c21

# 说明:请求地址,生产环境配置成app.cloopen.com

_serverIP = 'sandboxapp.cloopen.com'

# 说明:请求端口 ,生产环境为8883

_serverPort = ""

# 说明:REST API版本号保持不变

_softVersion = '2013-12-26'

#下面的内容不用修改

class CCP(object):

    """发送短信的辅助类"""

    def __new__(cls, *args, **kwargs):

        # 判断是否存在类属性_instance,_instance是类CCP的唯一对象,即单例

        if not hasattr(CCP, "_instance"):

            cls._instance = super(CCP, cls).__new__(cls, *args, **kwargs)

            cls._instance.rest = REST(_serverIP, _serverPort, _softVersion)

            cls._instance.rest.setAccount(_accountSid, _accountToken)

            cls._instance.rest.setAppId(_appId)

        return cls._instance

    def send_template_sms(self, to, datas, temp_id):

        """发送模板短信"""

        # @param to 手机号码

        # @param datas 内容数据 格式为数组 例如:{'12','34'},如不需替换请填 ''

        # @param temp_id 模板Id

        result = self.rest.sendTemplateSMS(to, datas, temp_id)

        # 如果云通讯发送短信成功,返回的字典数据result中statuCode字段的值为"000000"

        if result.get("statusCode") == "":

            # 返回0 表示发送短信成功

            return 0

        else:

            # 返回-1 表示发送失败

            return -1

if __name__ == '__main__':

    ccp = CCP()

    # 注意: 测试的短信模板编号为1

    ccp.send_template_sms('', ['', 5], 1)
三、代码实现
1,后端代码
views.py,这是获取验证码请求的处理,也就是后端产生一个随机码,发送给手机用户,然后把随机码存储于redis中,然后给前端返回一个验证码发送成功的信号
from .models import User

from rest_framework import status

from lufei_drf.libs.yuntongxun.sms import CCP

from django_redis import get_redis_connection

class SMSCodeAPIView(APIView):

    def get(self,request):

        # 1. 通过查询字符串获取手机号码

        phone = request.query_params.get("phone")

        ty=request.query_params.get('type')

        # 2. 发送短信之前验证码验证一下手机号码

        if ty=='register':

            try:

                User.objects.get(phone=phone)

                return Response({"message": "当前手机号已经被注册过"}, status=status.HTTP_400_BAD_REQUEST)

            except:

                pass

        redis = get_redis_connection("sms_code")

        if redis.get("times_%s" % phone):

            return Response({"message": "当前手机号已经在一分钟内发送过短信"}, status=status.HTTP_400_BAD_REQUEST)

        # 3. 使用手机号码发送短信验证码

        # 生成一个短信验证码

        sms_code = "%04d" % random.randint(0, 9999)

        ccp = CCP()

        result = ccp.send_template_sms(phone,[sms_code,"5分钟"],1)

        if result == 0:

            # 发送短信成功,保存短信验证码到redis数据库中

            # 开启管道操作

            pl = redis.pipeline()

            pl.multi() # 接下来会在管道中执行多条命令

            # setex(变量名,有效期[秒],值 )

            SMS_EXPIRE_TIME = 5 * 60 # 短信验证码的有效期

            SMS_TIMES = 60  # 短信发送的间隔时间

            # 把原来立即执行的命令放置到管道

            pl.setex("sms_%s" % phone, SMS_EXPIRE_TIME, sms_code)

            pl.setex("times_%s" % phone, SMS_TIMES, 1)

            # 统一执行管道中的命令

            pl.execute()

        # 4. 响应数据给客户端

        return Response({"message":result},status=status.HTTP_200_OK)
urls.py
from django.urls import path

# jwt内部实现的登陆视图

from rest_framework_jwt.views import obtain_jwt_token

from .views import SMSCodeAPIView,

urlpatterns=[

    path(r"login/", obtain_jwt_token ),

    path('sms/',SMSCodeAPIView.as_view()),

]
utils.py,这是对用户提交手机验证码后,对手机号和验证码的校对。判断都正确后,返回一个对象,包括token,user信息等,
from django.contrib.auth.backends import ModelBackend

from django_redis import get_redis_connection

def jwt_response_payload_handler(token, user=None, request=None):

    """

    自定义jwt认证成功返回数据

    :token  返回的jwt

    :user   当前登录的用户信息[对象]

    :request 当前本次客户端提交过来的数据

    """

    return {

        'token': token,

        'id': user.id,

        'username': user.username,

    }

#实现多功能登录

import re

from .models import User
#查找用户名或手机号是否已经是我们的用户

def get_user_by_account(account):

    """

    根据帐号获取user对象

    :param account: 账号,可以是用户名,也可以是手机号

    :return: User对象 或者 None

    """

    try:

        if re.match('^1[3-9]\d{9}$', account):

            # 帐号为手机号

            user = User.objects.get(phone=account)

        else:

            # 帐号为用户名

            user = User.objects.get(username=account)

    except User.DoesNotExist:

        return None

    else:

        return user

#验证用户提交的短信和我们保存在redis里的信息是否一致

def sms_code_verify(phone,sms_code):

    redis = get_redis_connection("sms_code")

    value=redis.get('sms_%s'%phone).decode()

    if value==sms_code:

        return True

    return False

class UsernameMobileAuthBackend(ModelBackend):

    """

    自定义用户名或手机号认证

    """

    def authenticate(self, request, username=None, password=None, **kwargs):

        user = get_user_by_account(username)
      #当密码长度为4时,我判断其为手机号和短信验证码登录

        if len(password)==4 and user is not None and sms_code_verify(username,password):

            return user

        elif user is not None and user.check_password(password):

            return user

        else:

            return None
2,前端代码
<template>
<div id="login">
<div class="box">
<p>
<img src="../../assets/login_title.png" alt="">
</p>
<p class="sign">帮助有志向的年轻人通过努力学习获得体面的工作和生活!</p>
<div class="pass" v-show="num==1">
<div class="title2 cursor">
<span @click="num=1" :class="num==1 ? 'show' :''">密码登录</span>
<span @click="num=2" :class="num==2 ? 'show' :''">短信登录</span>
</div>
<input v-model="username" type="text" class="ss" placeholder="用户名 / 手机号码">
<input v-model="password" type="password" class="ss" placeholder="密码">
<div id="captcha" class="ss"></div>
<div class="t1">
<div class="left">
<input type="checkbox" class="cursor" v-model="remenber">
<div class="remenber cursor" >记住密码</div>
</div>
<div class="right cursor">忘记密码</div>
</div>
<button class="login_btn" @click="login1">登录</button>
<div class="register">
没有账号
<span><router-link to="/register">立即注册</router-link></span>
</div>
</div>
<div class="messge" v-show="num==2">
<div class="title2 cursor">
<span @click="num=1" :class="num==1 ? 'show' :''">密码登录</span>
<span @click="num=2" :class="num==2 ? 'show' :''">短信登录</span>
</div>
<input v-model="phone" type="text" class="ss" placeholder="手机号码">
<div class="sms">
<input v-model="sms_code" type="text" class="ss">
<div class="content" @click="get_sms_code">{{content}}</div>
</div>
<button class="login_btn" @click="sms_login">登录</button>
<div class="register">
没有账号
<span><router-link to="/register">立即注册</router-link></span>
</div>
</div>
</div>
</div>
</template> <script>
export default {
name:'login',
data:function () {
return {
num:1,
username:'',
password:'',
remenber:'',
status:'',
content:'获取验证码',
phone:'',
sms_code:'',
}
},
methods:{
//手机号和短信验证码登录
sms_login:function(){
let _this=this;
this.$axios.post('http://127.0.0.1:8000/user/login/',{
'username':_this.phone,
'password':_this.sms_code,
},{responseType:'json'})
.then(function (res) {
sessionStorage.token=res.data.token;
_this.$router.go(-1);
}).catch(function (error) {
console.log(error.response)
});
},
//获取短信验证码
get_sms_code:function(){
let reg = /1[3-9]{2}\d{8}/;
if( reg.test(this.phone) ){
if(this.content == "获取验证码"){
this.content=60;
let _this=this;
let tt=setInterval(function () {
if (_this.content>=1){
_this.content--
}
else {
_this.content='获取验证码';
clearInterval(tt)
}
},1000);
this.$axios.get('http://127.0.0.1:8000/user/sms?type=login&phone='+this.phone)
.then(function (res) {
if(res.data.message==0){
alert('验证码发送成功')
}
}).catch(function (error) {
console.log(error.response)
})
}
}else {
alert('手机号码有误')
}
},
//用户名和密码登录
login1:function () {
if (this.status==1){
let _this=this;
this.$axios.post('http://127.0.0.1:8000/user/login/',{
'username':_this.username,
'password':_this.password,
},{responseType:'json'})
.then(function (res) {
if (res.status==200){
if (_this.remenber){
sessionStorage.removeItem('token');
localStorage.token=res.data.token;
}
else {
localStorage.removeItem('token');
sessionStorage.token=res.data.token
}
_this.$router.go(-1);
}
else {
alert('用户名或密码错误')
}
})
.catch(function (error) {
alert(error.response.data.non_field_errors[0]);
console.log(error.response.data.non_field_errors);
});
}
else {
alert('验证码错误')
}
},
handlerPopup:function (captchaObj) {
let _this=this;
captchaObj.onSuccess(function () {
var validate = captchaObj.getValidate();
_this.$axios.post("http://127.0.0.1:8000/user/yzm/",{
geetest_challenge: validate.geetest_challenge,
geetest_validate: validate.geetest_validate,
geetest_seccode: validate.geetest_seccode,
},{
responseType:"json",
}).then(function (res) {
_this.status=res.data.status
}).catch(function (error) {
console.log(error)
})
});
captchaObj.appendTo("#captcha");
}
},
created:function () {
let _this=this;
this.$axios.get("http://127.0.0.1:8000/user/yzm")
.then(function (res) {
let data=JSON.parse(res.data);
initGeetest({
width:'350px',
gt: data.gt,
challenge: data.challenge,
product: "popup",
offline: !data.success
}, _this.handlerPopup);
}).catch(function (error) {
console.log(error)
})
} }
</script> <style scoped>
#login{
background: url('../../assets/Login.jpg');
background-size: 100% 100%;
height: 100%;
position: fixed;
width: 100%;
}
.box{
width: 500px;
height: 600px;
margin: 0 auto;
margin-top: 200px;
text-align: center;
}
.box img{
width: 190px;
height: auto;
}
.box p{
margin: 0;
}
.sign{
font-size: 18px;
color: #fff;
letter-spacing: .29px;
padding-top: 10px;
padding-bottom: 50px;
}
.pass{
width: 400px;
height: 460px;
margin: 0 auto;
background-color: white;
border-radius: 4px;
}
.messge{
width: 400px;
height: 390px;
margin: 0 auto;
background-color: white;
border-radius: 4px;
}
.title2{
width: 350px;
font-size: 20px;
color: #9b9b9b;
padding-top: 50px;
border-bottom: 1px solid #e6e6e6;
margin: 0 auto;
margin-bottom: 20px;
}
.ss{
width: 350px;
height: 45px;
border-radius: 4px;
border: 1px solid #d9d9d9;
text-indent: 20px;
font-size: 14px;
margin-bottom: 20px;
}
.pass .t1{
width: 350px;
margin: 0 auto;
height: 20px;
line-height: 20px;
font-size: 12px;
text-align: center;
position: relative;
}
.t1 .right{
position: absolute;
right: 0;
}
.remenber{
display: inline-block;
position: absolute;
left: 20px;
}
.left input{
position: absolute;
left:0;
width: 14px;
height: 14px;
}
.login_btn{
width: 350px;
height: 45px;
background: #ffc210;
border-radius: 5px;
font-size: 16px;
color: #fff;
letter-spacing: .26px;
margin-top: 30px;
outline: none;
border:none;
cursor: pointer;
}
.register{
margin-top: 20px;
font-size: 14px;
color: #9b9b9b;
}
.register span{
color: #ffc210;
cursor: pointer;
}
.cursor{
cursor: pointer;
}
.show{
display: inline-block;
padding-bottom: 5px;
border-bottom: 2px solid orange;
color: #4a4a4a;
}
a{
text-decoration: none;
color: #ffc210;
}
#captcha{
margin: 0 auto;
height: 44px;
}
.sms{
position: relative;
width: 350px;
height: 45px;
margin: 0 auto;
line-height: 45px;
}
.sms .content{
position: absolute;
top:0;
right: 10px;
color: orange;
border-left: 1px solid orange;
padding-left: 10px;
cursor: pointer; }
</style>
login组件
前端获取短信验证码:
//获取短信验证码

      get_sms_code:function(){

        let reg = /1[3-9]{2}\d{8}/;
    //当手机号为为真实手机号,才可以触发获取验证码

        if( reg.test(this.phone) ){
    //当页面上显示为‘获取验证码’时,才可以触发获取验证码请求;当进入倒计时,点击不能触发获取验证码请求

          if(this.content == "获取验证码"){
     //成功发送获取验证码请求之后开始倒计时60秒

            this.content=60;

            let _this=this;

            let tt=setInterval(function () {

              if (_this.content>=1){

                _this.content--

              }

              else {

                _this.content='获取验证码';

                clearInterval(tt)

              }

            },1000);

            this.$axios.get('http://127.0.0.1:8000/user/sms?type=login&phone='+this.phone)

              .then(function (res) {

                if(res.data.message==0){

                  alert('验证码发送成功')

                }

              }).catch(function (error) {

                console.log(error.response)

              })

          }

        }else {

          alert('手机号码有误')

        }

      },
前端用手机号和短信验证码登录:
//手机号和短信验证码登录

      sms_login:function(){

        let _this=this;

        this.$axios.post('http://127.0.0.1:8000/user/login/',{

            'username':_this.phone,

            'password':_this.sms_code,

          },{responseType:'json'})

          .then(function (res) {
      //当验证成功后,接收返回的token放入session里

            sessionStorage.token=res.data.token;

             _this.$router.go(-1);

          }).catch(function (error) {

          console.log(error.response)

        });

      },
vue_drf之实现短信验证码的更多相关文章
- Atitit. 破解 拦截 绕过 网站 手机 短信 验证码 方式 v2 attilax 总结
Atitit. 破解 拦截 绕过 网站 手机 短信 验证码 方式 v2 attilax 总结 1. 验证码的前世今生11.1. 第一代验证码 图片验证码11.2. 第二代验证码 用户操作 ,比如 ...
- jQuery获取短信验证码+倒计时实现
jQuery 短信验证码倒计时 <script type="text/javascript" charset="utf-8"> $(function ...
- 转载:Android自动化测试- 自动获取短信验证码
前言:android应用的自动化测试必然会涉及到注册登录功能,而许多的注册登录或修改密码功能常常需要输入短信验证码,因此有必要能够自动获得下发的短信验证码. 主要就是实时获取短信信息. android ...
- App开发(Android与php接口)之:短信验证码
最近和同学们一起开发一个自主项目,要用到短信验证码,在网上搜索了很久,看到一个推荐贴,提到了很多不错的短信服务商.经过测试,帖子中提到的服务商他们的短信到达率和到达速度也都不错.最后,由于经费问题,我 ...
- android自动获取短信验证码
前言:android应用的自动化测试必然会涉及到注册登录功能,而许多的注册登录或修改密码功能常常需要输入短信验证码,因此有必要能够自动获得下发的短信验证码.主要就是实时获取短信信息.android上获 ...
- Atitit usrQBM1603短信验证码规范
Atitit usrQBM1603短信验证码规范 短信验证码扩展至短信服务和验证码服务1 主要方法1 参考模板1 短信验证码扩展至短信服务和验证码服务 主要方法 Line 27: public cla ...
- atitit 短信验证码的源码实现 .docx
atitit 短信验证码的源码实现 .docx 参考 Atitit usrQBM1603短信验证码规范1 主要方法1 源码实现1 参考 Atitit usrQBM1603短信验证码规范 主要方法 L ...
- Android学习笔记之短信验证码的获取和读取
PS:最近很多事情都拖拖拉拉的..都什么办事效率啊!!! 还得吐槽一下移动运营商,验证码超过五次的时候,直接把我的手机号封闭.真是受够了. 学习笔记: 1.Android之如何获取短信验证码. 2.如 ...
- php实现的IMEI限制的短信验证码发送类
php实现的IMEI限制的短信验证码发送类 <?php class Api_Sms{ const EXPIRE_SEC = 1800; // 过期时间间隔 const RESEND_SEC = ...
随机推荐
- linux时区和时间设置
1,修改时区 调整时区使用tzselect [root@lyn ~]# hwclock Tue Nov :: PM AST -0.198205 seconds [root@lyn ~]# tzsele ...
- c# 自定义日期的时分秒
DateTime beginTime = DateTime.Now.Date; 2 Console.WriteLine(beginTime); DateTime endTime = , , ); Co ...
- java面试一、1.5JVM
免责声明: 本文内容多来自网络文章,转载为个人收藏,分享知识,如有侵权,请联系博主进行删除. 1.5.JVM JVM运行时内存区域划分
- 基于jmeter的性能测试平台(二) 一个构想
之前基于jmeter搭好了分布式测试平台,但是感觉还是很粗糙,打算给它穿点衣服. 整个架构差不多就像下面这个图. (1)基于python django做一个web页面,友好地管理测试过程 (2)con ...
- ajax提交数组至后台,无法获取值得问题
$(".delAll_btn").click(function(){ var checkStatus = table.checkStatus('userList'), data = ...
- ICO图标下载地址
http://findicons.com/ http://www.iconfont.cn/
- karaf 控制台 常用linux指令(2)
11,查看onos风格注解实例列表 -bash代码 scr:list ACTIVE代表实例已生成,REGISTERED代表实例未注入生成 12,查看组件列表,查看组件信息,查看组件提供的服务 -bas ...
- admob sdk
https://support.google.com/admob/answer/2993059?hl=zh-Hans admob sample http://china.inmobi.com/sdk/ ...
- IDEA打开maven项目dependencies红线
第一步:install报红的项目,从maven库下载需要的包,看看日志还缺哪些本地包,少了就去下,丢到库里.不缺包后,reimport一下一般就OK了,如果还是红的,重启一下就好了. 如果第一步还没好 ...
- 搭建vue环境
1. 下载安装nodejs 截至2018-06-05 最新稳定版本为 8.11.2,直接 next ,不改目录. PS C:\Users\Administrator> node -v v8.11 ...