springboot入门_模板
springboot中已经不推荐使用jsp,而是推荐使用模板,如freemarker,thymeleaf等,本文记录在sprigboot中使用模板。
创建一个maven的springboot工程,
freemarker,要使用freemarker模板需引入所需要的jar,pom.xml如下:
 <project xmlns="http://maven.apache.org/POM/4.0.0" xmlns:xsi="http://www.w3.org/2001/XMLSchema-instance" xsi:schemaLocation="http://maven.apache.org/POM/4.0.0 http://maven.apache.org/xsd/maven-4.0.0.xsd">

   <modelVersion>4.0.0</modelVersion>

   <groupId>com.allen.springboot.learn</groupId>

   <artifactId>springboot_freemarker</artifactId>

   <version>0.0.1-SNAPSHOT</version>

   <parent>

     <groupId>org.springframework.boot</groupId>

     <artifactId>spring-boot-starter-parent</artifactId>

     <version>1.5.10.RELEASE</version>

   </parent>

   <dependencies>

     <!-- web 依赖 -->

     <dependency>

         <groupId>org.springframework.boot</groupId>

         <artifactId>spring-boot-starter-web</artifactId>

     </dependency>

     <!-- Freemarker 依赖 -->

     <dependency>

         <groupId>org.springframework.boot</groupId>

         <artifactId>spring-boot-starter-freemarker</artifactId>

     </dependency>

   </dependencies>

 </project>
在resources目录下创建application.properties文件,添加freemarker配置信息,代码如下:
 ##FREEMARKER

 spring.freemarker.template-loader-path=classpath:/view/

 spring.freemarker.suffix=.ftl

 #spring.freemarker.prefix=

 spring.freemarker.allow-request-override=false

 spring.freemarker.cache=true

 spring.freemarker.check-template-location=true

 spring.freemarker.charset=UTF-8

 spring.freemarker.content-type=text/html

 spring.freemarker.expose-request-attributes=false

 spring.freemarker.expose-session-attributes=false

 spring.freemarker.expose-spring-macro-helpers=false
这些配置信息中,比较重要的是前两行,分别指定文件所在路径和文件名的后缀。
至此freemarker的配置已经完成,接下来创建controller,实体类和模板,使用freemarker模板
 /**

  *

  */

 package com.allen.springboot.learn.controller;

 import java.util.ArrayList;

 import java.util.List;

 import org.springframework.stereotype.Controller;

 import org.springframework.ui.Model;

 import org.springframework.web.bind.annotation.RequestMapping;

 import com.allen.springboot.learn.entity.UserInfo;

 /**

  * @author admin

  *

  */

 @Controller

 @RequestMapping("/freemarker")

 public class FreemarkerController {

     @RequestMapping("/hello")

     public String hello(Model model){

         UserInfo u1 = new UserInfo();

         u1.setId(1);

         u1.setEmail("11@qq.com");

         u1.setAge(12);

         u1.setPassword("111111");

         u1.setSex("男");

         u1.setUsername("allen");

         model.addAttribute("u1", u1);

         List<UserInfo> userList = new ArrayList<UserInfo>();

         userList.add(u1);

         UserInfo u2 = new UserInfo();

         u2.setId(2);

         u2.setEmail("22@qq.com");

         u2.setAge(22);

         u2.setPassword("222222");

         u2.setSex("F");

         u2.setUsername("kobe");

         userList.add(u2);

         UserInfo u3 = new UserInfo();

         u3.setId(3);

         u3.setEmail("33@qq.com");

         u3.setAge(33);

         u3.setPassword("333");

         u3.setSex("M");

         u3.setUsername("kg");

         userList.add(u3);

         model.addAttribute("userList", userList);

         return "fmk";

     }

 }
 /**

  *

  */

 package com.allen.springboot.learn.entity;

 /**

  * @author admin

  *

  */

 public class UserInfo {

     private Integer id;

     private String username;

     private String password;

     private String sex;

     private String email;

     private int age;

     public Integer getId() {

         return id;

     }

     public void setId(Integer id) {

         this.id = id;

     }

     public String getUsername() {

         return username;

     }

     public void setUsername(String username) {

         this.username = username;

     }

     public String getPassword() {

         return password;

     }

     public void setPassword(String password) {

         this.password = password;

     }

     public String getSex() {

         return sex;

     }

     public void setSex(String sex) {

         this.sex = sex;

     }

     public String getEmail() {

         return email;

     }

     public void setEmail(String email) {

         this.email = email;

     }

     public int getAge() {

         return age;

     }

     public void setAge(int age) {

         this.age = age;

     }

 }
<!DOCTYPE html>
<html>
<head>
<title>Insert title here</title>
</head>
<body>
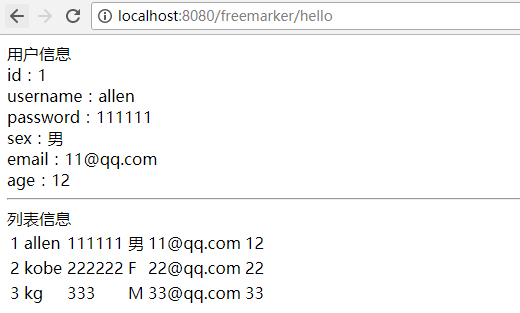
用户信息<br/>
id:${u1.id}<br/>
username:${u1.username}<br/>
password:${u1.password}<br/>
sex:${u1.sex}<br/>
email:${u1.email}<br/>
age:${u1.age}
<hr/>
列表信息<br/>
<table>
<#if (userList ? size > 0 )>
<#list userList as user>
<tr>
<td>${user.id}</td>
<td>${user.username}</td>
<td>${user.password}</td>
<td>${user.sex}</td>
<td>${user.email}</td>
<td>${user.age}</td>
</tr>
</#list>
<#else>
没有数据
</#if>
</table> </body>
</html>
现在就可以启动工程,访问controller了,信息正常信息
至此在springboot中使用freemarker已完成。
接下来看看使用thymeleaf模板,thymeleaf模板是springboot默认使用的模板,模板文件默认路径是在src/main/resources/templates下,和上文一样,只需要在pom.xml文件中引入对应的jar。

创建模板:
<!DOCTYPE html>
<html xmlns:th="http://www.thymeleaf.org" xmlns:tiles="http://www.thymeleaf.org">
<head>
<meta charset="UTF-8" />
<title>Insert title here</title>
</head>
<body>
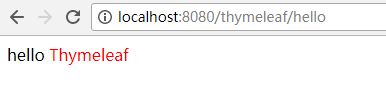
hello <span style="color:red" th:text="${name}"></span>
</body>
</html>
创建controller:
 /**

  *

  */

 package com.allen.springboot.learn.controller;

 import org.springframework.stereotype.Controller;

 import org.springframework.ui.Model;

 import org.springframework.web.bind.annotation.RequestMapping;

 /**

  * @author admin

  *

  */

 @Controller

 @RequestMapping("/thymeleaf")

 public class ThymeleafController {

     @RequestMapping("/hello")

     public String helloThymeleaf(Model model){

         model.addAttribute("name", "Thymeleaf");

         return "tmf";

     }

 }
接下来启动项目,访问controller中的地址,浏览器端显示如下内容
springboot入门_模板的更多相关文章
- SpringBoot集成beetl模板快速入门
SpringBoot集成beetl模板快速入门 首次探索 beetl官方网址:http://ibeetl.com/ 创建SpringBoot工程(idea) 新建工程 选择创建Spring工程 书写包 ...
- Spring_MVC_教程_快速入门_深入分析
Spring MVC 教程,快速入门,深入分析 博客分类: SPRING Spring MVC 教程快速入门 资源下载: Spring_MVC_教程_快速入门_深入分析V1.1.pdf Spring ...
- SpringBoot入门教程(二)CentOS部署SpringBoot项目从0到1
在之前的博文<详解intellij idea搭建SpringBoot>介绍了idea搭建SpringBoot的详细过程, 并在<CentOS安装Tomcat>中介绍了Tomca ...
- SpringBoot入门基础
目录 SpringBoot入门 (一) HelloWorld. 2 一 什么是springboot 1 二 入门实例... 1 SpringBoot入门 (二) 属性文件读取... 16 一 自定义属 ...
- Spring全家桶系列–[SpringBoot入门到跑路]
//本文作者:cuifuan Spring全家桶————[SpringBoot入门到跑路] 对于之前的Spring框架的使用,各种配置文件XML.properties一旦出错之后错误难寻,这也是为什么 ...
- springBoot入门教程(图文+源码+sql)
springBoot入门 1 springBoot 1.1 SpringBoot简介 Spring Boot让我们的Spring应用变的更轻量化.比如:你可以仅仅依靠一个Java类来运行一个Spr ...
- Springboot入门:
Springboot入门: 1.springboot是基于spring的全新框架,设计目的:简化spring应用配置和开发过程. 该框架遵循“约定大于配置”原则,采用特定的方式进行配置,从而事开发者无 ...
- SpringBoot入门系列(十一)统一异常处理的实现
前面介绍了Spring Boot 如何整合定时任务已经Spring Boot 如何创建异步任务和定时任务.不清楚的朋友可以看看之前的文章:<Spring Boot 入门系列文章> 接下来主 ...
- SpringBoot入门详细教程
一.SpringBoot入门 1.SpringBoot简介 SpringBoot是整个Spring技术栈的整合,来简化Spring应用开发,约定大于配置,去繁从简,just run 就能创建一 个独立 ...
随机推荐
- HTML <form>标签
1.单选按钮 <html> <body> <form> 名: <input type="radio" name="myname& ...
- sql语句添加删除外键及其约束
--删除外键 ALTER TABLE t_base_role_module DROP CONSTRAINT fk_t_base_role_module_t_base_defined_url; --增加 ...
- MySQL Block Nested Loop and Batched Key Access Joins(块嵌套循环和批量Key访问连接)
Block Nested-Loop and Batched Key Access Joins Batched Key Access (BKA) Join算法通过index和join buffer访问j ...
- Spring MVC中使用POI导出Word
内容绝大部分来源于网络 准备工作 准备[XwpfTUtil]工具类(来源于网络) 准备word模版 下载[XwpfTUtil]工具类 import org.apache.poi.xwpf.usermo ...
- jquery 导出Excel表格
仅在 table 中应用过!适用于导出简单的excel <script type="text/javascript" src="jquery.table2excel ...
- apktool给软件加注册机修改图标和文件名
功能实现,即让你的软件具有注册机功能,或者破解别人的软件,据为己有! 先反编译文件包 然后全局工具,修改图标和名称 加注册机,输入key,下载计算器,即可.给某个用户设置自定义的使用时间!
- localhost或本机ip无法连接数据库问题解决与原因
解决办法:将localhost替换为127.0.0.1 原因@参考文章:navicat在电脑没有联网的情况下,并不会把localhost解析成127.0.0.1,而mysql默认情况下只支持127.0 ...
- Failed to connect to VMware Lookup Service……SSL certificate verification failed
今天登陆vsphere web-client时候,报错如下: Failed to connect to VMware Lookup Service https://vc-test.cebbank.co ...
- C# MongoDB
一.搭建Mongodb 副本集 副本集中有三个角色: 主节点:所有副节点的数据均来自于主节点,并且只能对主节点进行读写操作.副节点:数据来自于主节点,可以进行读取操作,但是不能进行写操作.仲裁者:不含 ...
- Request.getparameternames 获取form表单里面所有的请求参数 。 返回一个Enumeration类型的枚举.
通过Enumeration的hasMoreElements()方法遍历.再由nextElement()方法获得枚举的值.此时的值是form表单中所有控件的name属性的值. 最后通过request.g ...