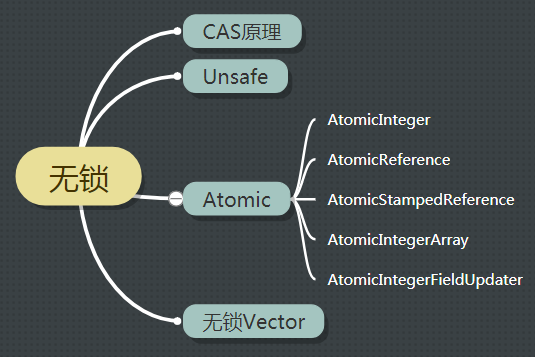
Java高并发之无锁与Atomic源码分析
目录
无锁即无障碍的运行, 所有线程都可以到达临界区, 接近于无等待.
无锁采用CAS(compare and swap)算法来处理线程冲突, 其原理如下
CAS原理
CAS包含3个参数CAS(V,E,N).V表示要更新的变量, E表示预期值, N表示新值.
仅当V值等于E值时, 才会将V的值设为N, 如果V值和E值不同, 则说明已经有其他线程做了更新, 则当前线程什么
都不做. 最后, CAS返回当前V的真实值. CAS操作是抱着乐观的态度进行的, 它总是认为自己可以成功完成操作.
当多个线程同时使用CAS操作一个变量时, 只有一个会胜出, 并成功更新, 其余均会失败.失败的线程不会被挂起,
仅是被告知失败, 并且允许再次尝试, 当然也允许失败的线程放弃操作.基于这样的原理, CAS操作即时没有锁,
也可以发现其他线程对当前线程的干扰, 并进行恰当的处理.
CPU指令
另外, 虽然上述步骤繁多, 实际上CAS整一个操作过程是一个原子操作, 它是由一条CPU指令完成的,
从指令层保证操作可靠, 不会被多线程干扰.
无锁与volatile
无锁可以通过cas来保证原子性与线程安全, 他与volatile什么区别呢?
当给变量加了volatile关键字, 表示该变量对所有线程可见, 但不保证原子性.
以volatile i, i++为例, 分为以下四步:
- 加载i
- 对i进行+1
- 回写i的值
- 用内存屏障通知其他线程i的值
其中前三步是线程不安全的, 可能其他线程会对i进行读写.
因此任何依赖于之前值的操作, 如i++, i = i *10使用volatile都不安全.
而诸如get/set, boolean这类可以使用volatile.
AtomicInteger
主要接口
 // 取得当前值

 public final int get()

 // 设置当前值

 public final void set(int newValue)

 // 设置新值,并返回旧值

 public final int getAndSet(int newValue)

 // 如果当前值为expect,则设置为u

 public final boolean compareAndSet(int expect, int u)

 // 当前值加1,返回旧值

 public final int getAndIncrement()

 // 当前值减1,返回旧值

 public final int getAndDecrement()

 // 当前值增加delta,返回旧值

 public final int getAndAdd(int delta)

 // 当前值加1,返回新值

 public final int incrementAndGet()

 // 当前值减1,返回新值

 public final int decrementAndGet()

 // 当前值增加delta,返回新值

 public final int addAndGet(int delta)
源码实现
     // 封装了一个int对其加减

     private volatile int value;

     .......

     public final boolean compareAndSet(int expect, int update) {

     // 通过unsafe 基于CPU的CAS指令来实现, 可以认为无阻塞.

         return unsafe.compareAndSwapInt(this, valueOffset, expect, update);

     }

     .......

     public final int getAndIncrement() {

         for (;;) {

         // 当前值

             int current = get();

         // 预期值

             int next = current + 1;

             if (compareAndSet(current, next)) {

         // 如果加成功了, 则返回当前值

                 return current;

         }

         // 如果加失败了, 说明其他线程已经修改了数据, 与期望不相符,

         // 则继续无限循环, 直到成功. 这种乐观锁, 理论上只要等两三个时钟周期就可以设值成功

         // 相比于直接通过synchronized独占锁的方式操作int, 要大大节约等待时间.

         }

     }
Demo
使用10个线程打印0-10000, 最终得到结果10w.
 import java.util.concurrent.atomic.AtomicInteger;

 public class AtomicIntegerDemo {

     static AtomicInteger i = new AtomicInteger();

     public static class AddThread implements Runnable {

         public void run() {

             for (int k = 0; k < 10000; k++) {

                 i.incrementAndGet();

             }

         }

     }

     public static void main(String[] args) throws InterruptedException {

         Thread[] ts = new Thread[10];

         for (int k = 0; k < 10; k++) {

             ts[k] = new Thread(new AddThread());

         }

         for (int k = 0; k < 10; k++) {

             ts[k].start();

         }

         for (int k = 0; k < 10; k++) {

             ts[k].join();

         }

         System.out.println(i);

     }

 }
Unsafe
Unsafe类是在sun.misc包下, 可以用于一些非安全的操作,比如:
根据偏移量设置值, 线程park(), 底层的CAS操作等等.
 // 获取类实例中变量的偏移量

 valueOffset = unsafe.objectFieldOffset(AtomicInteger.class.getDeclaredField("value"));

 // 基于偏移量对值进行操作

 unsafe.compareAndSwapInt(this, valueOffset, expect, update);
主要接口
 // 获得给定对象偏移量上的int值

 public native int getInt(Object o, long offset);

 // 设置给定对象偏移量上的int值

 public native void putInt(Object o, long offset, int x);

 // 获得字段在对象中的偏移量

 public native long objectFieldOffset(Field f);

 // 设置给定对象的int值,使用volatile语义

 public native void putIntVolatile(Object o, long offset, int x);

 // 获得给定对象对象的int值,使用volatile语义

 public native int getIntVolatile(Object o, long offset);

 // 和putIntVolatile()一样,但是它要求被操作字段就是volatile类型的

 public native void putOrderedInt(Object o, long offset, int x);
AtomicReference
与AtomicInteger类似, 只是里面封装了一个对象, 而不是int, 对引用进行修改
主要接口
 get()

 set(V)

 compareAndSet()

 getAndSet(V)
Demo
使用10个线程, 同时尝试修改AtomicReference中的String, 最终只有一个线程可以成功.
 import java.util.concurrent.atomic.AtomicReference;

 public class AtomicReferenceTest {

     public final static AtomicReference<String> attxnicStr = new AtomicReference<String>("abc");

     public static void main(String[] args) {

         for (int i = 0; i < 10; i++) {

             new Thread() {

                 public void run() {

                     try {

                         Thread.sleep(Math.abs((int) (Math.random() * 100)));

                     } catch (InterruptedException e) {

                         e.printStackTrace();

                     }

                     if (attxnicStr.compareAndSet("abc", "def")) {

                         System.out.println("Thread:" + Thread.currentThread().getId() + " change value to " + attxnicStr.get());

                     } else {

                         System.out.println("Thread:" + Thread.currentThread().getId() + " change failed!");

                     }

                 }

             }.start();

         }

     }

 }
AtomicStampedReference
也是封装了一个引用, 主要解决ABA问题.
ABA问题
线程一准备用CAS将变量的值由A替换为B, 在此之前线程二将变量的值由A替换为C, 线程三又将C替换为A, 然后线程一执行CAS时发现变量的值仍然为A, 所以线程一CAS成功.
主要接口
 // 比较设置 参数依次为:期望值 写入新值 期望时间戳 新时间戳

 public boolean compareAndSet(V expectedReference,V newReference,int expectedStamp,int newStamp)

 // 获得当前对象引用

 public V getReference()

 // 获得当前时间戳

 public int getStamp()

 // 设置当前对象引用和时间戳

 public void set(V newReference, int newStamp)
源码分析
     // 内部封装了一个Pair对象, 每次对对象操作的时候, stamp + 1

     private static class Pair<T> {

         final T reference;

         final int stamp;

         private Pair(T reference, int stamp) {

             this.reference = reference;

             this.stamp = stamp;

         }

         static <T> Pair<T> of(T reference, int stamp) {

             return new Pair<T>(reference, stamp);

         }

     }

     private volatile Pair<V> pair;

     // 进行cas操作的时候, 会对比stamp的值

     public boolean compareAndSet(V   expectedReference,

                                  V   newReference,

                                  int expectedStamp,

                                  int newStamp) {

         Pair<V> current = pair;

         return

             expectedReference == current.reference &&

             expectedStamp == current.stamp &&

             ((newReference == current.reference &&

               newStamp == current.stamp) ||

              casPair(current, Pair.of(newReference, newStamp)));

     }
Demo
后台使用多个线程对用户充值, 要求只能充值一次
 public class AtomicStampedReferenceDemo {

  static AtomicStampedReference<Integer> money=new AtomicStampedReference<Integer>(19,0);

     public staticvoid main(String[] args) {

         //模拟多个线程同时更新后台数据库,为用户充值

         for(int i = 0 ; i < 3 ; i++) {

             final int timestamp=money.getStamp();

             newThread() {

                 public void run() {

                     while(true){

                        while(true){

                            Integerm=money.getReference();

                             if(m<20){

                          if(money.compareAndSet(m,m+20,timestamp,timestamp+1)){

                           System.out.println("余额小于20元,充值成功,余额:"+money.getReference()+"元");

                                     break;

                                 }

                             }else{

                                //System.out.println("余额大于20元,无需充值");

                                 break ;

                              }

                        }

                     }

                 }

             }.start();

          }

        //用户消费线程,模拟消费行为

         new Thread() {

              publicvoid run() {

                 for(int i=0;i<100;i++){

                    while(true){

                         int timestamp=money.getStamp();

                         Integer m=money.getReference();

                         if(m>10){

                              System.out.println("大于10元");

                             if(money.compareAndSet(m, m-10,timestamp,timestamp+1)){

                              System.out.println("成功消费10元,余额:"+money.getReference());

                                  break;

                              }

                         }else{

                            System.out.println("没有足够的金额");

                              break;

                         }

                     }

                     try {Thread.sleep(100);} catch (InterruptedException e) {}

                  }

             }

         }.start();

     }

  }
AtomicIntegerArray
支持无锁的数组
主要接口
 // 获得数组第i个下标的元素

 public final int get(int i)

 // 获得数组的长度

 public final int length()

 // 将数组第i个下标设置为newValue,并返回旧的值

 public final int getAndSet(int i, int newValue)

 // 进行CAS操作,如果第i个下标的元素等于expect,则设置为update,设置成功返回true

 public final boolean compareAndSet(int i, int expect, int update)

 // 将第i个下标的元素加1

 public final int getAndIncrement(int i)

 // 将第i个下标的元素减1

 public final int getAndDecrement(int i)

 // 将第i个下标的元素增加delta(delta可以是负数)

 public final int getAndAdd(int i, int delta)
源码分析
     // 数组本身基地址

     private static final int base = unsafe.arrayBaseOffset(int[].class);

     // 封装了一个数组

     private final int[] array;

     static {

         // 数组中对象的宽度, int类型, 4个字节, scale = 4;

         int scale = unsafe.arrayIndexScale(int[].class);

         if ((scale & (scale - 1)) != 0)

             throw new Error("data type scale not a power of two");

         // 前导0 : 一个数字转为二进制后, 他前面0的个数

         // 对于4来讲, 他就是00000000 00000000 00000000 00000100, 他的前导0 就是29

         // 所以shift = 2

         shift = 31 - Integer.numberOfLeadingZeros(scale);

     }

     // 获取第i个元素

     public final int get(int i) {

         return getRaw(checkedByteOffset(i));

     }

     // 第i个元素, 在数组中的偏移量是多少

     private long checkedByteOffset(int i) {

         if (i < 0 || i >= array.length)

             throw new IndexOutOfBoundsException("index " + i);

         return byteOffset(i);

     }

     // base : 数组基地址, i << shift, 其实就是i * 4, 因为这边是int array.

     private static long byteOffset(int i) {

         // i * 4 + base

         return ((long) i << shift) + base;

     }

     // 根据偏移量从数组中获取数据

     private int getRaw(long offset) {

         return unsafe.getIntVolatile(array, offset);

     }
Demo
 import java.util.concurrent.atomic.AtomicIntegerArray;

 public class AtomicArrayDemo {

     static AtomicIntegerArray arr = new AtomicIntegerArray(10);

     public static class AddThread implements Runnable {

         public void run() {

             for (int k = 0; k < 10000; k++) {

                 arr.incrementAndGet(k % arr.length());

             }

         }

     }

     public static void main(String[] args) throws InterruptedException {

         Thread[] ts = new Thread[10];

         for (int k = 0; k < 10; k++) {

             ts[k] = new Thread(new AddThread());

         }

         for (int k = 0; k < 10; k++) {

             ts[k].start();

         }

         for (int k = 0; k < 10; k++) {

             ts[k].join();

         }

         System.out.println(arr);

     }

 }
AtomicIntegerFieldUpdater
让普通变量也享受原子操作
主要接口
 AtomicIntegerFieldUpdater.newUpdater()

 incrementAndGet()
- Updater只能修改它可见范围内的变量。因为Updater使用反射得到这个变量。如果变量不可见,就会出错。比如如果score申明为private,就是不可行的。
- 为了确保变量被正确的读取,它必须是volatile类型的。如果我们原有代码中未申明这个类型,那么简单得申明一下就行,这不会引起什么问题。
- 由于CAS操作会通过对象实例中的偏移量直接进行赋值,因此,它不支持static字段(Unsafe.objectFieldOffset()不支持静态变量)。
 import java.util.concurrent.atomic.AtomicInteger;

 import java.util.concurrent.atomic.AtomicIntegerFieldUpdater;

 public class AtomicIntegerFieldUpdaterDemo {

     public static class Candidate {

         int id;

         // 如果直接把int改成atomicinteger, 可能对代码破坏比较大

         // 因此使用AtomicIntegerFieldUpdater对score进行封装

         volatile int score;

     }

     // 通过反射实现

     public final static AtomicIntegerFieldUpdater<Candidate> scoreUpdater = AtomicIntegerFieldUpdater.newUpdater(Candidate.class, "score");

     // 检查Updater是否工作正确, allScore的结果应该跟score一致

     public static AtomicInteger allScore = new AtomicInteger(0);

     public static void main(String[] args) throws InterruptedException {

         final Candidate stu = new Candidate();

         Thread[] t = new Thread[10000];

         for (int i = 0; i < 10000; i++) {

             t[i] = new Thread() {

                 public void run() {

                     if (Math.random() > 0.4) {

                         scoreUpdater.incrementAndGet(stu);

                         allScore.incrementAndGet();

                     }

                 }

             };

             t[i].start();

         }

         for (int i = 0; i < 10000; i++) {

             t[i].join();

         }

         System.out.println("score=" + stu.score);

         System.out.println("allScore=" + allScore);

     }

 }
无锁的Vector
jdk中Vector是加锁的, 网上找的一个无锁Vector LockFreeVector, 给他添加了源码中文注释.
主要关注push_back, 添加元素的函数
 import java.util.AbstractList;

 import java.util.concurrent.atomic.AtomicReference;

 import java.util.concurrent.atomic.AtomicReferenceArray;

 /**

  * It is a thread safe and lock-free vector.

  * This class implement algorithm from:<br>

  *

  * Lock-free Dynamically Resizable Arrays <br>

  *

  * @param <E> type of element in the vector

  *

  */

 public class LockFreeVector<E> extends AbstractList<E> {

     private static final boolean debug = false;

     /**

      * Size of the first bucket. sizeof(bucket[i+1])=2*sizeof(bucket[i])

      */

     private static final int FIRST_BUCKET_SIZE = 8;

     /**

      * number of buckets. 30 will allow 8*(2^30-1) elements

      */

     private static final int N_BUCKET = 30;

     /**

      * We will have at most N_BUCKET number of buckets. And we have

      * sizeof(buckets.get(i))=FIRST_BUCKET_SIZE**(i+1)

      *

      * 为什么AtomicReferenceArray里再套一个AtomicReferenceArray呢, 类似一个篮子(buckets)里放了很多篮子

      * 为了在容量扩展时希望尽可能少的改动原有数据, 因此把一维数组扩展成二维数组.

      * 该二维数组并非均衡的分布. 可能第一个数组8个元素, 第二个数组16个元素, 第三个数组32个......

      */

     private final AtomicReferenceArray<AtomicReferenceArray<E>> buckets;

     /**

      * @param <E>

      */

     static class WriteDescriptor<E> {

         public E oldV;

         public E newV;

         public AtomicReferenceArray<E> addr;

         public int addr_ind;

         /**

          * Creating a new descriptor.

          *

          * @param addr Operation address 对哪个数组进行写

          * @param addr_ind  Index of address 指定index

          * @param oldV old operand

          * @param newV new operand

          */

         public WriteDescriptor(AtomicReferenceArray<E> addr, int addr_ind,

                                E oldV, E newV) {

             this.addr = addr;

             this.addr_ind = addr_ind;

             this.oldV = oldV;

             this.newV = newV;

         }

         /**

          * set newV.

          */

         public void doIt() {

             // 这边失败后重试的逻辑在另外的代码里.

             addr.compareAndSet(addr_ind, oldV, newV);

         }

     }

     /**

      * @param <E>

      */

     static class Descriptor<E> {

         public int size;

         volatile WriteDescriptor<E> writeop;

         /**

          * Create a new descriptor.

          *

          * @param size Size of the vector

          * @param writeop Executor write operation

          */

         public Descriptor(int size, WriteDescriptor<E> writeop) {

             this.size = size;

             this.writeop = writeop;

         }

         /**

          *

          */

         public void completeWrite() {

             WriteDescriptor<E> tmpOp = writeop;

             if (tmpOp != null) {

                 tmpOp.doIt();

                 writeop = null; // this is safe since all write to writeop use

                 // null as r_value.

             }

         }

     }

     private AtomicReference<Descriptor<E>> descriptor;

     private static final int zeroNumFirst = Integer

             .numberOfLeadingZeros(FIRST_BUCKET_SIZE);

     /**

      * Constructor.

      */

     public LockFreeVector() {

         buckets = new AtomicReferenceArray<AtomicReferenceArray<E>>(N_BUCKET);

         buckets.set(0, new AtomicReferenceArray<E>(FIRST_BUCKET_SIZE));

         descriptor = new AtomicReference<Descriptor<E>>(new Descriptor<E>(0,

                 null));

     }

     /**

      * add e at the end of vector.

      * 把元素e加到vector中

      *

      * @param e

      *            element added

      */

     public void push_back(E e) {

         Descriptor<E> desc;

         Descriptor<E> newd;

         do {

             desc = descriptor.get();

             desc.completeWrite();

             // desc.size   Vector 本身的大小

             // FIRST_BUCKET_SIZE  第一个一维数组的大小

             int pos = desc.size + FIRST_BUCKET_SIZE;

             // 取出pos 的前导0

             int zeroNumPos = Integer.numberOfLeadingZeros(pos);

             // zeroNumFirst  为FIRST_BUCKET_SIZE 的前导0

             // bucketInd 数据应该放到哪一个一维数组(篮子)里的

             int bucketInd = zeroNumFirst - zeroNumPos;

             // 00000000 00000000 00000000 00001000 第一个篮子满 8

             // 00000000 00000000 00000000 00011000 第二个篮子满 8 + 16

             // 00000000 00000000 00000000 00111000 第三个篮子满 8 + 16 + 32

             // ... bucketInd其实通过前导0相减, 就是为了得出来当前第几个篮子是空的.

             // 判断这个一维数组是否已经启用, 可能是第一次初始化

             if (buckets.get(bucketInd) == null) {

                 //newLen  一维数组的长度, 取前一个数组长度 * 2

                 int newLen = 2 * buckets.get(bucketInd - 1).length();

                 // 设置失败也没关系, 只要有人初始化成功就行

                 buckets.compareAndSet(bucketInd, null,

                         new AtomicReferenceArray<E>(newLen));

             }

             // 在这个一位数组中,我在哪个位置

             // 0x80000000是 10000000 00000000 00000000 00000000

             // 这句话就是把上述111000, 第一个1变成了0, 得到011000, 即新值的位置.

             int idx = (0x80000000>>>zeroNumPos) ^ pos;

             // 通过bucketInd与idx来确定元素在二维数组中的位置

             // 期望写入的时候, 该位置值是null, 如果非null, 说明其他线程已经写了, 则继续循环.

             newd = new Descriptor<E>(desc.size + 1, new WriteDescriptor<E>(

                     buckets.get(bucketInd), idx, null, e));

             // 循环cas设值

         } while (!descriptor.compareAndSet(desc, newd));

         descriptor.get().completeWrite();

     }

     /**

      * Remove the last element in the vector.

      *

      * @return element removed

      */

     public E pop_back() {

         Descriptor<E> desc;

         Descriptor<E> newd;

         E elem;

         do {

             desc = descriptor.get();

             desc.completeWrite();

             int pos = desc.size + FIRST_BUCKET_SIZE - 1;

             int bucketInd = Integer.numberOfLeadingZeros(FIRST_BUCKET_SIZE)

                     - Integer.numberOfLeadingZeros(pos);

             int idx = Integer.highestOneBit(pos) ^ pos;

             elem = buckets.get(bucketInd).get(idx);

             newd = new Descriptor<E>(desc.size - 1, null);

         } while (!descriptor.compareAndSet(desc, newd));

         return elem;

     }

     /**

      * Get element with the index.

      *

      * @param index

      *            index

      * @return element with the index

      */

     @Override

     public E get(int index) {

         int pos = index + FIRST_BUCKET_SIZE;

         int zeroNumPos = Integer.numberOfLeadingZeros(pos);

         int bucketInd = zeroNumFirst - zeroNumPos;

         int idx = (0x80000000>>>zeroNumPos) ^ pos;

         return buckets.get(bucketInd).get(idx);

     }

     /**

      * Set the element with index to e.

      *

      * @param index

      *            index of element to be reset

      * @param e

      *            element to set

      */

     /**

      * {@inheritDoc}

      */

     public E set(int index, E e) {

         int pos = index + FIRST_BUCKET_SIZE;

         int bucketInd = Integer.numberOfLeadingZeros(FIRST_BUCKET_SIZE)

                 - Integer.numberOfLeadingZeros(pos);

         int idx = Integer.highestOneBit(pos) ^ pos;

         AtomicReferenceArray<E> bucket = buckets.get(bucketInd);

         while (true) {

             E oldV = bucket.get(idx);

             if (bucket.compareAndSet(idx, oldV, e))

                 return oldV;

         }

     }

     /**

      * reserve more space.

      *

      * @param newSize

      *            new size be reserved

      */

     public void reserve(int newSize) {

         int size = descriptor.get().size;

         int pos = size + FIRST_BUCKET_SIZE - 1;

         int i = Integer.numberOfLeadingZeros(FIRST_BUCKET_SIZE)

                 - Integer.numberOfLeadingZeros(pos);

         if (i < 1)

             i = 1;

         int initialSize = buckets.get(i - 1).length();

         while (i < Integer.numberOfLeadingZeros(FIRST_BUCKET_SIZE)

                 - Integer.numberOfLeadingZeros(newSize + FIRST_BUCKET_SIZE - 1)) {

             i++;

             initialSize *= FIRST_BUCKET_SIZE;

             buckets.compareAndSet(i, null, new AtomicReferenceArray<E>(

                     initialSize));

         }

     }

     /**

      * size of vector.

      *

      * @return size of vector

      */

     public int size() {

         return descriptor.get().size;

     }

     /**

      * {@inheritDoc}

      */

     @Override

     public boolean add(E object) {

         push_back(object);

         return true;

     }

 }
Java高并发之无锁与Atomic源码分析的更多相关文章
- java io系列02之 ByteArrayInputStream的简介,源码分析和示例(包括InputStream)
我们以ByteArrayInputStream,拉开对字节类型的“输入流”的学习序幕.本章,我们会先对ByteArrayInputStream进行介绍,然后深入了解一下它的源码,最后通过示例来掌握它的 ...
- java io系列03之 ByteArrayOutputStream的简介,源码分析和示例(包括OutputStream)
前面学习ByteArrayInputStream,了解了“输入流”.接下来,我们学习与ByteArrayInputStream相对应的输出流,即ByteArrayOutputStream.本章,我们会 ...
- Java 序列化和反序列化(三)Serializable 源码分析 - 2
目录 Java 序列化和反序列化(三)Serializable 源码分析 - 2 1. ObjectStreamField 1.1 数据结构 1.2 构造函数 2. ObjectStreamClass ...
- Java 序列化和反序列化(二)Serializable 源码分析 - 1
目录 Java 序列化和反序列化(二)Serializable 源码分析 - 1 1. Java 序列化接口 2. ObjectOutputStream 源码分析 2.1 ObjectOutputSt ...
- Java并发编程笔记之读写锁 ReentrantReadWriteLock 源码分析
我们知道在解决线程安全问题上使用 ReentrantLock 就可以,但是 ReentrantLock 是独占锁,同时只有一个线程可以获取该锁,而实际情况下会有写少读多的场景,显然 Reentrant ...
- 【Java】NIO中Selector的select方法源码分析
该篇博客的有些内容和在之前介绍过了,在这里再次涉及到的就不详细说了,如果有不理解请看[Java]NIO中Channel的注册源码分析, [Java]NIO中Selector的创建源码分析 Select ...
- 【Java入门提高篇】Day26 Java容器类详解(八)HashSet源码分析
前面花了好几篇的篇幅把HashMap里里外外说了个遍,大家可能对于源码分析篇已经讳莫如深了.别慌别慌,这一篇来说说集合框架里最偷懒的一个家伙——HashSet,为什么说它是最偷懒的呢,先留个悬念,看完 ...
- java使用websocket,并且获取HttpSession,源码分析
转载请在页首注明作者与出处 http://www.cnblogs.com/zhuxiaojie/p/6238826.html 一:本文使用范围 此文不仅仅局限于spring boot,普通的sprin ...
- 【Java入门提高篇】Day21 Java容器类详解(四)ArrayList源码分析
今天要介绍的是List接口中最常用的实现类——ArrayList,本篇的源码分析基于JDK8,如果有不一致的地方,可先切换到JDK8后再进行操作. 本篇的内容主要包括这几块: 1.源码结构介绍 2.源 ...
随机推荐
- 简译《Dissecting SQL Server Execution Plans》——连载总入口
转载请注明出处 由于工作及学习需要,最近看了一下<Dissecting SQL Server Execution Plans>,这是少有的专门描述执行计划的优秀书籍,为了快速查找并供入门同 ...
- 【面试笔试算法】牛客网一站通Offer编程题2016.4.19
牛客网一站通offer (一)字符串变形 1. 题目: 对于一个给定的字符串,我们需要在线性(也就是O(n))的时间里对它做一些变形.首先这个字符串中包含着一些空格,就像"Hello Wor ...
- Leetcode_141_Linked List Cycle
本文是在学习中的总结,欢迎转载但请注明出处:http://blog.csdn.net/pistolove/article/details/42833739 Given a linked list, d ...
- Linux内核中SPI总线驱动分析
本文主要有两个大的模块:一个是SPI总线驱动的分析 (研究了具体实现的过程): 另一个是SPI总线驱动的编写(不用研究具体的实现过程). 1 SPI概述 SPI是英语Serial Peripheral ...
- rhel6.4 安装nodejs和Mysql DB服务
rhel6.4 安装nodejs和Mysql DB服务 安装好redhat6.4虚拟机后, 安装软件: # yum install gcc-c++ openssl-devel Loaded plugi ...
- ITU-T G.1081 IPTV性能监测点 (Performance monitoring points for IPTV)
ITU-T 建议书 G.1081 IPTV性能监测点 Performance monitoring points for IPTV Summary Successful deployment of I ...
- Advanced Pricing - How to source Pricing Attributes using QP_CUSTOM_SOURCE.Get_Custom_Attribute_Valu
详细内容需要参考文档:Oracle 11i Advanced Pricing-Don't Customize, Extend! utl:http://blog.csdn.net/cai_xingyun ...
- OAF更改动态头行
选择头信息,动态刷新行信息.本文将详细介绍该种需求的做法. 本例沿用<OAF-头行结构>的am与vo,所以在进行本例之前,请先完成<OAF-头行结构> 一.创建页面 在test ...
- iOS下如何获取一个类的所有子类
因为项目中,不同用户切换时,用的是不同数据库,路径不同,而JKDBModel,数据库创建和字段检测,在app一次生命周期里,只会执行一次,所以得考虑账号切换时,创建数据库,需要获取所有JKDBMode ...
- ZooKeeper leader election
Paxos是分布式应用中解决同步问题的核心.作为应用研发工程师,我们总是倾向于使用一种相对简洁的方式实现复杂的算法.ZooKeeper leader election实现就是一个非常好的参考. 其实现 ...