Jupyter Notebook的快捷键
Jupyter Notebook 有两种键盘输入模式。
编辑模式,允许你往单元中键入代码或文本,这时的单元框线是绿色的。
命令模式,键盘输入运行程序命令;这时的单元框线是蓝色。
命令模式 (按键 Esc 开启)
- Enter : 转入编辑模式
- Shift-Enter : 运行本单元,选中下个单元
- Ctrl-Enter : 运行本单元
- Alt-Enter : 运行本单元,在其下插入新单元
- Y : 单元转入代码状态
- M :单元转入markdown状态
- R : 单元转入raw状态
- 1 : 设定 1 级标题
- 2 : 设定 2 级标题
- 3 : 设定 3 级标题
- 4 : 设定 4 级标题
- 5 : 设定 5 级标题
- 6 : 设定 6 级标题
- Up : 选中上方单元
- K : 选中上方单元
- Down : 选中下方单元
- J : 选中下方单元
- Shift-K : 扩大选中上方单元
- Shift-J : 扩大选中下方单元
- A : 在上方插入新单元
- B : 在下方插入新单元
- X : 剪切选中的单元
- C : 复制选中的单元
- Shift-V : 粘贴到上方单元
- V : 粘贴到下方单元
- Z : 恢复删除的最后一个单元
- D,D : 删除选中的单元
- Shift-M : 合并选中的单元
- Ctrl-S : 文件存盘
- S : 文件存盘
- L : 转换行号
- O : 转换输出
- Shift-O : 转换输出滚动
- Esc : 关闭页面
- Q : 关闭页面
- H : 显示快捷键帮助
- I,I : 中断Notebook内核
- 0,0 : 重启Notebook内核
- Shift : 忽略
- Shift-Space : 向上滚动
- Space : 向下滚动
编辑模式 ( Enter 键启动)
- Tab : 代码补全或缩进
- Shift-Tab : 提示
- Ctrl-] : 缩进
- Ctrl-[ : 解除缩进
- Ctrl-A : 全选
- Ctrl-Z : 复原
- Ctrl-Shift-Z : 再做
- Ctrl-Y : 再做
- Ctrl-Home : 跳到单元开头
- Ctrl-Up : 跳到单元开头
- Ctrl-End : 跳到单元末尾
- Ctrl-Down : 跳到单元末尾
- Ctrl-Left : 跳到左边一个字首
- Ctrl-Right : 跳到右边一个字首
- Ctrl-Backspace : 删除前面一个字
- Ctrl-Delete : 删除后面一个字
- Esc : 进入命令模式
- Ctrl-M : 进入命令模式
- Shift-Enter : 运行本单元,选中下一单元
- Ctrl-Enter : 运行本单元
- Alt-Enter : 运行本单元,在下面插入一单元
- Ctrl-Shift-- : 分割单元
- Ctrl-Shift-Subtract : 分割单元
- Ctrl-S : 文件存盘
- Shift : 忽略
- Up : 光标上移或转入上一单元
- Down :光标下移或转入下一单元
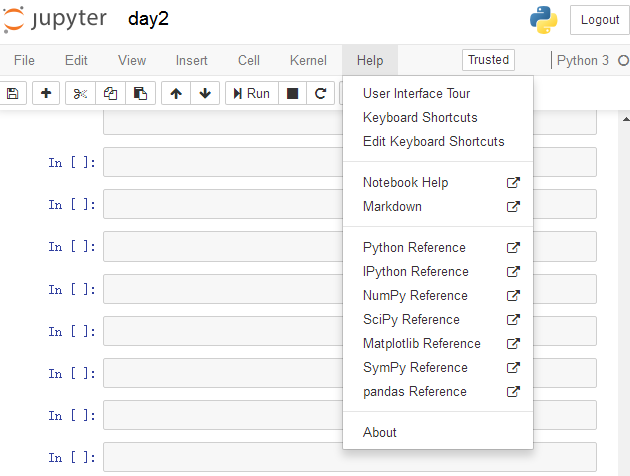
HELP可以帮助我们直接进入对应的官方文档
Keyboard Shortcuts 原文档
Command Mode (press Esc to enable)Edit Shortcuts
Edit Mode (press Enter to enable)
Jupyter Notebook的快捷键的更多相关文章
- jupyter notebook常用快捷键
阅读目录 命令模式 (按键 Esc 开启) 编辑模式 ( Enter 键启动) Jupyter Notebook 的快捷键 使用前需要进行安装: pip install jupyter (前提是你 ...
- Jupyter Notebook 的快捷键
原文:http://blog.csdn.net/lawme/article/details/51034543 Jupyter Notebook 的快捷键 Jupyter Notebook 有两种键盘输 ...
- Jupyter Notebook 常用快捷键
Jupyter Notebook 提供了比 IPython 美观的多得多的可视化形式.(比如对于 pandas 下的 DataFrame 的展示,df.head(5)) Jupyter Noteboo ...
- [转载]Jupyter Notebook 的快捷键
原文:http://blog.csdn.net/lawme/article/details/51034543 Jupyter Notebook 的快捷键 Jupyter Notebook 有两种键盘输 ...
- 【转载】Jupyter Notebook 常用快捷键
原文:http://blog.csdn.net/lawme/article/details/51034543 Jupyter Notebook 有两种键盘输入模式.编辑模式,允许你往单元中键入代码或文 ...
- Jupyter Notebook 常用快捷键 (转)
Jupyter Notebook 有两种键盘输入模式. 编辑模式,允许你往单元中键入代码或文本:这时的单元框线是绿色的. 命令模式,键盘输入运行程序命令:这时的单元框线为蓝色. 命令模式 (按键 Es ...
- Jupyter NoteBook使用快捷键
命令模式 (按键 Esc 开启) Enter : 转入编辑模式 Shift-Enter : 运行本单元,选中下个单元 Ctrl-Enter : 运行本单元 Alt-Enter : 运行本单元,在其下插 ...
- [转]Jupyter NoteBook 的快捷键使用指南
- Jupyter Notebook(推荐使用Anaconda安装)
一.Jupyter Notebook介绍 1.简介 Jupyter Notebook是基于网页的用于交互计算的应用程序.其可被应用于全过程计算:开发.文档编写.运行代码和展示结果. 简而言之,Jupy ...
随机推荐
- JSP中的编译指令和动作指令的区别
JSP中的编译指令和动作指令的区别 1.编译指令是通知Servlet引擎的处理消息,而动作指令只是运行时的脚本动作 2.编译指令是在将JSP编译成Servlet时起作用,而动作指令可替换成JSP脚本, ...
- 查找IFileSourceFilter上的Pin
创建了IFileSourceFilter,可IFileSourceFilter好像不是从IBaseFilter继承来的,没有EnumPins,那应该怎么查找IFileSourceFilter上的pin ...
- javascript学习记录-2-18
对象定义的几种方法: var person=new Object(); person.name="111"; person.age=22; 或 var person={ na ...
- centos7下搭建 MongoDB -01
距离上次写的一篇mongoDB搭建已经有一年多的时间了,刚好这次在公司搭建好在centos7下的mongodb搭建,简单的做一个记录吧 mongo 是一个基于分布式文件存储的数据库,数据主要存储在磁盘 ...
- PHP Curl会话请求
/** * @param string $url 请求地址 * @param string $type 请求类型 post get * @param string $arr 如果是post 传递的数据 ...
- 2018第一波iOS经典笔试题(现场实拍)
序言 作为一个开发者,眼里不仅仅只存在于那一行又一行的代码,更还有那诗和远方. 注明:面试是对自我审视的一种过程,面试题和iOS程序员本身技术水平没任何关联,无论你能否全部答出,都不要对自己产生任何正 ...
- autobase之配置文件
配置文件内容: 1.db_info{},数据库链接属性,包括Oracle,dmdb,快立方 2.credit etc目录的路径 3.批量基础数据导入sql路径 4.用例执行日志存储目录路径 功能: 1 ...
- Loadrunner 11在win7录制中失败“the recording of the application was terminated by windows due to window data execution prevention feature"
在录制过程中遇到如下问题: 查了下如何Enable, Disable Data Execution Prevention (DEP) in Windows 10/8/7 (http://www.the ...
- Linux Centos 下安装软件 三种方式(转)
Linux学习的路还很远呢,各位码农,新年快乐哈! 1)一种是软件的源代码,您需要自己动手编译它.这种软件安装包通常是用gzip压缩过的tar包(后缀为.tar.gz). 2)另一种是软件的可执行程序 ...
- mount挂载与umount卸载
mount挂载与umount卸载 author:headsen chen 2017-10-23 15:13:51 个人原创,转载请注明作者,否则依法追究法律责任 mount:挂载: eg ...