001-web基本程序搭建
一、IDEA创建项目
1、基本项目创建
1.1、基本步骤
1、Create New Project 【File→New→Project】→New Project
2、maven→group、artifactId、version即可
1.2、调整maven配置
1、统一源代码编码方式
在pom中添加
- <properties>
- <project.build.sourceEncoding>UTF-8</project.build.sourceEncoding>
- </properties>
2、统一源代码与编译输出JDK版本
- <build>
- <plugins>
- <plugin>
- <groupId>org.apache.maven.plugins</groupId>
- <artifactId>maven-compiler-plugin</artifactId>
- <version>3.3</version>
- <configuration>
- <source>1.8</source>
- <target>1.8</target>
- </configuration>
- </plugin>
- </plugins>
- </build>
maven中心仓库地址:http://search.maven.org/
3、打包时忽略测试
- <!-- Test -->
- <plugin>
- <groupId>org.apache.maven.plugins</groupId>
- <artifactId>maven-surefire-plugin</artifactId>
- <version>2.18.1</version>
- <configuration>
- <skipTests>true</skipTests>
- </configuration>
- </plugin>
基本项目创建完毕
2、转为java web项目
2.1、转化步骤
a.在main下添加webapp目录
b.在webapp下添加WEB-INF目录
c.在WEB-INF下添加web.xml文件
此时IDEA会出现
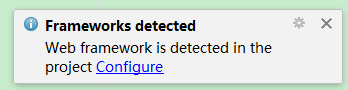
自动识别项目为web【即Servlet框架】项目,点击Configure,在点击ok即可
在web.xml中添加如下,使用servlet 3.0
- <?xml version="1.0" encoding="UTF-8"?>
- <web-app xmlns="http://java.sun.com/xml/ns/javaee"
- xmlns:xsi="http://www.w3.org/2001/XMLSchema-instance"
- xsi:schemaLocation="http://java.sun.com/xml/ns/javaee http://java.sun.com/xml/ns/javaee/web-app_3_0.xsd"
- version="3.0">
- </web-app>
2.2、添加javaweb的maven依赖
1、打包设置【pom中】
- <packaging>war</packaging>
2、添加java web 所需依赖Servlet 、JSP、JSTL等
- <dependencies>
- <!-- Servlet -->
- <dependency>
- <groupId>javax.servlet</groupId>
- <artifactId>javax.servlet-api</artifactId>
- <version>3.1.0</version>
- <scope>provided</scope>
- </dependency>
- <!-- JSP -->
- <dependency>
- <groupId>javax.servlet.jsp</groupId>
- <artifactId>jsp-api</artifactId>
- <version>2.2</version>
- <scope>provided</scope>
- </dependency>
- <!-- JSTL -->
- <dependency>
- <groupId>javax.servlet</groupId>
- <artifactId>jstl</artifactId>
- <version>1.2</version>
- <scope>runtime</scope>
- </dependency>
- </dependencies>
3、增加tomcat插件
- <!-- Tomcat -->
- <plugin>
- <groupId>org.apache.tomcat.maven</groupId>
- <artifactId>tomcat7-maven-plugin</artifactId>
- <version>2.2</version>
- <configuration>
- <path>/${project.artifactId}</path>
- </configuration>
- </plugin>
至此java web搭建完毕
3、简单web应用【原生】
需求:写一个HelloServlet,接收Get类型的/hello请求,转发到/WEB-INF/jsp/hello.jsp页面,在hello.jsp页面上显示当前时间。
3.1、编写Servlet类
- package com.lhx.chapter1;
- import javax.servlet.ServletException;
- import javax.servlet.annotation.WebServlet;
- import javax.servlet.http.HttpServlet;
- import javax.servlet.http.HttpServletRequest;
- import javax.servlet.http.HttpServletResponse;
- import java.io.IOException;
- import java.text.DateFormat;
- import java.text.SimpleDateFormat;
- import java.util.Date;
- /**
- * @author lihongxu6
- * @since 2017/10/9 14:07
- */
- @WebServlet("/hello")
- public class HelloServlet extends HttpServlet {
- @Override
- protected void doGet(HttpServletRequest req, HttpServletResponse resp)
- throws ServletException, IOException {
- DateFormat dateFormat = new SimpleDateFormat("yyyy-MM-dd HH:mm:ss");
- String currentTime = dateFormat.format(new Date());
- req.setAttribute("currentTime", currentTime);
- req.getRequestDispatcher("/WEB-INF/jsp/hello.jsp").forward(req, resp);
- }
- }
说明:使用WebServlet注解并配置请求路径,对外发布Servlet服务。
Servlet 3.0增加WebServlet配置后,在web.xml不用配置即可
3.2、编写jsp页面
在WEB-INF下建立jsp文件夹,下建立hello.jsp
- <%@ page contentType="text/html;charset=UTF-8" language="java" %>
- <html>
- <head>
- <title>Title</title>
- </head>
- <body>
- <h1>Hello!</h1>
- <h2>当前时间是:${currentTime}</h2>
- </body>
- </html>
至此以编写完成
4、web启动
方式一、使用集成的tomcat
http://www.cnblogs.com/bjlhx/p/7059671.html
方式二、使用tomcat的maven插件
在pom中增加如下
- <!-- Tomcat -->
- <plugin>
- <groupId>org.apache.tomcat.maven</groupId>
- <artifactId>tomcat7-maven-plugin</artifactId>
- <version>2.2</version>
- <configuration>
- <path>/${project.artifactId}</path>
- </configuration>
- </plugin>
打开IDEA的maven面板,双击tomcat7:run命令即可。
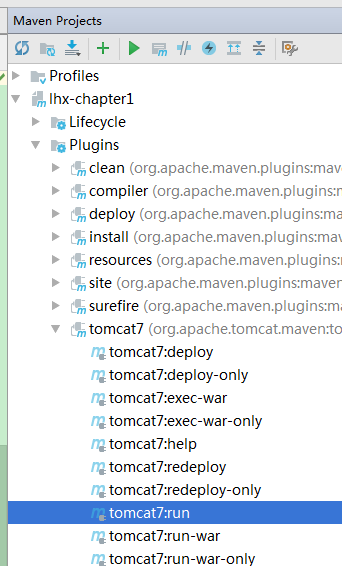
访问此地址Running war on http://localhost:8080/lhx-chapter1/hello即可
以Debug方式访问

添加一个maven方式的Configuration配置
1、打开 Edit Configuration配置,找到maven
2、名称输入tomcat,Command Line输入:tomcat7:run即可
5、git的使用
5.1、编写.gitignore文件
在根目录下增加.gitignore文件
- # Maven #
- target/
- # IDEA #
- .idea/
- *.iml
- # Eclipse #
- .settings/
- .metadata/
- .classpath
- .project
- Servers/
5.2、提交本地git
在VCS中”Import into Version Control/Create Git Repository... “,点击ok,即创建本地仓库完成。
选中项目,右键→git→add将添加至本地仓库
选中项目,右键→git→Commit Directory...将添加至本地仓库
git add负责将文件内容存入blob对象,并更新index,git commit负责根据index生成tree对象,然后生成commit对象指向这个tree对象。
5.3、推送至远程git
可以使用开源的Github或者开源中国http://git.oschina.net,建立项目
本地使用
- git remote add origin < Git仓库地址>
- git push -u origin master
001-web基本程序搭建的更多相关文章
- 简单java web应用程序搭建与部署
1. 准备工作 工具:tomcat.editplus.jdk.windows操作系统 操作:在windows操作系统上安装jdk.tomcat.editplus,配置JAVA_HOME,Path,CL ...
- net core体系-web应用程序-4asp.net core2.0 项目实战(任务管理系统)-2项目搭建
系统要求 首先建议采用 Windows 10 专业版/企业版/教育版,且必须是64位操作系统,原因是docker装起来比较方便,Win7装起来比较麻烦,且不确定是否有其他问题(自己没有实践过) 其次W ...
- 基于EasyUI的Web应用程序及过去一年的总结
前言 在这家公司服务了一年时间,一个多月之前已经提交了离职申请,好在领导都已经批准了,过几天就办理手续了,在此感谢领导的栽培与挽留,感谢各位同事在工作中的给我的帮助,感谢师傅(在我心中当他是我师傅,跟 ...
- ASP.NET MVC3入门教程之第一个WEB应用程序
本文转载自:http://www.youarebug.com/forum.php?mod=viewthread&tid=91&extra=page%3D1 上一节,我们已经搭建好了AS ...
- Node.js高级编程读书笔记 - 4 构建Web应用程序
Outline 5 构建Web应用程序 5.1 构建和使用HTTP中间件 5.2 用Express.js创建Web应用程序 5.3 使用Socket.IO创建通用的实时Web应用程序 5 构建Web应 ...
- CentOS下Web服务器环境搭建LNMP一键安装包
CentOS下Web服务器环境搭建LNMP一键安装包 时间:2014-09-04 00:50来源:osyunwei.com 作者:osyunwei.com 举报 点击:3797次 最新版本:lnmp- ...
- 一步一步学习SignalR进行实时通信_9_托管在非Web应用程序
原文:一步一步学习SignalR进行实时通信_9_托管在非Web应用程序 一步一步学习SignalR进行实时通信\_9_托管在非Web应用程序 一步一步学习SignalR进行实时通信_9_托管在非We ...
- office web apps 部署-搭建office web apps服务器
二.搭建office web apps服务器 相关文件可以去焰尾迭分享的百度网盘下载,下载地址:http://pan.baidu.com/s/1o6tCo8y#path=%252Foffice%252 ...
- (译)Web是如何工作的(2):客户端-服务器模型,以及Web应用程序的结构
原文地址:https://medium.freecodecamp.org/how-the-web-works-part-ii-client-server-model-the-structure-of- ...
- 03、NetCore2.0下Web应用之搭建最小框架
03.NetCore2.0下Web应用之搭建最小框架 这里我们不使用VS2017或者CLI命令的方式创建Asp.Net Core 2.0网页应用程序,而是完全手工的一点点搭建一个Web框架,以便更好的 ...
随机推荐
- php常见的类库-文件操作类
工作中经常用php操作文件,因此把常用文件操作整理出来: class hylaz_file{ /** * Read file * @param string $pathname * @return s ...
- 在ubuntu下安装ns2-allinone-2.35.tar.gz
1.软件下载 首先先下载ns-allinone-2.35.tar.gz (下载路径http://sourceforge.net/projects/nsnam/files/),将其放到你/home/my ...
- 设置一个label显示多种颜色,多种字体大小
UILabel* label = [[UILabel alloc] init]; label.frame = CGRectMake(0, 100, 200, 100); label.textColor ...
- centos6.5下redis的安装与配置
参照官网描述(https://redis.io/download),linux下redis安装步骤如下: $ wget http://download.redis.io/releases/redis- ...
- openWRT自学---如何开发新的用户态模块-helloworld
以http://www.gargoyle-router.com/wiki/doku.php?id=openwrt_coding为参考文档 1.要获得openWRT的sdk环境.只要在Backfire的 ...
- 切比雪夫多项式(Chebyshev Polynomials)
切比雪夫多项式在逼近理论中有重要的应用.这是因为第一类切比雪夫多项式的根(被称为切比雪夫节点)可以用于多项式插值.相应的插值多项式能最大限度地降低龙格现象,并且提供多项式在连续函数的最佳一致逼近. 参 ...
- 黑马day11 事务的四大特性
1.事务的四大特性:一个事务具有的最主要的特性.一个设计良好的数据库能够为我们保证这四大特性. 1.1原子性:原子性是指事务是一个不可切割的工作单位,事务中的操作要么都发生要么都不发生. 1.2一致性 ...
- poj 2226(最小覆盖)
题目链接:http://poj.org/problem?id=2226 思路:将连续的横向水洼看成X集合中的一个点,连续的纵向水洼看成Y集合中的一个点,而将每个水点看成一条边,它连接了所在的X集合中的 ...
- OpenCV学习笔记十:opencv_superres模块
一,简介: 该库用于图像超分辨率重建.即通过硬件或软件的方法提高原有图像的分辨率,通过一系列低分辨率的图像来得到一幅高分辨率的图像.
- OpenCV学习笔记四:ImgProc模块
一,简介 这个模块包含一系列的常用图像处理算法. 二,分析 此模块包含的文件如下图: 其导出算法包括如下: /*********************** Background statistics ...