消息中间件 ActiveMQ的简单使用
一、AactiveMQ的下载和安装
1. 下载ActiveMQ
地址:http://activemq.apache.org/activemq-5152-release.html
我这里下载的是window的版本
2. 下载后,解压

里面有win32位和win64两种文件夹,找到你电脑上对应的win版本,我这里用的win64

右击activemq.bat,并且以管理员身份运行
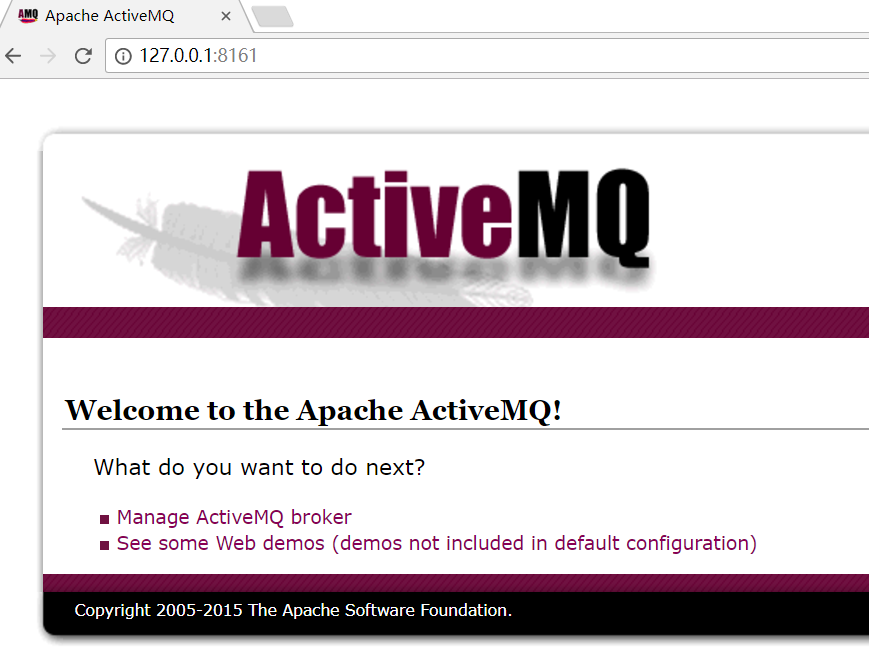
启动成功后,会打印http的地址

打开这个网址http://127.0.0.1:8186
二、代码的使用
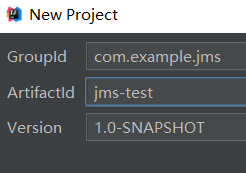
1. 创建工程
创建一个Maven工程,
2. 创建生产者
public class AppProducer

{

    private static final String url = "tcp://192.168.2.121:61616";

    private static final String queueName="queue-test";

    public static void  main(String[] args){

        //1. 创建ConnectionFactory

        ConnectionFactory connectionFactory = new ActiveMQConnectionFactory(url);

        try {

            //2. 创建Connection

            Connection connection = connectionFactory.createConnection();

            //3. 启动连接

             connection.start();

             //4. 创建会话

            Session session = connection.createSession(false, Session.AUTO_ACKNOWLEDGE);

            //5. 创建一个目标

            Destination destination = session.createQueue(queueName);

            //6.  创建一个目标

            MessageProducer producer = session.createProducer(destination);

            for(int i=0; i<100; i++){

                //7. 创建消息

                TextMessage textMessage = session.createTextMessage("test" + i);

                //8. 发布消息

                producer.send(textMessage);

                System.out.println("发送消息" + textMessage.getText());

            }

            //9.关闭连接

            connection.close();

        } catch (JMSException e) {

            e.printStackTrace();

        }

    }
3. 创建消费者
public class AppConsumer {

    private static final String url = "tcp://192.168.2.121:61616";

    private static final String queueName="queue-test";

    public static void  main(String[] args) throws JMSException{

        //1. 创建ConnectionFactory

        ConnectionFactory connectionFactory = new ActiveMQConnectionFactory(url);

        //2. 创建Connection

        Connection connection = connectionFactory.createConnection();

        //3. 启动连接

        connection.start();

        //4. 创建会话

        Session session = connection.createSession(false, Session.AUTO_ACKNOWLEDGE);

        //5. 创建一个目标

        Destination destination = session.createQueue(queueName);

        //6. 创建一个消费者

        MessageConsumer consumer = session.createConsumer(destination);

        //7. 创建一个监听器

        consumer.setMessageListener(new MessageListener() {

            public void onMessage(Message message) {

                TextMessage textMessage = (TextMessage)message;

                try {

                    System.out.println("接收消息" + textMessage.getText());

                } catch (JMSException e) {

                    e.printStackTrace();

                }

            }

        });

    }

}
三、主题模式下的消息
1. 消费者
public class AppConsumer {

    private static final String url = "tcp://192.168.2.121:61616";

    private static final String topicName="topic-test";

    public static void  main(String[] args) throws JMSException{

        //1. 创建ConnectionFactory

        ConnectionFactory connectionFactory = new ActiveMQConnectionFactory(url);

        //2. 创建Connection

        Connection connection = connectionFactory.createConnection();

        //3. 启动连接

        connection.start();

        //4. 创建会话

        Session session = connection.createSession(false, Session.AUTO_ACKNOWLEDGE);

        //5. 创建一个目标

        Destination destination = session.createTopic(topicName);

        //6. 创建一个消费者

        MessageConsumer consumer = session.createConsumer(destination);

        //7. 创建一个监听器

        consumer.setMessageListener(new MessageListener() {

            public void onMessage(Message message) {

                TextMessage textMessage = (TextMessage)message;

                try {

                    System.out.println("接收消息" + textMessage.getText());

                } catch (JMSException e) {

                    e.printStackTrace();

                }

            }

        });

    }

}
2. 创建生产者
public class AppProducer

{

    private static final String url = "tcp://192.168.2.121:61616";

    private static final String topicName="topic-test";

    public static void  main(String[] args){

        //1. 创建ConnectionFactory

        ConnectionFactory connectionFactory = new ActiveMQConnectionFactory(url);

        try {

            //2. 创建Connection

            Connection connection = connectionFactory.createConnection();

            //3. 启动连接

             connection.start();

             //4. 创建会话

            Session session = connection.createSession(false, Session.AUTO_ACKNOWLEDGE);

            //5. 创建一个目标

            Destination destination = session.createTopic(topicName);

            //6.  创建一个目标

            MessageProducer producer = session.createProducer(destination);

            for(int i=0; i<100; i++){

                //7. 创建消息

                TextMessage textMessage = session.createTextMessage("test" + i);

                //8. 发布消息

                producer.send(textMessage);

                System.out.println("发送消息" + textMessage.getText());

            }

            //9.关闭连接

            connection.close();

        } catch (JMSException e) {

            e.printStackTrace();

        }

    }

}
消息中间件 ActiveMQ的简单使用的更多相关文章
- 消息中间件ActiveMQ使用详解
消息中间件ActiveMQ使用详解 一.消息中间件的介绍 介绍 消息队列 是指利用 高效可靠 的 消息传递机制 进行与平台无关的 数据交流,并基于 数据通信 来进行分布式系统的集成. 特点(作用) ...
- 消息中间件系列之ActiveMQ的简单安装
本次测试使用一台ip为192.168.2.12的虚拟机 一.解压压缩包 tar -zxvf apache-activemq-5.14.4-bin.tar.gz 二.启动activemq 进入到bin目 ...
- ElasticSearch(九):springboot项目集成消息中间件activeMQ
目的:为了将elasticsearch做成单独的服务,那么我们必须解耦,也就是业务逻辑和搜索模块是没有关系的,并且是异步的.那么项目之间通信,使用的选择有限,消息中间件是一个不错的选择. 消息中间件常 ...
- 消息中间件-activemq安全机制
activemq作为消息中间件这样一个独立的个体存在,连通用户和服务器.如果没有一套完备的安全机制去设置用户权限设置消息分发机制可想后果是非常严重.ActiveMQ如果不加入安全机制的话,任何人只要知 ...
- 消息中间件-activemq入门(二)
上一节我们了解了JMS规范并且知道了JMS规范的良好实现者-activemq.今天我们就去了解一下activemq的使用.另外我们应该抱着目的去学习,别忘了我们为什么要使用消息中间件:解耦系统之间的联 ...
- 关于消息中间件ActiveMQ的企业级应用
几个月前看到项目中配置了activeMq,于是想通透的掌握activeMq,便去网上学习搜寻资料,找到这一篇博客挺不错的,解释的比较清楚,包括原理使用和配置,特此把它分享给大家. 众所周知,消息中间件 ...
- ActiveMQ的简单例子应用
ActiveMQ是一种消息中间件,它实现了JMS规范,提供点对点和订阅-发布两种模式.下面介绍下ActiveMQ的使用: 一.环境的搭建 首先我们需要下载ActiveMQ的安装包,下载地址http:/ ...
- 消息中间件ActiveMQ及Spring整合JMS的介绍
一 .消息中间件的基本介绍 1.1 消息中间件 1.1.1 什么是消息中间件 消息中间件利用高效可靠的消息传递机制进行平台无关的数据交流,并基于数据通信来进行分布式系统的集成.通过提供消息传递和消息排 ...
- 遇见JMS[1] —— activeMQ的简单使用
1.JMS Java Message Service,提供API,供两个应用程序或者分布式应用之间异步通信,以传送消息. 2.相关概念 提供者:实现JMS规范的消息中间件服务器客户端:发送或接收消息的 ...
随机推荐
- (转)使用UTL_SMTP包发送邮件
使用UTL_SMTP包发送邮件 参考文档 Email From Oracle PL/SQL (UTL_SMTP) UTL_SMTP Oracle 存储过程中发送邮件,并支持用户验证.中文标题和内容
- ES curl bulk 导入数据
比如我们现在有这样一个文件,data.json: { " } } { "field1" : "value1" } 它的第一行定义了_index,_ty ...
- spring cloud学习(四) Fegin 的使用
Feign 的使用 什么是Feign? Feign : Declarative REST clients. Feign 是一个声明web服务客户端,这便得编写web服务客户端更容易,使用Feign 创 ...
- BZOJ1461 字符串的匹配
什么字符串...明明是两个数列... 分类上来讲,还是一道很好的noip题...(雾) 首先,kmp会不会?(答:会!) 其次,树状数组求顺序对会不会?(再答:会!) 讲完了!>.< 进入 ...
- POJ 3220 位运算+搜索
转载自:http://blog.csdn.net/lyhypacm/article/details/5813634 DES:相邻的两盏灯状态可以互换,给出初始状态.询问是否能在三步之内到达.如果能的话 ...
- struts2 实现rest
参考链接https://www.ibm.com/developerworks/cn/java/j-lo-struts2rest/
- 怎么让wordpress用sqlite3 搭建轻量级博客系统
wordpress 默认是用mysql作为数据库支持,这个对个人站长来说还是有点麻烦了些.特别是如果以后网站备份迁移就有点事多了. 之前用django开发自己的博客感觉其实用sqlite3作为数据库插 ...
- Python 编程核心知识体系-文件对象|错误处理(四)
错误处理 文件对象
- DevExpress v18.1最新版帮助文档下载大全
DevExpress v18.1.4帮助文档下载列表大全来啦!包含.NET.VCL.HTML/JS系列所有帮助文档,提供CHM和PDF两个版本.除已停止更新的Silverlight.Windows 8 ...
- FlytestingToolkit工具派送,懒人的测试思考
工欲善其事必先利其器,在IT路上摸爬这些年,去年我们分享了<Fiddler录制jmeter脚本,干货分享>,今天我们有另外的思考,我懒,故我思考. 下载解压后是这样的: 双击 Flytes ...