基于cxf开发restful风格的Web Service
一、写在前面
webservice一些简单的其他用法和概念,就不在这里赘述了,相信大家都可以在网上查到,我也是一个新手,写这篇文章的目的一方面是想记录自己成长的历程,另一方面是因为学习这个的时候花了点时间,希望本文章能为大家节约点时间。当然描述的可能不到位,望谅解。
二、创建项目
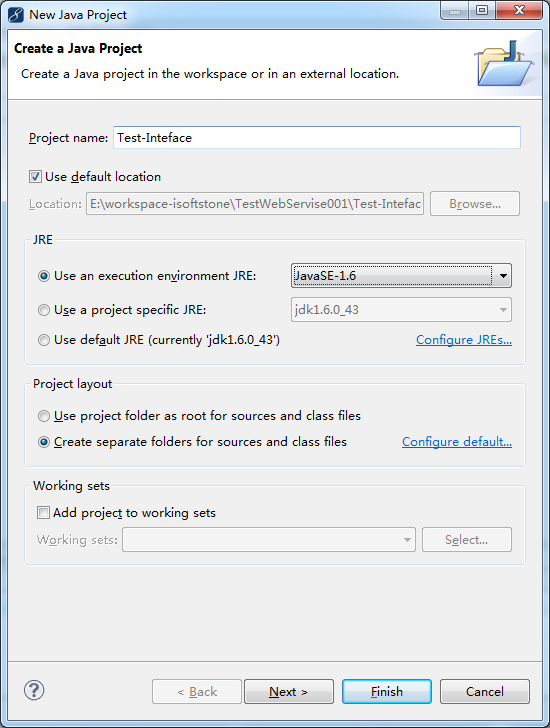
2.1、创建公用接口project
为了方便服务端和客户端调用接口可以先创建一个接口java project,单独建一个接口project的用处后面再说。
然后导入对应jar包,可以去cxf官网下载http://cxf.apache.org/download.html把里面的所有包可以都导入
新建一个实体类User
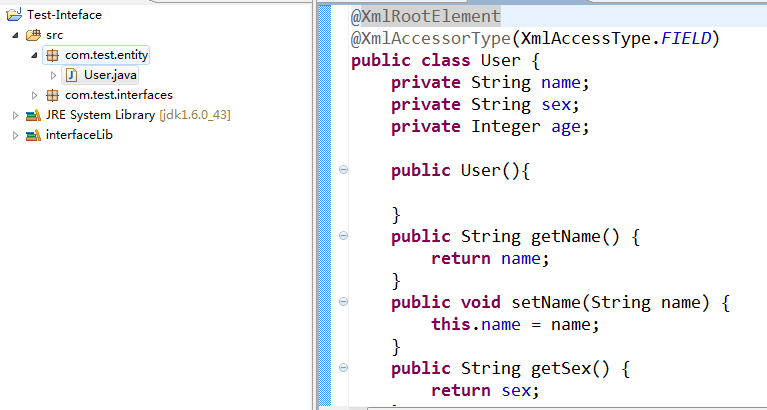
定义实体类
package com.test.entity;

import javax.xml.bind.annotation.XmlAccessType;

import javax.xml.bind.annotation.XmlAccessorType;

import javax.xml.bind.annotation.XmlRootElement;

@XmlRootElement

@XmlAccessorType(XmlAccessType.FIELD)

public class User {

    private String name;

    private String sex;

    private Integer age;

    public User(){

    }

    public String getName() {

        return name;

    }

    public void setName(String name) {

        this.name = name;

    }

    public String getSex() {

        return sex;

    }

    public void setSex(String sex) {

        this.sex = sex;

    }

    public Integer getAge() {

        return age;

    }

    public void setAge(Integer age) {

        this.age = age;

    }

    @Override

    public String toString() {

        return "User [name=" + name + ", sex=" + sex + ", age=" + age + "]";

    }

}
新建对应接口和继承接口
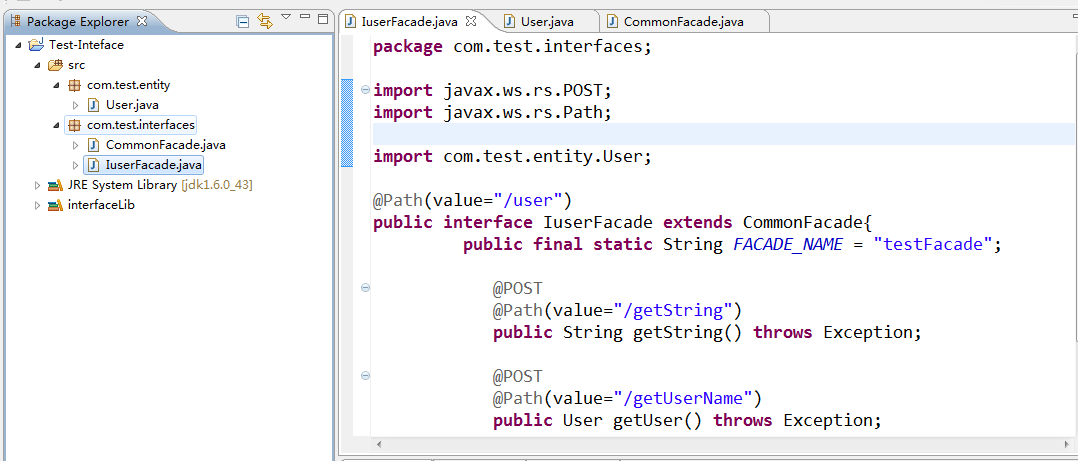
对应代码
package com.test.interfaces;

import javax.ws.rs.POST;

import javax.ws.rs.Path;

import com.test.entity.User;

@Path(value="/user")

public interface IuserFacade extends CommonFacade{

         public final static String FACADE_NAME = "testFacade";

            @POST

            @Path(value="/getString")

            public String getString() throws Exception;

            @POST

            @Path(value="/getUserName")

            public User getUser() throws Exception;

    }
package com.test.interfaces;

import javax.ws.rs.Consumes;

import javax.ws.rs.Produces;

@Consumes(value = { CommonFacade.APPLICATION_JSON_UTF_8, CommonFacade.APPLICATION_XML_UTF_8 })

@Produces(value = { CommonFacade.APPLICATION_JSON_UTF_8, CommonFacade.APPLICATION_XML_UTF_8 })

public interface CommonFacade {

    public final static String APPLICATION_JSON_UTF_8 = "application/json; charset=UTF-8";

    public final static String APPLICATION_XML_UTF_8 = "application/xml; charset=UTF-8";

}
接口定义完成,下面创建web service。
2.2、创建实现接口web service
这里创建的普通的web project,实现web service主要是看配置文件。
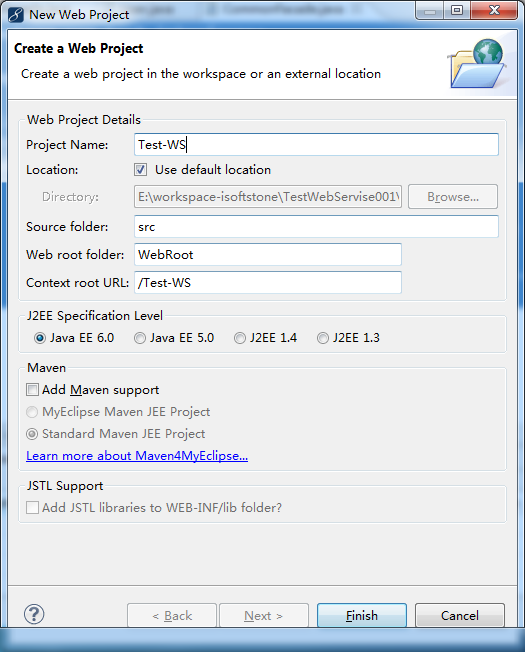
因为这里的需要实现上面建的接口,所以先关联Test-interfacse
这样在实现的时候才可以用不然会提示不存在

实现类为
package com.test.interfacesImpl;

import org.springframework.stereotype.Service;

import com.test.entity.User;

import com.test.interfaces.IuserFacade;

@Service(value = IuserFacade.FACADE_NAME)

public class IuserFacadeImpl implements IuserFacade{

    @Override

    public String getString() throws Exception {

        return "this is ws test";

    }

    @Override

    public User getUser() throws Exception {

        User user=new User();

        user.setAge(13);

        user.setName("minzhou");

        user.setSex("man");

        return user;

    }

}
配置web.xml文件
<?xml version="1.0" encoding="UTF-8"?>

<web-app version="3.0"

    xmlns="http://java.sun.com/xml/ns/javaee"

    xmlns:xsi="http://www.w3.org/2001/XMLSchema-instance"

    xsi:schemaLocation="http://java.sun.com/xml/ns/javaee

    http://java.sun.com/xml/ns/javaee/web-app_3_0.xsd">

  <display-name></display-name>

       <context-param>

        <param-name>contextConfigLocation</param-name>

        <param-value>classpath*:conf/applicationContext*.xml</param-value>

    </context-param>

    <listener>

        <listener-class>org.springframework.web.context.ContextLoaderListener</listener-class>

    </listener>

        <!-- CXF Servlet -->

    <servlet>

        <servlet-name>CXFService</servlet-name>

        <servlet-class>org.apache.cxf.transport.servlet.CXFServlet</servlet-class>

    </servlet>

    <servlet-mapping>

        <servlet-name>CXFService</servlet-name>

        <url-pattern>/rs/*</url-pattern>

    </servlet-mapping>

  <welcome-file-list>

    <welcome-file>index.jsp</welcome-file>

  </welcome-file-list>

</web-app>
创建conf ,在conf里面创建对应xml

对应applicationContext-cxf.xml和applicationContext-default.xml分别为
<?xml version="1.0" encoding="UTF-8"?>

<beans xmlns="http://www.springframework.org/schema/beans"

    xmlns:cxf="http://cxf.apache.org/core" xmlns:xsi="http://www.w3.org/2001/XMLSchema-instance"

    xmlns:jaxrs="http://cxf.apache.org/jaxrs" xmlns:security="http://www.springframework.org/schema/security"

    xsi:schemaLocation="

        http://www.springframework.org/schema/beans http://www.springframework.org/schema/beans/spring-beans.xsd

        http://cxf.apache.org/core http://cxf.apache.org/schemas/core.xsd

        http://cxf.apache.org/jaxrs http://cxf.apache.org/schemas/jaxrs.xsd

        http://www.springframework.org/schema/security http://www.springframework.org/schema/security/spring-security.xsd">

    <import resource="classpath:META-INF/cxf/cxf.xml" />

    <import resource="classpath:META-INF/cxf/cxf-servlet.xml" />

    <import resource="classpath:META-INF/cxf/cxf-extension-soap.xml" />

    <jaxrs:server id="rest-container" address="/">

        <jaxrs:serviceBeans>

            <ref bean="testFacade" />

        </jaxrs:serviceBeans>

    </jaxrs:server>

</beans>
<?xml version="1.0" encoding="UTF-8"?>

<beans xmlns="http://www.springframework.org/schema/beans"

xmlns:aop="http://www.springframework.org/schema/aop"

    xmlns:xsi="http://www.w3.org/2001/XMLSchema-instance"

    xmlns:context="http://www.springframework.org/schema/context"

    xsi:schemaLocation="

        http://www.springframework.org/schema/beans http://www.springframework.org/schema/beans/spring-beans-3.0.xsd

        http://www.springframework.org/schema/context http://www.springframework.org/schema/context/spring-context-3.0.xsd

        http://www.springframework.org/schema/aop

http://www.springframework.org/schema/aop/spring-aop-3.0.xsd

        ">

    <context:annotation-config />

    <aop:aspectj-autoproxy/>

    <context:component-scan base-package="com" />

</beans>
运行后输入http://localhost:8080/Test-WS/rs/?_wadl得到

这里web service端就完成了,通过把地址发给别人就可以访问了,这里面的接口project就可以同时打包发过去,调用的时候就可以引用接口jar包,和地址,访问了。
当然到这里还存在问题,在客户端调用的时候就会发现问题,有兴趣的可以先把这放着,直接写客户端代码,然后调用,看看是什么问题。为了避免问题我先把代码加上
新加一个类
package com.test.interfacesImpl;

import com.fasterxml.jackson.databind.ObjectMapper;

import com.fasterxml.jackson.jaxrs.json.JacksonJaxbJsonProvider;

public class ISSJacksonJaxbJsonProvider extends JacksonJaxbJsonProvider {

    public ISSJacksonJaxbJsonProvider(ObjectMapper objectMapper){

        super(objectMapper, DEFAULT_ANNOTATIONS);

    }

}
修改applicationContext-cxf.xml 增加<jaxrs:providers></jaxrs:providers>引用新建的类
<?xml version="1.0" encoding="UTF-8"?>

<beans xmlns="http://www.springframework.org/schema/beans"

    xmlns:cxf="http://cxf.apache.org/core" xmlns:xsi="http://www.w3.org/2001/XMLSchema-instance"

    xmlns:jaxrs="http://cxf.apache.org/jaxrs" xmlns:security="http://www.springframework.org/schema/security"

    xsi:schemaLocation="

        http://www.springframework.org/schema/beans http://www.springframework.org/schema/beans/spring-beans.xsd

        http://cxf.apache.org/core http://cxf.apache.org/schemas/core.xsd

        http://cxf.apache.org/jaxrs http://cxf.apache.org/schemas/jaxrs.xsd

        http://www.springframework.org/schema/security http://www.springframework.org/schema/security/spring-security.xsd">

    <import resource="classpath:META-INF/cxf/cxf.xml" />

    <import resource="classpath:META-INF/cxf/cxf-servlet.xml" />

    <import resource="classpath:META-INF/cxf/cxf-extension-soap.xml" />

    <jaxrs:server id="rest-container" address="/">

        <jaxrs:providers>

            <bean class="com.test.interfacesImpl.ISSJacksonJaxbJsonProvider">

                <constructor-arg type="com.fasterxml.jackson.databind.ObjectMapper">

                    <bean class="com.fasterxml.jackson.databind.ObjectMapper">

                        <property name="serializationInclusion" value="NON_NULL" />

                    </bean>

                </constructor-arg>

            </bean>

        </jaxrs:providers>

        <jaxrs:serviceBeans>

            <ref bean="testFacade" />

        </jaxrs:serviceBeans>

    </jaxrs:server>

</beans>
三、客户端实现web service
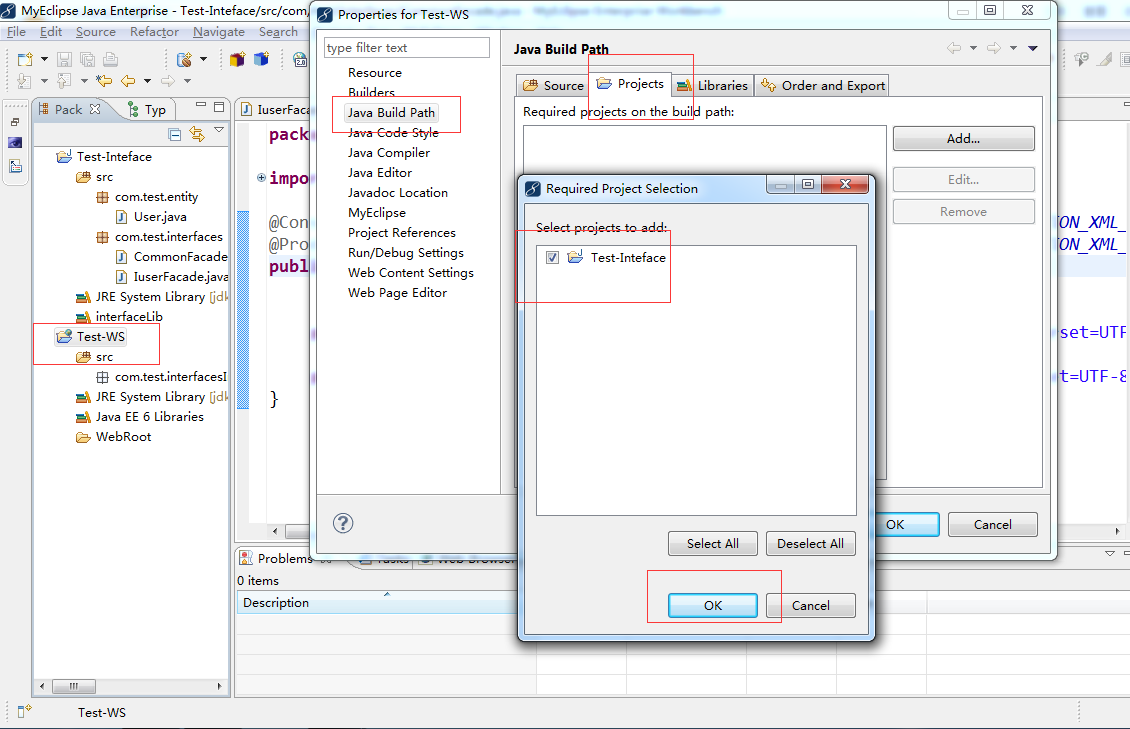
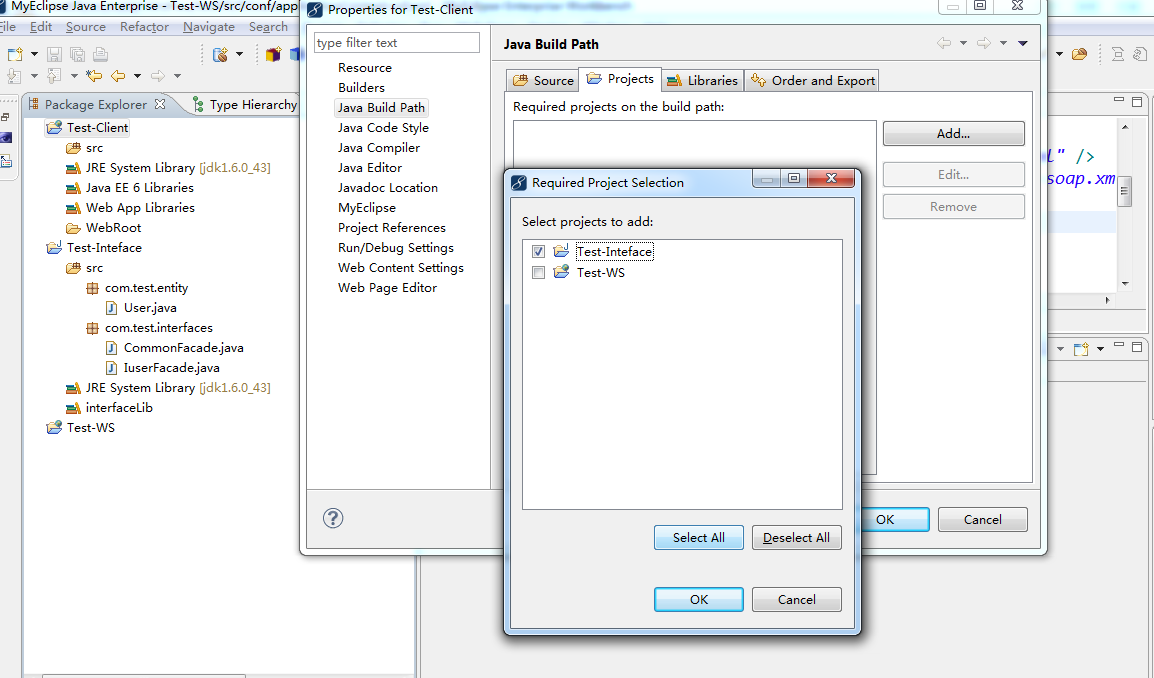
创建一个web project Test-Client同理关联接口,当然也可以不关联接口,直接把接口所导成的jar包导入即可。因为是本地项目所以可以这样,若是给人调用,只需要把web service接口地址和打包的接口jar给人就可以。
创建调用外部webservice控制器
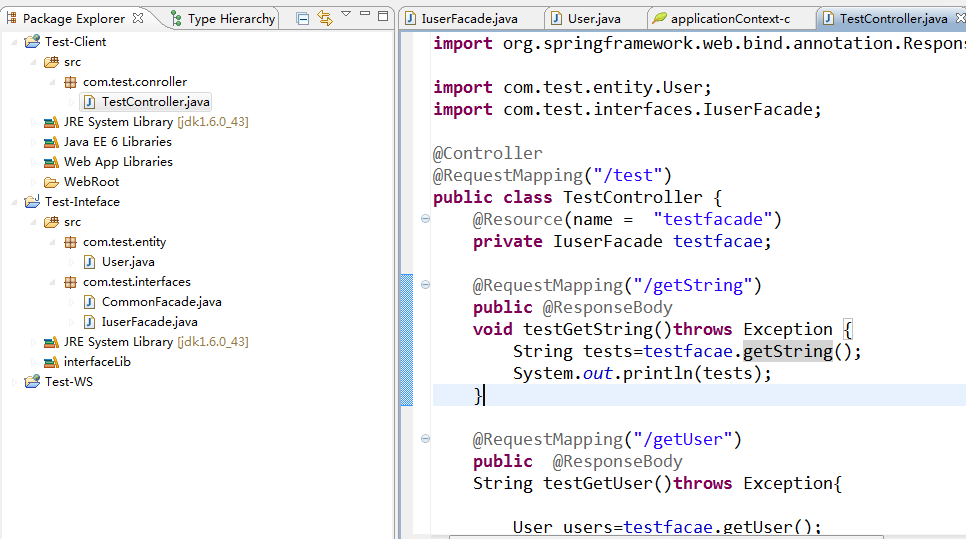
testcontroller.java代码
package com.test.conroller;

import javax.annotation.Resource;

import org.springframework.stereotype.Controller;

import org.springframework.web.bind.annotation.RequestMapping;

import org.springframework.web.bind.annotation.ResponseBody;

import com.test.entity.User;

import com.test.interfaces.IuserFacade;

@Controller

@RequestMapping("/test")

public class TestController {

    @Resource(name =  "testfacade")

    private IuserFacade testfacae;

    @RequestMapping("/getString")

    public @ResponseBody

    void testGetString()throws Exception {

        String tests=testfacae.getString();

        System.out.println(tests);

    }

    @RequestMapping("/getUser")

    public  @ResponseBody

    String testGetUser()throws Exception{

        User users=testfacae.getUser();

        System.out.println(users.toString());

        System.out.println("my name is:"+users.getName()+" and my age is "+users.getAge());

        return users.toString();

    /*    UserQueryResp uq=userFacade.getUserQueryRespById("40289518501706fe01504a91cc2c00d8");*/

    }

}
这里@Resource(name = "testfacade")需要在xml中配置

具体applicationContext-cxf.xml代码
<?xml version="1.0" encoding="UTF-8"?>

<beans xmlns="http://www.springframework.org/schema/beans"

    xmlns:jaxrs="http://cxf.apache.org/jaxrs" xmlns:context="http://www.springframework.org/schema/context"

    xmlns:jaxws="http://cxf.apache.org/jaxws" xmlns:cxf="http://cxf.apache.org/core"

    xmlns:xsi="http://www.w3.org/2001/XMLSchema-instance" xmlns:http-conf="http://cxf.apache.org/transports/http/configuration"

    xsi:schemaLocation="http://www.springframework.org/schema/beans    http://www.springframework.org/schema/beans/spring-beans.xsd

http://cxf.apache.org/jaxws http://cxf.apache.org/schemas/jaxws.xsd   http://cxf.apache.org/core http://cxf.apache.org/schemas/core.xsd

http://cxf.apache.org/transports/http/configuration   http://cxf.apache.org/schemas/configuration/http-conf.xsd

http://cxf.apache.org/jaxrs   http://cxf.apache.org/schemas/jaxrs.xsd

http://www.springframework.org/schema/context   http://www.springframework.org/schema/context/spring-context.xsd ">

    <http-conf:conduit name="{WSDL Namespace}portName.http-conduit">

        <http-conf:client ConnectionTimeout="30000"

            ReceiveTimeout="30000" />

    </http-conf:conduit>

    <cxf:bus>

        <cxf:features>

            <cxf:logging />

            <!--<cxf:fastinfoset force="false" /> -->

        </cxf:features>

        <!-- compress the exchange data size -->

        <cxf:inInterceptors>

            <bean class="org.apache.cxf.transport.common.gzip.GZIPInInterceptor" />

        </cxf:inInterceptors>

        <cxf:outInterceptors>

            <bean class="org.apache.cxf.transport.common.gzip.GZIPOutInterceptor" />

        </cxf:outInterceptors>

    </cxf:bus>

    <jaxrs:client id="testfacade" address="${dataserver.rs.address}"

        serviceClass="com.test.interfaces.IuserFacade"

        inheritHeaders="true">

        <jaxrs:headers>

            <entry key="Accept" value="application/json" />

            <entry key="Content-Type" value="application/json;charset=UTF-8" />

            <entry key="Authorization" value="Basic dG9tOjEyMzQ1Njc4" />

        </jaxrs:headers>

        <jaxrs:providers>

            <bean class="com.fasterxml.jackson.jaxrs.json.JacksonJaxbJsonProvider" />

        </jaxrs:providers>

    </jaxrs:client>

</beans>
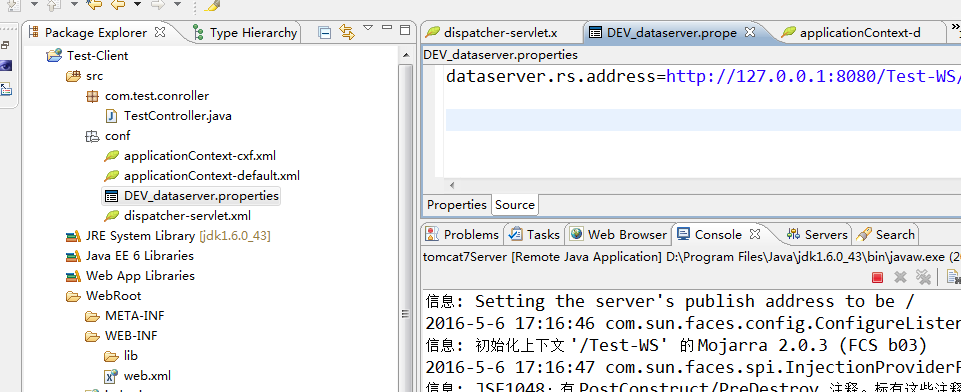
其中用到${dataserver.rs.address}这里配置到了DEV_dataserver.properties
dataserver.rs.address=http://127.0.0.1:8080/Test-WS/rs/?_wadl
web.xml配置
<?xml version="1.0" encoding="UTF-8"?>

<web-app version="3.0"

    xmlns="http://java.sun.com/xml/ns/javaee"

    xmlns:xsi="http://www.w3.org/2001/XMLSchema-instance"

    xsi:schemaLocation="http://java.sun.com/xml/ns/javaee

    http://java.sun.com/xml/ns/javaee/web-app_3_0.xsd">

  <display-name></display-name>

  <context-param>

        <param-name>contextConfigLocation</param-name>

        <param-value>classpath*:conf/applicationContext*.xml</param-value>

    </context-param>

     <listener>

        <listener-class>org.springframework.web.context.ContextLoaderListener</listener-class>

    </listener>

    <servlet>

        <servlet-name>DispatcherServlet</servlet-name>

        <servlet-class>org.springframework.web.servlet.DispatcherServlet</servlet-class>

        <init-param>

            <param-name>contextConfigLocation</param-name>

            <param-value>classpath*:conf/dispatcher-servlet.xml</param-value>

        </init-param>

        <load-on-startup>1</load-on-startup>

    </servlet>

    <servlet-mapping>

        <servlet-name>DispatcherServlet</servlet-name>

        <url-pattern>/dispatcher/*</url-pattern>

    </servlet-mapping>

  <welcome-file-list>

    <welcome-file>index.jsp</welcome-file>

  </welcome-file-list>

</web-app>
dispatcher-servlet.xml配置
<?xml version="1.0" encoding="UTF-8"?>

<beans xmlns="http://www.springframework.org/schema/beans"

    xmlns:xsi="http://www.w3.org/2001/XMLSchema-instance" xmlns:p="http://www.springframework.org/schema/p"

    xmlns:mvc="http://www.springframework.org/schema/mvc" xmlns:context="http://www.springframework.org/schema/context"

    xmlns:util="http://www.springframework.org/schema/util" xmlns:aop="http://www.springframework.org/schema/aop"

    xmlns:task="http://www.springframework.org/schema/task"

    xsi:schemaLocation="

        http://www.springframework.org/schema/beans http://www.springframework.org/schema/beans/spring-beans-3.2.xsd

         http://www.springframework.org/schema/mvc http://www.springframework.org/schema/mvc/spring-mvc-3.2.xsd

        http://www.springframework.org/schema/context http://www.springframework.org/schema/context/spring-context-3.2.xsd

        http://www.springframework.org/schema/util http://www.springframework.org/schema/util/spring-util-3.2.xsd

        http://www.springframework.org/schema/aop http://www.springframework.org/schema/aop/spring-aop-3.2.xsd

        http://www.springframework.org/schema/task http://www.springframework.org/schema/task/spring-task-3.0.xsd">

    <context:annotation-config />

    <aop:aspectj-autoproxy proxy-target-class="true" />

    <context:component-scan base-package="com.test" />

    <util:list id="messageConverters">

    <bean class="org.springframework.http.converter.json.MappingJackson2HttpMessageConverter" />

    </util:list>

    <!-- content neotiating view resolver, a delegate over the accept header -->

    <bean id="contentNegotiatingViewResolver"

        class="org.springframework.web.servlet.view.ContentNegotiatingViewResolver">

        <property name="contentNegotiationManager">

            <bean

                class="org.springframework.web.accept.ContentNegotiationManagerFactoryBean">

                <property name="mediaTypes">

                    <props>

                        <prop key="atom">application/atom+xml;charset=UTF-8</prop>

                        <prop key="xml">application/xml;charset=UTF-8</prop>

                        <prop key="html">text/html;charset=UTF-8</prop>

                        <prop key="json">application/json;charset=UTF-8</prop>

                    </props>

                </property>

            </bean>

        </property>

        <property name="defaultViews">

            <list>

                <bean

                    class="org.springframework.web.servlet.view.json.MappingJackson2JsonView">

                </bean>

            </list>

        </property>

        <property name="viewResolvers">

            <list>

                <bean class="org.springframework.web.servlet.view.BeanNameViewResolver" />

                <bean

                    class="org.springframework.web.servlet.view.InternalResourceViewResolver">

                    <property name="viewClass"

                        value="org.springframework.web.servlet.view.JstlView" />

                    <property name="prefix" value="/page/" />

                    <property name="suffix" value=".jsp" />

                </bean>

            </list>

        </property>

    </bean>

    <bean

        class="org.springframework.validation.beanvalidation.LocalValidatorFactoryBean">

        <property name="providerClass" value="org.hibernate.validator.HibernateValidator" />

    </bean>

</beans>
applicationContext-default.xml配置
<?xml version="1.0" encoding="UTF-8"?>

<beans xmlns="http://www.springframework.org/schema/beans"

    xmlns:aop="http://www.springframework.org/schema/aop"

    xmlns:context="http://www.springframework.org/schema/context"

    xmlns:jaxws="http://cxf.apache.org/jaxws" xmlns:cxf="http://cxf.apache.org/core"

    xmlns:xsi="http://www.w3.org/2001/XMLSchema-instance"

    xmlns:http-conf="http://cxf.apache.org/transports/http/configuration"

    xmlns:jaxrs="http://cxf.apache.org/jaxrs"

    xsi:schemaLocation="

http://www.springframework.org/schema/beans http://www.springframework.org/schema/beans/spring-beans.xsd

http://cxf.apache.org/jaxws http://cxf.apache.org/schemas/jaxws.xsd

http://cxf.apache.org/core http://cxf.apache.org/schemas/core.xsd

http://cxf.apache.org/transports/http/configuration http://cxf.apache.org/schemas/configuration/http-conf.xsd

http://cxf.apache.org/jaxrs http://cxf.apache.org/schemas/jaxrs.xsd

http://www.springframework.org/schema/context http://www.springframework.org/schema/context/spring-context.xsd

http://www.springframework.org/schema/aop

http://www.springframework.org/schema/aop/spring-aop-3.0.xsd

">

    <context:component-scan base-package="com" />

    <aop:aspectj-autoproxy/>

    <context:property-placeholder location="classpath:conf/DEV_dataserver.properties" ignore-unresolvable="true"/>

   <bean class="org.springframework.web.servlet.mvc.method.annotation.RequestMappingHandlerMapping" />

    <bean class="org.springframework.web.servlet.mvc.method.annotation.RequestMappingHandlerAdapter">

        <property name="messageConverters">

            <list>

                <bean class="org.springframework.http.converter.StringHttpMessageConverter">

                    <property name="supportedMediaTypes">

                        <list>

                            <value>text/html; charset=UTF-8</value>

                            <value>application/json;charset=UTF-8</value>

                        </list>

                    </property>

                </bean>

                <bean class="org.springframework.http.converter.json.MappingJackson2HttpMessageConverter">

                    <property name="supportedMediaTypes">

                        <list>

                            <value>text/html; charset=UTF-8</value>

                            <value>application/json;charset=UTF-8</value>

                        </list>

                    </property>

                </bean>

            </list>

        </property>

    </bean>

</beans>
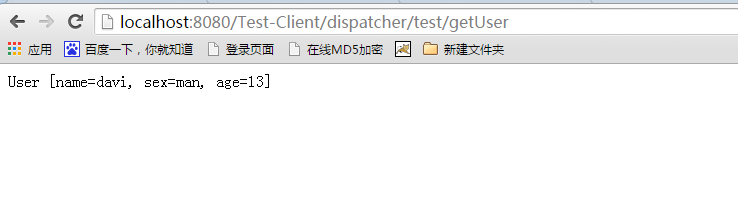
这样启动项目后可以访问http://localhost:8080/Test-Client/dispatcher/test/getUser得到,这样通过客户端访问服务端就可以得到相应的值,这里面的值比较简单,若是webservice端链接上数据库,就可以取得对应数据,客户端也可以在对应页面上获取值,本文只是写对应过程。当然里面的配置文件可能会有多余的,但是大致思想是这样的。
总结:1、通过创建web service 暴露对应访问地址,可以让开发人员调用而保护数据。
2、单独创建接口project可以避免在服务端和客户端同时编辑接口,而且给外部访问的时候可以通过导入jar包提供方便
3、对应代码下载http://files.cnblogs.com/files/minzhousblogs/TestWebServise001.zip 里面没有jar包,可以直接放jar
基于cxf开发restful风格的Web Service的更多相关文章
- 用cxf开发restful风格的WebService
我们都知道cxf还可以开发restful风格的webService,下面是利用maven+spring4+cxf搭建webService服务端和客户端Demo 1.pom.xml <projec ...
- 使用CXF开发RESTFul服务
相信大家在阅读CXF官方文档(http://cxf.apache.org/docs/index.html)时,总是一知半解.这里向大家推荐一本PacktPub.Apache.CXF.Web.Servi ...
- 开发基于CXF的 RESTful WebService web 项目 webservice发布
配置步骤 开发基于CXF的 RESTful WebService 1.创建Web项目并导入CXF的jar 2.在Web.xml中配置 CXFServlet <servlet> <se ...
- Rest(Restful)风格的Web API跟RPC风格的SOAP WebService--这些名词都啥意思?
经常看到这些词汇,也有baidu或google过,但记忆里总是模糊,不确定,以至于别人问及的时候,总说不清楚.开篇随笔记录下.大家有补充或者意见的尽请留文. 本文顺序: 一.Rest(Restful) ...
- 采用CXF+spring+restful创建一个web接口项目
这篇文章是http://blog.csdn.net/zxnlmj/article/details/28880303下面,加入的基础上的restful特征 1.参加restful必jar包裹 jsr31 ...
- 基于CXF开发crm服务
1 基于CXF开发crm服务 1.1 数据库环境搭建 1.2 web项目环境搭建 第一步:创建动态web项目 第二步:导入CXF相关jar包 第三步:配置web.xml <context-par ...
- RESTful风格的Web服务框架:Swagger
Swagger与SpringMVC项目整合 为了方便的管理项目中API接口,在网上找了好多关于API接口管理的资料,感觉目前最流行的莫过于Swagger了,功能强大,UI界面漂亮,并且支持在线测试等等 ...
- 基于MVC的RESTful风格的实现
基于MVC的RESTful风格的实现 1.RESTful风格阐述 REST服务是一种ROA(Resource-Oriented Architecture,面向资源的架构)应用.主要特点是方法信息存在于 ...
- soap,restful 两种web service实现方式比较
web service服务 目前常用的实现web service的方式有有两种 1.SOAP 原始的web service标准,一堆标准,不过这些标准是在开发框架中实现的,有上层接口,可以调用 2.R ...
随机推荐
- doubango介绍
1.doubango官网:http://www.doubango.org/ 2.doubango是一个开源的VOIP基础平台, 并能用于嵌入式和桌面系统的开源框架,该框架使用ANSCI-C编写,具有很 ...
- HDU4474
Yet Another Multiple Problem Time Limit: 40000/20000 MS (Java/Others) Memory Limit: 65536/65536 K ...
- GreenOpenPaint的实现(一)基本框架
Win7下的MSPaint是Ribbon的典型运行.这种SDI程序对于图像处理来说是很适合的.利用春节时间,基于之前的积累,我实现GreenOpenPaint,主要就是模拟MSPaint的界面,实现出 ...
- 关于Task的一点思考和建议
前言 本打算继续写SQL Server系列,接下来应该是死锁了,但是在.NET Core项目中到处都是异步,最近在写一个爬虫用到异步,之前不是很频繁用到异步,当用到时就有点缩手缩尾,怕留下坑,还是小心 ...
- Python 黑帽编程 4.2 Sniffer之数据本地存储和加载
在上一节,我们完成了编写一个简易的Sniffer的第一步--数据捕获. 很多时候,我们需要将捕获的数据先保存到磁盘上,之后再使用工具或者自己编写代码来进行详细分析. 本节我们在上一节的基础上来讲解保存 ...
- c#入门系列——番外篇:vs的安装与使用
vs的安装 1.安装条件 vs全称visual studio 它是一个开发平台,不仅可以用于c#开发,别的也可以.安装vs前,首先需要一个安装包.安装包可以在网上下载.没有购买版权的 ...
- C#属性和字段
属性 属性是一种用于访问对象或类的特性的成员.属性是字段的自然扩展,这两者都是具有关联类型的命名成员.而且访问字段和属性的语法是相同的.然而,与字段不同,属性不表示存储位置.相反属性具有访问器,这些访 ...
- Centos更换yum源
Centos更换yum源 步骤如下: 备份原始源 cd /etc/yum.repos.d/ mv /etc/yum.repos.d/CentOS-Base.repo /etc/yum.repos.d/ ...
- NFS安装及配置
NFS 是Network File System的缩写,即网络文件系统.一种使用于分散式文件系统的协定,由Sun公司开发,于1984年向外公布.功能是通过网络让不同的机器.不同的操作系统能够彼此分享个 ...
- 【排序算法】直接选择排序算法 Java实现
基本思想 直接选择排序是从无序区选一个最小的元素直接放到有序区的最后. 初始状态:无序区为a[1...n],有序区为空. 第一次排序:在无序区a[1...n]中选出最小的记录a[k],将它与有序区的第 ...