angular2.x 下拉多选框选择组件
angular2.x - 5.x 的下拉多选框选择组件 ng2 -- ng5。最近在学angular4,经常在交流群看见很多人问 下拉多选怎么做。。。 今天就随便写的个。
组件源码 百度云 链接:https://pan.baidu.com/s/1SHV4_ccNPXyqpyEQZ8QQGg 密码: 2uv4
下面贴代码:
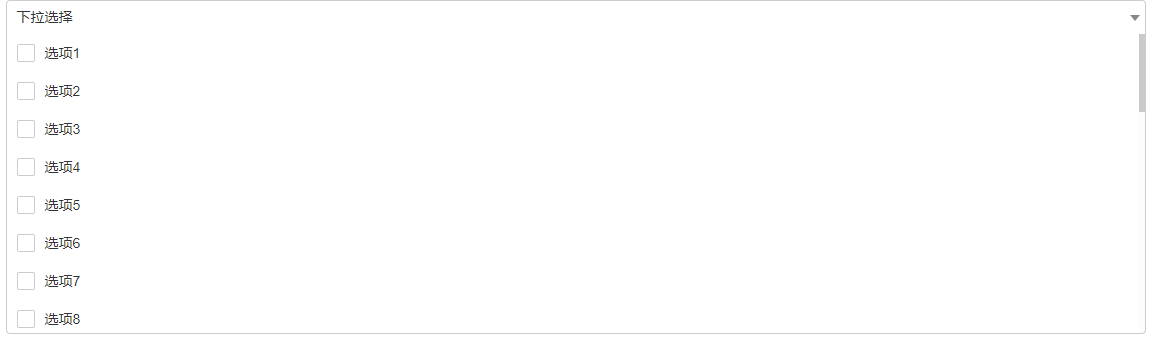
界面

引用 selectList 是 下拉框的数据列表 redSelList() 方法是获取 选择完成后的数据
<app-select-checkbox [itemList]="selectList" (selListOut)="redSelList($event)"></app-select-checkbox>
    // 初始化下拉框数据列表 放在 ngOnInit 里

this.selectList = [];

      for(let i = 1; i<= 30; i++){

        this.selectList.push({

          id: i,

          name: "选项"+ i

        })

      }

// 获取传递过来的数组

redSelList(event){

    console.log(event);

    this.selList = event;

}
html
<div class="select-checkbox-div" [ngClass]="{ 'selectOpen' : isSelectOpen }">

  <div class="select-checkbox-show clear-float" (click)="clickSelect()">

    <div class="show-data">{{ selectedName }}</div>

    <i class="fa-select"></i>

  </div>

  <div class="select-checkbox-content">

    <div class="select-checkbox-list">

      <div class="select-checkbox-item" *ngFor="let item of itemList">

        <div>{{i}}</div>

        <div class="input-checkbox-div"><input type="checkbox" [checked]="isCheck(item)" (click)="clickItem($event,item)" /></div>

        <div class="item-name" (click)="checkItem($event, item)">{{ item.name }}</div>

      </div>

    </div>

  </div>

</div>
ts
import { Component, OnInit, Input, Output, EventEmitter } from '@angular/core';

import * as $ from 'jquery';

@Component({

  selector: 'app-select-checkbox',

  templateUrl: './select-checkbox.component.html',

  styleUrls: ['./select-checkbox.component.css']

})

export class SelectCheckboxComponent implements OnInit {

  @Input() itemList: Array<any>;

  @Output() selListOut = new EventEmitter();

  public selected: Array<any>;

  public selectName: Array<any>;

  public selectItemList: Array<any>;

  public selectedName: string;

  public isSelectOpen: boolean;

  constructor() { }

  ngOnInit() {

    this.selected = [];

    this.selectName = [];

    this.selectItemList = [];

    this.isSelectOpen = false;

    this.selectedName = "下拉选择";

    let thisT = this;

    document.addEventListener("click", (e) =>{

      var target = $(e.target);

      if(target.closest('.select-checkbox-div').length == 0){

        thisT.isSelectOpen = false;

      }

    })

  }

  // 点击了显示框( 是否打开下拉框 )

  clickSelect(){

    this.isSelectOpen = !this.isSelectOpen;

  }

  // 点击整块div执行选择

  checkItem(e, item){

    const ele = e.target;

    const checkbox = ele.previousElementSibling.firstElementChild;

    const action = (checkbox.checked ? 'remove' : 'add');

    this.updateSelected(action, item);

  }

  //   点击input时执行

  clickItem(e, item) {

    const checkbox = e.target;

    const action = (checkbox.checked ? 'add' : 'remove');

    this.updateSelected(action, item);

  }

  // 用来判断input 的checked

  isCheck(item) {

    return this.selected.findIndex(value => value == item.id) >= 0;

  }

  //  执行增加、删除

  private updateSelected(action, item) {

    if (action == 'add' && this.selected.findIndex(value => value == item.id) == -1) {

      this.selected.push(item.id);

      this.selectName.push(item.name);

      this.selectItemList.push(item);

    }

    if (action == 'remove' && this.selected.findIndex(value => value == item.id) != -1) {

      this.selectItemList.splice(this.selected.findIndex(value => value == item.id), 1);

      this.selectName.splice(this.selected.findIndex(value => value == item.id), 1);

      this.selected.splice(this.selected.findIndex(value => value == item.id), 1);

    }

    if(this.selectName.length === 0){

      this.selectedName = "下拉选择";

    }else{

      this.selectedName = this.selectName.join(",");

    }

    this.selListOut.emit(this.selectItemList);

  }

}
css:
input[type="radio"], input[type="checkbox"]{

    margin:;

}

.clear-float:after{

    content: "";

    display: block;

    clear: both;

}

.select-checkbox-item:hover{

    background-color: #eee;

}

.select-checkbox-item{

    cursor: pointer;

    -moz-user-select: none;

    -ms-user-select: none;

    -webkit-user-select: none;

    user-select: none;

}

.input-checkbox-div{

    float: left;

    height: 18px;

    box-sizing: content-box;

}

.input-checkbox-div input[type=checkbox]{

    outline: none!important;

    -webkit-appearance: none;

    -moz-appearance: none;

    line-height: 18px;

    vertical-align: top;

    margin:;

    padding: 10px;

}

.input-checkbox-div input[type=checkbox]:before{

    content: url(../../assets/images/checkbox1.png);

    display: block;

}

.input-checkbox-div input[type=checkbox]:checked:before{

    content: url(../../assets/images/checkbox2.png);

    display: block;

}

.item-name{

    line-height: 18px;

    padding: 10px 0;

}

.check-item{

    float: left;

    padding: 1px 0 1px 10px;

    position: relative;

    border: 1px solid #ccc;

    border-radius: 4px;

    margin-right: 5px;

}

.check-close{

    float: right;

    width: 20px;

    height: 20px;

    line-height:;

    padding: 2px;

    box-sizing: border-box;

    background-color: #fff;

    cursor: pointer;

    text-align: center;

}

.select-checkbox-div {

    position: relative;

}

.select-checkbox-content{

    display: none;

    position: absolute;

    left:;

    right:;

    top: 34px;

    max-height: 300px;

    overflow-y: auto;

    overflow-x: hidden;

    background-color: #fff;

    border-color: #ccc;

    border-width: 0 1px 1px 1px;

    border-style: solid;

    border-radius: 0 0 4px 4px;

    z-index:;

}

.selectOpen .select-checkbox-content{

    display: block;

}

.selectOpen .select-checkbox-show{

    border-width: 1px 1px 0 1px;

    border-radius: 4px 4px 0 0;

}

.select-checkbox-show{

    padding: 6px 18px 6px 10px;

    border: 1px solid #ccc;

    border-radius: 4px;

    width: 100%;

    height: 34px;

    position: relative;

    cursor: pointer;

    -webkit-user-select: none;

    -moz-user-select: none;

    -ms-user-select: none;

    user-select: none;

}

.fa-select{

    display: block;

    border-color: #888 transparent transparent transparent;

    border-style: solid;

    border-width: 6px 5px 0 5px;

    right: 5px;

    top: 14px;

    position: absolute;

    z-index:;

}

.show-data{

    width: 100%;

    overflow-y: hidden;

    overflow-x: auto;

    white-space: nowrap;

}

.show-data::-webkit-scrollbar {

    width: 6px;

    height: 6px;

}

.show-data::-webkit-scrollbar-track {

    -webkit-box-shadow: inset 0 0 6px rgba(0,0,0,0);

        background-color: rgba(0,0,0,0.01);

}

    .show-data::-webkit-scrollbar-track:hover {

        background-color: rgba(0,0,0,0.01);

    }

    .show-data::-webkit-scrollbar-track:active {

        background-color: rgba(0,0,0,0.05);

    }

.show-data::-webkit-scrollbar-thumb {

    background-color: rgba(0,0,0,0.2);

}

.show-data:hover::-webkit-scrollbar-thumb {

    background-color: rgba(0,0,0,0.2);

}

.show-data::-webkit-scrollbar-thumb:hover {

    background-color: rgba(0,0,0,0.4);

}

.show-data::-webkit-scrollbar-thumb:active {

    background: rgba(0,0,0,0.6)

}

.select-checkbox-content::-webkit-scrollbar {

    width: 6px;

    height: 6px;

}

.select-checkbox-content::-webkit-scrollbar-track {

    -webkit-box-shadow: inset 0 0 6px rgba(0,0,0,0);

    background-color: rgba(0,0,0,0.01);

}

.select-checkbox-content::-webkit-scrollbar-track:hover {

    background-color: rgba(0,0,0,0.01);

}

.select-checkbox-content::-webkit-scrollbar-track:active {

    background-color: rgba(0,0,0,0.05);

}

.select-checkbox-content::-webkit-scrollbar-thumb {

    background-color: rgba(0,0,0,0.2);

}

.select-checkbox-content:hover::-webkit-scrollbar-thumb {

    background-color: rgba(0,0,0,0.2);

}

.select-checkbox-content::-webkit-scrollbar-thumb:hover {

    background-color: rgba(0,0,0,0.4);

}

.select-checkbox-content::-webkit-scrollbar-thumb:active {

    background: rgba(0,0,0,0.6)

}
angular2.x 下拉多选框选择组件的更多相关文章
- 使用jQuery为文本框、单选框、多选框、下拉框、下拉多选框设值及返回值的处理
<!DOCTYPE html PUBLIC "-//W3C//DTD HTML 4.01 Transitional//EN" "http://www.w3.org/ ...
- 品优购商城项目(二)AngularJS、自动代码生成器、select2下拉多选框
品优购商城想项目第二阶段 AngularJS.自动代码生成器.select2下拉多选框 完成了课程第三天.第四天的的任务. 1.学习了AngularJs前端的mvc分层思想,js部分分成control ...
- 自定义实现 PyQt5 下拉复选框 ComboCheckBox
一.前言 由于最近的项目需要具有复选功能,但过多的复选框会影响界面布局和美观,因而想到把 PyQt5 的下拉列表和复选框结合起来,但在 PyQt5 中并没有这样的组件供我们使用,所以想要自己实现一个下 ...
- 我的第一个jquery插件:下拉多选框
<!DOCTYPE HTML> <html> <head> <title> New Document </title> <meta n ...
- 自己用ul模拟实现下拉多选框,
模拟实现下拉多选框 效果如下 <!DOCTYPE html> <html lang="en"> <head> <meta charset= ...
- jquery--获取多选框的值、获取下拉多选框的值
获取多选框的值 var packageCodeList=new Array(); $('#server_id:checked').each(function(){ packageCodeList.pu ...
- selectpicker下拉多选框ajax异步或者提前赋值=》默认值
Bootstrap select多选下拉框赋值 success: function (data) { var oldnumber = new Array(); $.each(data, functio ...
- DevExpress下拉多选框 CheckComboboxEdit、CheckedListBoxControl
CheckComboboxEdit //清空项 checkedComboBoxEdit1.Properties.Items.Clear(); //自定义数组 ...
- Extjs下拉多选框
//------录入时间,下拉列表框------ var inputTimeRow = new Ext.data.Record.create([ { name : 'value' },{ name : ...
随机推荐
- MySQL之备份恢复
1.备份的种类 逻辑备份:SQL语句的备份 物理备份:数据页备份 2.逻辑备份工具介绍 select xxxx from t1 into outfile '/tmp/redis.txt' mysql ...
- 创建发布Webservice以及wsimport工具
一. 通过wsimport生成本地代理调用WebService 1.推荐的访问服务方式 WebService已纳入w3c规范,其他的平台都支持该规范 :J2EE\Php\.NET都支持wsimport ...
- 爱用bootstrap系列一:Sublime上写H5及运行
sublime上使用插件快速生成模板文件 第一,你要先下载package control的插件,这是一款用来管理插件的插件 . 可能会由于你所在的网络通过代理访问而导致安装失败,你可以通过下面的步骤来 ...
- python爬虫中文乱码解决方法
python爬虫中文乱码 前几天用python来爬取全国行政区划编码的时候,遇到了中文乱码的问题,折腾了一会儿,才解决.现特记录一下,方便以后查看. 我是用python的requests和bs4库来实 ...
- vue-cli中的.babelrc文件介绍
转载自:http://www.cnblogs.com/ye-hcj/p/7071850.html { // 此项指明,转码的规则 "presets": [ //个人认为多此一举 [ ...
- css-1,css的三种引入方式 基本选择器
<!-- (1)CSS 层叠样式表 作用:修饰网页结构 (2)css的三种引入方式 权重: 优先级高 权重大 谁在页面谁的权重大 - 行内样式 注意:行内样式的优先级是最高的 - 内接样式 - ...
- ansible playbook部署ELK集群系统
一.介绍 总共4台机器,分别为 192.168.1.99 192.168.1.100 192.168.1.210 192.168.1.211 服务所在机器为: redis:192.168.1.211 ...
- CSS3、SVG、Canvas、WebGL动画精选整理
一.CSS3动画 名称 用途 链接 阴影波纹特效 1.元素hover效果 2.突出表现效果 http://www.jq22.com/code80 横板导航菜单动画 导航菜单 http://www.jq ...
- python单元测试框架pytest——fixture函数(类似unitest的setup和teardown)
pytest的setup和teardown函数(曾被一家云计算面试官问到过). pytest提供了fixture函数用以在测试执行前和执行后进行必要的准备和清理工作.与python自带的unitest ...
- Web安全学习笔记之Kali配置国内软件更新源
0x0 前言 Kali安装完成后,默认是国外官方的更新源,更新速度4kb/s太酸爽了... 0x1 把更新源设置为国内阿里云或者中科大的镜像源 命令行:leafpad /etc/apt/sources ...