springboot2.0整合redis的发布和订阅
1.Maven引用
        <dependency>

            <groupId>org.springframework.boot</groupId>

            <artifactId>spring-boot-starter-web</artifactId>

        </dependency>

        <dependency>

            <groupId>org.springframework.boot</groupId>

            <artifactId>spring-boot-starter-data-redis</artifactId>

        </dependency>
2.redis属性配置
spring.redis.database=

spring.redis.host=127.0.0.1

spring.redis.port=

spring.redis.password=******

server.port=
3.设置监听相关对象
3.1接听对象
RedisReceiver可以是普通类或者继承MessageListener,普通类的写法如下,接收的时候只接收到消息,没有频道名
package com.example.redistest.config;

import org.springframework.data.redis.connection.Message;

import org.springframework.data.redis.connection.MessageListener;

import org.springframework.stereotype.Component;

@Component

public class RedisReceiver {

    public void receiveMessage(String message) {

        // TODO 这里是收到通道的消息之后执行的方法

        System.out.println(message);

    }

}
继承MessageListener,就能拿到消息体和频道名。
package com.example.redistest.config;

import org.springframework.data.redis.connection.Message;

import org.springframework.data.redis.connection.MessageListener;

import org.springframework.stereotype.Component;

@Component

public class RedisReceiver implements MessageListener {

    @Override

    public void onMessage(Message message, byte[] pattern) {

        System.out.println(new String(message.getBody()));

        System.out.println(new String(message.getChannel()));

    }

}
3.2 配置监听适配器、消息监听容器
container.addMessageListener(listenerAdapter, new PatternTopic("channel:test"));
消息监听容器增加监听的消息,第一个参数是监听适配器,第2个参数是监听的频道。
package com.example.redistest.config;

import org.springframework.cache.annotation.EnableCaching;

import org.springframework.context.annotation.Bean;

import org.springframework.context.annotation.Configuration;

import org.springframework.data.redis.connection.MessageListener;

import org.springframework.data.redis.connection.RedisConnectionFactory;

import org.springframework.data.redis.core.StringRedisTemplate;

import org.springframework.data.redis.listener.PatternTopic;

import org.springframework.data.redis.listener.RedisMessageListenerContainer;

import org.springframework.data.redis.listener.adapter.MessageListenerAdapter;

@Configuration

@EnableCaching

public class RedisCacheConfig {

    @Bean

    RedisMessageListenerContainer container(RedisConnectionFactory connectionFactory,

                                            MessageListenerAdapter listenerAdapter) {

        RedisMessageListenerContainer container = new RedisMessageListenerContainer();

        container.setConnectionFactory(connectionFactory);

        // 可以添加多个 messageListener,配置不同的交换机

        container.addMessageListener(listenerAdapter, new PatternTopic("channel:test"));

        return container;

    }

    @Bean

    MessageListenerAdapter listenerAdapter(RedisReceiver receiver) {

        System.out.println("消息适配器1");

        return new MessageListenerAdapter(receiver, "onMessage");

    }

    @Bean

    StringRedisTemplate template(RedisConnectionFactory connectionFactory) {

        return new StringRedisTemplate(connectionFactory);

    }

}
3.3 消息发送
package com.example.redistest.controller; import org.springframework.beans.factory.annotation.Autowired;
import org.springframework.data.redis.core.RedisTemplate;
import org.springframework.data.redis.core.StringRedisTemplate;
import org.springframework.data.redis.core.ValueOperations;
import org.springframework.stereotype.Controller;
import org.springframework.web.bind.annotation.PathVariable;
import org.springframework.web.bind.annotation.RequestMapping; import java.util.Date; @RequestMapping("/redis")
@Controller
public class RedisController { @Autowired
StringRedisTemplate template; /**
* 发布消息
*
* @param id
* @return
*/
@RequestMapping("/sendMessage/{id}")
public String sendMessage(@PathVariable String id) {
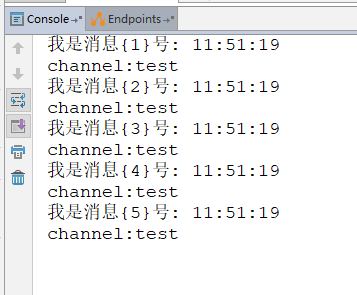
for(int i = 1; i <= 5; i++) {
template.convertAndSend("channel:test", String.format("我是消息{%d}号: %tT", i, new Date()));
}
return "";
} }
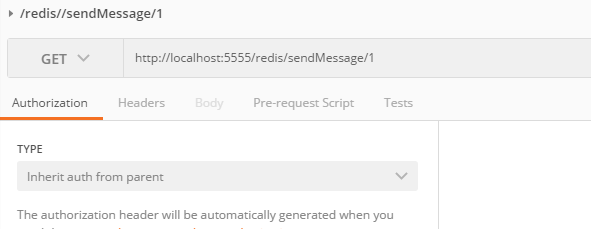
测试
postman访问http://localhost:5555/redis/sendMessage/1
接收消息后打印
springboot2.0整合redis的发布和订阅的更多相关文章
- SpringBoot2.0 整合 Redis集群 ,实现消息队列场景
本文源码:GitHub·点这里 || GitEE·点这里 一.Redis集群简介 1.RedisCluster概念 Redis的分布式解决方案,在3.0版本后推出的方案,有效地解决了Redis分布式的 ...
- Springboot2.0整合Redis(注解开发)
一. pom.xm文件引入对应jar包 <dependency> <groupId>org.springframework.boot</groupId> <a ...
- SpringBoot2.0整合Redis
Spring Boot2.0在2018年3月份正式发布,相比1.0还是有比较多的改动,例如SpringBoot 自2.0起支持jdk1.8及以上的版本.第三方类库升级.响应式 Spring 编程支持等 ...
- springboot2.0整合redis作为缓存以json格式存储对象
步骤1 <dependency> <groupId>org.springframework.boot</groupId> <artifactId>spr ...
- SpringBoot2.x整合Redis实战 4节课
1.分布式缓存Redis介绍 简介:讲解为什么要用缓存和介绍什么是Redis,新手练习工具 1.redis官网 https://redis.io/download 2.新手 ...
- redis实现发布(订阅)消息
redis实现发布(订阅)消息 什么是redis的发布订阅(pub/sub)? Pub/Sub功能(means Publish, Subscribe)即发布及订阅功能.基于事件的系统中,Pub/S ...
- 小D课堂 - 零基础入门SpringBoot2.X到实战_第9节 SpringBoot2.x整合Redis实战_39、SpringBoot2.x整合redis实战讲解
笔记 3.SpringBoot2.x整合redis实战讲解 简介:使用springboot-starter整合reids实战 1.官网:https://docs.spring.io/spring-bo ...
- 第二篇:SpringBoot2.0整合ActiveMQ
本篇开始将具体介绍SpringBoot如何整合其它项目. 如何创建SpringBoot项目 访问https://start.spring.io/. 依次选择构建工具Maven Project.语言ja ...
- SpringBoot2.0 整合 QuartJob ,实现定时器实时管理
一.QuartJob简介 1.一句话描述 Quartz是一个完全由java编写的开源作业调度框架,形式简易,功能强大. 2.核心API (1).Scheduler 代表一个 Quartz 的独立运行容 ...
随机推荐
- view组件
view标签的属性值: hover-class:按下的点击态 属性值:字符串 如果:hover-class="none" 按下就没有点击态 hover-stop-pro ...
- linux让命令或程序在终端后台运行的方法(Ubuntu/Fedora/Centos等一样适用)
https://segmentfault.com/a/1190000008314935
- nginx 入门 安装
.yum解决编译nginx所需的依赖包,之后你的nginx就不会报错了 yum install gcc patch libffi-devel python-devel zlib-devel bzip2 ...
- fedora23帮定键盘系统操作快捷键
在All settings -> keyboard 主要是以super为主, 然后有 super+ shift+...虽然感觉用 ctrl+super+... 来组合更方便, 但是用 shift ...
- 如何利用EDM邮件营销进行持续推销
一般来说,一个电子商务网站的转化率在2%左右是正常的.这也意味着其他98%的潜在客户并不会购买任何东西,并且可能再也不回来了.这个时候,如何利用EDM邮件营销进行持续推销呢? 首先,EDM邮件营销可以 ...
- 在mpvue或者Vue中使用VUEX
第一个页面Index,主页哦 import Vue from'vue' import Vuex from'vuex' import getters from'./getters' import sta ...
- linux文本图形界面转换
vim /etc/inittab 3为默认进入文本界面, 5为默认进入图形界面 文本界面下输入init5或者startx切换图形化界面 图形化界面下输入init3切换文本界面
- 【GIS数据处理】 利用空间关系建立线CAD数据和属性表关联
这两天遇到一个不太容易解决的问题. 某燃气公司想自己对自建管线进行测绘便于数字化管理,在接受了简单的RTK测量培训和Cass成图培训后,就自己着手开干. 最近数据整理的差不多了,就提交给我请我帮忙核查 ...
- iView 实战系列教程(21课时)_1.iView 实战教程之配置篇_图片优化
首先需要安装vue cli 3.0版本 点击添加插件, 输入iview 选中后安装 全部导入还是按需导入. 2.是否需要自定义主题变量 3.多语言的设置. 这里我们全部选择为默认 然后点击继续. 启动 ...
- G2 基本使用 折线图 柱状图 饼图 基本配置
G2的基本使用 1.浏览器引入 <!-- 引入在线资源 --> <script src="https://gw.alipayobjects.com/os/lib/antv ...