golang开发:(一)开发环境搭建vagrant+VirtualBox
开发环境介绍
不管何种开发语言,目前用的比较多的开发环境基本就是Vagrant+VirtualBox搭建的虚拟开发环境,这种开发环境的好处就是一次搭建处处可用,各个平台和系统都可以使用。开发团队中,可以自己制作一个box,让团队的成员方便安装,保证每个人的开发环境都是一致的。
Vagrant可以创建一些共享目录,让物理机和虚拟机使用共享的目录,虚拟机只提供开发环境。这样的话,开发环境随处可用。代码目录只要在物理机上共享就可以使用这套开发环境。
Vagrant 安装
官网下载合适的安装包傻瓜式安装。官网下载地址:http://www.vagrantup.com/downloads.html
安装完成后试下 命令
vagrant -h

Usage: vagrant [options] <command> [<args>]

    -v, --version                    Print the version and exit.

    -h, --help                       Print this help.

Common commands:

     box             manages boxes: installation, removal, etc.

     cloud           manages everything related to Vagrant Cloud

     destroy         stops and deletes all traces of the vagrant machine

     global-status   outputs status Vagrant environments for this user

     halt            stops the vagrant machine

     help            shows the help for a subcommand

     init            initializes a new Vagrant environment by creating a Vagrantfile
就表示安装成功了。
VirtualBox 安装
跟Vagrant类似傻瓜式安装。官网下载地址:https://www.virtualbox.org/wiki/Downloads/
下载合适的平台版本安装
VirtualBox 软件只要可以打开就表示安装成功了
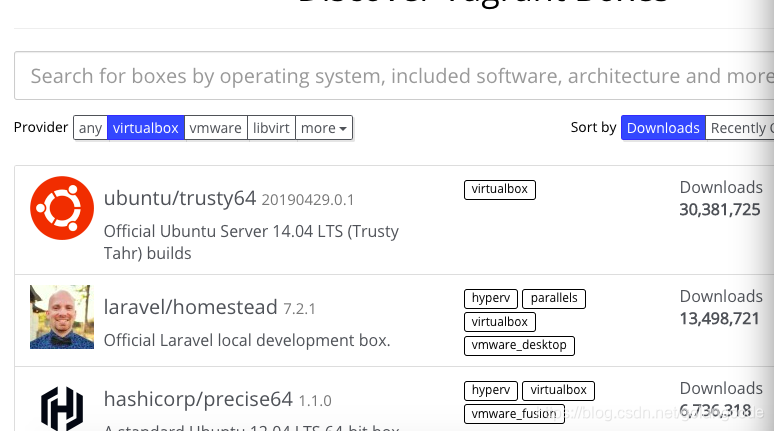
各种box的下载
先进入官网box的列表 https://app.vagrantup.com/boxes/search
查找自己需要虚拟机 系统 和版本,我们下载的基本都是VirtualBox版本的,可以点击菜单的VirtualBox标签
我们下载的是 Ubuntu 16.04 LTS
https://app.vagrantup.com/ubuntu/boxes/xenial64
找到它最近的版本,点击链接 https://app.vagrantup.com/ubuntu/boxes/xenial64/versions/20190521.0.0
URL + /providers/ + 虚拟机就是需要下载的box
我们下载的包就是下面的链接
https://app.vagrantup.com/ubuntu/boxes/xenial64/versions/20190521.0.0/providers/virtualbox.box
然后迅雷下载上面的链接
添加box
执行 vagrant box add 名称 box地址
名称--box名称,任意取名,默认 base
box地址--已经下载好的box地址或者远端的box地址
我的机器执行的是
vagrant box add base virtualboxubuntu.box
添加完成后执行
sudo vagrant init
我的执行
    sudo vagrant init

    A `Vagrantfile` has been placed in this directory. You are now

ready to `vagrant up` your first virtual environment! Please read

the comments in the Vagrantfile as well as documentation on

`vagrantup.com` for more information on using Vagrant.
启动 vagrant
     sudo vagrant up

/opt/vagrant/embedded/gems/2.2.2/gems/vagrant-2.2.2/lib/vagrant/util/which.rb:37: warning: Insecure world writable dir /data/code/go/bin in PATH, mode 040777

Bringing machine 'default' up with 'virtualbox' provider...

==> default: Importing base box 'base'...

==> default: Matching MAC address for NAT networking...

==> default: Setting the name of the VM: ubuntubox_default_1558766226465_14530

==> default: Fixed port collision for 22 => 2222. Now on port 2200.
连接登录虚拟机
sudo vagrant ssh

/opt/vagrant/embedded/gems/2.2.2/gems/vagrant-2.2.2/lib/vagrant/util/which.rb:37: warning: Insecure world writable dir /data/code/go/bin in PATH, mode 040777

Welcome to Ubuntu 16.04.6 LTS (GNU/Linux 4.4.0-148-generic x86_64)

 * Documentation:  https://help.ubuntu.com

 * Management:     https://landscape.canonical.com

 * Support:        https://ubuntu.com/advantage

0 packages can be updated.

0 updates are security updates.
可以看到是Ubuntu的系统
vagrantup 常用的开发配置
打开box的配置。vim Vagrantfile
config.vm.box = "base" --box 名字

config.vm.synced_folder "../data", "/vagrant_data"

--把本机的../data 挂载到虚拟机的 /vagrant_data

ned port

config.vm.network "forwarded_port", guest: 80, host: 8080

--把本机的8080端口请求转发到虚拟机的 80端口

config.vm.network "private_network", ip: "192.168.33.10"

--网络设置,主机虚拟机网络互访,主机通过192.168.33.10 可以访问虚拟机

config.ssh.username = "vagrant"

--登录用户名

config.ssh.password = "vagrant"

--登录密码

config.ssh.insert_key = "true"

--账户密码键值存储(一直没明白是啥意思)

config.ssh.private_key_path = "/Users/XXX/.ssh/id_rsa"

--密钥登录的时候,密钥地址。

onfig.vm.provision "shell", inline: <<-SHELL

 apt-get update

 apt-get install -y apache2

 SHELL

 --虚拟机启动的时候需要执行的脚本
了解一些简单vagrantup,平常开发就够用了。
vagrant box add/remove 添加移除 box

vagrant halt 停止虚拟机

vagrant init 初始化虚拟机

vagrant up 启动虚拟机

vagrant reload 重载虚拟机
golang开发:(一)开发环境搭建vagrant+VirtualBox的更多相关文章
- Tiny4412 开发板 编译环境搭建【转】
本文转载自:http://blog.csdn.net/beijiwei/article/details/51055369 版权声明:本文为博主原创文章,未经博主允许不得转载. /*********** ...
- 使用Kotlin开发Android应用 - 环境搭建 (1)
一. 在Android Studio上安装Kotlin插件 按快捷键Command+, -> 在Preferences界面找到Plugins -> 点击Browse repositorie ...
- 【golang学习记录】环境搭建
[golang学习记录]环境搭建 一. 概述 本文是[golang学习记录]系列文章的第一篇,安装Go语言及搭建Go语言开发环境,接下来将详细记录自己学习 go 语言的过程,一方面是为了巩固自己学到的 ...
- 基于GBT28181:SIP协议组件开发-----------第一篇环境搭建
原创文章,引用请保证原文完整性,尊重作者劳动,原文地址http://www.cnblogs.com/qq1269122125/p/3930018.html,qq:1269122125. SIP协议在安 ...
- 1 IDEA 安装 及 IDEA开发 spring的环境搭建
摘要: 主要讲解使用 IDEA 开发 Spring MVC 的环境搭建,Maven的简单教学. 参考1:https://my.oschina.net/gaussik/blog/385697 参考2:h ...
- Android NDK开发之从环境搭建到Demo级十步流
写在正文之前: 几个月没有更新博客,感觉有点生疏了,所以说不能断,一断人就懒. 其实这几个月也并不是什么事也没有做,俺可是时刻想着今年的任务呢,10本书,30篇博文...,这几个月间断性的也是在学习中 ...
- UI5-学习篇-1-Eclipse开发工具及环境搭建
最近研究SAP-UI5好几个月了,将相关学习经历及问题点做个记录. 1.先了解学习资料相关站点 SAP官网:https://www.sap.com/china/index.html SAP开发工具:h ...
- IoT设备程序开发及编译环境搭建初体验
引言 Mirai事件一经曝出,立即引领了一轮研究IoT设备的热潮.目前,对Mirai的报告大多只是在对其功能实现上的介绍,却很少提及如何实现IoT设备程序开发的测试环境.本文在对Mirai的源码研究的 ...
- webapp开发学习---Cordova环境搭建
Cordova 使用HTML, CSS & JS进行移动App开发;多平台共用一套代码;免费开源 步骤:(来自Cordova官网) 1.安装Cordova(在node.js环境下进行安装) 命 ...
随机推荐
- 20190729 将博客搬至CSDN
为更方便技术交流, 现将博客园内容搬迁至csdn, https://blog.csdn.net/lxw1844912514
- Java HashSet介绍
HashSet底层使用HashMap实现.当使用add方法将对象添加到Set当中时,实际上是将该对象作为底层所维护的Map对象的key,而value则都是同一个Object对象(该对象我们用不上). ...
- cv2.warpAffine 参数详解
本文链接:https://blog.csdn.net/qq878594585/article/details/81838260本文为作者原创文章,未经同意严禁转载! opencv中的仿射变换在pyth ...
- TreeFrog Framework : High-speed C++ MVC Framework for Web Application http://www.treefrogframework.org
TreeFrog Framework : High-speed C++ MVC Framework for Web Application http://www.treefrogframework.o ...
- hdfs 通过命令坏块监测和删除或者地址获取参数做监控
[root@nodecm.oldboy.org.cn /data/dfs/nn/current]# hdfs fsck -list-corruptfileblocksConnecting to nam ...
- Eclipse 的快捷键以及文档注释、多行注释的快捷键 一、多行注释快捷键
一.多行注释快捷键 1.选中你要加注释的区域,用ctrl+shift+C 或者ctrl+/ 会加上//注释2.先把你要注释的东西选中,用shit+ctrl+/ 会加上/* */注释 3.以上快捷 ...
- html表格导出Excel的实例
1. 拼成出完整的HMTL的Table代码片段后,转成二进制byte[]类型并存入数据库中,供下载时调出来使用. System.Text.StringBuilder sb = new StringBu ...
- 泡泡一分钟:Visual Odometry Using a Homography Formulation with Decoupled Rotation and Translation Estimation Using Minimal Solutions
张宁 Visual Odometry Using a Homography Formulation with Decoupled Rotation and Translation Estimation ...
- Python3入门(十三)——常用内置模块之摘要模块hashlib/hmac
(1)hashlib hashlib提供了常见摘要算法:如MD5,SHA1等等 一个md5的加密示例如下: import hashlib m = hashlib.md5() m.update(&quo ...
- 【Linux】Jenkins以war包运行及开机启动配置(四)
本例介绍jenkins已war包运行及开机启动配置 环境:Linux环境(CentOS 7.4) 以war包运行 1.下载jenkins.war包 2.启动war包( 默认端口:8080,默认JENK ...