深度学习(一):Python神经网络——手写数字识别
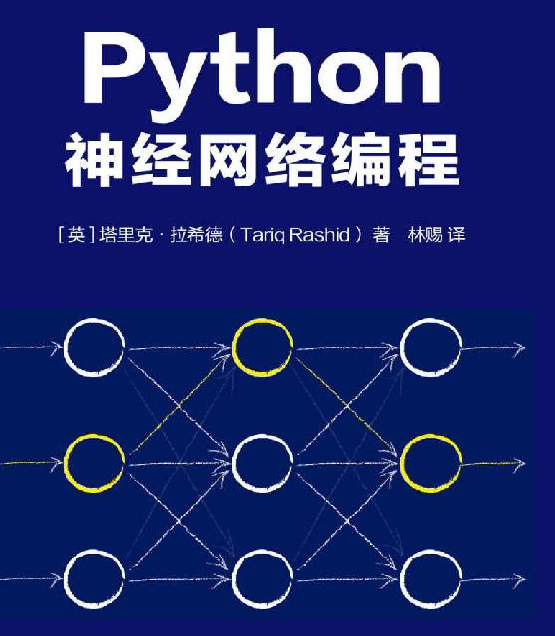
声明:本文章为阅读书籍《Python神经网络编程》而来,代码与书中略有差异,书籍封面:

源码
若要本地运行,请更改源码中图片与数据集的位置,环境为 Python3.6x.
  1 import numpy as np

  2 import scipy.special as ss

  3 import matplotlib.pyplot as plt

  4 import imageio as im

  5 import glob as gl

  6

  7

  8 class NeuralNetwork:

  9     # initialise the network

 10     def __init__(self, inputnodes, hiddennodes, outputnodes, learningrate):

 11         # set number of each layer

 12         self.inodes = inputnodes

 13         self.hnodes = hiddennodes

 14         self.onodes = outputnodes

 15         self.wih = np.random.normal(0.0, pow(self.inodes, -0.5), (self.hnodes, self.inodes))

 16         self.who = np.random.normal(0.0, pow(self.hnodes, -0.5), (self.onodes, self.hnodes))

 17         # learning rate

 18         self.lr = learningrate

 19         # activation function is sigmoid

 20         self.activation_function = lambda x: ss.expit(x)

 21         pass

 22

 23     # train the neural network

 24     def train(self, inputs_list, targets_list):

 25         inputs = np.array(inputs_list, ndmin=2).T

 26         targets = np.array(targets_list, ndmin=2).T

 27         hidden_inputs = np.dot(self.wih, inputs)

 28         hidden_outputs = self.activation_function(hidden_inputs)

 29         final_inputs = np.dot(self.who, hidden_outputs)

 30         final_outputs = self.activation_function(final_inputs)

 31         # errors

 32         output_errors = targets - final_outputs

 33         # b-p algorithm

 34         hidden_errors = np.dot(self.who.T, output_errors)

 35         # update weight

 36         self.who += self.lr * np.dot((output_errors * final_outputs * (1.0 - final_outputs)),

 37                                      np.transpose(hidden_outputs))

 38         self.wih += self.lr * np.dot((hidden_errors * hidden_outputs * (1.0 - hidden_outputs)), np.transpose(inputs))

 39         pass

 40

 41     # query the neural network

 42     def query(self, inputs_list):

 43         inputs = np.array(inputs_list, ndmin=2).T

 44         hidden_inputs = np.dot(self.wih, inputs)

 45         hidden_outputs = self.activation_function(hidden_inputs)

 46         final_inputs = np.dot(self.who, hidden_outputs)

 47         final_outputs = self.activation_function(final_inputs)

 48         return final_outputs

 49

 50     # numbers

 51

 52

 53 input_nodes = 784

 54 hidden_nodes = 100

 55 output_nodes = 10

 56

 57 # learning rate

 58 learning_rate = 0.2

 59

 60 # creat instance of neural network

 61 global n

 62 n = NeuralNetwork(input_nodes, hidden_nodes, output_nodes, learning_rate)

 63

 64 # file read only ,root of the file

 65 training_data_file = open(r"C:\Users\ELIO\Desktop\mnist_train.txt", 'r')

 66 training_data_list = training_data_file.readlines()

 67 training_data_file.close()

 68

 69 # train the neural network

 70 epochs = 5

 71 for e in range(epochs):

 72     for record in training_data_list:

 73         all_values = record.split(',')

 74         # scale and shift the inputs

 75         inputs = (np.asfarray(all_values[1:]) / 255.0 * 0.99) + 0.01

 76         targets = np.zeros(output_nodes) + 0.01

 77         # all_values[0] is the target label for this record

 78         targets[int(all_values[0])] = 0.99

 79         n.train(inputs, targets)

 80     pass

 81 pass

 82

 83 # load the file into a list

 84 test_data_file = open(r"C:\Users\ELIO\Desktop\mnist_train_100.csv.txt", 'r')

 85 test_data_list = test_data_file.readlines()

 86 test_data_file.close()

 87

 88 # test the neural network

 89 # score for how well the network performs

 90 score = []

 91

 92 # go through all the records

 93 for record in test_data_list:

 94     all_values = record.split(',')

 95     # correct answer is the first value

 96     correct_label = int(all_values[0])

 97     # scale and shift the inputs

 98     inputs = (np.asfarray(all_values[1:]) / 255.0 * 0.99) + 0.01

 99     # query the network

100     outputs = n.query(inputs)

101     # the index of the highest value corresponds to the label

102     label = np.argmax(outputs)

103     # append correct or incorrect to list

104     if (label == correct_label):

105         score.append(1)

106     else:

107         score.append(0)

108         pass

109 pass

110 # module1 CORRECT-RATE

111 # calculate the score, the fraction of correct answers

112 score_array = np.asarray(score)

113 print("performance = ", score_array.sum() / score_array.size)

114

115 # module2 TEST MNIST

116 all_values = test_data_list[0].split(',')

117 print(all_values[0])

118 image_array = np.asfarray(all_values[1:]).reshape((28, 28))

119 plt.imshow(image_array, cmap='Greys', interpolation='None')

120 plt.show()

121

122 # module3 USE YOUR WRITING

123 # own image test data set

124 own_dataset = []

125 for image_file_name in gl.gl(r'C:\Users\ELIO\Desktop\5.png'):

126     print("loading ... ", image_file_name)

127     # use the filename to set the label

128     label = int(image_file_name[-5:-4])

129     # load image data from png files into an array

130     img_array = im.imread(image_file_name, as_gray=True)

131     # reshape from 28x28 to list of 784 values, invert values

132     img_data = 255.0 - img_array.reshape(784)

133     # then scale data to range from 0.01 to 1.0

134     img_data = (img_data / 255.0 * 0.99) + 0.01

135     print(np.min(img_data))

136     print(np.max(img_data))

137     # append label and image data  to test data set

138     record = np.append(label, img_data)

139     print(record)

140     own_dataset.append(record)

141     pass

142 all_values = own_dataset[0]

143 print(all_values[0])
数据集,实验图片
链接:百度网盘
提取码:1vbq
深度学习(一):Python神经网络——手写数字识别的更多相关文章
- TensorFlow 卷积神经网络手写数字识别数据集介绍
欢迎大家关注我们的网站和系列教程:http://www.tensorflownews.com/,学习更多的机器学习.深度学习的知识! 手写数字识别 接下来将会以 MNIST 数据集为例,使用卷积层和池 ...
- 基于Numpy的神经网络+手写数字识别
基于Numpy的神经网络+手写数字识别 本文代码来自Tariq Rashid所著<Python神经网络编程> 代码分为三个部分,框架如下所示: # neural network class ...
- 深度学习-使用cuda加速卷积神经网络-手写数字识别准确率99.7%
源码和运行结果 cuda:https://github.com/zhxfl/CUDA-CNN C语言版本参考自:http://eric-yuan.me/ 针对著名手写数字识别的库mnist,准确率是9 ...
- 吴裕雄 python神经网络 手写数字图片识别(5)
import kerasimport matplotlib.pyplot as pltfrom keras.models import Sequentialfrom keras.layers impo ...
- 神经网络手写数字识别numpy实现
本文摘自Michael Nielsen的Neural Network and Deep Learning,该书的github网址为:https://github.com/mnielsen/neural ...
- 手写数字识别 ----在已经训练好的数据上根据28*28的图片获取识别概率(基于Tensorflow,Python)
通过: 手写数字识别 ----卷积神经网络模型官方案例详解(基于Tensorflow,Python) 手写数字识别 ----Softmax回归模型官方案例详解(基于Tensorflow,Pytho ...
- 【深度学习系列】手写数字识别卷积神经--卷积神经网络CNN原理详解(一)
上篇文章我们给出了用paddlepaddle来做手写数字识别的示例,并对网络结构进行到了调整,提高了识别的精度.有的同学表示不是很理解原理,为什么传统的机器学习算法,简单的神经网络(如多层感知机)都可 ...
- 深度学习面试题12:LeNet(手写数字识别)
目录 神经网络的卷积.池化.拉伸 LeNet网络结构 LeNet在MNIST数据集上应用 参考资料 LeNet是卷积神经网络的祖师爷LeCun在1998年提出,用于解决手写数字识别的视觉任务.自那时起 ...
- mnist手写数字识别——深度学习入门项目(tensorflow+keras+Sequential模型)
前言 今天记录一下深度学习的另外一个入门项目——<mnist数据集手写数字识别>,这是一个入门必备的学习案例,主要使用了tensorflow下的keras网络结构的Sequential模型 ...
随机推荐
- linux系统中firewalld防火墙管理工具firewall-config(GUI图形用户界面)
firewall-config是firewalld防火墙管理工具的GUI(图形用户界面)版本,几乎可以实现所有以命令行来执行的操作. firewall-config的界面如下图(在终端直接运行fire ...
- Learn day10 锁
1.锁 # ### 锁 from multiprocessing import Lock,Process import json,time """ # 创建一把锁 loc ...
- 机器学习之K均值算法(K-means)聚类
K均值算法(K-means)聚类 [关键词]K个种子,均值 一.K-means算法原理 聚类的概念:一种无监督的学习,事先不知道类别,自动将相似的对象归到同一个簇中. K-Means算法是一种聚类分析 ...
- 《Clojure编程》笔记 第2章 函数式编程
目录 背景简述 第2章 函数式编程 背景简述 本人是一个自学一年Java的小菜鸡,理论上跟大多数新手的水平差不多,但我入职的新公司是要求转Clojure语言的.坊间传闻:通常情况下,最好是有一定Jav ...
- 力扣 - 剑指Offer 35.复杂链表的复制
目录 题目 思路1 代码实现 思路2 代码实现 题目 请实现 copyRandomList 函数,复制一个复杂链表.在复杂链表中,每个节点除了有一个 next 指针指向下一个节点,还有一个 rando ...
- CF1137A/1138C Skyscrapers
排序+数据结构 将每一行(每一列)都排个序,并将原位置的在这一行(列)中的排行记录在一个数组里 注意,要将楼高度相同的元素看作一个元素 如 1 1 4 5 6 8 8,则排行是 1 1 2 ...
- c#习题之3
Dictionary<int, char> d = new Dictionary<int, char>(); int i=0; string s = "Welcome ...
- Linux (操作二)
1.U盘的装载与卸载(设备都保存在/dev中 /dev存放设备的文件) 1.卸载u盘 umount /media/xxx/xxx (xxx为具体路径) 2.查看设备 sudo fdisk -l ( ...
- 解决自动安装Freebsd系统盘符无法确定问题
最近因为需要用到Freebsd,所以研究了打包的一些方法,这个没什么太大问题,通过网上的一些资料可以解决,但是由于确实不太熟悉这套系统,还是碰上了一些比较麻烦的地方,目前也没看到有人写如何处理,那就自 ...
- Ceph Bluestore首测
Bluestore 作为 Ceph Jewel 版本推出的一个重大的更新,提供了一种之前没有的存储形式,一直以来ceph的存储方式一直是以filestore的方式存储的,也就是对象是以文件方式存储在o ...
