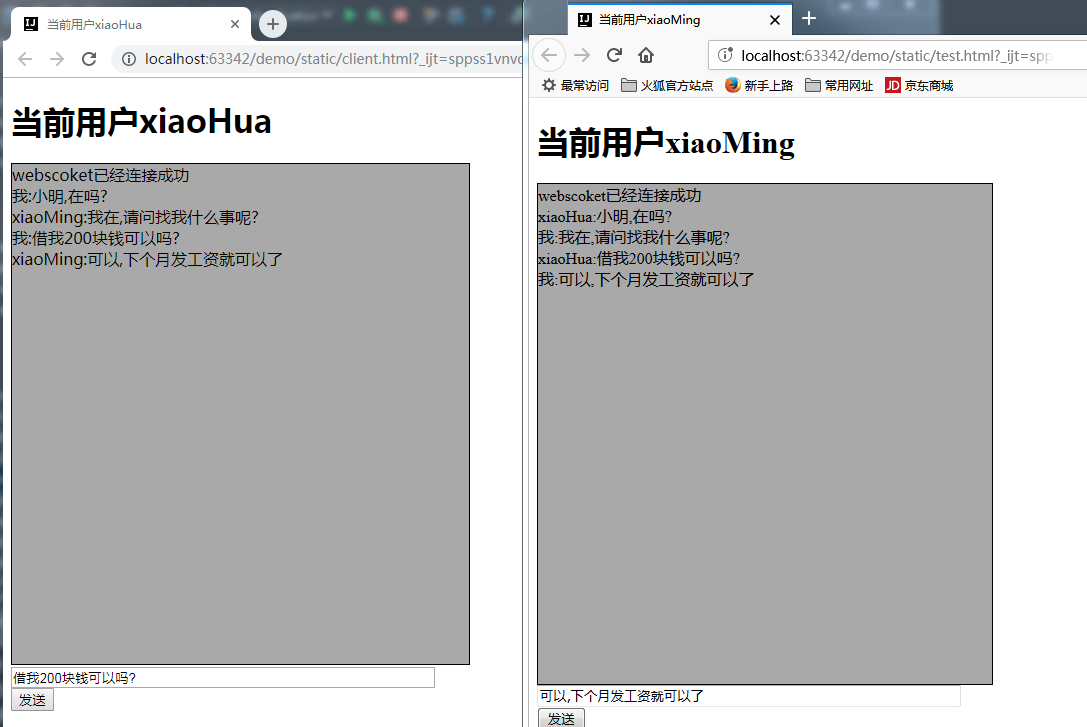
springboot+websocket实现简单的在线聊天功能
效果如下:
java实现逻辑:
1.引入maven依赖

<dependency>

<groupId>org.springframework.boot</groupId>

<artifactId>spring-boot-starter-websocket</artifactId>

</dependency>

2.创建一个服务端

package com.example.demo.controller;

import org.springframework.web.bind.annotation.RestController;

import javax.websocket.*;

import javax.websocket.server.PathParam;

import javax.websocket.server.ServerEndpoint;

import java.io.IOException;

import java.util.Map;

import java.util.Set;

import java.util.concurrent.ConcurrentHashMap;

@ServerEndpoint("/websocket/{name}")

@RestController

public class WebSocketServer {

    //存储客户端的连接对象,每个客户端连接都会产生一个连接对象

    private static ConcurrentHashMap<String,WebSocketServer> map=new ConcurrentHashMap();

    //每个连接都会有自己的会话

    private Session session;

    private String name;

    @OnOpen

    public void open(@PathParam("name") String name, Session session){

        map.put(name,this);

        System.out.println(name+"连接服务器成功");

        System.out.println("客户端连接个数:"+getConnetNum());

        this.session=session;

        this.name=name;

    }

    @OnClose

    public void close(){

        map.remove(name);

        System.out.println(name+"断开了服务器连接");

    }

    @OnError

    public void error(Throwable error){

        error.printStackTrace();

        System.out.println(name+"出现了异常");

    }

    @OnMessage

    public void getMessage(String message) throws IOException {

        System.out.println("收到"+name+":"+message);

        System.out.println("客户端连接个数:"+getConnetNum());

        Set<Map.Entry<String, WebSocketServer>> entries = map.entrySet();

        for (Map.Entry<String, WebSocketServer> entry : entries) {

            if(!entry.getKey().equals(name)){//将消息转发到其他非自身客户端

                entry.getValue().send(message);

            }

        }

    }

    public void send(String message) throws IOException {

        if(session.isOpen()){

           session.getBasicRemote().sendText(message);

        }

    }

    public int  getConnetNum(){

        return map.size();

    }

}

3.一个配置类

@Configuration

public class WebSocketConfig {

    @Bean

    public ServerEndpointExporter serverEndpointExporter() {

        return new ServerEndpointExporter();

    }

}
//客户端html代码,此处创建2个客户端,一个叫xiaoMing一个叫xiaoHua
<!DOCTYPE html>

<html lang="en">

<head>

    <meta charset="UTF-8">

    <title>当前用户xiaoMing</title>

</head>

<style>

    #message{

        width: 50%;

        height: 500px;

        border: 1px solid black;

        background-color: darkgray;

    }

    #inputVal{

        width: 50%;

    }

    input{

        width: 92%;

    }

</style>

<body>

<h1>当前用户xiaoMing</h1>

<div id="message">

</div>

<div id="inputVal">

    <input type="text" name="text">

    <button onclick="send()">发送</button>

</div>

<script>

    var messageEl=document.getElementById("message");

    var inputEl=document.getElementsByTagName("input")[0];

    var websocket=null;

    if('WebSocket' in window){

        websocket=new WebSocket("ws:localhost:2300/websocket/xiaoMing");

    }else {

        alert("浏览器不支持");

    }

    websocket.onopen=function () {

        console.log("webscoket已经连接成功");

        addMessage("webscoket已经连接成功");

    };

    websocket.onclose=function () {

        console.log("webscoket连接失败");

        addMessage("webscoket连接失败");

    };

    websocket.onmessage=function (event) {

        addMessage(event.data);

    };

    websocket.onerror=function () {

        console.log("webscoket连接失败");

        addMessage("webscoket连接失败");

    };

    function addMessage(message) {

        messageEl.innerHTML+=message+"</br>";

    }

    function send() {

        websocket.send("xiaoMing:"+inputEl.value);

        messageEl.innerHTML+="我:"+inputEl.value+"</br>";

    }

</script>

</body>

</html>
<!DOCTYPE html>

<html lang="en">

<head>

    <meta charset="UTF-8">

    <title>当前用户xiaoHua</title>

</head>

<style>

    #message{

        width: 50%;

        height: 500px;

        border: 1px solid black;

        background-color: darkgray;

    }

    #inputVal{

        width: 50%;

    }

    input{

        width: 92%;

    }

</style>

<body>

<h1>当前用户xiaoHua</h1>

<div id="message">

</div>

<div id="inputVal">

    <input type="text" name="text">

    <button onclick="send()">发送</button>

</div>

<script>

    var messageEl=document.getElementById("message");

    var inputEl=document.getElementsByTagName("input")[0];

    var websocket=null;

    if('WebSocket' in window){

        websocket=new WebSocket("ws:localhost:2300/websocket/xiaoHua");

    }else {

        alert("浏览器不支持");

    }

    websocket.onopen=function () {

        console.log("webscoket已经连接成功");

        addMessage("webscoket已经连接成功");

    };

    websocket.onclose=function () {

        console.log("webscoket连接失败");

        addMessage("webscoket连接失败");

    };

    websocket.onmessage=function (event) {

        addMessage(event.data);

    };

    websocket.onerror=function () {

        console.log("webscoket连接失败");

        addMessage("webscoket连接失败");

    };

    function addMessage(message) {

        messageEl.innerHTML+=message+"</br>";

    }

    function send() {

        websocket.send("xiaoHua:"+inputEl.value);

        messageEl.innerHTML+="我:"+inputEl.value+"</br>";

    }

</script>

</body>

</html>
springboot+websocket实现简单的在线聊天功能的更多相关文章
- 基于PHP实现一个简单的在线聊天功能(轮询ajax )
基于PHP实现一个简单的在线聊天功能(轮询ajax ) 一.总结 1.用的轮询ajax 二.基于PHP实现一个简单的在线聊天功能 一直很想试着做一做这个有意思的功能,感觉复杂的不是数据交互和表结构,麻 ...
- JAVA结合WebSocket实现简单客服聊天功能
说明:该示例只简单的实现了客服聊天功能. 1.聊天记录没有保存到数据库中,一旦服务重启,消息记录将会没有,如果需要保存到数据库中,可以扩展 2.页面样式用的网上模板,样式可以自己进行修改 3.只能由用 ...
- 使用WebSocket实现简单的在线聊天室
前言:我自已在网上找好了好多 WebSocket 制作 在线聊天室的案列,发现大佬们写得太高深了 我这种新手看不懂,所以就自已尝试写了一个在线简易聊天室 (我只用了js 可以用jq ) 话不多说,直接 ...
- WebSocket实现简单的在线聊天
SuperWebSocket在WebService中的应用 最开始使用是寄托在IIS中,发布之后测试时半个小时就会断开,所以改为WindowsService 1. 新建Windows服务项目[Test ...
- 使用websocket实现在线聊天功能
很早以前为了快速达到效果,使用轮询实现了在线聊天功能,后来无意接触了socket,关于socket我的理解是进程间通信,首先要有服务器跟客户端,服务的启动监听某ip端口定位该进程,客户端开启socke ...
- 基于Server-Sent Event的简单聊天室 Web 2.0时代,即时通信已经成为必不可少的网站功能,那实现Web即时通信的机制有哪些呢?在这门项目课中我们将一一介绍。最后我们将会实现一个基于Server-Sent Event和Flask简单的在线聊天室。
基于Server-Sent Event的简单聊天室 Web 2.0时代,即时通信已经成为必不可少的网站功能,那实现Web即时通信的机制有哪些呢?在这门项目课中我们将一一介绍.最后我们将会实现一个基于S ...
- Spring Websocket实现简易在线聊天功能
针对Spring Websocket的实现,我参照了其他博主的文章https://www.cnblogs.com/leechenxiang/p/5306372.html 下面直接给出实现: 一.引入相 ...
- websocket简单实现在线聊天
WebSocket简介与消息推送 B/S架构的系统多使用HTTP协议,HTTP协议的特点: 1 无状态协议2 用于通过 Internet 发送请求消息和响应消息3 使用端口接收和发送消息,默认为80端 ...
- html5+springboot+websocket的简单实现
环境 window7,IntelliJ IDEA 2019.2 x64 背景:利用IntelliJ来搭建springboot框架,之后来实现websocket的功能.websocket只是实现了画面上 ...
随机推荐
- (新手向)N皇后问题详解(DFS算法)
非常经典的一道题: N皇后问题: 国际象棋中皇后的势力范围覆盖其所在的行.列以及两条对角线,现在考察如下问题:如何在n x n的棋盘上放置n个皇后,使得她们彼此互不攻击 . 免去麻烦我们这里假定n不是 ...
- 软件工程第二次作业(Junit和GoogleTest)
使用Eclipse的Junit框架进行单元测试 一.前言 我的电脑因为以前学过安卓开发,已经安装好了eclipse,看了邹欣老师的博客,博客上讲的的非常详细,所以在进行的过程中遇到困难,基本都能解决. ...
- Kubernetes入门(二)——Dashboard 安装
Kubernetes集群搭建完成后,可以通过命令行方式可以了解集群资源的使用情况,但是这种方式比较笨拙且不直观,因此考虑给集群安装Dashboard,这样能更直观了解集群状态.本文Dashboard的 ...
- SpringBoot启动注解源码流程学习总结
- idea创建mybatis的逆向工程:generator
1在工程的目录下配置mybatis-generator插件 <build> <plugins> <!-- mybatis逆向工程 --> <plugin> ...
- java前端知识点整理
1.jsp内置对象?作用? request :客户端请求,包含来自 GET/POST,提供了几个用于获取 cookie, 和 session 的方法 response :网页传回用户端的回应 page ...
- 大数据计算的基石——MapReduce
MapReduce Google File System提供了大数据存储的方案,这也为后来HDFS提供了理论依据,但是在大数据存储之上的大数据计算则不得不提到MapReduce. 虽然现在通过框架的不 ...
- Spring Security如何优雅的增加OAuth2协议授权模式
一.什么是OAuth2协议? OAuth 2.0 是一个关于授权的开放的网络协议,是目前最流行的授权机制. 数据的所有者告诉系统,同意授权第三方应用进入系统,获取这些数据.系统从而产生一个短期的进入令 ...
- AndroidStudio修改程序的包名,可以修改com.example.xxx之类的详解
转载请说明出处.原创作品. 首先说明一下,当时公司需要修改androidStudio 项目的包名 于是上网查了一下,只看到了修改后面的包名,而不可以修改 前缀的com.example.xxx.所以很无 ...
- googleEarth
中国航天科技集团有限公司 http://www.spacechina.com/n25/n144/n210/index.html Celestia [官网]: https://celestia.spac ...